Table of Contents
Advertisement
Quick Links
Download this manual
See also:
User Manual
Advertisement
Table of Contents

Subscribe to Our Youtube Channel
Related Manuals for Martin Alien 05


Summary of Contents for Martin Alien 05
- Page 1 Alien 05 user manual...
- Page 2 © 2002 Martin Professional A/S, Denmark. All rights reserved. No part of this manual may be reproduced, in any form or by any means, with- out permission in writing from Martin Professional A/S, Denmark. Printed in Denmark. P/N 35000104, Rev A...
-
Page 3: Table Of Contents
Removing the Alien 05 ........ -
Page 4: Introduction
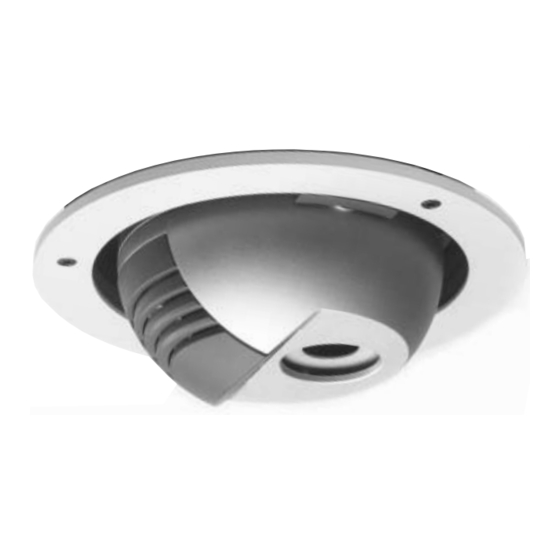
NTRODUCTION Thank you for selecting the Martin Alien 05. The Alien 05 is a recessed color changer with eight interchangeable dichroic color filters (plus open white) and speed change control. The Alien 05’s adjustable spherical head can be angled and swiveled to point in any outwards facing position. -
Page 5: Safety During Operation
Safety during operation • Never operate the fixture with missing or damaged lenses and/or covers. • Do not stare directly into the light. Never look at an exposed lamp while it is lit. • Replace the lamp if it becomes defective or worn out. •... -
Page 6: Installation
C O N F I G U R A T I O N O P T I O N S The Alien 05 must be connected to an 05 Driver unit (orderable separately) that contains the intelligent control functions. Each 05 Driver unit has six independent control channels, to each of which up to four Alien 05s can be connected (in a daisy-chain). -
Page 7: Fixture Location
Ensure that you have a 12 V AC halogen lamp transformer (not supplied) with which to power the Alien 05, and that this can be connected to AC power and to the Alien 05 at the position where it is to operate from. -
Page 8: Installation
CAT5 network cable for the link to that fixture. Note that it does not matter which network socket is used. Power CAT5 cables from network transformer cables (12 V AC) 4 Once the cables are connected, insert the Alien 05 into the mounting hole. Installation... -
Page 9: Removing The Alien 05
5 Using a 3 mm Allen wrench, tighten the screws to lock the fixture in place. Do not over tighten. R E M O V I N G T H E A L I E N 0 5 Once installed it is not recommended that you remove the Alien 05 unless absolutely necessary. To remove the Alien 05: 1 Remove the 3 Allen screws in the mounting ring (shown in the previous section) using a 3 mm Allen wrench. -
Page 10: General Operation
ENERAL OPERATION The Alien 05 effects (color filter selection and the speed of color changes) are controlled by an 05 Driver unit. Operators can develop programs, or issue control commands to an 05 Driver using the Oracle dedicated control unit, any DMX controller, DMX recorder, or any other USITT DMX512 compliant controlling device. -
Page 11: Positioning The Beam
Forcing the sphere into this position might also strain the cables within the fixture.. The Alien 05 is supplied with a diffuser filter installed. This ensures a soft illumination when illuminating close objects. When illuminating objects at greater distances, it is recommended that you remove the diffuser filter. -
Page 12: Color Filters
C O L O R F I L T E R S The Alien 05 is supplied with eight color filters and an open position. The filters sit in a motorized wheel that is controlled by the 05 Driver unit. The positions and... -
Page 13: Service
R E P L A C I N G T H E L A M P The Alien 05 uses the Osram ENL 50W 12V lamp (P/N 97000005). This lamp has been designed specifically for the Alien 05. Installing any other lamp is likely to result in a lower light output. -
Page 14: Removing The Diffuser Filter
6 Gently insert the lamp into its housing. 7 Replace the cover, being careful not to over tighten. R E M O V I N G T H E D I F F U S E R F I L T E R The diffuser filter sits in a metal holder on the outside of the sphere in front of the lens. - Page 15 3 Remove the color-filter access-cover using a 3 mm Allen wrench. See “Color filters” on page 12 for a list of the standard filters and their position numbers. The positions on the color wheel are as follows: 4 The filters clip into holders on the wheel. Being careful not to place finger prints on the filters, rotate the wheel, and replace the appropriate filters.
-
Page 16: Troubleshooting
ROUBLESHOOTING Problem Probable cause(s) Remedy No response from fixture when No power to fixture. Check power cables. power is applied. 05 Driver unit not connected. Connect 05 Driver unit. Fixture does not respond Inspect cables and correct correctly to 05 Driver unit Bad data link connection. -
Page 17: Specifications
A C S U P P L Y Alien 05 power supply: ....12 V AC halogen lamp transformer (not supplied) 05 Driver unit power supply: ........Auto-ranging... - Page 18 Alien 05, 12V, 50 W: ........
Need help?
Do you have a question about the Alien 05 and is the answer not in the manual?
Questions and answers