Table of Contents
Advertisement
Quick Links
Advertisement
Table of Contents

Subscribe to Our Youtube Channel
Related Manuals for Martin MAC Axiom Hybrid


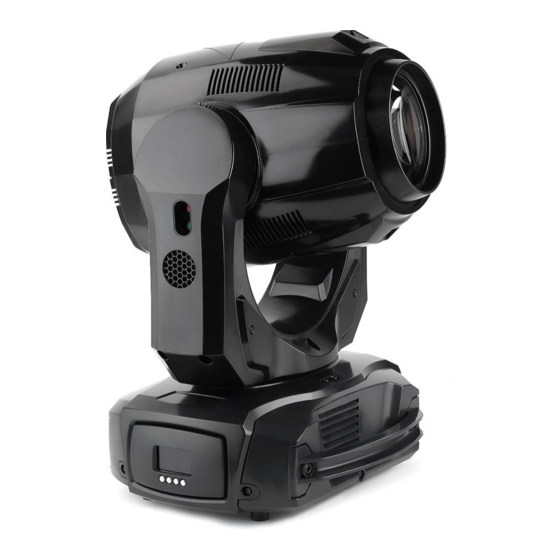
Summary of Contents for Martin MAC Axiom Hybrid
- Page 1 SERVICE MANUAL MAC Axiom Hybrid Revision B, 05-08-2017...
-
Page 2: Table Of Contents
Installing an upper retention arm ..................................34 Color mixing module ......................................39 Calibrating rotating gobos ....................................40 Replacing the gobo rotation belt ..................................43 Replacing the focus belt ...................................... 45 Replacing the zoom belt ...................................... 46 MAC Axiom Hybrid - Revision B, 05-08-2017 2 of 59... - Page 3 Uploading the software ....................................... 53 SiP insert ..........................................55 SiP dimensions ........................................55 Flightcase interior dimensions ....................................55 Maintenance ................................56 Cleaning the product ....................................56 Conditions ......................................56 Maintenance schedule ..................................57 MAC Axiom Hybrid - Revision B, 05-08-2017 3 of 59...
-
Page 4: General Information
• Small cutter • ESD wristband and mat. Take the necessary precautions to prevent static electricity from damaging the product during modification or repair. Figure 3: ESD mat and wristband MAC Axiom Hybrid - Revision B, 05-08-2017 4 of 59... -
Page 5: Spare Parts
Service manual Spare parts For an overview of the spare parts and spare part numbers of MAC Axiom Hybrid, refer to http://www. martin.com/support. Login with your user login details. Search for “MAC Axiom Hybrid”. Clik “Partfinder: Layered” (1). Figure 4: Partfinder: Layered... - Page 6 Figure 8: Access to ballast and ballast wires The base gives you easy access to the power supply (10), the CPU (11) and the fans (12). Figure 9: Access to the power supply, CPU and fans MAC Axiom Hybrid - Revision B, 05-08-2017 6 of 59...
-
Page 7: Troubleshooting
The wiring connection (4) between the tilt Replace the wire set. encoder and the PCBA for pan-tilt is faulty. The tilt function (5) is locked Unlock the tilt function Figure 12: TILT and TILT LOCKED MAC Axiom Hybrid - Revision B, 05-08-2017 7 of 59... -
Page 8: Pan Zero Sensor Line
Replace the hall sensor PCBA. The wiring connection (2) between the Replace the wire set. PCBA for the tilt hall sensor and the PCBA for pan-tilt is faulty. Figure 15: TILT ZERO SENSOR LINE MAC Axiom Hybrid - Revision B, 05-08-2017 8 of 59... -
Page 9: Pan-Tilt Pcba
“Replacing the fuse” on page 52. The wiring connection between the PCBA Replace the wire set (3). for pan-tilt and the PCBA for fans control is faulty. Figure 18: BUS AUX FANS MAC Axiom Hybrid - Revision B, 05-08-2017 9 of 59... -
Page 10: Prism (Three-Facet Prism)
Replace the driver PCBA and update the faulty. See fi gure 11. software. The PCBA for prism arm hall sensor (2) Replace the PCBA. is faulty. Figure 21: PRISM LINEATOR (prism arm) MAC Axiom Hybrid - Revision B, 05-08-2017 10 of 59... -
Page 11: Focus
The master PCBA driver for motors is Replace the driver PCBA and update the faulty. See fi gure 11. software. The PCBA for zoom hall sensor is faulty. Replace the PCBA. Figure 24: ZOOM MAC Axiom Hybrid - Revision B, 05-08-2017 11 of 59... -
Page 12: Colour Wheel
The wiring connection (2) for cyan- Replace the wire set. magenta hall sensor is faulty. The PCBA for cyan blade hall sensor (3) Replace the PCBA. is faulty. Figure 27: CYAN MAC Axiom Hybrid - Revision B, 05-08-2017 12 of 59... -
Page 13: Magenta
The wiring connection (2) for CTO hall Replace the wire set. sensor is faulty. The PCBA for the CTO blade hall sensor Replace the PCBA. (3) is faulty. Figure 30: CTO MAC Axiom Hybrid - Revision B, 05-08-2017 13 of 59... -
Page 14: Gobo
The slave PCBA driver for motors is faulty. Replace the driver PCBA and update the See fiFigure 11. software. The PCBA for the shutter hall sensor is Replace the PCBA. faulty. Figure 33: SHUTTER MAC Axiom Hybrid - Revision B, 05-08-2017 14 of 59... -
Page 15: Lamp Startup Fail
Figure 34: LAMP STARTUP FAIL LAMP ON OVER 1500 HOURS Cause Remedy The lamp has been in use for more than Replace the lamp. See “Replacing the 1500 hours. lamp” on page 33. MAC Axiom Hybrid - Revision B, 05-08-2017 15 of 59... -
Page 16: Wiring Diagrams
Service manual Wiring diagrams Figure 35: Wiring diagram, MAC Axiom Hybrid, 1 of 17 MAC Axiom Hybrid - Revision B, 05-08-2017 16 of 59 16 of 59... - Page 17 Service manual Figure 36: Wiring diagram, MAC Axiom Hybrid, 2 of 17 MAC Axiom Hybrid - Revision B, 05-08-2017 17 of 59 17 of 59...
- Page 18 Service manual Figure 37: Wiring diagram, MAC Axiom Hybrid, 3 of 17 MAC Axiom Hybrid - Revision B, 05-08-2017 18 of 59 18 of 59...
- Page 19 Service manual Figure 38: Wiring diagram, MAC Axiom Hybrid, 4 of 17 MAC Axiom Hybrid - Revision B, 05-08-2017 19 of 59 19 of 59...
- Page 20 Service manual Figure 39: Wiring diagram, MAC Axiom Hybrid, 5 of 17 MAC Axiom Hybrid - Revision B, 05-08-2017 20 of 59 20 of 59...
- Page 21 Service manual Figure 40: Wiring diagram, MAC Axiom Hybrid, 6 of 17 MAC Axiom Hybrid - Revision B, 05-08-2017 21 of 59 21 of 59...
- Page 22 Service manual Figure 41: Wiring diagram, MAC Axiom Hybrid, 7 of 17 MAC Axiom Hybrid - Revision B, 05-08-2017 22 of 59 22 of 59...
- Page 23 Service manual Figure 42: Wiring diagram, MAC Axiom Hybrid, 8 of 17 MAC Axiom Hybrid - Revision B, 05-08-2017 23 of 59 23 of 59...
- Page 24 Service manual Figure 43: Wiring diagram, MAC Axiom Hybrid, 9 of 17 MAC Axiom Hybrid - Revision B, 05-08-2017 24 of 59 24 of 59...
- Page 25 Service manual Figure 44: Wiring diagram, MAC Axiom Hybrid, 10 of 17 MAC Axiom Hybrid - Revision B, 05-08-2017 25 of 59 25 of 59...
- Page 26 Service manual Figure 45: Wiring diagram, MAC Axiom Hybrid, 11 of 17 MAC Axiom Hybrid - Revision B, 05-08-2017 26 of 59 26 of 59...
- Page 27 Service manual CONN DF1 3 M RBS040200 BC817 74HC595M 74HC595M 74HC589 100nF DF3A6.8 CONN DF1 6 M Figure 46: Wiring diagram, MAC Axiom Hybrid, 12 of 17 MAC Axiom Hybrid - Revision B, 05-08-2017 27 of 59 27 of 59...
- Page 28 Service manual CONN DF1 3 M RBS040200 BC817 74HC595M 74HC595M 74HC589 100nF DF3A6.8 CONN DF1 6 M Figure 47: Wiring diagram, MAC Axiom Hybrid, 13 of 17 MAC Axiom Hybrid - Revision B, 05-08-2017 28 of 59 28 of 59...
- Page 29 Service manual Figure 48: Wiring diagram, MAC Axiom Hybrid, 14 of 17 MAC Axiom Hybrid - Revision B, 05-08-2017 29 of 59 29 of 59...
- Page 30 Service manual Figure 49: Wiring diagram, MAC Axiom Hybrid, 15 of 17 MAC Axiom Hybrid - Revision B, 05-08-2017 30 of 59 30 of 59...
- Page 31 Service manual Figure 50: Wiring diagram, MAC Axiom Hybrid, 16 of 17 MAC Axiom Hybrid - Revision B, 05-08-2017 31 of 59 31 of 59...
- Page 32 Service manual Figure 51: Wiring diagram, MAC Axiom Hybrid, 17 of 17 MAC Axiom Hybrid - Revision B, 05-08-2017 32 of 59 32 of 59...
-
Page 33: Repair And Maintenance
Remove the four screws (3). Figure 52: Removing the heat shield Gently remove the lamp (4). Figure 53: Removing the screws NOTE! Always wear gloves when handling the lamp. Figure 54: Removing the lamp MAC Axiom Hybrid - Revision B, 05-08-2017 33 of 59... -
Page 34: Installing An Upper Retention Arm
• four cable ties. Figure 55: Retention arm kit Remove the three torx screws (1) which fix the arm cover (2) on the fan side. Figure 56: Removing the screws MAC Axiom Hybrid - Revision B, 05-08-2017 34 of 59... - Page 35 6. 13. Make sure that the cables of the new upper retention arm are aligned as in fi gure 60. Figure 60: Aligning cables correctly MAC Axiom Hybrid - Revision B, 05-08-2017 35 of 59...
- Page 36 (22) on the support plate (23) by the use of two cable ties (24). 18. Fix the second cable tie in the opposite direction as the first one (25). Figure 63: Fixing the upper retention part MAC Axiom Hybrid - Revision B, 05-08-2017 36 of 59...
- Page 37 24. Make sure that the new upper retention arm (34) is installed correctly. 25. Check the position of the cables (35) used for the tilt function. Figure 66: Cables in vertical tilt MAC Axiom Hybrid - Revision B, 05-08-2017 37 of 59...
- Page 38 27. Apply the threadlock glue on the screws prior to tightening them. 28. Position the arm cover and fix it by tightening the torx screws (39). Figure 69: Tightening torx screws MAC Axiom Hybrid - Revision B, 05-08-2017 38 of 59...
-
Page 39: Color Mixing Module
• DMX 35: CMY fade mode. Your console library may lable these settings differently or exclude them all together. Check your library to make sure you can access this option. MAC Axiom Hybrid - Revision B, 05-08-2017 39 of 59... -
Page 40: Calibrating Rotating Gobos
13. In the GOBO 2 INDEX menu, press ENTER. 14. Use the UP or DOWN key to adjust the index position of the image as per reference. 15. Press ENTER. Figure 74: GOBO 2 INDEX MAC Axiom Hybrid - Revision B, 05-08-2017 40 of 59... - Page 41 28. In the GOBO 5 INDEX menu, press ENTER. 29. Use the UP or DOWN key to adjust the index position of the image as per reference. 30. Press ENTER. Figure 77: GOBO 5 INDEX MAC Axiom Hybrid - Revision B, 05-08-2017 41 of 59...
- Page 42 43. In the GOBO 8 INDEX menu, press ENTER. 44. Use the UP or DOWN key to adjust the index position of the image as per reference. 45. Press ENTER. Figure 80: GOBO 8 INDEX MAC Axiom Hybrid - Revision B, 05-08-2017 42 of 59...
-
Page 43: Replacing The Gobo Rotation Belt
Figure 81: GOBO 9 INDEX Replacing the gobo rotation belt Remove the seven screws (1). Figure 82: Removing the screws Remove the color wheel (2). Figure 83: Removing the color wheel MAC Axiom Hybrid - Revision B, 05-08-2017 43 of 59... - Page 44 NOTE! When you remove the brake, the spring and friction brake easily pop out. Figure 85: Removing the brake Remove the gobo wheel (5). Figure 86: Removing the gobo wheel MAC Axiom Hybrid - Revision B, 05-08-2017 44 of 59...
-
Page 45: Replacing The Focus Belt
3 mm. Figure 87: Removing the gobo rotation belt Replacing the focus belt Remove the lens (1). Figure 88: Removing the lens Loosen the pulley (2). Figure 89: Loosening the pulley MAC Axiom Hybrid - Revision B, 05-08-2017 45 of 59... -
Page 46: Replacing The Zoom Belt
To install a new focus belt, follow the procedure in reverse order. Figure 91: Removing focus belt from bare pulley Replacing the zoom belt Remove the lens (1). Figure 92: Removing the lens MAC Axiom Hybrid - Revision B, 05-08-2017 46 of 59... - Page 47 Figure 94: Removing zoom belt from the fork Remove the zoom belt (5) from the bare pulley (6). To install a new zoom belt, follow the procedure in reverse order. Figure 95: Replacing the zoom belt MAC Axiom Hybrid - Revision B, 05-08-2017 47 of 59...
-
Page 48: Yoke
Remove the screws (1) and cable ties (2). Figure 97: Removing screws and cable ties NOTE! Install the star washer (3) between the fan base and the ground wire. Figure 98: Ground connection MAC Axiom Hybrid - Revision B, 05-08-2017 48 of 59... -
Page 49: Replacing The Pan Belt
Replacing the pan belt Remove the yoke cover. Cut the cable ties. See the arrows in fi gure 100. Figure 100: Cutting cable ties Remove the connectors (2). Figure 101: Removing connectors MAC Axiom Hybrid - Revision B, 05-08-2017 49 of 59... - Page 50 To install a new pan belt, follow the procedure in reverse order. NOTE! Make sure to place the connections correctly. See fi gure 105. Figure 104: Removing the screws and pan belt MAC Axiom Hybrid - Revision B, 05-08-2017 50 of 59...
-
Page 51: Replacing The Power Supply
Figure 106: Removing the screws Remove the screws (2). Remove the power supply (3). To install a new power supply, follow the procedure in reverse order. Figure 107: Removing the power supply MAC Axiom Hybrid - Revision B, 05-08-2017 51 of 59... -
Page 52: Replacing The Fuse
Install a new fuse. Figure 108: Removing the fuse Replacing the display PCB Remove the two screws (1). Figure 109: Removing screws Remove the four screws (2). Figure 110: Removing screws MAC Axiom Hybrid - Revision B, 05-08-2017 52 of 59... -
Page 53: Uploading The Software
Connect the software uploader to the computer’s USB port. Connect the software uploader’s DMX output to the fixtures’ DMX input with a standard DMX cable. Figure 113: Connecting DMX MAC Axiom Hybrid - Revision B, 05-08-2017 53 of 59... - Page 54 (3) and search for the firmware release. Press the SEND UPGRADE button (4). The firmware is tranfered to the fixture. The fixture will reset when the firmware has been transfered. Figure 115: Launching the software MAC Axiom Hybrid - Revision B, 05-08-2017 54 of 59...
-
Page 55: Sip Insert
* The foam block in the lid must be 120 mm wide and minimum 30 mm thick or it must suit couplers. **The total height including projector. Figure 117: Flightcase interior dimensions MAC Axiom Hybrid - Revision B, 05-08-2017 55 of 59... -
Page 56: Maintenance
Check again at frequent intervals. This procedure will allow you to assess cleaning requirements in your particular situation. If in doubt, consult your Martin™ by Harman dealer about a suitable maintenance schedule. Work in a clean, well lit area. Use gentle pressure only when cleaning. -
Page 57: Maintenance Schedule
Service manual Maintenance schedule MAC Axiom Hybrid - Revision B, 05-08-2017 57 of 59 57 of 59... - Page 58 Service manual MAC Axiom Hybrid - Revision B, 05-08-2017 58 of 59 58 of 59...
- Page 59 Martin™, Harman™ and all other trademarks in this document pertaining to services or products by Martin Professional™...
Need help?
Do you have a question about the MAC Axiom Hybrid and is the answer not in the manual?
Questions and answers