Table of Contents
Advertisement
Quick Links
Advertisement
Table of Contents

Subscribe to Our Youtube Channel
Related Manuals for Martin RUSH MH 10 Beam FX


Summary of Contents for Martin RUSH MH 10 Beam FX
- Page 1 RUSH MH 10 Beam FX User Manual...
- Page 2 HARMAN Professional Denmark ApS registered in the United States and/or other countries. Features, specifications, and appearance are subject to change without notice. Martin Professional • Olof Palmes Allé 18 • 8200 Aarhus N • Denmark • www.martin.com Manual: Revision B...
-
Page 3: Table Of Contents
Table of contents Safety information ....................5 Introduction ...................... 11 Before using the product for the first time ............ 11 Physical installation ..................12 Fastening the fixture to a flat surface ............12 Mounting the fixture on a truss ..............12 AC power ...................... - Page 4 Maintenance..................... 31 Cleaning ....................... 31 Replacing the primary fuse ................32 Service and repairs ..................32 DMX protocol ....................33 Control menus ....................43 Troubleshooting ....................46 Specifications ....................47...
-
Page 5: Safety Information
Install, operate and service Martin® products only as directed in their user manuals, or you may create a safety hazard or cause damage that is not covered by product warranties. - Page 6 If you have any questions about how to install, operate or service the fixture safely, please contact your Martin® distributor (see www.martin.com/where-to for details) or call the Martin® 24-hour service hotline on +45 8740 0000, or in the USA on 1-888-tech-180. Respect all locally applicable laws, codes and regulations when installing, operating or servicing the fixture.
- Page 7 the MAINS OUT socket, see ‘Linking fixtures to power in a chain’ on page 15. Protection from burns and fire Do not operate the fixture if the ambient temperature (T ) exceeds 40° C (104° F). The surface of the product casing can reach up to 50° C (122° F) during operation.
- Page 8 applied, when the product receives a DMX signal, or when certain control menu items are selected. The fixture falls into the following Risk Groups according to EN62471 at the distances indicated below: Protection from injury Fasten the fixture securely to a fixed surface or structure when in use.
- Page 9 Do not attempt to use a fixture that is obviously damaged. Do not modify the fixture in any way not described in this manual or install other than genuine Martin® parts. Refer any service operation not described in this manual to a qualified technician.
- Page 10 RUSH™ MH10 Beam FX User Manual...
-
Page 11: Introduction
4. Before operating, ensure that the voltage and frequency of the power supply match the power requirements of the fixture. 5. Check the support pages on the Martin Professional website at www.martin.com for the most recent user documentation and technical information about the fixture. -
Page 12: Physical Installation
Martin® can supply safety cables and rigging clamps that are suitable for use with the fixture (see ‘Included Items Power cable, 1.5 m (4.9 ft.) 18AWG/0.75mm... - Page 13 (see illustrations above and to right) and around a secure anchoring point. If a safety cable attachment point becomes damaged or deformed, do not use the fixture. Return it to a Martin Service Centre for repair. RUSH™ MH10 Beam FX User Manual...
-
Page 14: Ac Power
AC power Warning! Read ‘Safety information’ on page 5 before connecting the fixture to AC mains power. Warning! The mains power input cable supplied with the fixture is rated 6 A and can supply only one fixture with mains power. Do not connect any device to the fixture’s MAINS OUT socket when using this input cable. -
Page 15: Linking Fixtures To Power In A Chain
OUT socket on the fixture to link power to another fixture in a daisy-chain, you must obtain the larger power input cables and power link cables available as an accessory from Martin (see ‘Included Items Power cable, 1.5 m (4.9 ft.) 18AWG/0.75mm... -
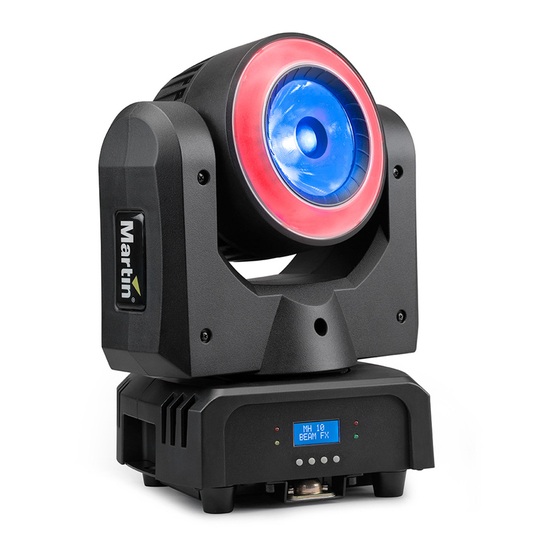
Page 16: Fixture Overview
Fixture overview 1 – Display 2 – LEDs Four LEDs provide status information. DMX: Valid DMX signal present. SLAVE: Fixture operating as a stand-alone slave. MASTER: Fixture operating as the stand-alone master. SOUND: Audio signal triggering stand-alone sequence. 3 –... -
Page 17: Control Data Link
Control data link A DMX 512 data link is required in order to control the fixture via DMX. The fixture has 3-pin and 5-pin XLR connectors for DMX data input and output. Up to 32 devices can be linked together on a single daisy chain. The total number of fixtures in one 512-channel DMX universe is limited by the number of DMX channels required by the fixtures. -
Page 18: Connecting The Data Link
To split the link into branches, use an opto-isolated splitter such as the Martin® DMX 5.3 Splitter. Terminate the link by installing a termination plug in the output socket of the last fixture. The termination plug, which is a male XLR plug with a 120 Ohm, 0.25 W resistor soldered between pins 2 and 3, “soaks... -
Page 19: Fixture Setup
Fixture setup This section explains the fixture characteristics you can set that determine how it can be controlled and will behave. You choose the settings using the menus available from the control panel, and they are retained even when the fixture is powered off. -
Page 20: Dmx Channel Mode
DMX channel mode You can control the fixture in two modes: Basic (24 channel mode) controls all 24 cells of the LED ring together, so they will be all the same color in RGB mode (though FX animations for the ring are provided). - Page 21 1. Select SHOW MODE and press ENTER to confirm. The currently selected show will blink in the display. 2. Use the DOWN and UP buttons to select Show 1, 2, 3 or 4. 3. Press ENTER to save your selection. Master/slave operation Fixtures in Show Mode can be linked in a chain and set to master/slave operation, where one master fixture running a standalone show controls the...
-
Page 22: Pan/Tilt Inversion
3. Use the DOWN and UP buttons to change the sensitivity level from 0 to100. 4. When the fixture responds correctly to the beat, press ENTER to save your selection. Pan/tilt inversion The PAN INVERSE and TILT INVERSE menus can be used to reverse the direction of pan and tilt. -
Page 23: Backlight
To set the fixture’s dimmer curve: 1. Select DIMMER CURVE and press ENTER to confirm. The mode that is currently active will blink in the display. 2. Use the DOWN and UP buttons to select the desired mode. 3. Press ENTER to save your selection. Dimming curve can also be set by DMX using the Special Function channel. -
Page 24: Function Delay
Function delay To reduce the risk of accidental activation, you can set a delay of up to 3 seconds before a DMX command will activate a function on the special function settings DMX channel. To set the delay duration: 1. Select FUNCTION DELAY and press ENTER to confirm. The current delay setting will blink in the display. -
Page 25: Led Temperature
2. Press the ENTER button. The fixture will run a self-test routine. LED Temperature To check the LED Temperature of the fixture, select LED TEMP. and press ENTER. The display will show the temperature of the unit. Press MENU to exit. -
Page 26: Home Position Adjustment (Offset Menu)
The fixture offset/calibration can also be set by DMX using the Special Function channel. Setting options by RDM You can remotely configure the fixture over the DMX line using RDM. Martin® offers a range of suitable RDM-compatible controllers. Martin® M-PC is a Windows-based application available from Martin® that lets you set up, manage and control a lighting installation from a PC that is connected to the installation via a DMX data link. -
Page 27: Getting Status And Setting Options By Rdm
Check that the fixtures are correctly connected to the RDM controller on the data link and that power is applied to all fixtures. 1. In Martin® M-PC, go to RDM CONTROLLER DISCOVER DEVICES. 2. Give the controller time to identify the devices on the link and prepare for communication with the devices. - Page 28 COMMS_STATUS QUEUED_MESSAGE STATUS_MESSAGES STATUS_ID_DESCRIPTION CLEAR_STATUS_ID DEVICE_MODEL_DESCRIPTION MANUFACTURER_LABEL DEVICE_LABEL BOOT_SOFTWARE_VERSION_ID DMX_PERSONALITY DMX_PERSONALITY_DESCRIPTION SENSOR_DEFINITION SENSOR_VALUE DEVICE_HOURS PAN_INVERT TILT_INVERT LAST_STATE (0XA004)* DIMMER_CURVE (0XA007)* *See ’Control menus’...
-
Page 29: Effects
Effects See ‘DMX protocol’ on page 33 for a full list of the DMX channels and values required to control the different effects. Pan and tilt The fixture’s head can be rotated continuously on both pan and tilt axes, or can be positioned through 540°... -
Page 30: Electronic Dimming
Electronic dimming You can set the overall intensity of the beam effect and the ring effect separately using electronic dimming from 0 to 100%. There is 16-bit coarse and fine control for each effect. Dimmer options Four different dimming curves are available (see ‘Dimmer settings’ on page 22). -
Page 31: Maintenance
The user may carry out the service operations described in this manual. All other service operations must be carried out by an authorized Martin® service technician. Do not try to repair the fixture yourself, as you may create a safety risk or cause damage that is not covered by the product warranty. -
Page 32: Replacing The Primary Fuse
Never try to repair the fixture by yourself as this may result in damage or malfunction and it may potentially void your product warranty. The equipment must only be serviced or repaired by an authorized Martin service technician. RUSH™ MH10 Beam FX User Manual... -
Page 33: Dmx Protocol
DMX protocol Basic (24-channel) mode Fade Default Channel Value Function type value Beam Section Strobe 000-031 Close 032-063 Open 064-095 Strobe (SlowFast) 096-127 Fast Close, Slow Open Snap 128-159 Fast Open, Slow Close 160-191 Pulse Effects 192-223 Random Strobe (SlowFast) 224-255 Shutter Open Dimmer Coarse 0-100%... - Page 34 Fade Default Channel Value Function type value 155-119 LEE089 - Moss Green (contd.) 120-124 LEE122 - Fern Green 125-129 LEE738 - JAS Green 130-134 LEE088 - Lime Green 135-139 LEE100 - Spring Yellow 140-144 LEE104 - Deep Amber 145-149 LEE179 - Chrome Orange 150-154 LEE105 - Orange 155-159...
- Page 35 Fade Default Channel Value Function type value Special Functions 000-009 No function (disables calibration) 010-014 Reset fixture 015-054 No function 055-059 Enable Calibration (5 sec.) 060-064 Linear dimmer curve (1 sec.) 065-069 Square law dimmer curve (default) (1 sec.) 070-074 Inverse square law dimmer curve (1 sec.) 075-079...
- Page 36 Color Presets 000-009 Open 010-014 LEE790 - Moroccan Pink 015-019 LEE157 - Pink 020-024 LEE332 - Special Rose Pink 025-029 LEE328 - Follies Pink 030-034 LEE345 - Fuchsia Pink 035-039 LEE194 - Surprise Pink 040-044 LEE181 - Congo Blue 045-049 LEE071 - Tokyo Blue 050-054 LEE120 - Deep Blue...
- Page 37 Color FX 000-009 Open 010-020 FX 1 (Pixel chase, clockwise) 021-031 FX 2 (Pixel chase, counterclockwise) 032-042 FX 3 (Pixel bounce effect) 043-053 FX 4 (Pixel fill, horizontal) 054-064 FX 5 (Pixel fill, vertical) 065-075 FX 6 (Dual bounce effect) 076-086 FX 7 (Pixel wave, horizontal) 087-097...
- Page 38 Extended (93-channel) mode Channel Value Function Fade Default type value Beam Section Strobe 000-031 Close 032-063 Open 064-095 Strobe (SlowFast) 096-127 Fast Close, Slow Open Snap 128-159 Fast Open, Slow Close 160-191 Pulse Effects 192-223 Random Strobe (SlowFast) 224-255 Shutter Open Dimmer Coarse 0-100% 000-255 Fade...
- Page 39 Channel Value Function Fade Default type value 125-129 LEE738 - JAS Green 130-134 LEE088 - Lime Green 135-139 LEE100 - Spring Yellow 140-144 LEE104 - Deep Amber 145-149 LEE179 - Chrome Orange 150-154 LEE105 - Orange 155-159 LEE021 - Gold Amber 160-164 LEE778 - Millennium Gold 165-169...
- Page 40 Channel Value Function Fade Default type value Special Functions 000-009 No Function (disables calibration) 010-014 Reset fixture 015-054 No Function 055-059 Enable Calibration (5 sec.) 060-064 Linear dimmer curve (1 sec.) 065-069 Square law dimmer curve (default) (1 sec.) 070-074 Inverse square law dimmer curve (1 sec.) 075-079...
- Page 41 Color Presets 000-009 Open 010-014 LEE790 - Moroccan Pink 015-019 LEE157 - Pink 020-024 LEE332 - Special Rose Pink 025-029 LEE328 - Follies Pink 030-034 LEE345 - Fuchsia Pink 035-039 LEE194 - Surprise Pink 040-044 LEE181 - Congo Blue 045-049 LEE071 - Tokyo Blue 050-054 LEE120 - Deep Blue...
- Page 42 Color FX 000-009 Open 010-020 FX 1 (Pixel chase, clockwise) 021-031 FX 2 (Pixel chase, counterclockwise) 032-042 FX 3 (Pixel bounce effect) 043-053 FX 4 (Pixel fill, horizontal) 054-064 FX 5 (Pixel fill, vertical) 065-075 FX 6 (Dual bounce effect) 076-086 FX 7 (Pixel wave, horizontal) 087-097...
-
Page 43: Control Menus
Control menus To access the control menus, press the MENU button. Use the UP and DOWN buttons to navigate the menus. Select a menu option with the ENTER button. For more information, see ‘Using the control menus’ on page 19. Default fixture settings are shown in bold. - Page 44 Menu Sub-menu Explanation Function Delay no delay Adds a delay before function changes are 1s delay activated on the Special 2s delay Function channel 3s delay White Balance set brightness 125-255 Green set brightness 125-255 Blue set brightness 125-255 Manual Test 0-255 RPan (Pan rotate) 0-255...
- Page 45 Menu Sub-menu Explanation Force a fixture motor reset Reset To access the Offset menu, press MENU to enter the menu structure and then press and hold ENTER for three seconds. Menu Sub-menu Setting Explanation -127127 Pan offset Offset Menu Tilt -127127 Tilt offset RUSH™...
-
Page 46: Troubleshooting
One of the control DMX setup or DMX link See next section. channels is fault. unresponsive or only Damaged step motor or Contact your Martin responds cable connection authorized distributor or intermittently. between head and body. service center for assistance. -
Page 47: Specifications
Specifications Physical Dimensions (LxWxH) ....275 x 188 x 325 mm (10.8 x 7.4 x 12.8 in.) Weight ..................7.5 kg (16.5 lbs.) Dynamic Effects Beam color mixing ..................RGBW Ring color mixing ...... RGB, grouped or individual control of 24 cells Virtual color wheel .. - Page 48 Control and Programming Control options ........DMX, RDM, stand-alone, master/slave DMX channels ..................24 or 93 Stand-alone trigger options ..........Music trig, auto trig Stand-alone memory ................4 shows Setting and addressing ......Control panel with backlit LCD display Pan and tilt speed ....Adjustable via onboard control panel and DMX DMX compliance ............
- Page 49 US EMC ................FCC Part 15 Class A Canadian safety ..............CSA C22.2 No. 166 Canadian EMC ..............ICES-003 Class A Australia/NZ ....................RCM Thermal Cooling ........Forced air (temperature regulated, low noise) Maximum ambient temperature (T max.) ......... 40° C (104° F) Minimum ambient temperature (T min) ..........
- Page 50 Related Items RUSH® Software Uploader 1 ............ P/N 91611399 Martin® Companion uploader software with Martin® M-DMX Interface ......... See www.martin.com Ordering Information RUSH® MH 10 Beam FX in cardboard box ......P/N 90280120 Specifications subject to change without notice. For latest product specifications, see www.martin.com...
- Page 51 Disposing of this product RUSH by Martin® products are supplied in compliance with Directive 2012/19/EC of the European Parliament and of the Council of the European Union on WEEE (Waste Electrical and Electronic Equipment), where applicable. Help preserve the environment! Ensure that this product is recycled at the end of its life.
Need help?
Do you have a question about the RUSH MH 10 Beam FX and is the answer not in the manual?
Questions and answers