Table of Contents
Advertisement
Advertisement
Table of Contents

Related Manuals for Martin JEM Glaciator X-Stream


Summary of Contents for Martin JEM Glaciator X-Stream
- Page 1 SERVICE MANUAL JEM Glaciator X-Stream Revision A, 06-19-2017, Level 1...
-
Page 2: Table Of Contents
Sight glass level check ..........................19 Condensate drain ............................20 Firmware updates............................20 Maintenance ..........................21 Cleaning the product ..........................21 Casework, fan, drip tray cleaning ....................21 Air filter maintenance ........................22 Heat exchanger cleaning .........................22 Maintenance schedule ..........................23 JEM Glaciator X-Stream - Revision A, 06-19-2017, Level 1 2 of 24... -
Page 3: General Information
If you have questions about how to operate the machine safely, or if you have followed the instructions in this manual and the machine is malfunctioning, please contact Martin™ Service. JEM Glaciator X-Stream - Revision A, 06-19-2017, Level 1 3 of 24... -
Page 4: Preventing Electric Shocks
Do not operate the machine if any parts are damaged, defective or missing. • Moisture and electricity do not mix. Do not aim fog output at electrical connections or devices. JEM Glaciator X-Stream - Revision A, 06-19-2017, Level 1 4 of 24... -
Page 5: Preventing Burns And Fire
Children should be supervised to ensure that they do not play with the appliance. JEM Glaciator X-Stream - Revision A, 06-19-2017, Level 1 5 of 24... -
Page 6: Preventing Breathing Problems
Flashlight or work light. Figure 6: Tools Take the necessary precautions to prevent static electricity from damaging the product during modification or repair. Figure 7: ESD mat and wristband JEM Glaciator X-Stream - Revision A, 06-19-2017, Level 1 6 of 24... -
Page 7: Spare Parts
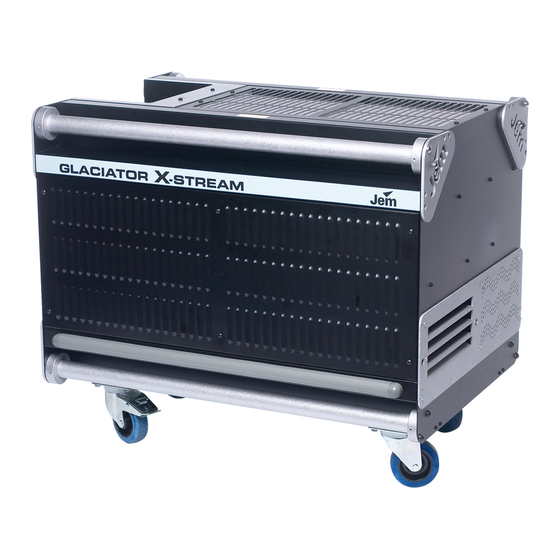
PCBs and require different maintenance procedures. Please note the year of manufacture on your machines serial number label for correct procedures. Figure 9: JEM Glaciator X-Stream JEM Glaciator X-Stream - Revision A, 06-19-2017, Level 1 7 of 24... -
Page 8: Repair And Maintenance
Power off the machine. Remove the control panel access cover (four M5 screws). Figure 10: Removing the cover Lift the control panel access cover up. Figure 11: Lifting the cover JEM Glaciator X-Stream - Revision A, 06-19-2017, Level 1 8 of 24... - Page 9 Use the variable slider to set the calibration point to 11.5 mV. 10. Power on the machine. Danger! Take precaution to limit exposure to live wires. Figure 14: Replacing thermocouple wires JEM Glaciator X-Stream - Revision A, 06-19-2017, Level 1 9 of 24...
- Page 10 24. If re-calibration is not possible, the PCB may need to be replaced. Contact Martin service for detailed instructions to proceed. Figure 17: Connecting a digitial multimeter JEM Glaciator X-Stream - Revision A, 06-19-2017, Level 1 10 of 24...
-
Page 11: Heat Exchanger Calibration - Digital Pcb
Figure 18: Removing the cover Lift the control panel access cover up. Figure 19: Lifting the cover Locate the digital mains PCB. Figure 20: Digital mains PCB JEM Glaciator X-Stream - Revision A, 06-19-2017, Level 1 11 of 24... - Page 12 15. Replace the TCAL jumper back to its original pin positions. 16. Power off and disconnect the calibration box from Figure 23: Replacing thermocouple wires the mains PCB. JEM Glaciator X-Stream - Revision A, 06-19-2017, Level 1 12 of 24...
- Page 13 25. If re-calibration is not possible, the PCB may need to be replaced. Contact Martin service or replace utilizing “PCBA power HFGX, 230V 50/60Hz, Tiny 44 – P/N: 62020130”. JEM Glaciator X-Stream - Revision A, 06-19-2017, Level 1 13 of 24...
-
Page 14: Fluid Pump Speed Calibration
Set the fog output level to one (1) on the left side LCD display. Turn dipswitch S2 to ON for pump ramp override. Figure 27: Mains PCB JEM Glaciator X-Stream - Revision A, 06-19-2017, Level 1 14 of 24... -
Page 15: Fluid Sensor Calibration
Gently remove the ground wire, and set aside. Locate the fluid sensor PCB. NOTE! It is on the front side of the machine just behind the fluid compartment. Figure 30: Fluid sensor PCB JEM Glaciator X-Stream - Revision A, 06-19-2017, Level 1 15 of 24... - Page 16 15. If calibration was unsuccessful, the fluid sensor PCB is likely faulty. Replace it with “Loom fluid sensor c/w wire &h, P/N: 11862026”. Figure 33: Turning the potentiometer JEM Glaciator X-Stream - Revision A, 06-19-2017, Level 1 16 of 24...
-
Page 17: Refrigeration System
Leave the machine for 30 minutes to stabilize. Scroll through the ICE menu and record your readings in the table to the right. Figure 35: Record your readings JEM Glaciator X-Stream - Revision A, 06-19-2017, Level 1 17 of 24... -
Page 18: Temperature Values
If your measurements are not within range, contact Martin™ Support. Figure 37: Ice no/no fog (tick over) after 40 minutes Figure 38: Fog on level 20 after 5 minutes JEM Glaciator X-Stream - Revision A, 06-19-2017, Level 1 18 of 24... -
Page 19: Rear Fan Diagnostics
10-15 seconds. If no level is seen and clicking noise is more frequent than normal, a possible refrigeration leak is possible. Contact Martin™ Service for service and support. JEM Glaciator X-Stream - Revision A, 06-19-2017, Level 1 19 of 24... -
Page 20: Condensate Drain
JEM Glaciator X-Stream. If firmware updates are required, a programmer will be required and is available from Martin™ by Harman as “Epsilon 5 Programmer: P/N: 5050200”. JEM Glaciator X-Stream - Revision A, 06-19-2017, Level 1 20 of 24... -
Page 21: Maintenance
Clean fog fluid residues from the fog output of the machine using a damp cloth. • Clean the outer casing with a damp cloth only. • Clean the drip tray using water and a mild detergent. JEM Glaciator X-Stream - Revision A, 06-19-2017, Level 1 21 of 24... -
Page 22: Air Filter Maintenance
NOTE! Cleaning procedure should be used if the unit is to be stored for 30 days or more. Ensure there is no fluid in the fluid tube when placing in storage. JEM Glaciator X-Stream - Revision A, 06-19-2017, Level 1 22 of 24... -
Page 23: Maintenance Schedule
Sight glass level check Every 1000 hours or annually See page 19 Condensate drain Every 500 hours or annually See page 20 * Not required for machines produced after April 2012. JEM Glaciator X-Stream - Revision A, 06-19-2017, Level 1 23 of 24... - Page 24 Harman Professional Denmark ApS registered in the United States and/or other countries. Features, specifications, and appearance are subject to change without notice. Harman Professional Denmark ApS • Olof Palmes Allé 18 • 8200 Aarhus N • Denmark • www.martin.com JEM Glaciator X-Stream - Revision A, 06-19-2017, Level 1...
Need help?
Do you have a question about the JEM Glaciator X-Stream and is the answer not in the manual?
Questions and answers