Xterra ERG600W Owner's Manual
Owner's manual
Hide thumbs
Also See for ERG600W:
- Owner's manual (33 pages) ,
- Owner's manual (25 pages) ,
- User manual (48 pages)

Related Manuals for Xterra ERG600W


Summary of Contents for Xterra ERG600W
- Page 1 FITNESS ERG600W ROWER OWNER’S MANUAL PLEASE CAREFULLY READ THIS ENTIRE MANUAL BEFORE OPERATING YOUR NEW ROWER...
-
Page 2: Table Of Contents
XTERRA Fitness will do all we can to make your ownership experience as pleasant as possible for many years to come. If you have questions, or if parts are missing or damaged, or you require customer service, call (870) 333-5500. -
Page 3: Product Registration
Serial Number Register Your Purchase The self-addressed product registration card must be completed in full and returned to XTERRA Fitness. You can also go to www.xterrafitness.com/warrantyreg.html to register online. ATTENTION THIS ROWER IS INTENDED FOR RESIDENTIAL USE ONLY AND IS WARRANTED FOR THE APPLICATION. -
Page 4: Important Safety Instructions
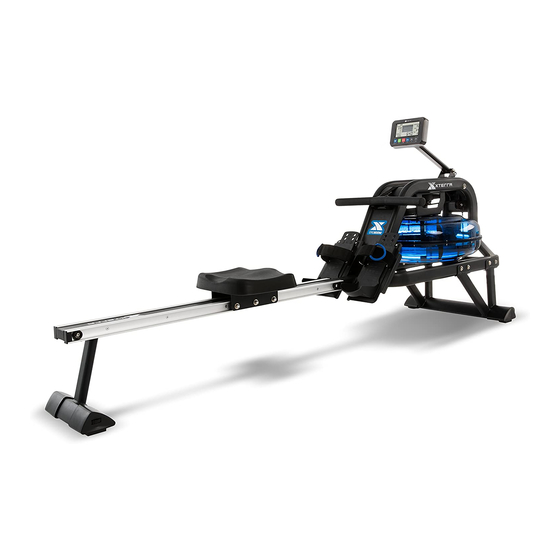
Failure to follow all guidelines may compromise the effectiveness of the exercise experience, expose yourself (and possibly others) to injury, and reduce the longevity of the equipment. SAVE THESE INSTRUCTIONS - THINK SAFETY! CAUTION!! Please be careful when unpacking the carton. ERG600W Rower... - Page 5 For your benefit, read this manual carefully before you use the ERG600W Water Rower. To help us assist you, note the product model number and serial number before contacting us. Before reading further, please familiarize yourself with the parts that are labeled in the drawing below.
-
Page 6: Erg600W Assembly Instructions
ERG600W Assembly Part Checklist ERG600W Rower... - Page 7 ERG600W Assembly Part Checklist Part No Description Q’ty Main Frame Front Stabilizer Rear Stabilizer Slide Rail Left End Cap Right End Cap Console Rail Endcap L Rail Endcap R Stopper Seat Funnel Pumping Siphon Water-Purification Tablet User Manual Hardware Parts Note: Above parts are all needed to assemble this machine.
- Page 8 ERG600W Assembly Pack Checklist ERG600W Rower...
- Page 9 ERG600W Assembly Instructions Rear Stabilizer NOTE: We recommend having 2 people to assemble the product. 1. Turn over the Slide Rail (No. 3) as above. Attach the Rear Stabilizer (No.4) to the Slide Rail with 4 Washers (No.71) and 4 Outer Hex Screws (No.66).
- Page 10 Front Stabilizer Endcaps 1. Attach L & R End Caps (No.25 & 26) to Front Stabilizer (No.2). Then tighten with 2 Cross Screws (No.68) using the Spanner (No.75). ERG600W Rower...
- Page 11 8 Washers (No.71) and 8 Screws (No.60). Tighten with Allen Wrench (No.74). 2. You can put 3~4 screws into the holes first, and start tightening by hand. After all the screws are put in, then tighten with the tool. ERG600W Rower...
- Page 12 3. Secure the Stopper (No.35) with 2 Screws (No.60) and Washers (No.87). Insert all 6 screws partially into the holes first, and then tighten with Allen Wrench (No.74). 4. Attach Rail endcap L(No.82) and Rail endcap R(No.83) to the Slide Rail (No.3). ERG600W Rower...
- Page 13 Console 1. Attach Console(No.46) to Main Frame (No.1) using 4 Washers (No.71) and 4 Screws (No.60). Tighten with Allen wrench (No.74). ERG600W Rower...
-
Page 14: Fill And Empty The Tank
Filling the tank over this limit will void the warranty. • The resistance depends on the water level in the tank. Water level 1 is the lowest resistance. Level 6 is the highest resistance. ERG600W Rower... -
Page 15: Adjustment Guides
There are 3 hooks (A, B, C) for the bungee cord, located on the inside of the Frame (No.1) under the water tank. If you hook the Bungee Cord (No.39) on to B or C, it increases the assisted return of the mesh belt. C is the fastest return. Use caution when adjusting the bungee cord. ERG600W Rower... - Page 16 To move the machine, lift up the rear stabilizer until the transportation wheels on the front stand touch the ground. With the wheels on the ground, you can transport the rower to the desired location with ease. ERG600W Rower...
- Page 17 When not in use, you can save space by storing the rower vertically. Lift by the Rear Stabilizer (No.4) to raise the rower to vertical position. If not using the rower for more than a month, empty the tank before storing. ERG600W Rower...
-
Page 18: Console Operation
Operation of Your Console ERG600W Console START RECOVERY RESET ENTER DOWN STOP Our computerized display console on the Water Rower allows the user to tailor a personalized workout by monitoring their progress. During a workout, the display console will alternately and repeatedly display the Time, Time/500M, SPM, Distance, Strokes, Total Strokes, Calories Burned and Pulse (all of the above). - Page 19 The computer will display year, month, and day when computer is in sleep mode. TEMPERATURE: The computer will display current room temperature when the computer is in sleep mode. CLOCK: The computer will display current clock when the computer is in sleep mode. ERG600W Rower...
- Page 20 Computer will then go into the SPORT screen (Fig.3). 3. When you enter into the SPORT screen, MANUAL and RACE will blink. Press UP or DOWN to select MANUAL or RACE. Press ENTER to confirm your selection. Fig. 1 Fig. 2 Fig. 3 Fig. 4 ERG600W Rower...
- Page 21 Press ENTER and the picture of the race will display on the screen. The TIME/500M of the programs are as follows: L12 L13 L14 L15 8:00 7:30 7:00 6:30 6:00 5:30 5:00 4:30 4:00 3:30 3:00 2:30 2:00 1:30 1:00 Fig. 5 ERG600W Rower...
- Page 22 If there is a problem with the display, try changing the batteries first. When changing the batteries, change both of them. Do not mix battery types. Do not mix old and new batteries. Dispose of old batteries according to your regional guidelines ERG600W Rower...
- Page 23 Sensor wire not connected are connected properly at the upright and the computer No count or distance Sensor wire not working Replace sensor wire displays on the monitor properly Monitor not working properly Replace monitor Squealing Belt slipping Adjust Belt ERG600W Rower...
-
Page 24: Manufacturer's Limited Warranty
Effective August 21, 2018 - ROWER LIMITED WARRANTY XTERRA Fitness Inc. warrants all its home use Rower parts for a period of time listed below, from the date of retail sale, as determined by a sales receipt or in the absence of a sales receipt, eighteen (18) months from the original factory shipping date. XTERRA Fitness’... - Page 25 ERG600W Rower...
- Page 26 ERG600W Rower...
- Page 27 ERG600W Rower...
- Page 28 3000 Nestle Road Jonesboro, AR 72401 - Phone:870-333-5500 - Fax:870-935-7611 www.xterrafitness.com ©2018 All RIghts Reserved. ERG600W Owner’s Manual...
Need help?
Do you have a question about the ERG600W and is the answer not in the manual?
Questions and answers