Table of Contents
Advertisement
Quick Links
OWNER'S MANUAL
MODEL NO.
16604703800
FS380
Assembly
Operation
Trouble –Shooting
Parts
Warranty
CAUTION:
You must read and
understand this owner's
manual before operating
unit.
Keep this manual for
future reference.
Ser
ial number
____________________
Write the serial number
in the space above for
reference. Serial number
can be found at the front
bottom section of the
elliptical.
Advertisement
Table of Contents

Related Manuals for Xterra FS380


Summary of Contents for Xterra FS380
- Page 1 OWNER’S MANUAL MODEL NO. 16604703800 FS380 Assembly Operation Trouble –Shooting Parts Warranty CAUTION: You must read and understand this owner’s manual before operating unit. Keep this manual for future reference. ial number ____________________ Write the serial number in the space above for reference.
- Page 2 Manufacture’s Limited Warranty Dyaco Canada Inc. warrants all its home use elliptical parts for a period of time listed below, from the date of retail sale, as determined by a sales receipt. Dyaco Canada Inc.’s responsibilities include providing new or remanufactured parts, at Dyaco Canada Inc.’s option, and technical support to our independent dealers and servicing organizations.
-
Page 3: Important Safety Information
IMPORTANT SAFETY INFORMATION THIS UNIT IS INTENDED FOR HOUSEHOLD USE ONLY READ ALL INSTRUCTIONS BEFORE USING THIS ELLIPTICAL Thank you for purchasing our product. Even though we go to great efforts to ensure the quality of each product we produce, occasional errors and /or omissions do occur. In any event should you find this product to have either a defective or a missing part please contact us for a replacement. - Page 4 16. Never hold your breath while exercising. Breathing should remain at a normal rate in conjunction with the level of exercise being performed. If dizziness, nausea, chest pains, or any other abnormal symptoms are experienced while using this equipment, STOP the workout at once. CONSULT A PHYSICIAN IMMEDIATELY.
-
Page 5: Important Safety Instructions
IMPORTANT SAFETY INSTRUCTIONS When using an electrical appliance, basic precautions should always be followed, including the following: Read all instructions before using this appliance. DANGER - To reduce the risk of electric shock: Always unplug this appliance from the electrical outlet immediately after using and before cleaning. - Page 6 Transportation The elliptical is equipped with transport wheels, which are engaged when the rear of the elliptical is lifted POWER CONNECTOR – FRONT, LEFT SIDE OF UNIT CUSTOMER SERVICE 1-888-707-1880 Dyaco Canada Inc.©2017 Email: customerservice@dyaco.ca...
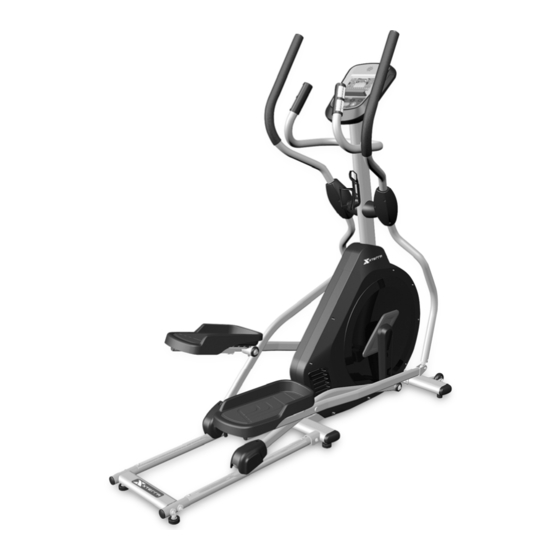
- Page 7 HOW THE ELLIPTICAL WORKS The elliptical allows your feet to move in a natural elliptical path, minimizing the impact on your knees and ankles. Dual Action Handles for total body workout Stationary handlebar for stability Console Handpulse Water Bottle Holder Console Mast Pedal Transportation Wheels...
- Page 8 ASSEMBLY PACK CHECKLIST Hardware Step 1 #78. 3/8" × 3-3/4" Hex #76. 5/16" × 3/4" Hex Head Bolt (2 pcs) Head Bolt (6 pcs) #83. M5 × 12mm Phillips #80. 3/8" x 2" Button Head #96.
- Page 9 Hardware Step 2 #76. 5/16" × 3/4" #77. 5/16" × 15mm Button #93. 5/16" × 7T Hex Head Bolt (2 pcs) Head Socket Bolt (2 pcs) Nyloc Nut (2 pcs) #115. 5/16" × 1-1/4"mm #116. 5/16" x 20 x 1.5T #104.
-
Page 10: Assembly Instruction
ASSEMBLY INSTRUCTION Assembly Tools #121. Combination M6 Allen Wrench & Phillips Head Screwdriver (1 pcs) #120. Phillips Head Screwdriver (1 pcs) #118. 12/14m/m_Wrench (1 pcs) #119. 13/14m/m_Wrench (1 pcs) #122. 6m/m_ L Allen Wrench ... - Page 11 Console Mast & Front Stabilizer 1. Slide the Rear Rail into the Main Frame (1). Insert one Button Head Socket Bolt (80) through each side and attach a Flat Washer (105) and a Nyloc Nut (96) to each joint on the inside. Attach the Rail Connecting Tube (4) to the Rear Rails (16) with two Button Head Socket Bolts (80) and Curved Washers (113) on each side.
- Page 12 Lower Swing Arms 1. Place 2 Wave Washers (124) into the center axle of Console Mast. Then place Lower Handle Bar (L) (10) into left center axle of Console Mast, secure with a Hex Head Bolt (76) and Flat Washer (104) with the Wrench (118).
- Page 13 Upper Swing Arms 1. Insert the Left and Right Swing Arms (14 & 15) into the Lower Left and Right Lower Handle Bars (10 & 11) secure with 6 Hex Head Bolts (76) and 6 Curved Washers (112) by using the Wrench (118).
- Page 14 Plastic Covers ...
-
Page 15: Operation Of Your Console
OPERATION OF YOUR CONSOLE Console Integrated Speakers for MP3 Player LCD with workout data Convenient cargo compartment for phone or MP3 player Audio Input Jack Easy-Touch for customized Control Keys listening Power Up Power the elliptical on by plugging it into an appropriate wall outlet. When turned on, the display with emit 1 beep as all LCD displays light up. -
Page 16: Console Operation
Console Operation The console beeps after turning on the power and LCD is with full display for 2 seconds, as shown in fig. 1 following by showing the software version and system specification for another 2 seconds. To set the personal information, press UP (▲)/DOWN (▼) buttons followed by “SET” button to confirm. - Page 17 Choosing Manual Mode: (a) Choosing Manual and press “SET” button to enter. Press “START” to directly begin the workout without setting parameters, or press “SET” button to start setting parameters. First parameter is TIME. (b) To set time, press UP (▲)/DOWN (▼) buttons (Fig. 16). When finish, press “SET” button to go to next step.
- Page 18 5. Choosing Fat Burn Mode: (a) Choosing Fat Burn and press “SET” button to enter. Press “START” to directly begin the workout without setting parameters, or press “SET” button for next step to set TIME. (b) To set time, press UP (▲)/DOWN (▼) buttons (Fig. 21). When finish, press “SET” button to confirm and then press “START”...
- Page 19 8. Choosing Interval Mode: (a) Choosing Interval and press “SET” button to enter. Press “START” to directly begin the workout without setting parameters, or press “SET” button for next step to set TIME. (b) To set time, press UP (▲)/DOWN (▼) buttons (Fig. 24). When finish, press “SET” button to confirm and then press “START”...
- Page 20 Fig. 28 Fig. 29 Fig. 30 Fig. 31 10. Choosing H.R.C. Mode: (a) Choosing H.R.C and press “SET” button to enter and immediately go to next step for percentage setting. (b) To set percentage, press UP(▲)/DOWN(▼) buttons to choose 50%, 60%, 70%, 80%, 90% or TARGET mode (Fig.
- Page 21 11. Choosing User Define Mode: (a) Choosing User Define and press “SET” button to enter and immediately go to next step for program profile setting. (b) There are 20 segments for profile setting. Press UP (▲)/DOWN (▼) buttons to set LOAD then press SET button to confirm and go on for next setting (Fig.
- Page 22 Heart Rate The old motto, “no pain, no gain”, is a myth that has been overpowered by the benefits of exercising comfortably. A great deal of this success has been promoted by the use of heart rate monitors. With the proper use of a heart rate monitor, many people find that their usual choice of exercise intensity was either too high or too low and exercise is much more enjoyable by maintaining their heart rate in the desired benefit range.
- Page 23 Rate of Perceived Exertion Heart rate is important but listening to your body also has a lot of advantages. There are more variables involved in how hard you should workout than just heart rate. Your stress level, physical health, emotional health, temperature, humidity, the time of day, the last time you ate and what you ate all contribute to the intensity at which you should workout.
-
Page 24: General Maintenance
General Maintenance 1. Wipe down all areas in the sweat path with a damp cloth after each workout. 2. If a squeak, thump, clicking or rough feeling develops, the main cause is most likely one of two reasons: i. The hardware was not sufficiently tightened during assembly. All bolts that were installed during assembly need to be tightened as much as possible. -
Page 25: Exploded View Diagram
Exploded View Diagram CUSTOMER SERVICE 1-888-707-1880 Dyaco Canada Inc.©2017 24 Email: customerservice@dyaco.ca ... -
Page 26: Parts List
Parts List KEY NO. PART NO. Description Q’TY Main Frame 7038001 Front Stabilizer Bar 7038002 Crank Arm Assembly 7038003 Rail Connecting Tube 7038004 Pedal Arm (L) 7038005 Pedal Arm (R) 7038006 Connecting Arm (L) 7038007 Connecting Arm (R) 7038008 Console Mast 7038009 Lower Handle Bar (L) 7038010... - Page 27 KEY NO. PART Description Q’TY Sleeve 7038050 Bushing 7038051 End Cap Stopper 7038052 Bushing 7038053 Console Mast Cover 7038054 Side Case (L) 7038055 Side Case (R) 7038056 Side Case Plate(L) 7038057 Side Case Plate(R) 7038058 Pedal (L) 7038059 Pedal (R) 7038060 Ø32 ×...
- Page 28 KEY NO. PART NO. Description Q’TY Ø5 × Ø15 × 1.5T_Flat Washer 70380101 Ø5/16" × Ø23 × 1.5T_Flat Washer 70380103 Ø8.5 × Ø26 × 2.0T_Flat Washer 70380104 Ø3/8" × Ø19 × 1.5T_Flat Washer 70380105 Ø17 × Ø23.5 × 1.0T_Flat Washer 70380106 Ø20 ×...
- Page 29 USER DIRECTION IMPORTANT The elliptical comes with two Dual Action Handles and a Stationary Handlebar. Always hold the Stationary Handlebar when getting on and off the elliptical. First time users should familiarize themselves with using the elliptical by using the Stationary Handlebar first and then progressing to the Dual Action Handles.
- Page 30 Correct Position Your body should be in an upright position so that your back is straight. Keep your head up to minimize neck and upper back strain. Always try and use the elliptical in a rhythmical and smooth motion. If you find yourself feeling uncomfortable, or experience a surging type feeling, there is probably too much tension. ...
-
Page 31: Training Guidelines
TRAINING GUIDELINES EXERCISE Exercise is one of the most important factors in the overall health of an individual. Listed among its benefits are: Increased capacity for physical work (strength endurance) Increased cardiovascular (heart and arteries/veins) and respiratory efficiency ... - Page 32 Overload This is where you exercise at a level above that which can be carried out comfortably. The intensity, duration and frequency of exercise should be above the training threshold and should be gradually increased as the body adapts to the increasing demands. As your fitness level improves, so the training threshold should be raised.
- Page 33 The following table is a guide to those who are “starting fitness”. Target heart Rate 10 Second Count Beats per Minute Pulse Count The pulse count (on your wrist or carotid artery in the neck, taken with two index fingers) is done for ten seconds, taken a few seconds after you stop exercising.
- Page 34 benefits. In your overall program, you should vary the workload, frequency and intensity. The body responds better to variety and so do you. In addition, when you feel yourself getting “stale’, bring in periods of lighter exercise to allow the body to recuperate and restore its reserves.
- Page 35 STRETCHING Stretching should be included in both your warm up and cool down, and should be performed after 3-5 minutes of low intensity aerobic activity or callisthenic type exercise. Movements should be performed slowly and smoothly, with no bouncing or jerking. Move into the stretch until slight tension, not pain, is felt in the muscle and hold for 20-30 seconds.
- Page 36 INNER THIGH STRETCH TOUCHES Sit with the soles of your feet together with your Slowly bend forward from your waist, letting knees pointing outward. Pull your feet as close your back and shoulders relax as you stretch Into your groin as possible. Gently push your toward your toes.
- Page 37 Please visit us online for information about our other brands and products manufactured and distributed by Dyaco Canada Inc www.dyaco.ca www.dyaco.ca www.dyaco.ca www.dyaco.ca ...
Need help?
Do you have a question about the FS380 and is the answer not in the manual?
Questions and answers