Advertisement
KRAMER
KT-10 Quick Start Guide
This guide helps you install and use your product for the first time. For more detailed information, g
http://www.kramerav.com/downloads/KT-10 to download the latest QS (or scan the QR code) and check if firmware
upgrades are available.
Step 1: Check what's in the box
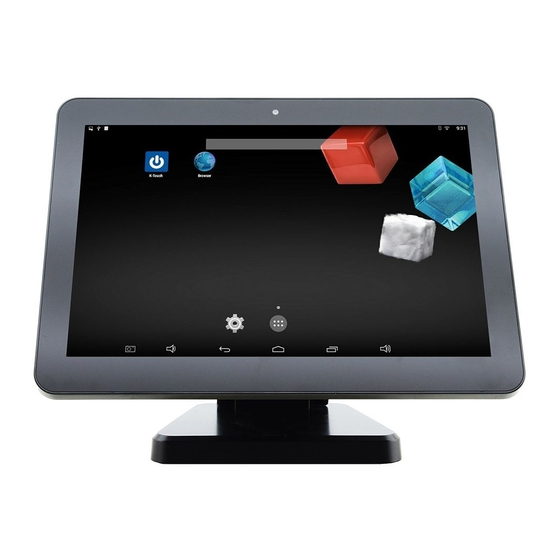
The KT-10 Touch Panel
Tabletop mount
Step 2: Getting to know your KT-10
Top Side View
Rear Panel View
Add-on USB
module slot
Speaker
Lower Side View
Step 3: Mounting on a wall or a table
Mounting on a wall
Use the VESA kit to mount the KT-10 onto the wall:
1. Secure the on-wall mount to the wall using the
installation screws.
2. Attach the panel mount bracket to the VESA
mounting holes on the rear side of the KT-10.
3. Slide the panel mount bracket to the on-wall
bracket already mounted on the wall.
On-wall mount bracket
Panel mount bracket
KT-10 Quick Start (P/N: 2900-300607QS REV 1)
AC/DC adapter
On-wall mount bracket
Exit
Volume
Up/down
button
setup (+/-)
keys
Micro USB
Ethernet PoE
USB
port (RJ-45)
type A
Mounting on a table
Set the KT-10 on a table by attaching the KT-10
(securing with installation screws via the VESA mounting
holes) to the panel on the tabletop mount kit. Optionally
you can secure the base to the table using the four base
mounting screw holes.
Note that the base screw holes can also be used for
mounting the KT-10 on the wall together with the tabletop
mount.
Panel mount bracket
Installation Screws
SD card
Power
slot & cover
LED
4 VESA mounting
screw holes (75x75mm)
Add-on USB
module slot
Speaker
DC in
Add-on USB
module slot
DC in
Control
Power
I/O ports
switch
o
77.6
4.3
102.4
P/N:
2 9 0 0 - 3 0 0 6 0 7 QS
o to
1 Quick start guide
Note that the camera and
microphone are shown in Step 4.
VESA Mounting Holes
136.52
82
Base Mounting
Holes
o
Sizes are in mm
Left Side View
Headphone
3.5mm port
Rev:
1
Advertisement
Table of Contents

Related Manuals for Kramer KT-10


Summary of Contents for Kramer KT-10
- Page 1 This guide helps you install and use your product for the first time. For more detailed information, g o to http://www.kramerav.com/downloads/KT-10 to download the latest QS (or scan the QR code) and check if firmware upgrades are available. Step 1: Check what’s in the box...
-
Page 2: Specifications
PoE-compliant Ethernet cable. Alternatively, or in addition to PoE powering, connect the 12V AC/DC power adapter to the KT-10 DC IN power socket and to the mains electricity. 2. Turn the power switch on the rear panel of the touch panel to ON.
Need help?
Do you have a question about the KT-10 and is the answer not in the manual?
Questions and answers