
Related Manuals for Kramer KT-2015


Summary of Contents for Kramer KT-2015
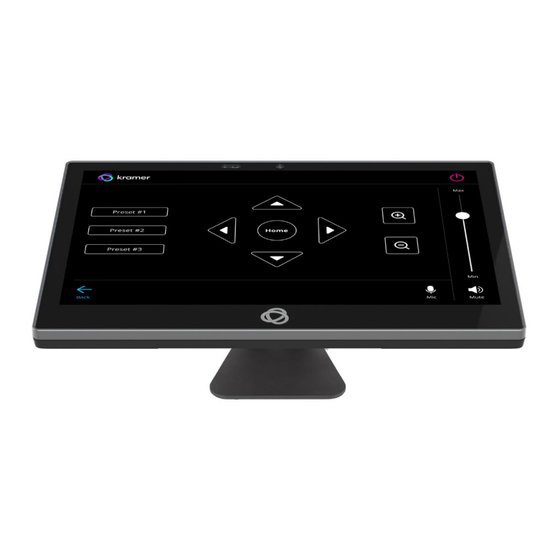
- Page 1 USER MANUAL MODEL: KT-2015 / KT-2015WM 15" Touch Panel P/N: 2900-301732 Rev 1 www.kramerav.com...
-
Page 2: Table Of Contents
Kramer Electronics Ltd. Contents Contents Introduction Getting Started Overview Typical Applications Defining KT-2015 / KT-2015WM 15" Touch Panel KT-2015 Tabletop Mount KT-2015WM On-Wall Mount Mounting the KT-2015 / KT-2015WM Mounting KT-2015 on a Table Mounting KT-2015WM on a Wall Connecting Options... -
Page 3: Introduction
Kramer Electronics Ltd. Introduction Welcome to Kramer Electronics! Since 1981, Kramer Electronics has been providing a world of unique, creative, and affordable solutions to the vast range of problems that confront the video, audio, presentation, and broadcasting professional on a daily basis. In recent years, we have... -
Page 4: Overview
European Advanced Recycling Network (EARN) and will cover any costs of treatment, recycling and recovery of waste Kramer Electronics branded equipment on arrival at the EARN facility. For details of Kramer’s recycling arrangements in your particular country go to our recycling pages at https://www.kramerav.com/social-responsibility/environment/. -
Page 5: Typical Applications
Typical Applications KT-2015 / KT-2015WM is ideal for the following typical applications: Control user interface in meeting and conference rooms, boardrooms, and auditoriums. • Presentation of room scheduling. • KT-2015 / KT-2015WM – Introduction... -
Page 6: Defining Kt-2015 / Kt-2015Wm 15" Touch Panel
Optionally, you can connect the power adapter too (as backup). Kensington Lock Anti-theft security slot for locking the device. 12V/2A DC Connector Connect to the power adapter (optional, purchased separately). KT-2015 / KT-2015WM – Defining KT-2015 / KT-2015WM 15" Touch Panel... -
Page 7: Kt-2015 Tabletop Mount
For securing the 15" Touch Panel to the wall mount bracket using the supplied M3 screw. For measurements see the image in Mounting KT-2015WM on a Wall on page 10. KT-2015 / KT-2015WM – Defining KT-2015 / KT-2015WM 15" Touch Panel... -
Page 8: Mounting The Kt-2015 / Kt-2015Wm
° The top slot is 30 , the middle 45 and the ° bottom 60 Choose the slot you want to use (top, middle or bottom) and insert the stand. KT-2015 / KT-2015WM – Mounting the KT-2015 / KT-2015WM... - Page 9 M3 screw. The table stand and touch panel are now ready for use. For optimum range and performance use the recommended Kramer cables available at https://www.kramerav.com/product/KT-2015. Using third-party cables may cause damage!
-
Page 10: Mounting Kt-2015Wm On A Wall
3. Click the wall bracket onto the back of the I/O cover. Push the bracket into place while holding its top slightly outward. Note: The bracket looks slightly different and has additional screw holes. KT-2015 / KT-2015WM – Mounting the KT-2015 / KT-2015WM... - Page 11 3. Secure the touch panel to the wall bracket and back cover. Use the provided M3*15 (qty 1) screw. For optimum range and performance use the recommended Kramer cables available at https://www.kramerav.com/product/KT-2015. Using third-party cables may cause damage! KT-2015 / KT-2015WM – Mounting the KT-2015 / KT-2015WM...
-
Page 12: Connecting Options
Kramer Electronics Ltd. Connecting Options You can power the KT-2015 or KT-2015WM using any or all of the following options: 1. Connect the PoE-enabled LAN RJ-45 connector to your local area PoE-enabled network. 2. Connect the power adapter to the 12V DC connector on the rear side. The DC power supply is optional: It can be purchased separately. -
Page 13: Controlling Kt-2015 / Kt-2015Wm
Using Navigation Buttons or Gestures By default, KT-2015 / KT-2015WM run the Kramer Control app and display its login screen at start- up. If available, you can use the navigation buttons displayed at the bottom of the screen. You can also set up your device to use gestures-based navigation. -
Page 14: Using The Home Page
Kramer Electronics Ltd. Using the Home Page Swipe a finger upwards from the Kramer icon at the bottom of the screen and release to see the navigation buttons. A PIN may be required (default 9428). - Home – Opens the home page. -
Page 15: Basic Settings Of Kt-2015 / Kt-2015Wm
2015WM Essential First Steps To exit the Kramer Control agent, enter the PIN (default 9428). If the PIN button is not displayed, swipe up from the bottom of the screen to bring up the PIN entry pop-up. To re-open the Control Agent click the icon on the Home page. -
Page 16: Connecting To Wi-Fi Or Ethernet
5. Select a Wi-Fi SSID, check Advanced options and enter the Wi-Fi information in the fields that appear, then press Connect. 6. If you are using 802.1X authentication, then add the certificate information. 802.1X is enabled. KT-2015 / KT-2015WM – Basic Settings of KT-2015 / KT-2015WM... -
Page 17: Installing An 802.1X Certificate
After installing the certificates, see Connecting to Wi-Fi or Ethernet on page for instructions on using the certificates. Ethernet must be disabled before setting-up Ethernet certificates. KT-2015 / KT-2015WM – Basic Settings of KT-2015 / KT-2015WM... -
Page 18: Changing The Automated Firmware Update
5. To change the time that the system checks for updates, press Set check time and select a new time. 6. Press OK to close the window and then press SET. Changing (or clearing) the URL will disable the updates. KT-2015 / KT-2015WM – Basic Settings of KT-2015 / KT-2015WM... - Page 19 12 in Defining KT-2015 / KT-2015WM 15" Touch Panel on page 6). To upgrade the firmware 1. Download the firmware update file from the Kramer website at www.kramerav.com/product/KT-2015. Verify that you are using the correct KT-2015 / KT-2015WM firmware file as there maybe ...
-
Page 20: Changing The Automated Kramer Control Agent Update
5. Press Set check time to select a new time. 6. Press OK to close the window and then press SET. Changing (or clearing) the URL will disable the updates. KT-2015 / KT-2015WM – Basic Settings of KT-2015 / KT-2015WM... -
Page 21: Setting The Display And Keyboard Language
5. If you are using multiple languages, the order in which they are listed represents the priority assigned to them, change the order by dragging languages. 6. Press On-screen keyboard to select keyboard languages. The keyboard language has been set. KT-2015 / KT-2015WM – Basic Settings of KT-2015 / KT-2015WM... -
Page 22: Using The Kramer Control Agent (Connecting To Brain)
When the touch panel starts, the Kramer Control agent runs automatically (it is pre-installed on KT-2015 / KT-2015WM). If an interface has been defined, it will be displayed. If not, it will display the Kramer Agent welcome screen where you can enter the interface’s IP. -
Page 23: The Kramer Control Agent Settings
• (check box) By default, the Kramer Control box is checked, setting the tablet in Immersive Mode: In Immersive (full screen) mode, the system bars are hidden, and users must swipe up/down and enter a PIN to exit the Control Interface. If you are using a generic webpage (such as www.google.com), Immersive mode must be disabled. - Page 24 3. Lock Tablet (and USB) Enable/disable the PIN that restricts access to the Kramer Control agent and USB. Press Lock Tablet to change the PIN and view more options. USB locking is optional. Lock Tablet (slider) •...
-
Page 25: Using The Kramer Control Agent's Api
Example: Setting the Launch URL in the Control Agent a) Open a browser window on a computer connected to the same network as the touch panel. b) Example: To set the Launch URL in the Kramer Control agent (on the touch panel), use the following format: https://<IP of the touch panel>... - Page 26 If more than one interface is defined in the Brain, the Brain’s IP and port must be followed by two parameters: /?Interface=<interface ID>&page=<page ID>. For example: https://192.168.0.56:9804/launchkramerurl?192.168.2.53:8001/?interface=e84f5fb8-c5a3- 4675-9006-d79d3e6cfe59&page=5913c07a-9a41-4fac-9870-e87b1ef719df KT-2015 / KT-2015WM – Using the Kramer Control agent (connecting to Brain)
-
Page 27: Methods Of Setting The Control Interface Url
When the touch panel starts, the (pre-installed) Kramer Control agent runs automatically. You will need to set up its connection with the Kramer Brain, so that it can display the desired control interface. There are 3 possible methods of setting the interface IP in the Kramer Control agent: 1. - Page 28 Kramer Electronics Ltd. 2. Controlling the Kramer Control agent by API call This method of changing settings of the Kramer Control interface can be done remotely, without using the touch panel. For more information see Using the Kramer Control Agent’s API on page 25.
- Page 29 5. Navigate back to the Builder, double click on the touch panel (in the Devices list) and paste the URL from the previous step to the Kramer Control URL. Assign it a Friendly Name. Figure 20: Kramer Control URL in the Builder 6.
- Page 30 Kramer Electronics Ltd. Figure 21: System Events window open on Initialization actions Every time the Brain reboots or connects to the touch panel the interface will be updated. KT-2015 / KT-2015WM – Using the Kramer Control agent (connecting to Brain)
-
Page 31: Advanced Settings
1. If necessary, swipe up from the bottom of the screen to bring up the PIN entry pop-up and enter the PIN (default 9428). 2. From the Home page, open the Settings screen 3. Select Security Password to enable and enter the password. KT-2015 / KT-2015WM – Advanced Settings... -
Page 32: Factory Reset & Reboot
Resetting with the external reset button Insert a pin into the pinhole on the back (see Defining KT-2015 / KT-2015WM 15" Touch Panel on page 6) and hold for 22 seconds to reset the device to factory default values. -
Page 33: Defining An Auto-Start Playlist
The Content field in the Home page will be changed to the storage location of your content. The home page’s Content field defines the auto-start link to Kramer Control. Changing the value in this field is not recommended as it will disable Kramer Control. Defining auto-start HTML or SMIL content The device home page can be set to automatically run an HTML page or Synchronized Multimedia Integration Language (SMIL) content. -
Page 34: Modifying Display Settings
Switching to native Android mode turns the device into a regular android device, allowing you full control of its content. Changing to native Android will disable Kramer Control. To make the switch: 1. If necessary, swipe up from the bottom of the screen to bring up the PIN entry pop-up and enter the PIN (default 9428). -
Page 35: Technical Specifications
600 x 492 x 356mm (4 pcs) Weight KT-2015: 2.83kg (approximate) KT-2015WM: 2.66kg (approximate) Accessories Optional Power adapter. KT-2015 Table-top mount and screws. KT-2015WM On-wall mount bracket and screws. Specifications are subject to change without notice at www.kramerav.com KT-2015 / KT-2015WM – Technical Specifications... - Page 36 This limited warranty gives you specific legal rights, and you may have other rights which vary from country to country or state to state. This limited warranty is void if (i) the label bearing the serial number of this product has been removed or defaced, (ii) the product is not distributed by Kramer Electronics or (iii) this product is not purchased from an authorized Kramer Electronics reseller.
- Page 37 SAFETY WARNING Disconnect the unit from the power supply before opening and servicing For the latest information on our products and a list of Kramer distributors, visit our website where updates to this user manual may be found. We welcome your questions, comments, and feedback.
Need help?
Do you have a question about the KT-2015 and is the answer not in the manual?
Questions and answers