Table of Contents
Advertisement
Quick Links
Advertisement
Table of Contents

Related Manuals for Kramer KT-10


Summary of Contents for Kramer KT-10
- Page 1 USER MANUAL MODEL: KT-10 Touch Panel P/N: 2900-300607 Rev 5 www.kramerAV.com...
-
Page 4: Table Of Contents
Figures Figure 1: KT-10 Touch Panel Rear Figure 2: KT-10 Touch Panel Front Figure 3: Attaching the Tabletop Mount to the KT-10 Touch Panel Figure 4: Mounting the Touch Panel on the wall Figure 5: Connecting the KT-10 Touch Panel Figure 6: Connecting the KT-10 Touch Panel with PSE-1 KT-10 –... -
Page 5: Introduction
GROUP 9: Room Connectivity; GROUP 10: Accessories and Rack Adapters; GROUP 11: Sierra Video Products; GROUP 12: Digital Signage; GROUP 13: Audio; and GROUP 14: Collaboration. Congratulations on purchasing your Kramer KT-10 Touch Panel, which is ideal for the following typical applications: •... -
Page 6: Getting Started
Avoid interference from neighbouring electrical appliances that may adversely influence signal quality • Position your KT-10 away from moisture, excessive sunlight and dust This equipment is to be used only inside a building. It may only be connected to other equipment that is installed inside a building. -
Page 7: Recycling Kramer Products
Kramer Electronics has made arrangements with the European Advanced Recycling Network (EARN) and will cover any costs of treatment, recycling and recovery of waste Kramer Electronics branded equipment on arrival at the EARN facility. For details of Kramer’s recycling arrangements in your particular country go to our recycling pages at www.kramerav.com/support/recycling/. -
Page 8: Overview
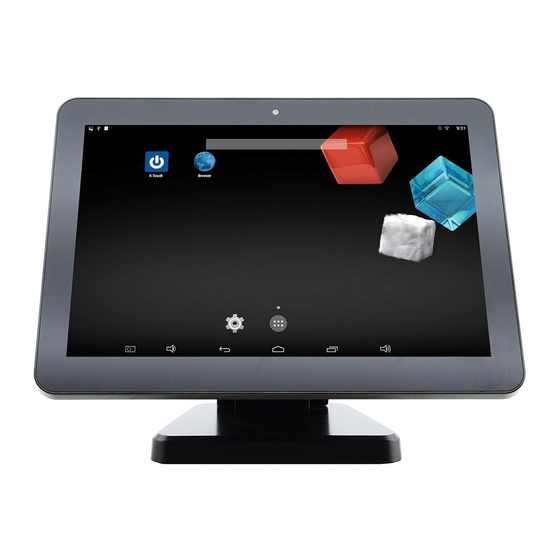
Overview The KT-10 is a portable 10" IPS multi−touch Touch Panel with a 1280x800 resolution. This Android−based Touch Panel can be tabletop− and on−wall− mounted and is VESA compliant. The device supports Power over Ethernet (PoE) and comes with an Ethernet cable, an additional power supply and Wi−Fi options. -
Page 9: Figure 2: Kt-10 Touch Panel Front
VESA Mounting Screw Holes (x4) Use to connect to the tabletop mount to place on the table or mount on the wall, or connect to connect the on-wall bracket to mount the KT-10 on the wall Figure 2: KT-10 Touch Panel Front Feature Function... -
Page 10: Mounting The
You can either place the KT-10 on a table or mount it on the wall. Placing the KT-10 on the table To place the KT-10 on the table, attach the tabletop mount to the KT-10 via the four VESA screws located on its rear side and the four supplied screws (see... -
Page 11: Mounting On The Wall
Mounting on the Wall You can attach the KT-10 Touch Panel to the wall either by hanging the tabletop mount on the wall after attaching it to the KT-10 (see Figure 4) or by using the VESA kit. Figure 4: Mounting the Touch Panel on the wall The VESA kit includes two pieces: the on-wall mount bracket and the panel mount bracket. - Page 12 2. Attach the panel mount bracket to the VESA mounting holes on the rear side of the KT-10. 3. Slide the panel mount bracket onto the on-wall mount bracket (that is already fixed to the wall). KT-10 – Mounting the KT-10...
-
Page 13: Connecting The
Connecting the KT-10 Always switch off the power to each device before connecting it to your KT-10. After connecting your KT-10, connect its power and then switch on the power to each device. To connect the KT-10, as illustrated in the example in Figure •... -
Page 14: Setting Up The
Ethernet. • PoE and PSU – when both are connected, PoE takes precedence and PSU is used as a backup. If PoE is unplugged, KT-10 keeps working smoothly with no need for rebooting. KT-10 – Setting up the KT-10... -
Page 15: Firmware Upgrade
To upgrade KT-10 to a new firmware version: 1. Check for an up-to-date KT-10 firmware file (update.zip) on our Web site at: www.kramerav.com/downloads/KT-10. 2. Download the firmware file to a flash drive (USB memory stick). - Page 16 The following message appears: 7. Click Check now. The system reads the update.zip file from the connected flash drive. 8. Click Install and wait for the upgrade procedure to complete and for the system to reboot. KT-10 – KT-10 Firmware Upgrade...
- Page 17 9. When complete, the following message appears: 10. Click No or Yes as required. 11. Check that the build number has changed in Settings > About tablet. KT-10 – KT-10 Firmware Upgrade...
-
Page 18: Touch App Upgrade
2. Download the application file to a flash drive (USB memory stick). 3. Connect the USB memory stick to the USB port on the KT-10. 4. Open Explore on the touch panel home page. 5. Select USB Storage and select the K-Touch (APK) file. -
Page 19: Technical Specifications
CERTIFICATIONS: CE, FCC, ROHS MOUNTING OPTIONS: Panel-back 4 VESA-compatible screw holes Specifications are subject to change without notice For the most updated resolution list, go to our Web site at www.kramerav.com/ KT-10 – Technical Specifications... - Page 21 SAFETY WARNING Disconnect the unit from the power supply before opening and servicing For the latest information on our products and a list of Kramer distributors, visit our Web site to find updates to this user manual. We welcome your questions, comments, and feedback.
Need help?
Do you have a question about the KT-10 and is the answer not in the manual?
Questions and answers