
Related Manuals for Kramer KT-107


Summary of Contents for Kramer KT-107
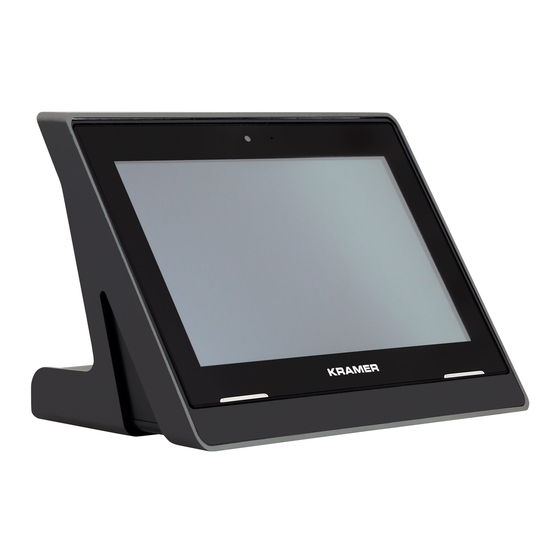
- Page 1 USER MANUAL MODELS: KT-107, 7” Touch Panel KT-107RB, 7” Touch Panel P/N: 2900-300696 Rev 1 www.kramerAV.com...
-
Page 2: Table Of Contents
Defining the KT-107, KT-107RB KT-107 Touch Panel KT-107 Tabletop Mount KT-107 On-Wall Mount Mounting the KT-107, KT-107RB Mounting the KT-107 on a Table Mounting the KT-107 on a Wall Connecting Options Setting up the KT-107, KT-107RB Initial Setup Additional KT-107 Important Functions... -
Page 3: Introduction
Kramer Electronics Ltd. Introduction Welcome to Kramer Electronics! Since 1981, Kramer Electronics has been providing a world of unique, creative, and affordable solutions to the vast range of problems that confront the video, audio, presentation, and broadcasting professional on a daily basis. In recent years, we have... -
Page 4: Overview
European Advanced Recycling Network (EARN) and will cover any costs of treatment, recycling and recovery of waste Kramer Electronics branded equipment on arrival at the EARN facility. For details of Kramer’s recycling arrangements in your particular country go to our recycling pages at www.kramerav.com/support/recycling/. -
Page 5: Typical Applications
H.265 video and audio streams, and seamlessly operating the high-resolution 2Mp HD front camera. Flexible Services – Advanced Android 6.0 Operating System with rich Kramer and market-available software applications offered via cloud/store, such as K-Touch Control. Advanced and User-friendly Operation ... -
Page 6: Defining The Kt-107, Kt-107Rb
Speakers To output the sound. Control Button Touch the Kramer logo area lightly to set the screen to sleep mode or turn it back on. Press and hold (for 1 to 2 seconds) to open the pop-up menu which lets you power down the unit, reboot it or return to the Home-page. - Page 7 Kramer Electronics Ltd. Figure 2: KT-107 Touch Panel Rear Panel Feature Function Cover Covers the wall mount connections and power button. Press to power on the KT-107. Power Button When powered, press briefly to open the pop-up menu and power down the device, reboot it or return to the Home-page.
-
Page 8: Kt-107 Tabletop Mount
M2x4 screws (see Mounting the KT-107 on a Table on page 9). M5x60 Secure Screw For safely securing the tabletop mount to the table from underneath (see Opening Figure KT-107, KT-107RB - Defining the KT-107, KT-107RB... - Page 9 Connect to the PoE-enabled Ethernet cable. Cable Cover with Opening Hides the ports and includes an opening for passing connected cables over the table. Solid Cable Cover Hides the ports when passing connected cables under the table. KT-107, KT-107RB - Defining the KT-107, KT-107RB...
-
Page 10: Kt-107 On-Wall Mount
Figure 5: KT-107 Touch Panel Front Panel Feature Function Groove (x4) For hanging the panel mount plate (attached to KT-107) on a wall. Flat Cable Connector Connect to the rear side of the KT-107 using the supplied flat cable. -
Page 11: Mounting The Kt-107, Kt-107Rb
Drill a hole in the table to fit the M5x60 screw used for securing the tabletop mount to the table. Cut an opening in the table if you need to pass the cables from underneath. The thickness of the table should be 76.2mm (3”) or less. KT-107, KT-107RB - Mounting the KT-107, KT-107RB... - Page 12 Figure 6 (not to scale). Take care not to damage the table. Kramer Electronics is not responsible for any damage caused to the table. To cut the cable pass-through opening (if required): 1. Carefully measure the exact location of the cable pass-through opening.
- Page 13 To secure the KT-107 tabletop mount: 1. Remove the rubber covers from the rear tabletop mount. 2. Remove the cable cover Figure 7: Removing Cable Cover and Rubber Screw Cover 3. Place the tabletop mount on the table. KT-107, KT-107RB - Mounting the KT-107, KT-107RB...
- Page 14 Before you begin, verify that the cable cover is removed. To connect the cables and set the KT-107 on the tabletop mount: 1. Connect the RJ-45 port on the tabletop mount to the PoE-enabled network. 2. Connect the power adapter to the Power 2-pin terminal block connector on the tabletop mount and to the mains power.
- Page 15 Replace the rubber covers to hide the screws. Figure 9: Connecting to the KT-107 Rear Panel 7. Connect the Ethernet and micro-USB cables by either passing the cables from underneath the table via the cable opening (see Preparing the Table for a Secure Mount on page 9), or by placing them over the table.
-
Page 16: Mounting The Kt-107 On A Wall
UK: 2 Gang in-wall junction box, 137x75mm, 41mm minimum depth (BS 4662). Other popular in-wall mounting boxes may also be available in the market (such as the GEWISS 4 Gang 144x85x50mm box (GW 24 404)). KT-107, KT-107RB - Mounting the KT-107, KT-107RB... - Page 17 The on-wall mount screw openings are set in different locations to fit various types of in-wall junction boxes. Figure 11: Installing the On-Wall Mount Unit 3. Optionally, insert the supplied right-angle OTG USB port if you need to connect the KT-107 to an external USB device. KT-107, KT-107RB - Mounting the KT-107, KT-107RB...
- Page 18 Panel. To connect the flat cable: 1. On the rear side of the KT-107, unscrew the cover and set the cover and screw aside. Figure 12: Removing the Cover on the KT-107 Rear Side 2. Attach the panel mount plate, top side up (see arrows), to the rear of the KT-107.
- Page 19 Kramer Electronics Ltd. 4. Insert the 4 M2x4 screws (supplied) and tighten. Figure 13: Attaching the Panel Mount Plate to the Rear Side of the KT-107 5. Connect the flat cable between the on-wall mount and the KT-107. Figure 14: Connecting the On-wall Mount Flat Cable...
- Page 20 Kramer Electronics Ltd. 6. Hang the KT-107 on the wall by sliding the tabs on the attached panel mount plate over the grooves on the on-wall mount unit. Figure 15: Hanging KT-107 on the Wall KT-107, KT-107RB - Mounting the KT-107, KT-107RB...
- Page 21 Kramer Electronics Ltd. Installing the On-Wall Secure Lock The KT-107-OWLK, is purchased separately and secures KT-107 safely to the on-wall mount. The On-Wall Lock includes a 2-part frame (short and long part), 2 screws and 2 washers. To secure KT-107 to the on-wall mount: 1.
- Page 22 Figure 17: Screws Loose 5. After hanging the KT-107 on the wall (Figure 14), tighten the two screws until the KT-107 securely fixed in place. Figure 18: Screws Tightened KT-107, KT-107RB - Mounting the KT-107, KT-107RB...
-
Page 23: Connecting Options
Use the internal battery (after initially charging the battery for 8 hours). Figure 19: Powering the KT-107 Touch Panel Connect to the local area Ethernet network: Via Ethernet cable connection to the LAN RJ-45 connector. -
Page 24: Setting Up The Kt-107, Kt-107Rb
Setting the Date and Time on page 23. Modifying the Display Settings on page 24. Setting the Control Button on page 26. Defining Home-page Password-protected Exit on page 27. KT-107, KT-107RB - Setting up the KT-107, KT-107RB... - Page 25 Figure 22: Settings – Automatic Date & Time 3. Enable Automatic date & time to derive the date and time from the network. If disabled, set the date and time manually. 4. Select the time format. KT-107, KT-107RB - Setting up the KT-107, KT-107RB...
- Page 26 Kramer Electronics Ltd. Modifying the Display Settings To modify Display Settings: In the Home-page, click Settings. Figure 23: Settings - Display 2. Click Display. Figure 9: Settings – Display Setup KT-107, KT-107RB - Setting up the KT-107, KT-107RB...
- Page 27 Press rear-side power button to power on. The Touch (see Defining Home-page Password- Panel powers up. protected Exit on page 27), enter the correct Go to Home-page. password and switch to Home-page. KT-107, KT-107RB - Setting up the KT-107, KT-107RB...
- Page 28 Press for 1 to 2 seconds for the pop-up menu to appear and select Power off, Reboot or Home-page. Figure 24: Using a Hidden Control Button When the Touch Panel is off, turn it on again via the power button on the rear side of the Touch Panel. KT-107, KT-107RB - Setting up the KT-107, KT-107RB...
- Page 29 Password protection is used to prevent an unauthorized person from exiting an application program. When the Control button is disabled, this option is disabled too. To enable/disable password protection: 1. In the Home-page, click Settings. 2. Select Control. KT-107, KT-107RB - Setting up the KT-107, KT-107RB...
-
Page 30: Additional Kt-107 Important Functions
Figure 26: Password on Exit Settings Additional KT-107 Important Functions This section describes the following additional KT-107 functions: About Touch Panel Page on page Top Bar Functions on page Lower Bar Functions on page KT-107, KT-107RB - Setting up the KT-107, KT-107RB... - Page 31 To view Touch Panel information: 1. In the Home-page, click Settings. 2. Scroll down and select About touch panel. The About touch panel screen appears: Figure 27: About the KT-107 Touch Panel KT-107, KT-107RB - Setting up the KT-107, KT-107RB...
- Page 32 The top bar displays various messages such as time and date, battery status and so on. Figure 28: Top Bar Functions Lower Bar Functions Use the lower bar functions as follows: Figure 29: KT-107 Lower Bar Functions KT-107, KT-107RB - Setting up the KT-107, KT-107RB...
-
Page 33: Upgrading The Firmware
The FW-upgrade-tools zip file includes both ‘Rockchip_DriverAssitant’ and ‘KT FW Upgrade Tool’ upgrade tools. 2. Copy the ‘KT-107 Firmware Release xx’ (or ‘KT-107RB Firmware Release xx’), ‘FW Upgrade Tool’ and ‘Rockchip_driverAssistant’ files and unzip them to local folders on your ... - Page 34 4. Click Install Driver. The following window appears: Figure 31: Driver Installation Security Note 5. Click Install repeatedly on the next few screens until the driver is successfully installed. Figure 32: Successful Installation 6. Click OK. KT-107, KT-107RB - Upgrading the Firmware...
-
Page 35: Prepare The Kt-107 For Firmware Upgrade
USB cable or port. Upgrade the Firmware via PC To upgrade the firmware: 1. In the ‘KT FW Upgrade Tool’ folder, double-click ‘Kramer Touch Panel FW Upgrade Tool.exe’. The FW Upgrade Tool window appears:... - Page 36 Kramer Electronics Ltd. 2. Click the … button next to the FW Path text box to select the path to the Update.img file in the unzipped ‘KT-107 Firmware Release xx’ folder. Figure 34: Update File Loaded 3. Press the Touch Panel...
- Page 37 FW upgrade process. Figure 35: Touch Panel Connected to PC 5. Click Upgrade (after all the Connected Devices icons turn green). The upgrade progress is displayed: Figure 36: Firmware Upgrade Progress KT-107, KT-107RB - Upgrading the Firmware...
- Page 38 Kramer Electronics Ltd. 6. Wait for the green “Success” message to appear: Figure 37: Firmware Upgrade Complete Following successful firmware installation, wait for the Touch Panel to power up. This process may take a few minutes. KT-107, KT-107RB - Upgrading the Firmware...
-
Page 39: Technical Specifications
Included Accessories: Power supply unit adapter (5V, 4.0A AC/DC), tabletop mount, on-wall mount unit, panel-mount plate, right-angle OTG USB cable, installation screws Options: On-wall security lock (KT-107-OWLK) Specifications are subject to change without notice at www.kramerav.com KT-107, KT-107RB - Technical Specifications... - Page 40 What Kramer Electronics Will Do Kramer Electronics will, at its sole option, provide one of the following three remedies to whatever extent it shall deem necessary to satisfy a proper claim under this limited warranty: Elect to repair or facilitate the repair of any defective parts within a reasonable period of time, free of any charge for the necessary parts and labor to complete the repair and restore this product to its proper operating condition.
- Page 41 SAFETY WARNING Disconnect the unit from the power supply before opening and servicing For the latest information on our products and a list of Kramer distributors, visit our Web site where updates to this user manual may be found. We welcome your questions, comments, and feedback.
Need help?
Do you have a question about the KT-107 and is the answer not in the manual?
Questions and answers