Table of Contents
Advertisement
Quick Links
Advertisement
Table of Contents

Subscribe to Our Youtube Channel
Related Manuals for VeEX VePAL MX120e+


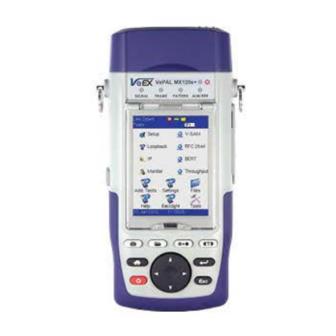
Summary of Contents for VeEX VePAL MX120e+
- Page 1 MX100e+/MX120e+ e_Manual D07-00-050P RevD00 Page 1 of 115...
-
Page 2: Table Of Contents
MX100e+/MX120e+ e_Manual D07-00-050P RevD00 Page 2 of 115 Table of Contents 1.0 About this User Manual 2.0 Introduction to MX100e+ and MX120e+ 2.1 MX100e+ Introduction 2.2 MX120e+ Introduction 3.0 Safety Information 4.0 Basic Operation 4.1 Keypad 4.2 Touch Screen Display 4.3 Battery 4.4 Connectors and Panels 4.4.1 Test Ports... - Page 3 MX100e+/MX120e+ e_Manual D07-00-050P RevD00 Page 3 of 115 7.1.2 Traffic Settings 7.1.3 Error Injection Settings 7.1.4 Control Settings 7.1.5 Starting/Stopping a BERT Test 7.2 BERT Results 7.2.1 Summary 7.2.2 Errors 7.2.3 Events 7.2.4 Alarms 7.2.5 Traffic 7.2.6 Rates 7.2.7 Delay 7.2.8 Saving BERT Results 8.0 RFC 2544 Conformance Testing 8.1 RFC 2544 Setup...
- Page 4 MX100e+/MX120e+ e_Manual D07-00-050P RevD00 Page 4 of 115 9.1 Setup 9.1.1 General Settings 9.1.2 Control Settings 9.1.3 Header Configurations (Individual Streams) 9.1.4 Traffic Settings (Individual Streams) 9.1.5 Error Injection Settings (Individual Streams) 9.1.6 Starting/Stopping a Throughput Test 9.2 Throughput Results 9.2.1 Viewing Test Results (Individual and Multiple Streams) 9.2.2 Global Results (Multiple Streams) 9.2.3 Individual Stream Results...
- Page 5 MX100e+/MX120e+ e_Manual D07-00-050P RevD00 Page 5 of 115 11.2.4 Traffic Distribution Details 11.2.5 Delay and Rates 11.2.6 Port Selection 12.0 Loopback 13.0 V-SAM 13.1 V-SAM Overview 13.2 V-SAM Setup 13.2.1 General Settings 13.2.2 Services - Header 13.2.3 Services - Bandwidth 13.2.4 Services - Thresholds 13.2.5 Control Settings 13.3 Results...
-
Page 6: About This User Manual
VeEX Inc. This device uses software either developed by VeEX Inc or licensed by VeEX Inc from third parties and is the confidential and proprietary of VeEX Inc. -
Page 7: Mx100E+ Introduction
MX100e+/MX120e+ e_Manual D07-00-050P RevD00 Page 7 of 115 loopback device offering simplified network testing and monitoring. The MX100e+ shares all the same features as the MX100+ unit, with the additional support of 100Mbps optical on SFP. Note that any reference in this manual to MX100e+ applies to the MX100+ product and any reference to MX120e+ applies to MX120+ product, respectively. -
Page 8: Mx120E+ Introduction
MX100e+/MX120e+ e_Manual D07-00-050P RevD00 Page 8 of 115 Go back to top Go back to ToC 2.2 MX120e+ Introduction The MX120e+ is part of the MX product family - in essence the MX120e+ is similar to having two MX100e+ units in one chassis. The default configuration of the MX120e+ allows for single port operation (same as the MX100e+), dual port operation, and pass through monitor mode. -
Page 9: Basic Operation
Do not operate the instrument in the presence of flammable gases or fumes or any other combustible environment. VeEX Inc. assumes no liability for the customer's failure to comply with safety precautions and requirements. -
Page 10: Battery
MX100e+/MX120e+ e_Manual D07-00-050P RevD00 Page 10 of 115 The location of the cursor on the screen is indicated by a focus state. The focus state varies depending on the function or section of the test set. Please observe the following precautions: Never use excessive pressure on the touch-screen as this may damage its functionality. - Page 11 MX100e+/MX120e+ e_Manual D07-00-050P RevD00 Page 11 of 115 Go back to top Go back to ToC MX120e+ Test Interfaces The MX120e+ is equipped with the following interfaces: Electrical Ethernet Interfaces Dual 10/100/1000Base-T Ports, RJ45 connector, IEEE 802.3 compliant A green LED on the RJ45 connector flashes when there is activity on the network The green LED is On when there is a valid Ethernet link with the network and off when there is no link Optical Ethernet Interface options Dual 1000Base-X SFP Ports, LC connector...
-
Page 12: Utility Ports
MX100e+/MX120e+ e_Manual D07-00-050P RevD00 Page 12 of 115 Go back to top Go back to ToC 4.4.2 Utility Ports The Ethernet and USB ports are located on the left and right side of the unit. RJ45, 10/100Base-T port: To access the Ethernet management port, remove the protective rubber cover on the right hand side of the unit to expose the connector. -
Page 13: Software Upgrade
There are two methods of updating the test set software: manually or via ReVeal MTX software. Manual Software Upgrade To manually upgrade the test set software, download the latest version from the VeEX website. Downloading Software from the VeEX website Enter Username and Password under Customers Login (1). - Page 14 MX100e+/MX120e+ e_Manual D07-00-050P RevD00 Page 14 of 115 Installing New MX100e+/MX120e+ software Unzip the file and copy the unzipped folder onto a USB stick formatted in the FAT-32 file format. Verify that the MX100e+ unit is powered off and that the AC adaptor connected to the unit is charging the battery. Insert the USB stick on the right side of the unit.
-
Page 15: Home Menus
MX100e+/MX120e+ e_Manual D07-00-050P RevD00 Page 15 of 115 Go back to top Go back to ToC 5.0 Home Menus The Home menu can be accessed at anytime during operation by pressing the Home key on the rubber keypad. Screen Layout Screen Icons Action Menu 5.1 Screen Layout... -
Page 16: Screen Icons
MX100e+/MX120e+ e_Manual D07-00-050P RevD00 Page 16 of 115 MX120e+ Home Menu for Port 1 (P1) MX120e+ Home Menu for Port 2 (P2) Go back to top Go back to ToC 5.2 Screen Icons The following icons are located at the top right hand corner of the screen: Laser icon: Indicates if the optical transmitter in the SFP transceiver is switched On or Off. -
Page 17: Setup
MX100e+/MX120e+ e_Manual D07-00-050P RevD00 Page 17 of 115 The Action Menu is accessed by tapping the Action icon in BERT or Throughput Testing. Menu options feature: Close: Closes the Action menu Stop: Stops the measurement Stop TX: Stops the Transmitter Error Injection: Injects an Error or Alarm depending on Error and Alarm generation settings Restart: Restarts the measurement after it has been stopped by the user Laser On/Off: Turns Laser On or Off depending on measurement application... - Page 18 MX100e+/MX120e+ e_Manual D07-00-050P RevD00 Page 18 of 115 MX120e+ Interface selections: Dual Port is the default selection. The user can switch between Port 1 and Port 2 by selecting P1 or P2. See Chapter 5.0 Home Menus for screenshots and more information on MX120e+ P1 and P2 home menus. Port 2 has limited functionality.
- Page 19 MX100e+/MX120e+ e_Manual D07-00-050P RevD00 Page 19 of 115 MX120e+ Port Settings - Fiber (P1) MX120e+ Port Settings - Fiber (P2) Note: When Dual port mode is selected (MX120+ only), a P1 and P2 selection window appears at the top of the screen. Use this window to select and configure the necessary port settings.
-
Page 20: Port Status
MX100e+/MX120e+ e_Manual D07-00-050P RevD00 Page 20 of 115 Speed: Only available when auto-negotiation is off. Select from 10Mbps, 100Mbps, or 1000Mbps when the 10/100/1000T port is selected. 100 Mbps for 100Base-FX. 1000Mbps/1Gbps is fixed when the 1000Base-X port is selected. Duplex: Only available when auto-negotiation is off for the 10/100/1000T port. -
Page 21: Laser Activation
MX100e+/MX120e+ e_Manual D07-00-050P RevD00 Page 21 of 115 Go back to top Go back to ToC 6.3 Laser Activation LASER On/Off Operation: When the 1000Base-X port(s) is/are selected, the top drop-down menu appears in the Setup/Port screen. From this drop-down menu the user is able turn the LASER On or Off. The LASER may also be turned on/off from any of the following application menus: BERT RFC 2544... -
Page 22: Measurement Settings
MX100e+/MX120e+ e_Manual D07-00-050P RevD00 Page 22 of 115 Previously stored profiles can be viewed, deleted and loaded from this screen. When the user loads a profile, the screen will change automatically to the application that the profile corresponds to. Profile Selection Profile View Go back to top Go back to ToC 6.5 Measurement Settings... -
Page 23: Bert
MX100e+/MX120e+ e_Manual D07-00-050P RevD00 Page 23 of 115 Event Log: Circular or Blocked. Up to 1000 event logs can be stored. Circular: Only the latest events will be stored if there are over 1000 event logs. The oldest event will be deleted so that the new event can be added. - Page 24 MX100e+/MX120e+ e_Manual D07-00-050P RevD00 Page 24 of 115 Layer 2: Framed BERT (same as Layer 1 Framed) MAC Address: A default or user configured Media Access Control (MAC) address is added to the frame BERT Setup - Header (Layer 2) BERT Setup - MAC address editing Layer 3: Framed BERT (same as Layer 1 &...
-
Page 25: Header Settings
MX100e+/MX120e+ e_Manual D07-00-050P RevD00 Page 25 of 115 Layer 4: Framed BERT (same as Layer 1, 2 & 3 Framed) MAC Address: A default or user configured Media Access Control (MAC) address is added to the frame IP Address: A default or user configured IP address is added to the frame UDP/TCP: A user defined source and destination port address is added to the frame BERT Setup - Header (Layer 4) BERT Setup - Header (Layer 4) UDP Settings... - Page 26 MX100e+/MX120e+ e_Manual D07-00-050P RevD00 Page 26 of 115 802.3 LLC (IEEE 802.3 frame with LLC header) 802.3 SNAP (IEEE 802.3 frame with SNAP header) Ethernet II (DIX) (named after DEC, Intel, and Xerox, this is the most common frame type today) MAC/IP: Tap the MAC and IP blocks on the Frame image to access the setup menus Set the Source and Destination MAC address for Layer 2 Set the Source and Destination MAC and IP addresses for Layer 3 and Layer 4...
- Page 27 MX100e+/MX120e+ e_Manual D07-00-050P RevD00 Page 27 of 115 Go back to top Go back to ToC VLAN Tab: In the VLAN tab the following parameters are configured: VLAN ID: Can be configured in the range 1 to 4094. VLAN ID is the identification of the VLAN, which is basically used by the standard 802.1Q. It has 12 bits which allows the identification of 4096 (2^12) VLANs.
- Page 28 MX100e+/MX120e+ e_Manual D07-00-050P RevD00 Page 28 of 115 Go back to top Go back to ToC MPLS Tab: In the MPLS tab the following parameters are configured: MPLS label: Can be configured in the range 16 through 1,048,575 (labels 0 to 15 are reserved). Note: Composed of 20 bits which allows for the creation of over one million labels.
- Page 29 MX100e+/MX120e+ e_Manual D07-00-050P RevD00 Page 29 of 115 IP Src and IP Dest: For IP Src, if the IP connection is up, refer to section 5.1 IP in the V100+ Common Functions manual. The source address is fixed to the IP address from the IP setup menu. IP TOS (for Quality of Service testing): Legacy TOS (Precedence): The first three bits of the IP TOS field can be edited: 000 - Routine...
- Page 30 MX100e+/MX120e+ e_Manual D07-00-050P RevD00 Page 30 of 115 Go back to top Go back to ToC Layer 2,3, & 4 test patterns PRBS: 2^31 -1 (147 483 647-bit pattern used for special measurement tasks, e.g., delay measurements at higher bit rates) 2^23 -1 (8 388 607-bit pattern primarily intended for error and jitter measurements at bit rates of 34 368 and 139 264kbit/s) 2^15 -1 (32 767-bit pattern primarily intended for error and jitter measurements at bit rates of 1544,...
-
Page 31: Traffic Settings
MX100e+/MX120e+ e_Manual D07-00-050P RevD00 Page 31 of 115 Go back to top Go back to ToC RX Filter Tab: Allows the user to filter incoming streams. When checked, the incoming traffic flows not matching these criteria will not be considered for these results. MAC Destination address MAC Source address VLAN ID... - Page 32 MX100e+/MX120e+ e_Manual D07-00-050P RevD00 Page 32 of 115 Traffic tab: The user configures the traffic profile for the stream, including traffic flow, frame size, frame type, and transmit rate. Traffic Flow: Select from the following traffic flows: Constant: The selected frame is transmitted continuously according to the selected bandwidth %. Burst: The selected frame is transmitted in a staircase profile according to user selectable step time, number of steps, and maximum bandwidth.
-
Page 33: Error Injection Settings
MX100e+/MX120e+ e_Manual D07-00-050P RevD00 Page 33 of 115 7.1.3 Error Injection Settings Error injection can only be performed during testing. The error type and injection rate are configured in the Error Injection tab. Error type: Select from Bit, CRC, IP Checksum (Layer 3, 4 only), Pause, TCP/UDP Checksum (Layer 4 only). With Pause selected, the unit will transmit a pause frame when Error Injection icon is pressed. - Page 34 MX100e+/MX120e+ e_Manual D07-00-050P RevD00 Page 34 of 115 MX Discover Feature If the local and remote test sets are on the same IP subnet, the MX Discover feature can be used - Automatically discover the far-end test unit by pressing the Discover button - Once discovered, select the remote unit and send a loop up command - No manual configuration of the IP address is needed, since these are populated automatically Go back to top Go back to ToC...
-
Page 35: Starting/Stopping A Bert Test
MX100e+/MX120e+ e_Manual D07-00-050P RevD00 Page 35 of 115 Go to Throughput > OAM > Link and tap on the 802.3ah check box to enable Link OAM. Select Active from the OAM Mode drop-down menu (only Active mode can send loop commands). Return to the BERT OAM Discover tab to see a list of discovered OAM devices. -
Page 36: Errors
MX100e+/MX120e+ e_Manual D07-00-050P RevD00 Page 36 of 115 100Mbps) of the total link capacity (or Line Rate). Number of bytes Optical power: Optical level measured by the SFP transceiver. Go back to top Go back to ToC 7.2.2 Errors Errors tab: The following Errors (Current and Total) are displayed: Bit: Indicates errors related to test pattern (Bit Error or LSS [Pattern Loss]) BER: Bit Error Ratio Symbol: Declared when an invalid code-group in the transmission code is detected... -
Page 37: Traffic
Tap on the graph for detailed screens. Frames tab: The following Frame distribution statistics are displayed in Count (#) and Percentage (%): Received (RX) frames: Total frames Test frames: Frames containing VeEX proprietary tags VLAN tagged frames Q-in-Q VLAN stacked frames: Multiple VLAN tags Non-test frame... - Page 38 MX100e+/MX120e+ e_Manual D07-00-050P RevD00 Page 38 of 115 Go back to top Go back to ToC Traffic Type tab: The following Traffic distribution statistics are displayed in Count (#) and Percentage (%): Layer 2 Unicast frames: Number of Unicast frames received without FCS errors. Layer 2 Broadcast frames: Number of Broadcast frames received without FCS errors.
-
Page 39: Rates
MX100e+/MX120e+ e_Manual D07-00-050P RevD00 Page 39 of 115 Go back to top Go back to ToC 7.2.6 Rates Rates tab: Rate statistics are displayed in a graph format. Tap on the magnifying glass to see rate details in table form. The table shows transmitted (Tx) and received (Rx) current, minimum, maximum and average frame rates (FPS) and Data Rates (Mbps). -
Page 40: Saving Bert Results
MX100e+/MX120e+ e_Manual D07-00-050P RevD00 Page 40 of 115 Variation (Current) - Interframe delay variation BERT Results - Delay Go back to top Go back to ToC 7.2.8 Saving BERT Results Once the test is completed, results can be saved by pressing the save function key on the keypad. The results will be saved and named automatically. -
Page 41: Header Settings
MX100e+/MX120e+ e_Manual D07-00-050P RevD00 Page 41 of 115 Unless otherwise noted, the Header and related setups are identical to the setups described in the BERT Test Application above. A summary of the RFC 2544 setup options are outlined below. 8.1.1 Header Settings RFC 2544 Profile: Load a previously configured test profile or create a new profile from existing settings. - Page 42 86DD (Internet Protocol, Version 6 [IPv6]) - Future Release Data Tab: No payload selection is possible. The payload area is populated with a VeEX signature field and other proprietary data. RX Filter Tab: Depending on test layer, allows the user to filter streams by:...
-
Page 43: Frame Settings
MX100e+/MX120e+ e_Manual D07-00-050P RevD00 Page 43 of 115 8.1.2 Frame Settings Frames tab: User Configures: Preset Frames: User selects from a list of recommended test frame sizes defined in RFC 2544: Test frames are 64, 128, 256, 512, 1024, 1280, and 1518 bytes The default selected frames are 64 and 1518 bytes To select/deselect any of the recommended test frames, check the box to the right of the desired frame Add frame: The user can add two additional user configurable test frames of any size ranging from 64 bytes to 10000 bytes... -
Page 44: Throughput, Latency, Frame Loss, And Burst Settings
MX100e+/MX120e+ e_Manual D07-00-050P RevD00 Page 44 of 115 Go back to top Go back to ToC 8.1.4 Throughput, Latency, Frame Loss, and Burst Settings The RFC 2544 test suite allows the user to run all four of the tests, one of the four tests, or a combination of any of the four tests. The user simply has to enable/disable which tests to perform by checking/unchecking a selection box in the respective tab for each test. - Page 45 MX100e+/MX120e+ e_Manual D07-00-050P RevD00 Page 45 of 115 Go back to top Go back to ToC Latency tab: User configures: Test: Throughput Rate or Custom Rate. The default value is throughput. Throughput rate: Latency test will be performed at the throughput rate found for each of the tested frame sizes. Custom rate: User configures a custom rate in % or Mbps.
- Page 46 MX100e+/MX120e+ e_Manual D07-00-050P RevD00 Page 46 of 115 Max Rate: Up to 100% of the negotiated line rate. The default value is 100%. This is the maximum transmit rate to perform the frame loss test for each test frame size. The user may configure this rate as a % of the total line rate or in Mbps.
-
Page 47: Control Settings
MX100e+/MX120e+ e_Manual D07-00-050P RevD00 Page 47 of 115 Go back to top Go back to ToC 8.1.5 Control Settings Overview: Asymmetrical links provide different line rates in the two directions. To verify the information for both the low and the high rates of the link, the user needs to send a test signal from one instrument located at one end of the link to an instrument at the other end of the link and vice versa to test traffic capacity. - Page 48 MX100e+/MX120e+ e_Manual D07-00-050P RevD00 Page 48 of 115 MX Discover Configures the loop up and loop down commands necessary to control the remote unit or the test profile in the case of Asymmetric testing. Use the local unit to configure local and remote unit settings. Manual: User must input the destination IP address of the far-end device Automatic: No configuration is necessary - user only has to select the "discovered"...
- Page 49 MX100e+/MX120e+ e_Manual D07-00-050P RevD00 Page 49 of 115 Asymmetric Throughput Asymmetric Frame Loss Asymmetric Burst Accessing Upstream and Downstream Settings Depending on the Control Mode selected (e.g. Asymmetric mode), test settings for upstream and downstream are also displayed. OAM Discover For more information on OAM Discover, please see the BERT OAM Discover section under 7.1.4 Control Settings.
-
Page 50: Starting/Stopping An Rfc 2544 Test
MX100e+/MX120e+ e_Manual D07-00-050P RevD00 Page 50 of 115 Prior to conducting any tests, Quick Check transmits and receives traffic to verify that remote and local units are configured correctly. Select Enable in the drop-down menu and press Start from the action menu to start Quick Check. -
Page 51: Rfc 2544 Results
MX100e+/MX120e+ e_Manual D07-00-050P RevD00 Page 51 of 115 8.2 RFC 2544 Results The progress and current result of the RFC 2544 can be viewed as the test is in progress. Results tab Navigate the respective sub-tabs (throughput, latency, frame loss, or burst) to view the results for each test. For the burst test the results can be viewed in summary table format or test log format. -
Page 52: Latency
MX100e+/MX120e+ e_Manual D07-00-050P RevD00 Page 52 of 115 RFC Results - Throughput Test Log Go back to top Go back to ToC 8.2.3 Latency Latency and frame jitter measurements results are displayed in the following formats. Use the drop-down menu to select the Latency format: Graphical: Latency results displayed in line graph form (Latency [us] vs Frame size [bytes]). -
Page 53: Frame Loss
MX100e+/MX120e+ e_Manual D07-00-050P RevD00 Page 53 of 115 RFC Results - Latency Jitter RFC Results - Latency Jitter Graph RFC Results - Latency Jitter Log Summary Go back to top Go back to ToC 8.2.4 Frame Loss Frame loss displays the percentage of frames not received. Use the drop-down menu to select the Frame Loss format: Summary and Test log tables display test frame length, byte size, frame loss (%) from received traffic, and rate (%) transmitted. -
Page 54: Burstability
MX100e+/MX120e+ e_Manual D07-00-050P RevD00 Page 54 of 115 RFC Results - Frame Loss Test Graph RFC Results - Frame Loss Graph (Zoomed) Go back to top Go back to ToC 8.2.5 Burst Burstability (back-back) results are the number of frames successfully transmitted/received at the line rate. It is displayed in the following formats: Summary table: Displays Average Frame Count received for each test frame length Test log table: Displays Average Frame Count and Duration (seconds) for each test frame length... -
Page 55: Saving Rfc Results
MX100e+/MX120e+ e_Manual D07-00-050P RevD00 Page 55 of 115 Go back to top Go back to ToC 8.2.6 Saving RFC 2544 Results Once the test has been stopped the results can be saved by pressing the save key on the keypad. The results will be saved and named automatically. -
Page 56: Setup
MX100e+/MX120e+ e_Manual D07-00-050P RevD00 Page 56 of 115 Frame/packet arrival analysis Received traffic type analysis Received traffic frame size analysis On the transmit side, the throughput application allows for the configuration of up to 8 traffic streams with their own MAC and IP addresses, VLAN tags (up to 3 per stream), bandwidth/rate, frame size, and L2 and/or L3 quality of service (QoS) parameters. -
Page 57: Control Settings
MX100e+/MX120e+ e_Manual D07-00-050P RevD00 Page 57 of 115 Go back to top Go back to ToC 9.1.2 Control Settings MX Discover: Configures the loop up and loop down commands necessary to control the far-end unit. The user is allowed to configure the commands manually or automatically. -
Page 58: Header Configurations (Individual Streams)
MX100e+/MX120e+ e_Manual D07-00-050P RevD00 Page 58 of 115 Go back to top Go back to ToC 9.1.3 Header Configurations (Individual Streams ) Selecting a Stream to Configure Please note that for any of the per stream configurations (Header, Traffic, and Error Injection), a stream number will be displayed. -
Page 59: Traffic Settings (Individual Streams)
MX100e+/MX120e+ e_Manual D07-00-050P RevD00 Page 59 of 115 Note: Please see 7.1.1 Header Settings in the BERT section for further details on MAC and VLAN configuration options. Note*: VLAN and MAC Flooding are only available for single stream testing. Throughput - VLAN Setup Throughput - MAC Setup Multiple Streams - MAC/IP address setups If all streams are going to the same far-end unit, the MAC/IP destination addresses must be the... -
Page 60: Error Injection Settings (Individual Streams)
MX100e+/MX120e+ e_Manual D07-00-050P RevD00 Page 60 of 115 Throughput - Traffic Setup - Burst Throughput - Traffic Setup - Single Burst Go back to top Go back to ToC 9.1.5 Error Injection Settings (Individual Streams) Error injection can be performed during the test. The type of errors and error injection are configured in the Error Injection tab. Once the test is running, error injection can be performed by pressing the Error Injection button on the right side of the screen. -
Page 61: Starting/Stopping A Throughput Test
MX100e+/MX120e+ e_Manual D07-00-050P RevD00 Page 61 of 115 Throughput - Error Inject Setup Stream 1 Throughput - Error Inject Setup Stream 2 Throughput - Error Injection icon Go back to top Go back to ToC 9.1.6 Starting/Stopping a Throughput Test Once all the necessary configurations have been made, the user can now start the Throughput test. -
Page 62: Global Results (Multiple Streams)
MX100e+/MX120e+ e_Manual D07-00-050P RevD00 Page 62 of 115 9.2.2 Global Results (Multiple Streams) The Global results pages displays measurements for all traffic streams as well as non test traffic. Aggregate screen displays transmitted and received: Line Rate (Mbps): Negotiated rate of the interface (10M, 100M, or 1000M). This value is always fixed since it depends on the maximum capacity of the link under test, hence the test interface that is configured. - Page 63 MX100e+/MX120e+ e_Manual D07-00-050P RevD00 Page 63 of 115 Throughput Results - Global Aggregate Throughput Results - Stream Summary Go back to top Go back to ToC The Global Errors screen displays the Current and Total error count of all streams: Bit: Indicates errors related to test pattern (Bit Error or LSS [Pattern Loss]) BER: Bit Error Ratio Symbol: Declared when an invalid code-group in the transmission code is detected...
- Page 64 MX100e+/MX120e+ e_Manual D07-00-050P RevD00 Page 64 of 115 Giant frames: Number of received frames larger than 1522 bytes containing an invalid FCS The Global Alarms screen displays the Current and Total alarm count of all streams: LOS: Loss of Signal LOS Sync: Loss synchronization Service disruption associated with loss of signal: Current: Duration of the current service disruption...
-
Page 65: Individual Stream Results
MX100e+/MX120e+ e_Manual D07-00-050P RevD00 Page 65 of 115 For more information on Traffic results, please see 7.2.5 BERT Traffic Go back to top Go back to ToC 9.2.3 Individual Stream Results The Per Stream traffic pages, display the statistics for each traffic stream configured in the throughput test. Tap on the stream number (S#) in the top right corner to navigate to a different stream. - Page 66 The Per Stream Traffic screen displays the frame type summary (graphical), frame type (tabular) and frame size distribution pertaining to each stream. Frames tab: The following Frame distribution statistics are displayed in Count (#) and Percentage (%): Received (Rx) Frames : Total frames Test frames (frames containing VeEX proprietary tags) VLAN tagged frames Transmitted (Tx) Frames :...
- Page 67 MX100e+/MX120e+ e_Manual D07-00-050P RevD00 Page 67 of 115 Total frames - Total # frames transmitted Frame Size tab: The following Frame distribution statistics are displayed in Count (#) and Percentage (%): < 64 byte frames 64-127 byte frames 128-255 byte frames 256-511 byte frames 512-1023 byte frames 1024-1279 byte frames...
-
Page 68: Saving Throughput Results
MX100e+/MX120e+ e_Manual D07-00-050P RevD00 Page 68 of 115 rate details applicable to that stream. Throughput Results - Rates Stream 1 Throughput Results - Rates Stream 2 Rate Details Stream 1 Rate Details Stream 2 Go back to top Go back to ToC 9.2.4 Saving Throughput Results To save test results, press the store button during or after testing. -
Page 69: Oam Testing
MX100e+/MX120e+ e_Manual D07-00-050P RevD00 Page 69 of 115 Go back to top Go back to ToC 10.0 OAM Testing Ethernet OAM provides automatic defect detection, fault management and performance monitoring tools for network links and end- to-end Ethernet Virtual Circuits (EVC). The OAM service supports IEEE 802.3ah, IEEE 802.1ag, and ITU-T Y.1731. The OAM feature can be accessed through the Throughput menu ( Throughput >... - Page 70 MX100e+/MX120e+ e_Manual D07-00-050P RevD00 Page 70 of 115 Remote loopback Fault detection Collecting Performance Statistics (function not supported in current software release) Organizational Specific Extensions (function not supported in current software release) Link OAM Setup (Page 1) Link OAM Setup (Page 2) 802.3ah OAM: Tap on the check box to start 802.3ah protocol testing.
-
Page 71: Service Level Oam
MX100e+/MX120e+ e_Manual D07-00-050P RevD00 Page 71 of 115 2. Tap the box next to 802.1ag or Y.1731 to start the selected test. The transmission of OAM PDUs become active as soon as the check mark is added to the test. Note: The different test options become available only when either 802.1ag or Y.1731 is selected. - Page 72 MX100e+/MX120e+ e_Manual D07-00-050P RevD00 Page 72 of 115 Page 3: Enable: Enable sending Continuity Check messages Disable: Disable sending Continuity Check messages Priority: 802.1p priority in the CCM VLAN Tag Tx Interval: Choose from the supported CCM intervals: 1 s, 10 s, 1 min, 10 min Page 4 (802.1ag): Test Function: LTM / LBM Destination...
- Page 73 MX100e+/MX120e+ e_Manual D07-00-050P RevD00 Page 73 of 115 Selecting 802.1ag enables Continuity Check Messages (CCM), Loopback Message (LBM) and Link Trace Message (LTM). ITU-T Y.1731 provides all of the 802.1ag functionality with additional performance monitoring capabilities including Frame Loss (LM) and Delay (DM). Go back to top Go back to ToC 802.1ag/Y.1731 Connectivity Fault Management Functions 802.1ag/Y.1731 Functions supported are as listed:...
-
Page 74: Oam Results
MX100e+/MX120e+ e_Manual D07-00-050P RevD00 Page 74 of 115 Two-way ETH-DM: DMM frame (Unicast DA or Multicast Class 1 DA for multipoint measurement) & DMR frame (Unicast DA) FD = RxTimeb – TxTimeStampf Dual Ended Frame Delay Measurement DMM and DMR frames contain timestamp info. Go back to top Go back to ToC 10.2 OAM Results 10.2.1 Link OAM Results... - Page 75 MX100e+/MX120e+ e_Manual D07-00-050P RevD00 Page 75 of 115 Vendor SPI and OUI: Organization Unique identifier and Vendor specific information (similar to MAC address fields). Discovery State: Send Any indicates the device was successfully discovered. Parser/Multiplexer state: Forward indicates the device is forwarding regular traffic transmission. Loopback/drop indicates loopback is enabled.
-
Page 76: Oam Service Results
MX100e+/MX120e+ e_Manual D07-00-050P RevD00 Page 76 of 115 OAM PDU Transmitted and received 802.3ah OAM PDU are displayed with other Link OAM statistics: Information: Information OAM PDU acts as a "heart beat" message. Discovery must be restarted if no OAM PDU is received after 5 seconds. - Page 77 MX100e+/MX120e+ e_Manual D07-00-050P RevD00 Page 77 of 115 RDI, LOC, XCON, UNEXP, and Alarm will display an Inactive or Active status. Remote MPID: MEP ID of the remote MEP. Remote MAC: MAC address of the remote MEP. RDI: The CCM received contains the RDI flag set. LOC: The MEP detects loss of connectivity.
- Page 78 MX100e+/MX120e+ e_Manual D07-00-050P RevD00 Page 78 of 115 OAM LTM Results Action: RlyHit indicates that the LTM has reached the destination MAC/MEP (i.e., final point) MAC: MAC address of the responder TTL: TTL field on the response, indicated how many hops have been traversed Flags: If set, indicates that only MAC addresses learned in a Bridge's Filtering Database, and not information saved in the MIP CCM Database, is to be used to determine the Egress Port Y.1731 Performance Management Functions Results...
-
Page 79: Definitions
MX100e+/MX120e+ e_Manual D07-00-050P RevD00 Page 79 of 115 NE=Near End device FD=Far-End device OAM DMM Parameters DMM Status: Lists status: In progress, Fail, or Complete Delay Samples: Number of frames transmitted Average Delay: Average round trip delay over the number of delay samples Average Variation: Average round trip delay variation over the number of delay samples Last Delay: Last round trip delay value measured Last Variation: Last round trip delay variation value measured... -
Page 80: Ieee 802.1Ag Definitions
MX100e+/MX120e+ e_Manual D07-00-050P RevD00 Page 80 of 115 Go back to top Go back to ToC 10.3.2 IEEE 802.1ag Definitions Maintenance Domain (MD): Management space on a network that is owned and operated by a single network provider. There is a maintenance level (from 0 to 7) to define the hierarchical relationship between domains. Maintenance domains can be nested but never intersect. -
Page 81: Measurement Definitions
MX100e+/MX120e+ e_Manual D07-00-050P RevD00 Page 81 of 115 Maintenance Point Roles Go back to top Go back to ToC 10.3.3 Measurement Definitions Continuity Check Messages (CCM) CCM Messages are multicast messages sent from MEP to MEP at configurable intervals. Loss of continuity is detected after no CCM is received for 3.5 times the CCM interval. - Page 82 MX100e+/MX120e+ e_Manual D07-00-050P RevD00 Page 82 of 115 Go back to top Go back to ToC Link Trace Messages (LTM/LTR) LTM (Link Trace Message) Multicast messages are transmitted on demand to a destination MAC address. All MIPs and destination MEPs respond with LTR (Link Trace Reply) and forward the LTM on to its destination. LTM Diagram Link Trace Message Format Link Trace Response Format...
-
Page 83: Monitor Mode - Pass Through (Mx120E+ Only)
MX100e+/MX120e+ e_Manual D07-00-050P RevD00 Page 83 of 115 Loopback Message Format Go back to top Go back to ToC 11.0 Monitor Mode - Pass Through (MX120e+ only) Overview: Pass through monitor mode enables the test set to be used for long term in-service testing. This allows for bidirectional non-obtrusive monitoring of up to full gigabit Ethernet line rate on the two 1000Base-X ports or the two 10/100/1000T ports. -
Page 84: Results
MX100e+/MX120e+ e_Manual D07-00-050P RevD00 Page 84 of 115 Select Monitor from the Main Menu - the unit will take a few moments to configure. Connect both 1000Base-X fiber ports (Port 1 and Port 2) or both 10/100/1000T copper ports (Port 1 and Port 2), depending on the interfaces to be monitored. -
Page 85: Alarms
MX100e+/MX120e+ e_Manual D07-00-050P RevD00 Page 85 of 115 The following Errors (Current and Total) are displayed: FCS/CRC: Number of received frames with an invalid FCS IP Checksum (Layer 3 only) Jabber frames: Number of received frames larger than 1518 bytes containing an invalid FCS Runt frames: Number of received frames smaller than 64 bytes containing an invalid FCS Giant frames: Number of received frames larger than 1522 bytes containing an invalid FCS Note: A flashing red tab indicates an anomaly has occurred. -
Page 86: Traffic Distribution Details
MX100e+/MX120e+ e_Manual D07-00-050P RevD00 Page 86 of 115 Monitor Mode - Events Monitor Mode - Status Go back to top Go back to ToC 11.2.4 Traffic Distribution Details Traffic Type: The following Traffic distribution statistics are displayed in Count (#) and Percentage (%): Unicast frames: Number of Unicast frames received without FCS errors. -
Page 87: Delay And Rates
MX100e+/MX120e+ e_Manual D07-00-050P RevD00 Page 87 of 115 Total frames Test frames VLAN tagged frames VLAN stacked frames MPLS labeled frames MPLS stacked frames Non-test frame Paused frames: Received Frame Size: The following Frame distribution statistics are displayed in Count (#) and Percentage (%): <... -
Page 88: Port Selection
MX100e+/MX120e+ e_Manual D07-00-050P RevD00 Page 88 of 115 Minimum Maximum Average Monitor Mode - Delay Monitor Mode - Rate Details Go back to top Go back to ToC 11.2.6 Port Selection To view Port 1 and Port 2 results, select "P1" and "P2" respectively to switch between ports. Port Selection - Monitor Mode... -
Page 89: Loopback
MX100e+/MX120e+ e_Manual D07-00-050P RevD00 Page 89 of 115 Go back to top Go back to ToC 12.0 Loopback The loopback application in the main menu allows the user to establish a manual loopback on the test set. The loopback function is used when an end-to-end test needs to be performed with one of the test partners in software loopback mode. -
Page 90: V-Sam
Go back to top Go back to ToC 13.1 V-SAM Overview V-SAM (VeEX Service Activation Methodology) is an automated Ethernet service activation test feature conforming to the ITU-T Y.1564 standard, created to address and solve the deficiencies of RFC 2544: •... - Page 91 MX100e+/MX120e+ e_Manual D07-00-050P RevD00 Page 91 of 115 Comparison of RFC 2544 and Y.1564 Test Methodology The purpose of the SAM test suite is to verify that the service is compliant to its Bandwidth Profile and Service Acceptance Criteria. The test is broken down into two phases: Phase 1: Service Configuration test: The services running on the same line are tested one by one to verify the correct service profile provisioning.
- Page 92 MX100e+/MX120e+ e_Manual D07-00-050P RevD00 Page 92 of 115 integral part of the standard. Service Bandwidth Profile Phase 2: Service Performance Test Services running on the same line are tested simultaneously over an extended period of time, to verify network robustness. Service Acceptance Criteria (SAC) including Frame Transfer Delay (FTD), Frame Delay Variation (FDV), Frame Loss Ratio (FLR) and Availability (AVAIL) are verified for each service.
-
Page 93: Services - Header
MX100e+/MX120e+ e_Manual D07-00-050P RevD00 Page 93 of 115 Go back to top Go back to ToC 13.2.1 Services - Header Settings Please see 8.1 RFC 2544 Setup and follow the setup procedure to configure the Header Settings for V-SAM. Tapping the zoom function on the bottom right hand side of the screen displays the Summary, MAC and RX Filter tabs which are also explained in the RFC 2544 Setup section. -
Page 94: Services - Bandwidth
MX100e+/MX120e+ e_Manual D07-00-050P RevD00 Page 94 of 115 Selecting a Stream On the Services tab, tap on the stream number (S #) next to the Action Menu icon to select a service to configure. Go back to top Go back to ToC 13.2.2 Services - Bandwidth Profile The Bandwidth Profile specifies how much traffic the customer is authorized to transmit and how the frames are prioritized within the network. - Page 95 MX100e+/MX120e+ e_Manual D07-00-050P RevD00 Page 95 of 115 CIR: Committed Information Rate. This is the guaranteed maximum rate at which the customer can send frames that are assured to be forwarded through the network without being dropped. Tap on the box to enter a rate and choose between Mbps or ULR Mbps.
-
Page 96: Services - Thresholds
MX100e+/MX120e+ e_Manual D07-00-050P RevD00 Page 96 of 115 passing or failing the service. Copying Frame Configurations V-SAM Services - Thresholds Between Services Copying Services Tap on the Copy button on the bottom of any of the Services tabs (Header, Bandwidth, Threshold) to copy frame parameters specific to that tab to other services. - Page 97 MX100e+/MX120e+ e_Manual D07-00-050P RevD00 Page 97 of 115 V-SAM Services Summary Once setup parameters are completed, tapping the zoom function at the bottom right hand side of the screen displays a summary of all service settings. A check next to the Service number indicates that the test for the corresponding service is set to run.
-
Page 98: Results
MX100e+/MX120e+ e_Manual D07-00-050P RevD00 Page 98 of 115 Go back to top Go back to ToC 13.3 Results 13.3.1 Configuration Test Note: To run the test, make sure that traffic is being looped back at the far-end of the network under test. The Summary tab displays the status of each service and test as Pass, Failed, Pending, or Disabled. - Page 99 MX100e+/MX120e+ e_Manual D07-00-050P RevD00 Page 99 of 115 S1 Detailed Results - CBS Test S1 Detailed Results - EBS Test Viewing Test Results on Different Stream s On the Services tab of Conf. Test and Perf. Test, tap on the service number (S #) next to the Action Menu icon to view the test results for a specific stream.
- Page 100 MX100e+/MX120e+ e_Manual D07-00-050P RevD00 Page 100 of 115 CBS Test: The test passes if the frame loss rate stays below the configured FLR. EBS Test: The test passes if the frame loss rate stays below the configured FLR. CBS, EBS, CIR , CIR/EIR Test, and Policing tabs display min, mean, and max values for IR Mbps, FTD, FDV, FL Count, and FLR (%) .
-
Page 101: Additional Tests
MX100e+/MX120e+ e_Manual D07-00-050P RevD00 Page 101 of 115 Go back to top Go back to ToC 14.0 Additional Tests Additional Tests home menu offers the following tools: Packet Capture Scan Net Wiz Profile Scripting (MX100e+ only) Additional Tests Home Menu Additional Tests Home - MX100e+ Go back to top Go to ToC 14.1 Packet Capture... - Page 102 MX100e+/MX120e+ e_Manual D07-00-050P RevD00 Page 102 of 115 Setup The following Options are available for setup: Capture Filter: Disable/Enable filter. Capture Mode: Manual or Automatic. Automatic mode stops packet capture after a designated number of packets have been captured or a specified amount of time has passed. Automatic mode only: Stop After...: Select # of packets or # of seconds .
-
Page 103: Scan
MX100e+/MX120e+ e_Manual D07-00-050P RevD00 Page 103 of 115 Starting/Stopping Packet Capture Press the Action menu and press Start to run packet capture. If set to manual, packet capture will continue to capture packets until the user presses Stop. Results The Results tab displays packet capture details for each packet in a table format: Packet number Time of capture Source and Destination IP address... - Page 104 MX100e+/MX120e+ e_Manual D07-00-050P RevD00 Page 104 of 115 Scan and Monitor Buttons Scan in Progress Message The VLAN Stack tab displays detected SP and CE VLAN tags (if stack VLAN tags are used). VLAN ID VLAN Stack Monitoring Traffic After checking VLAN IDs to monitor (from the VLAN ID tab), press Monitor (on the screen or from the Action menu ) to monitor streaming traffic.
-
Page 105: Netwiz
MX100e+/MX120e+ e_Manual D07-00-050P RevD00 Page 105 of 115 Press Monitor from the Action menu to monitor selected streams. Monitor Setup Stream Filter Configuration Results For a description of each measurement from Global and Per Stream Results tabs, please see the Throughput Results section. -
Page 106: Profile Scripting (Mx100E+ Only)
MX100e+/MX120e+ e_Manual D07-00-050P RevD00 Page 106 of 115 NetWiz Detail Test Info Discovery Test Discovery Note: Before proceeding with the discovery function, please go to IP Tool to establish a connection. Check the desired parameters and press ‘Start.’ The Discovery summary provides total transmitted and received frames, received frame in error, speed and duplex mode advertised, the number of devices and networks found. - Page 107 MX100e+/MX120e+ e_Manual D07-00-050P RevD00 Page 107 of 115 3. Tap Start to start the test. The screen will show the respective test's results screen. Test Results Summary 4. Open the Action Menu by tapping the arrow icon in the top right hand corner. The actions available are: Close: Stop the test Restart: Restart the test Next Profile: Move to the next profile in the script for testing.
-
Page 108: Common Functions
MX100e+/MX120e+ e_Manual D07-00-050P RevD00 Page 108 of 115 Go back to top Go to ToC 15.0 Common Functions MX100e+ Home Menu MX120e+ Home Menu The following functions are common to all V100+ test sets. Please refer to the V100+ Common Functions Manual for these sections. -
Page 109: Profiles
MX100e+/MX120e+ e_Manual D07-00-050P RevD00 Page 109 of 115 Please install the ReVeal MTX software (supplied with the instrument) onto your PC. The ReVeal software offers the following functionalities: Profiles: Create, Edit and Manage Test Profiles Results: Download and Manage test results, generate Test Reports Software: Download software, upgrade test set, add options, and check instrument configuration Tools: Remote Control the instrument (optional) ReVeal MTX - Home Menu... -
Page 110: Results
MX100e+/MX120e+ e_Manual D07-00-050P RevD00 Page 110 of 115 Go back to top Go back to ToC 16.2 Results Results menu allows you to: Download Results Manage Results Create Reports Convert Results to PDF format Convert Results to CSV (Comma Separated Value) format Print Results to a selected printer ReVeal MTX - Results Menu... -
Page 111: Software
Go back to top Go back to ToC 16.3 Software The Software menu allows you to: Download software from the VeEX website to upgrade the test set Enable or Disable software options Check test set configuration Upgrade test set software... -
Page 112: Tools
MX100e+/MX120e+ e_Manual D07-00-050P RevD00 Page 112 of 115 Go back to top Go back to ToC 16.4 Tools 16.4.1 Remote Control Launch ReVeal MTX software on your PC to remote control the instrument The test instrument must be connected to the PC via an IP connection Select the remote control application located in the Tools menu Start the remote control application For detailed information, refer to the ReVeal MTX user manual. -
Page 113: Warranty And Software
Replace the hardware which proves to be defective provided that the products that the customer elects to replace is returned to VeEX Inc by the customer along with proof of purchase within thirty (30) days of the request by the customer, freight prepaid. -
Page 114: Product Specifications
(hardware, software, firmware and/or accessories) Revoking the warranty: VeEX Inc does not guarantee or warrant that the operation of the hardware, software or firmware will be uninterrupted or error-free. The warranty will not apply in any of the following cases:... - Page 115 MX100e+/MX120e+ e_Manual D07-00-050P RevD00 Page 115 of 115 2827 Lakeview Court Fremont, CA 94538 CA Tel: +1 510 651 0500 Fax: +1 510 651 0505 Customer Care Phone: + 1 510 651 0500 E-mail: customercare@veexinc.com Go back to ToC...
Need help?
Do you have a question about the VePAL MX120e+ and is the answer not in the manual?
Questions and answers