Table of Contents
Advertisement
Advertisement
Table of Contents

Related Manuals for Elmo PX-10


Summary of Contents for Elmo PX-10
- Page 1 VISUAL PRESENTER PX-30 / PX-10 INSTRUCTION MANUAL...
-
Page 2: Important Safeguards
■ IMPORTANT SAFEGUARDS ■ Read Instructions All the safety and operating instructions should be read before the appliance is operated. ■ Retain Instructions The safety and operating instructions should be retained for future reference. ■ Heed Warnings All warnings on the product and in the operating instructions should be adhered to. ■... - Page 3 ■ Lightning For added protection for this product during a lightning storm, or when it is left unattended and unused for long periods of time, unplug it from the wall outlet and disconnect the antenna or cable system. This will prevent damage to the product due to lightning and power-line surges.
- Page 4 The lightning flash with arrowhead symbol, within an equilateral triangle, is intended to alert the user to the presence of uninsulated “dangerous voltage” within the product’s enclosure that may be of SA 1965 sufficient magnitude to constitute a risk of electric shock to persons. The exclamation point within an equilateral triangle is intended to alert the user to the presence of important operating and maintenance (servicing) instructions in the literature...
- Page 5 WARNING TO REDUCE THE RISK OF FIRE OR ELECTRIC SHOCK, DO NOT EXPOSE THIS PRODUCT TO RAIN OR MOISTURE. The connection of a non-shielded equipment interface cable to this equipment will invalidate the FCC Certification or Declaration of this device and may cause interference levels which exceed the limits established by the FCC for this equipment.
-
Page 6: Before You Use
BEFORE YOU USE ■ The supplied power cord and AC adapter are designed for exclusive use with this product. Do not use them with other products. ■ Be sure to use the power cord applicable to your local power specifications. If the product was sold in Japan, use the AC adapter sold with the product with 100 VAC and 50 or 60 Hz. - Page 7 ・ Pay attention to the polarity (+ / - ) of the battery. ・ Children may ingest small batteries; always keep batteries safe and out of reach. If a battery is swallowed, consult a doctor immediately as this could result in asphyxiation or be an obstacle to digestion, etc.
-
Page 8: Handling Precautions
HANDLING PRECAUTIONS The followings are special precautions against mishandling of the product. Pay close attention to them. ①Installation ②Carrying the product Do not place the product on an To avoid malfunction of the camera, unstable place or slanted surface. fold the arm before carrying the product. -
Page 9: Table Of Contents
➌-2 ABOUT RS-232C ······················································································· 41 ◆CONNECTION VIA RS-232C ········································································ 41 ➌-3 ABOUT NETWORK FUNCTION ······························································· 42 ➌-4 FIRMWARE UPDATE PROCEDURE ······························································· 42 ➌-5 ABOUT EIT(ELMO INTERACTIVE TOOLBOX) ··············································· 43 ◆SYSTEM REQUIREMENTS ············································································ 43 ◆SOFTWARE INSTALLATION ········································································· 43 ➍ ERROR MESSAGES ····················································································· 44 ➎... - Page 10 By placing the supplied whiteboard sheet on the stage, you can draw directly on the sheet with a whiteboard marker and shoot it. ★Bright LED lighting The small LED lighting of the PX-10/30 is designed to reduce glare to a minimum by focusing lights with lenses. It delivers bright and even illumination to the entire stage.
-
Page 11: ➊ Preparation
➊ PREPARATION ◆PACKAGE CONTENTS The items below are included with this product. If any item is missing, contact the dealer from whom you purchased this product. Document Camera AC power cord AC adapter (The shape of the plug differs according to the region in which the product is sold.) Lithium coin battery for remote control... -
Page 12: ➋ Basic Operations
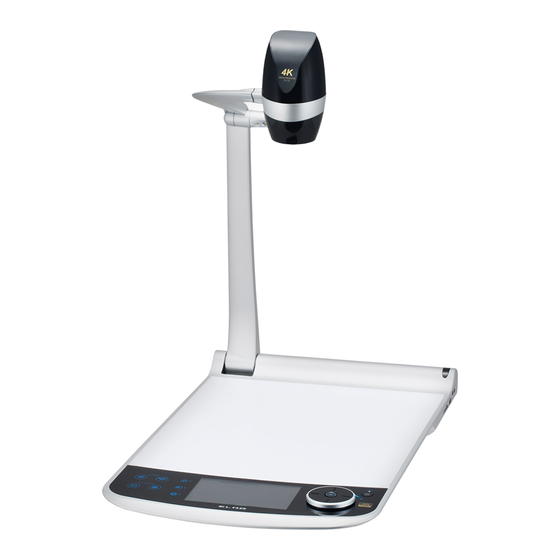
➋ BASIC OPERATIONS ➋-1 ABOUT THE DOCUMENT CAMERA ◆PART NAMES ① ⑤(Side) ⑥ ⑦ ④ ② ③(Back) Name ① LED lighting ② Operating panel ③ Speaker ④ Stage ⑤ Side panel ⑥ IR receiver ⑦ Rear panel... -
Page 13: Operating Panel
◆OPERATING PANEL ⑪ ⑧ ⑥ ⑩ ⑨ ⑦ ⑤ ④ ③ ② ① Mark Name Function ① Power To ON/OFF the power.(⇒P.21) Rotating counter clockwise: Zoom out. ② Zoom jog dial Rotating clockwise: Zoom in. (⇒P.21) ③ The auto focus works once when the AF button is pressed.(⇒P.22) Images being output is displayed with the OSD menu for ④... -
Page 14: Rear Panel
To connect the RGB cable (commercially available) to input analog RGB images. ④ RGB in [mini DSUB15pin] To connect the LAN cable (commercially available) to control the PX-10/30 from a ⑤ (for PX-30 PC or transfer images over the network. [RJ45]... -
Page 15: Side Panel
[Φ3.5mm jack (stereo)] CAUTION Connecting a microphone other than an electret condenser microphone (a microphone for a computer) may cause malfunction. ◆MOVING PARTS OF THE DOCUMENT CAMERA The PX-10/30 can be moved as shown below. 0°~ 72° 185° 0°~ 110° 84°... -
Page 16: Setting Up
◆SETTING UP Place the PX-10/30 on an even, flat surface. Then set up the PX-10/30 as shown in the figures below. STEP1 STEP2 STEP3 STEP4 Lens direction ◆FOLDING THE DOCUMENT CAMERA After using the PX-10/30, fold it as shown in the figures below. -
Page 17: Supplied Accessories
② RECEIVING IR FROM THE REMOTE CONTROL Point the IR transmitter of the remote control to the IR receiver of the PX-10/30, and press the desired button.(⇒P.12) Receivable range: within approx. 5m Button... -
Page 18: Whiteboard Sheet
The melamine sponge is consumable. When the supplied melamine sponge needs to be replaced, purchase a commercially available melamine sponge. Be sure to strictly observe the precautions provided when using the stage of the PX-10/30 as a writing board. Whiteboard marker... -
Page 19: Caution Sticker
◆CAUTION STICKER A caution sticker which contains the folding instructions of the camera arm and other precautions is supplied with the PX-10/30. Follow the instructions when using the PX-10/30. Attach the sticker to the unit as indicated in the sticker. -
Page 20: Shooting Images
➋-3 SHOOTING IMAGES ◆CONNECTING TO A PROJECTOR OR MONITOR Connect the PX-10/30 to a projector or monitor with the HDMI cable (commercially available) or the RGB cable (commercially available). Then connect the supplied AC power cord to the AC adapter. -
Page 21: Turning On/Off The Power
Power ON (LED turns blue) CAUTION Do not operate the PX-10/30 while the LED is flashing. ◆ADJUSTING THE SIZE The size of the image displayed can be adjusted by rotating the zoom jog dial on the operating panel or by pressing the zoom buttons [ ] on the remote control. -
Page 22: Af (Auto Focus)
A zoom bar indicating the zoom position appears on the LCD touchscreen during zoom operation. The upper part indicates the digital zoom range and the lower part indicates the optical zoom range. ※The zoom bar appears only on the LCD touchscreen of the PX-10/30. Digital zoom range Optical zoom range ZOOM BAR ◆AF (AUTO FOCUS) -
Page 23: Using The Lcd Touchscreen
◆USING THE LCD TOUCHSCREEN The PX-10/30 can be controlled using the LCD touchscreen. LCD touchscreen STARTUP SCREEN When the PX-10/30 is started, the startup screen appears on the LCD touchscreen, and then the camera image appears. HOW TO USE THE LCD TOUCHSCREEN ①Tap By tapping an icon on the LCD touchscreen, you can select a function and operate. -
Page 24: Adjusting The Brightness
◆ADJUSTING THE BRIGHTNESS Press the Brightness button [ ] on the operating panel to display the menu for brightness adjustment. The image brightness can be adjusted by sliding the bar to the right or left, or by using the [ ] buttons on the remote control. -
Page 25: Turning On/Off The Led Lighting
・When you take a picture of a person, turn off the LED lighting. ・The PX-10/30 is equipped with high-brightness LED. You can safely use it to light up subjects. Make sure that the light from the LED does not shine directly into your eyes. -
Page 26: Selecting The Image Source
・When using a PC with output mode selection feature, setup according to the following instruction: 1. Connect a PC to the PX-10/30. 2. Set the output mode of the PC to “EXTERNAL OUTPUT”. 3. Press the Select image button and select either “HDMI-1”, “HDMI-2”, or “RGB”. -
Page 27: ➋-4 Configuring The Settings
➋-4 CONFIGURING THE SETTINGS Each setting of the PX-10/30 can be configured through the menu (texts or icons) displayed on the screen. ◆HOW TO CONFIGURE THE SETTINGS Press the Settings button [ ] on the operating panel. The settings menu appears. “System Setting”, “Image Quality Setting”, “Network Settings”, and “Product Information”... - Page 28 To configure actions when the PX-10/30 is connected to a PC through the USB3.0 port. USB mode UVC ✔ To control the PX-10/30 from a PC. Mass storage To transfer the data from the SD card to a PC. To select the source of the audio input.
- Page 29 To record a still image to the internal memory. Save / Play Tap “Save” to save. memory (5/5 page) When this setting is set to ON, the PX-10/30 Auto wake up ON / OFF automatically starts up after the AC power is supplied.
- Page 30 Image Quality Setting (1/2 page) (2/2 page) Name Selection item Function AF mode Zoom sync To perform auto focus only once after zooming. To perform auto focus only once when [ One-push✔ on the operating panel or [ ] on the remote control is pressed.
- Page 31 Version of the PX-10/30 CMOS Version of CMOS FPGA MAIN Version of MAIN FPGA PANEL Version of PANEL FPGA HDBaseT (for PX-30 only) Version of HDBaseT Production Date Production date of the PX-10/30 License The license information used for the PX-10/30 is displayed.
-
Page 32: Details About Functions
◆DETAILS ABOUT FUNCTIONS FREEZE To pause the camera image. Press the Freeze button [ ] on the operating panel or [ ] on the remote control to pause the image. You can set whether to freeze the image on the LCD touchscreen when Freeze function is activated from the System Setting. - Page 33 CONTOUR CORRECT To enhances the edge of the image. (0~10: 11 levels) Default value 5(⇒P.30) As the value gets smaller, the image becomes softer. As the value gets larger, the image becomes sharper. While the image gets sharper by setting to a larger value, it may take more time to process the image or the file size may become large.
-
Page 34: ➌ Advanced Operations
➌-1 USING SD CARD/USB FLASH DRIVE With the PX-10/30, you can record the camera image as a still picture to an SD card, USB flash drive, or internal memory. Also, you can record the camera image as a video to an SD card. -
Page 35: Recording
◆RECORDING STILL IMAGE Recording using the operating panel ①Press the Capture button [ ] on the operating panel to record a still image. ②Recording is performed when a mark appears on the preview image displayed on the LCD touchscreen. Capture button Recording using the remote control ①Press the Capture button [ ] on the remote control. - Page 36 (class 10 or above). If you use an SD card that has slow read and write speeds, the video quality may be degraded. ・When both SD card and USB flash drive are inserted into the PX-10/30, the primary recording destination is SD card. When recording a still picture to a USB flash drive, go to the System...
-
Page 37: Displaying Recorded Files
RECORDING SPECIFICATIONS (STILL PICTURE / VIDEO) < STILL IMAGE RECORDING > Recording media SD card, USB flash drive, internal memory Recording size Determined according to the settings of Resolution and Viewing angle. (⇒P.27) Image type JPEG File format DCF 2.0 compliant A thumbnail is created each time a still picture is recorded. - Page 38 ②Select a still image or video that you want to display full-screen. (1)Tap the thumbnail on the touchscreen to move the cursor. (2)Tap the selected thumbnail again to display the selected still image or video full-screen. (The video automatically starts to play.) SD still image / SD video / USB still image (list of thumbnails) Still image (⇒P.39)
- Page 39 EXPLANATION OF ICONS SD still image still image / SD video / USB still image (list of thumbnails) ② ① ③ ④ ⑤ ⑥ ⑦ Icon Name Function Number of thumbnails To change the number of thumbnails displayed. (9 / 4) ①...
- Page 40 PLAYING VIDEOS Tap a thumbnail to play a video file. Tap the Return icon [ ] to return to the list of thumbnails. You can switch between videos by performing left flick or right flick while the video is playing. (The switched video does not play automatically.) Left flick: To display the previous video.
-
Page 41: ➌-2 About Rs-232C
PX-10/30. NOTE ・To protect the PX-10/30 and your PC, be sure to turn off the power of each unit before starting the connection work. ・For the information how to set the communication mode of the RS-232C, refer to the instruction manual of your PC. -
Page 42: ➌-3 About Network Function
➌-4 FIRMWARE UPDATE PROCEDURE The firmware of the PX-10/30 will be updated from time to time. By updating the firmware, you will be able to use new functions. Download the latest firmware from Elmo official website and update the firmware of the PX-10/30 according to the following procedure. -
Page 43: ➌-5 About Eit(Elmo Interactive Toolbox)
By installing EIT into your PC, you can control a large monitor or tablet PC or annotate on the image using the touchscreen. The following features are available by connecting a PC with EIT installed to the PX-10/30 with the USB cable. -
Page 44: ➍ Error Messages
LCD touchscreen. (⇒P.26) Cannot display images This message appears when HDCP-protected signals is input to the PX-10/30 after selecting the HDMI in the Select image menu. (⇒P.26) To display images on the LCD touchscreen, input unencrypted HDMI signals. -
Page 45: ➎ Trouble Shooting
・The power is not on. (Power button: lit in blue) ・If you turn on the power immediately after turning it off, the PX-10/30 may not start. Wait for several seconds after turning the power off, and then turn it back on. - Page 46 About long-term usage of this product Due to the lifetime of its parts, if PX-10/30 is used for longer than the warranty period, its performance and quality may deteriorate. In this case, we will replace the parts for a charge.
-
Page 47: ➏ Specifications
➏ SPECIFICATIONS Item PX-30 PX-10 Image pick-up 12M Sony element Effective pixels 3,840x2,160(16:9) 8.3M 3,520x2,640(4:3) 9.3M Horizontal 1,600TV lines(center) resolution 24x (Optical zoom 12x + Sensor zoom 2x ※) Zoom Digital zoom 12x ※ (※when output at 1080p) Total zoom 288x Focus mode AUTO:Zoom sync AF/... - Page 48 1. 3,840×2,160@30fps ※2 HDBaseT out 2. 1,920×1,080@60fps ※1 3. 1,280×720@60fps ※1 ※1 Extendable up to 100m with the LAN ― cable ※2 Extendable up to 70m with the LAN cable Input source HDMI:Type A x2 VGA:D-Sub ×1 selection For HDMI, recording is possible, and can be converted and output as RGB or USB. (※For RGB, recording is not possible.
-
Page 49: Trademarks And Licenses
■TRADEMARKS AND LICENSES 、VISUAL PRESENTER are registered trademarks of Elmo Co., Ltd. SD、SDHC、SDXC、 logo are trademarks of SD-3C,LLC. HDMI 、 logo and High-Definition Multimedia interface are trademarks or registered trademarks of HDMI Licensing LLC HDBaseT and are trademarks of HDBaseT Alliance.
Need help?
Do you have a question about the PX-10 and is the answer not in the manual?
Questions and answers