
Related Manuals for Elmo P30S


Summary of Contents for Elmo P30S
-
Page 1: Document Camera
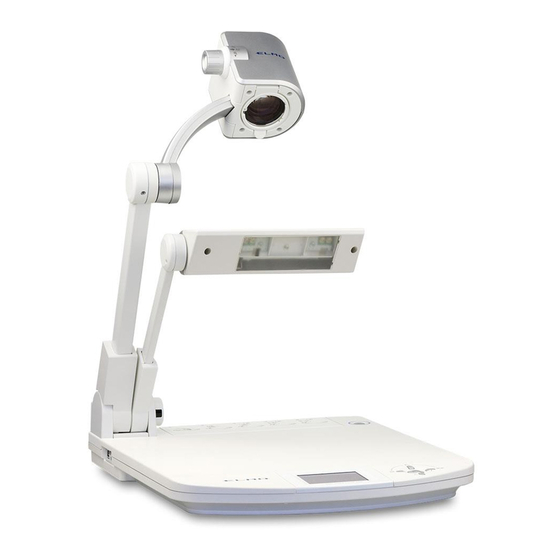
Français P000~P000 Deutch P000~P000 English P80~P157 DOCUMENT CAMERA P30S INSTRUCTION MANUAL Please read this instruction manual carefully before using this product and keep it for future reference. -
Page 3: Important Safeguards
ENGLISH IMPORTANT SAFEGUARDS Read Instructions – All the safety Ventilation – Slots and openings and operating instructions should be in the cabinet are provided for read before the appliance is ventilation and to ensure reliable operated. operation of the product and to protect it from overheating, and Retain Instructions –... - Page 4 ENGLISH Grounding or Polarization – This Overloading - Do not overload product may be equipped with wall outlets, extension cords, or either a polarized 2-wire AC line integral convenience receptacles as plug (a plug having one blade wider this can result in a risk of fire or than the other) or a 3-wire electric shock.
- Page 5 ENGLISH Damage Requiring Service – Heat – The product should be Unplug this product from the wall situated away from heat sources outlet and refer servicing to qualified such as radiators, heat registers, service personnel under the stoves, or other products (including following conditions: amplifiers) that produce heat.
- Page 6 ENGLISH WARNING: FOR UNITED STATES TO REDUCE THE RISK USERS: OF FIRE OR ELECTRIC SHOCK, DO NOT INFORMATION EXPOSE THIS PRODUCT This equipment has been tested TO RAIN OR MOISTURE. and found to comply with the limits for a Class A digital device, THIS IS A CLASS A pursuant to Part 15 of the FCC PRODUCT.
-
Page 7: Before You Use
ENGLISH BEFORE YOU USE Be sure to use the power cord and AC adapter attached to this camera system as accessories. The power cord applicable to the local power specifications is attached. Be sure to use the power cord applicable to your local power specification. Do not leave this product under direct sunlight or by heaters, or this product may be discolored, deformed, or damaged. - Page 8 ENGLISH Transfer the data in an SD card to a PC or other data storage means for backup purpose. Note with care that the data in the SD card could be lost due to failure or repair of this product. Do not look into the lamp (LED) part directly at close range.
-
Page 9: Table Of Contents
CONTENTS IMPORTANT SAFEGUARDS .........82 BEFORE YOU USE ..............86 OUTLINE OF THIS CAMERA ........89 Part Names and Functions ............89 OSD (On Screen Display) ............. 97 Receiving by Wireless Remote Control ........103 How to Attach Wireless Remote Control Holder ......... 104 How to Set up the Camera ............ -
Page 10: Outline Of This Camera
ENGLISH OUTLINE OF THIS CAMERA Part Names and Functions Appearance - Front and Side Name Reference page Camera head ① - Zoom dial P.117 ② AF button P.119 ③ Lamp head ④ - Lamp column ⑤ - Camera column ⑥ -... - Page 11 ENGLISH Appearance - Rear Name Reference page Wireless remote control sensor unit ⑮ - Rear panel P.92 ⑯ Cord cover ⑰ - Note: • The wireless remote control sensor unit is also located on the front side. • When plugging/unplugging the cord, open the cord cover. •...
-
Page 12: Front Operating Panel
ENGLISH Front Operating panel Condition Name Function Reference page LCD panel To display the output video and the OSD. ① - - To switch the output video to the camera (up) button video, and the color of the front operating P.118 panel LED to blue. -
Page 13: Rear Panel
ENGLISH Rear Panel Name Function Reference page S-VIDEO OUT To output video from the Mini DIN4P terminal to the (S-Video Output P.110 ① NTSC/PAL-system monitor (e.g., TV monitor). Terminal) VIDEO OUT To output video from the RCA pin-jack terminal to (Composite Video P.109 ②... -
Page 14: Side Panel
ENGLISH Side Panel Name Function Reference page To control the video transfer or main unit by using the bundled utility software on the "Utility P.138 ① (USB 2.0 complied) Software CD-ROM" through the connected PC. To insert the SD card. To remove SD card, push the SD card again, and P.126 ②... - Page 15 ENGLISH Wireless Remote Control...
- Page 16 ENGLISH Name Function Reference page To save the current setting status of the unit PRESET P.125 ① Used together with the memory No. To call up the saved setting status CALL P.125 ② Used together with the memory No. MEMORY NO. To display the memory No.
- Page 17 ENGLISH Name Function Reference page To pause the camera video. PAUSE Pressing this button again will resume the camera - video. IMAGE ROTATION To rotate the camera video by 180º. P.144 NEAR To move the focus to the near side. P.119 To move the focus to the far side.
-
Page 18: Osd (On Screen Display)
ENGLISH OSD (On Screen Display) The menu items displayed/selected on the monitor or projection screen are called "OSD (On Screen Display)". This manual calls the OSD displaying status "OSD menu". OSD Main Menu When the output video is switched to the camera video as per "Switching Video" (P.118) and the [MENU/ENTER] button is pressed, the OSD Main menu appears. - Page 19 ENGLISH OSD Setting Menu When the output video is switched to the camera video as per "Switching Video" (P.118) and the [MENU/ENTER] button is pressed, the OSD Main menu appears. When [ SETTINGS] is selected from the OSD Main menu, the OSD Setting menu appears. Icon Name Condition Selection item...
- Page 20 ENGLISH Selection Icon Name Condition Function item HIGH GRAPH- To select the preferable gray scale of the GAMMA NORMAL video. To select the camera video from between COLOR COLOR/ [COLOR] and [B&W]. - B&W Selecting [B&W] when the material is B&W document B&W will facilitate the visualization of the video.
- Page 21 ENGLISH OSD SD Single Menu When the output video is switched to the SD mode as per "Switching Video" (P.118) and the [MENU/ENTER] button is pressed, the OSD SD Single menu appears. * Select [ DISPLAY] and set to [SINGLE]. Icon Name Condition Selection item...
- Page 22 ENGLISH OSD SD Split screen Menu When the output video is switched to the SD mode as per "Switching Video" (P.118) and the [MENU/ENTER] button is pressed, the OSD SD Split screen menu appears. * Select [ DISPLAY] and set to [3x3] or [4x4]. Icon Name Condition Selection item...
- Page 23 ENGLISH OSD SD Slide Show Setting Menu When the output video is switched to the SD mode as per "Switching Video" (P.118) and the [MENU/ENTER] button is pressed, the OSD SD split screen menu appears. When [ SLIDE SHOW SETTING] is selected from the OSD SD split screen menu, the OSD SD Slide Show Setting menu appears.
-
Page 24: Receiving By Wireless Remote Control
ENGLISH Receiving by Wireless Remote Control Point the transmission unit of the wireless remote control at the sensor unit located on the front side of the Camera main unit, press the operation button of the intended operation and operate the Camera main unit accordingly. Receivable Range Distance: Within approx. -
Page 25: How To Attach Wireless Remote Control Holder
ENGLISH How to Attach Wireless Remote Control Holder Attach the supplied wireless remote control holder to the rear side of the stage as follows: Insert the tab of the wireless remote control holder into the slit of the rear side of the stage for latching. -
Page 26: How To Set Up The Camera
ENGLISH How to Set up the Camera Lift the camera column. Simultaneously, the lamp column rises. Turn the camera head. Move the lamp column and the lamp head to an appropriate position. - Page 27 ENGLISH Connect the video cable to the Camera, and plug the DC plug of the AC adapter into the 12VDC IN terminal (power socket). Connecting AC Adapter and Video Cable (P.107) Ref. Turn ON the power supply to the Camera. Note: •...
-
Page 28: Connecting Ac Adapter And Video Cable
ENGLISH Connecting AC Adapter and Video Cable USB terminal To PC SD card 12VDC IN terminal To AC adapter RGB IN terminal To PC RGB OUT terminal To projector To PC monitor DVI OUT terminal S-VIDEO OUT terminal To projector VIDEO OUT terminal To TV monitor To PC monitor... - Page 29 ENGLISH ② For Connecting to device having DVI Input Terminal Connect the DVI cable to the DVI OUT terminal of the rear panel. Connect the DVI cable to the DVI IN terminal of the unit having a DVI input terminal. ③...
- Page 30 ENGLISH ④ For Connecting to device having Analog RGB Output Terminal Connect the analog RGB cable to the RGB IN terminal of the rear panel. Connect the analog RGB cable to the RGB OUT terminal of the device having an analog RGB output terminal. ・Analog RGB input terminal RGB IN specifications of the Camera.
- Page 31 ENGLISH ⑥ For Connecting to device having S-Video Input Terminal Connect the S-video cable to the S-VIDEO OUT terminal of the rear panel. Note: • If the unit to be used is of Y/C-separate connector type, a conversion adapter should be used. Connect the S-vide cable to the S-VIDEO IN terminal of the device having an S-video input terminal.
-
Page 32: How To Store The Camera
ENGLISH How to Store The Camera Turn OFF the power supply to the Camera. Note: • When storing the Camera, turn OFF the power supply to the Camera beforehand. Remove the DC plug of the AC adapter and the video cable from the Camera. Connecting of AC Adapter and Video Cable (P.107) Ref. -
Page 33: Operation Of This Camera
ENGLISH OPERATION OF THIS CAMERA Turning ON/OFF Power Supply For Turning ON Note: • When connecting the Camera to other device, turn OFF the power supply to all device beforehand. Plug the DC plug of the supplied AC adapter into the 12VDC IN terminal of the rear panel, and plug the AC adapter into the outlet. -
Page 34: Basic Operation Of Osd
ENGLISH Basic Operation of OSD The following procedures show how to operate the buttons for setting and operating the Camera from the OSD. For the details of the setting and operation, refer to OSD (On Screen Display) (P.97). For Selecting and Deciding Icon Go to the icon to be operated or set by using the [ ] buttons on the front operating panel or wireless remote control. - Page 35 ENGLISH For Adjusting Level Bar Adjust the set value by using the [ ] buttons on the front operating panel or wireless remote control. Fix the set value by using the [MENU/ENTER] button on the front operating panel or wireless remote control. Level bar BRIGHTNESS S E T T I N G...
-
Page 36: Turning On/Off Lamp
ENGLISH Turning ON/OFF Lamp When used in the case of insufficient brightness of the material surface or shooting a 3D object, the lamp helps obtaining sharp video. When the OSD menu is in display, hide the OSD menu by operating the front operating panel or repeatedly pressing the [BACK] button on the wireless remote control. - Page 37 ENGLISH For Adjusting Illumination Position Adjust the lamp column so that the lamp head cannot be shot on the screen. Adjust the angle of the lamp head while watching the screen so that the illumination can be provided uniformly over the stage. Note: •...
-
Page 38: Adjusting Zoom
ENGLISH Adjusting Zoom Turn the zoom dial. The display range can be adjusted. • WIDE-ANGLE (ZOOM-OUT ( To image the object smaller. • TELESCOPIC (ZOOM-IN ( To image the object larger. When the wireless remote control is used, press the [ ] button for WIDE- ANGLE and the [ ] button for... -
Page 39: Switching Video
ENGLISH Switching Video When the OSD menu is in display, hide the OSD menu by operating the front operating panel or repeatedly pressing the [BACK] button on the wireless remote control. When [ HIDE MENU] is ON, cancel it. Press the [ ] buttons on the front operating panel to select the CAMERA... -
Page 40: Adjusting Focus
ENGLISH Adjusting Focus The focus of the object can be adjusted. The Camera is of one-shot auto focus type. Once the object is brought into focus, the auto focus operation is cancelled and the then focus position is maintained. The manual focus is used to adjust the focus to any part of the object (e.g., 3D material). - Page 41 ENGLISH Note: Focal range: • With the close-up lens TELE side (Telescopic): 250 - 410mm (9.8 - 16.1 in) from the close-up lens WIDE side (Wide-angle): 85 - 410mm (3.3 - 16.1 in) from the close-up lens • Without the close-up lens TELE side (Telescopic): 500mm - ∞...
-
Page 42: Adjusting Brightness
ENGLISH Adjusting Brightness The brightness of video can be adjusted by adjusting the lens iris. For Adjusting Brightness Automatically When the OSD menu is in display, hide the OSD menu by operating the front operating panel or repeatedly pressing the [BACK] button on the wireless remote control. When [ HIDE MENU] is ON, cancel it. - Page 43 ENGLISH For Adjusting Brightness Manually When the OSD menu is in display, hide the OSD menu by operating the front operating panel or repeatedly pressing the [BACK] button on the wireless remote control. When [ HIDE MENU] is ON, cancel it. Press the [ ] button on the front operating panel or the [ ] button on...
-
Page 44: Adjusting White Balance
ENGLISH Adjusting White Balance The intensity of the white color of video can be adjusted. When the OSD menu is in display, hide the OSD menu by operating the front operating panel or repeatedly pressing the [BACK] button on the wireless remote control. When [ HIDE MENU] is ON, cancel it. - Page 45 ENGLISH For Adjusting R-GAIN and B-GAIN Manually When the OSD menu is in display, hide the OSD menu by operating the front operating panel or repeatedly pressing the [BACK] button on the wireless remote control. When [ HIDE MENU] is ON, cancel it. Press the [ ] button on the front operating panel or the [ ] button on...
-
Page 46: Presetting And Calling
ENGLISH Presetting and Calling The status of the Camera can be saved (i.e., presetting) and called up. Up to 8 different statuses can be saved out of the following statuses: ・ Current zoom field angle (Optical zoom range) ・ Brightness level ・... -
Page 47: Using Sd Card (Option)
• The Camera is capable of controlling up to 2048 images. • ELMO Co., Ltd. is not liable to any damages and passive damages due to the loss of the data on the SD card. • In the SD mode, the bundled software cannot be used. - Page 48 • Be sure to try shooting and confirm the normal saving of the image beforehand. If the image saving is failed due to some trouble in this Camera or the SD card, ELMO Co., Ltd. is not liable to the compensation for the loss of the image data.
- Page 49 ENGLISH For Operation in SD Mode When the OSD menu is in display, hide the OSD menu by operating the front operating panel or repeatedly pressing the [BACK] button on the wireless remote control. When [ HIDE MENU] is ON, cancel it. Press the [ ] button on the front operating panel or the [...
- Page 50 ENGLISH For Displaying OSD SD Single Menu When the OSD menu is in display, hide the OSD menu by operating the front operating panel or repeatedly pressing the [BACK] button on the wireless remote control. When [ HIDE MENU] is ON, cancel it. Press the [ ] button on the front operating panel or the [...
- Page 51 ENGLISH For Displaying OSD SD Split screen Menu When the OSD menu is in display, hide the OSD menu by operating the front operating panel or repeatedly pressing the [BACK] button on the wireless remote control. When [ HIDE MENU] is ON, cancel it. Press the [ ] button on the front operating panel or the [...
- Page 52 ENGLISH For Selecting Images on SD Card from OSD SD Single Menu When the OSD menu is in display, hide the OSD menu by operating the front operating panel or repeatedly pressing the [BACK] button on the wireless remote control. When [ HIDE MENU] is ON, cancel it.
- Page 53 ENGLISH When the cursor is on any icon other than the [ BACK] icon, press the ] button on the front operating panel. The image saved on the SD card can be selected. Basic operation for image selection: ] button : To display the next image saved on the SD card (Screen Feed Forward)
- Page 54 ENGLISH For Selecting Images on SD Card from OSD SD Split screen Menu When the OSD menu is in display, hide the OSD menu by operating the front operating panel or repeatedly pressing the [BACK] button on the wireless remote control. When [ HIDE MENU] is ON, cancel it.
- Page 55 ENGLISH When the cursor is on any icon other than the [ BACK] icon, press the ] button on the front operating panel. The image saved on the SD card can be selected. OSD SD Thumbnail Menu Basic operation for image selection: ] buttons: To select the image saved on the SD card [MENU/ENTER] button: To display the selected image and switch the menu to the OSD SD Single menu.
- Page 56 ENGLISH For Performing Slide Show When the OSD menu is in display, hide the OSD menu by operating the front operating panel or repeatedly pressing the [BACK] button on the wireless remote control. When [ HIDE MENU] is ON, cancel it. Press the [ ] button on the front operating panel or the [...
- Page 57 ENGLISH For Deleting Image from SD Card When the OSD menu is in display, hide the OSD menu by operating the front operating panel or repeatedly pressing the [BACK] button on the wireless remote control. When [ HIDE MENU] is ON, cancel it. Press the [ ] button on the front operating panel or the [...
- Page 58 ENGLISH For Formatting SD Card When the OSD menu is in display, hide the OSD menu by operating the front operating panel or repeatedly pressing the [BACK] button on the wireless remote control. When [ HIDE MENU] is ON, cancel it. Press the [ ] button on the front operating panel or the [...
- Page 59 ENGLISH For Importing Image from SD Card into PC through USB Cable When the PC is connected to the Camera with the USB cable, the image data saved on the SD card can be imported into the PC. Note: • The PC installed with the OS of Microsoft Windows2000 (SP4 or newer), XP (SP2 or newer) or Vista (32 bits) is connectable •...
- Page 60 ENGLISH Press the [ ] button on the front operating panel or the [ ] button on the wireless remote control to switch the output video to the camera video. Press the [MENU/ENTER] button on the front operating panel or wireless remote control.
- Page 61 ENGLISH Select [ USB MODE] → [MASS STORAGE] from the OSD Setting menu by using the [ buttons on the front operating panel MASS STORAGE APPLICATION or wireless remote control. OSD Setting Menu Connect the USB cable to the PC. The Camera is recognized as a removable disk.
-
Page 62: Using Bundled Software
ENGLISH Using Bundled Software The "Utility Software" is available on the CD-ROM provided from ELMO Co., Ltd.. The "Utility Software" includes PC link software "Image Mate for Presentation" and "Image Mate for Movie Creation" and TWAIN driver "ELMO TWAIN DS (VHQ)"... - Page 63 ENGLISH For Using Bundled Software When the OSD menu is in display, hide the OSD menu by operating the front operating panel or repeatedly pressing the [BACK] button on the wireless remote control. When [ HIDE MENU] is ON, cancel it. Press the [ ] button on the front operating panel or the [...
- Page 64 ENGLISH Select [ SETTINGS] from the OSD Main menu by using the ] buttons on the front operating panel wireless remote control. The OSD Setting menu appears. OSD Main Menu S e l e c t [ U S B M O D E ] → [APPLICATION] from Setting...
-
Page 65: Shooting Off The Stage
ENGLISH Shooting off the Stage For Shooting Forward and Backward from The Camera Set the camera head in the horizontal direction. The camera head is adjusted automatically that camera video output cannot be inverted. <Forward shooting> <Backward shooting> Note: • The manual rotation of the camera video output can be adjusted by selecting [IMAGE ROTATION] →... -
Page 66: Presentation Using Films
ENGLISH Presentation Using Films Slide shooting adapter Slide Pass the film under the tabs. Film Set the main unit. Fold only the lamp column of the main unit (Fig. [A]), connect the projector or PC monitor to the main unit, and turn ON the power supply to the Camera. Set the slide shooting adapter. -
Page 67: About Rs-232C
ENGLISH ABOUT RS-232C Connecting RS-232C When the RS-232C terminal is connected to the PC, the Camera can be controlled from the PC. For Setting up To use communication control, be sure to set the Camera and the PC as follows: Connect the Camera to the PC with an RS-232C cable. -
Page 68: Specifications Of Rs-232C
ENGLISH Specifications of RS-232C Data Format Specifications This command is executed in the form of 1 command/1 packet. Until one processing is completed, the next command is not accepted. • The communication command always starts with STX (Start of Text) and ends with ETX (End of Text). -
Page 69: Uart Communication Format
ENGLISH Communication Specifications • Full-duplex asynchronous method • Start bit: 1 bit • Data bit: 8 bits • Stop bit: 1 bit • Parity bit: None • X parameter: None • Baud rate (Communication speed): 9600bps UART Communication Format Commands, parameters and data are all transmitted in ASCII code. Operation Command Parameter... - Page 70 ENGLISH Operation Command Parameter Data Function 0 (OFF) To set whether the main unit operation status Guide ■■ should be displayed on the screen or not. 1 (ON) 0 (Single) To set the split screen display in the SD Display 1 (3x3) ■■...
- Page 71 ENGLISH Operation Command Parameter Data Function 1 (SXGA) Resolution To switch the resolution. 2 (XGA) ■■ switching 3 (HD) 0 (0°) Image Rotation To rotate the image. ■■ 1 (180°) 0 (OFF) 1 (Low) Edge effect To set the edge effect. ■■...
- Page 72 ENGLISH Note: • If the RS-232C cable is not connected correctly between the Camera and the PC, no ACK is transmitted. • Connect the RS-232C cable correctly, and fix it firmly with the connector set screws before starting the operation.
-
Page 73: Appendix
ENGLISH APPENDIX Troubleshooting If the operation of the Camera becomes abnormal, troubleshoot the abnormality by referring to the below table. If the abnormality still remains after troubleshooting, consult the sales outlet from whom you have purchased the Camera or our branch or sales office nearest your location. Reference Symptom Check item... - Page 74 ENGLISH Note: • About the lamp (LED lamp) The brightness of the lamp used for the Camera deteriorates as the operating time passes. If the brightness is reduced abnormally, we will replace the lamp with payment. In this case, cconsult the dealer from whom you have purchased the product or our branch/office near your location.
-
Page 75: Specifications
ENGLISH Specifications General Item Specifications Power supply 12 VDC (AC adapter 100 - 240 VAC) "50/60Hz" Power consumption 24 W (including AD adapter) When folded W376xD482xH181mm (W14.8xD19.0xH7.1 in) Outside dimensions When set up W376xD482xH549mm (W14.8xD19.0xH21.6 in) Mass Approx. 4.6kg (10.1 lb) (Main unit only) Input selection Main unit / External one system DVI-D output... - Page 76 ENGLISH Main body camera unit Item Specifications Camera lens f = 4.9 - 78.4mm (0.19 - 3.09in) (16x zoom lens) F = 2.7 Imaging speed 30 frames/sec SXGA: Max. 405x324mm (15.9x12.8 in), Min. 30x24mm (1.2x0.9 in) Imaging range HD 720P: Max. 405x224mm (15.9x8.8 in), Min. 30x17mm (1.2x0.7 in) XGA: Max.
- Page 77 ENGLISH Item Specifications Edge effect Provided (only in the Graphic mode) Video pausing Provided Image recording Provided (SD card) Split screen display Provided (SD card images, 9 splits, 16 splits) Slide show Provided (SD card images) Lighting unit Item Specifications Lighting White LED...
-
Page 78: Accessories
Note: • For RCA pin, use pin plug compliant with EIAJ RC-7603. • These specifications are subject to change without notice. is a trademark of ELMO Co., Ltd. VESA and SVGA are registered trademarks of Video Electronics Standards Association. SXGA, VGA and XGA are trademarks or registered trademarks of International Business Machines Corporation.
Need help?
Do you have a question about the P30S and is the answer not in the manual?
Questions and answers