Table of Contents
Advertisement
Advertisement
Table of Contents

Subscribe to Our Youtube Channel
Related Manuals for Vertiv Avocent MergePoint Unity


Summary of Contents for Vertiv Avocent MergePoint Unity
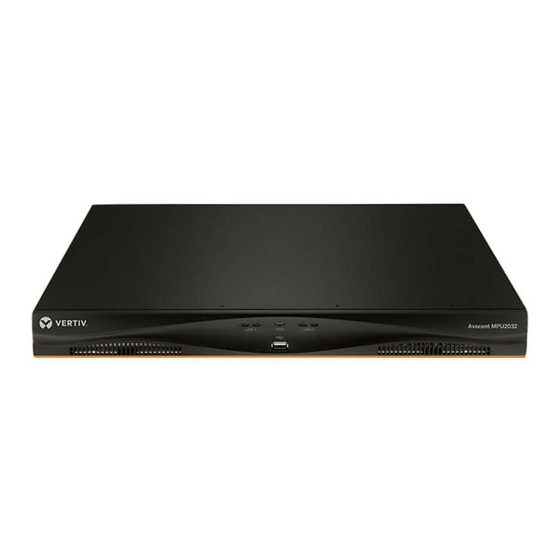
- Page 1 Avocent® MergePoint Unity™ Switch for Dell® Installer/User Guide...
- Page 2 Technical Support Site If you encounter any installation or operational issues with your product, check the pertinent section of this manual to see if the issue can be resolved by following outlined procedures. For additional assistance, visit https://www.VertivCo.com/en-us/support/...
-
Page 3: Table Of Contents
3.1.2 OBWI 3.1.3 Using the user interfaces 3.2 Viewing System Information 3.3 Switch Sessions 3.3.1 Launching a session 3.3.2 Configuring sessions 3.3.3 Closing a session 3.4 Appliance Tools Vertiv™ | Vertiv™ Avocent® MergePoint Unity™ Switch for Dell® Installer/User Guide |... - Page 4 4.6 Saving the View 4.7 Pasting Text 4.8 Closing a KVM Video Viewer Session 4.9 KVM Video Viewer Profile Settings 4.9.1 Refresh 4.9.2 Fit 4.9.3 Full Screen 4.9.4 Mini-Mode 4.9.5 Scaling Vertiv™ | Vertiv™ Avocent® MergePoint Unity™ Switch for Dell® Installer/User Guide |...
- Page 5 6.0.2 DSRIQ-SRL module modes 6.0.3 Creating a DSRIQ-SRL module macro 6.0.4 Using History mode 6.0.5 DSRIQ-SRL module pinouts 6.0.6 Using MPUIQ-SRL Modules 6.0.7 ACS console server port pinouts Vertiv™ | Vertiv™ Avocent® MergePoint Unity™ Switch for Dell® Installer/User Guide |...
- Page 6 Appendix F: Technical Specifications Appendix G: Sun Advanced Key Emulation 6.0.12 Special considerations for Japanese Sun USB and Korean Sun USB keyboards (USB IQ modules only) Appendix H: KVM Session Optimization Vertiv™ | Vertiv™ Avocent® MergePoint Unity™ Switch for Dell® Installer/User Guide |...
-
Page 7: Product Overview
1 PRODUCT OVERVIEW 1.1 Features and Benefits The Vertiv™Avocent® MergePoint Unity™ KVM over IP and serial console switch system for Dell combines analog and digital technology to provide flexible, centralized control of data center servers and virtual media, and to facilitate the OA&M (operations, activation and maintenance) of remote branch offices where trained operators may be unavailable. -
Page 8: True Serial Capabilities
Users access the switch and all attached systems via Ethernet or using a V.34, V.90 or V.92 modem from a client. The clients can be located anywhere a valid network connection exists. Vertiv™ | Vertiv™ Avocent® MergePoint Unity™ Switch for Dell® Installer/User Guide |... -
Page 9: Fips Cryptographic Module
For more information, see the DSView Software Plug-In for MergePoint Unity switch for Dell Technical Bulletin. Vertiv™ | Vertiv™ Avocent® MergePoint Unity™ Switch for Dell® Installer/User Guide |... - Page 10 This page intentionally left blank. Vertiv™ | Vertiv™ Avocent® MergePoint Unity™ Switch for Dell® Installer/User Guide |...
-
Page 11: Installation
The switch uses TCP/IP for communication over Ethernet. Although 10BaseT Ethernet may be used, Vertiv™ recommends a dedicated, switched 100BaseT or 1000BaseT network for switches that support it. The switch uses the Point-to-Point Protocol (PPP) for communication over a V.34, V.90 or V.92 modem. - Page 12 Figure 2.1 Basic Switch Configuration Vertiv™ | Vertiv™ Avocent® MergePoint Unity™ Switch for Dell® Installer/User Guide |...
-
Page 13: Setting Up Your Network
The switching system uses IP addresses to uniquely identify the switch and the target devices. The switch family supports both Dynamic Host Configuration Protocol (DHCP) and static IP addressing. Vertiv™ recommends that IP addresses be reserved for each switch and that they remain static while the switches are connected to the network. - Page 14 To connect a DSRIQ-SRL module to a serial device: Attach the DSRIQ-SRL module 9-pin serial connector to the serial port of the device to be connected to your switch. Vertiv™ | Vertiv™ Avocent® MergePoint Unity™ Switch for Dell® Installer/User Guide |...
-
Page 15: Cascading Switches
NOTE: The system will automatically “merge” the two switches. All servers connected to the cascaded switch will display on the main switch server list in the local UI. Vertiv™ | Vertiv™ Avocent® MergePoint Unity™ Switch for Dell® Installer/User Guide |... -
Page 16: Configuring The Mergepoint Unity Switch For Dell
Used by the web browser interface for managing the switch and launching HTML5 KVM sessions In a typical configuration, as shown in the following figure, the user’s computer is located outside of the firewall, and the switch resides inside the firewall. Vertiv™ | Vertiv™ Avocent® MergePoint Unity™ Switch for Dell® Installer/User Guide |... -
Page 17: Verifying The Connections
They illuminate green when the communication speed is 1000M. • They illuminate amber when the communication speed is 100M. • They are not illuminated when the communication speed is 10M. Vertiv™ | Vertiv™ Avocent® MergePoint Unity™ Switch for Dell® Installer/User Guide |... -
Page 18: Front Panel Status Leds
2.7 Adjusting Mouse Settings on Target Devices Before a computer connected to the switch can be used for remote user control, you must either enable Vertiv Mouse Sync (see ) or set the target mouse speed and turn off acceleration. For machines running ®... - Page 19 Ctrl key cursor location animations, cursor shadowing and cursor hiding, should also be turned off. For more information about setting mouse movement and cursor features for use with Vertiv™ hardware products and DSView management software, please visit http://www.VertivCo.com and consult the Mouse and Pointer Settings guide.
- Page 20 This page intentionally left blank. Vertiv™ | Vertiv™ Avocent® MergePoint Unity™ Switch for Dell® Installer/User Guide |...
-
Page 21: Local And Remote Configuration
For more than 20 attached target devices, the Target List-Full screen provides additional navigation tools. At the Target List-Full screen you can navigate by entering the page Vertiv™ | Vertiv™ Avocent® MergePoint Unity™ Switch for Dell® Installer/User Guide |... -
Page 22: Obwi
The switch OBWI is a remote, web browser-based user interface. For details on setting up your system, see Connecting the Switch Hardware on page 7. The following table shows which operating systems and browsers the OBWI supports. Vertiv™ recommends that the browser be kept up-to-date with the latest version. Table 3.1 OBWI Supported Operating Systems and Browsers... -
Page 23: Using The User Interfaces
Top option bar: Use the top option bar to bookmark an interface window, refresh the display of an interface window, print a web page, log out of a software session or access the Vertiv™ Technical Support help page. The name of the logged in user appears on the left side of the top option bar. - Page 24 3. Click Print to print the switch OBWI window and close the Print dialog box. Refreshing a window The switch user interface may be refreshed at any time by clicking Refresh or the refresh icon in the top option bar. Vertiv™ | Vertiv™ Avocent® MergePoint Unity™ Switch for Dell® Installer/User Guide |...
-
Page 25: Viewing System Information
From the side navigation bar, select Unit View - Target Devices. A list of available devices will appear. 2. Click the KVM Session or Serial Session link to the right of the desired target device to launch the session. Vertiv™ | Vertiv™ Avocent® MergePoint Unity™ Switch for Dell® Installer/User Guide |... -
Page 26: Configuring Sessions
From the side navigation bar, select Active Sessions to display the Appliance Sessions screen. 2. Click the checkbox next to the desired target device(s). 3. Click Disconnect. NOTE: If there is an associated locked virtual media session, it will be disconnected. Vertiv™ | Vertiv™ Avocent® MergePoint Unity™ Switch for Dell® Installer/User Guide |... -
Page 27: Appliance Tools
CAUTION: Disconnecting an IQ module during a firmware update or cycling power to the target device will render the module inoperable and require the IQ module to be returned to the factory for repair. Vertiv™ | Vertiv™ Avocent® MergePoint Unity™ Switch for Dell® Installer/User Guide |... -
Page 28: Saving And Restoring Appliance Configurations And Appliance User Databases
2. Click Restore Appliance Configuration or Restore Appliance User Database. The Restore Appliance Configuration Window or Restore Appliance User Database Window will appear. 3. Click Browse. Navigate to the desired location and select the file name. Click Upload. Vertiv™ | Vertiv™ Avocent® MergePoint Unity™ Switch for Dell® Installer/User Guide |... -
Page 29: Network Settings
4. Select either Enabled or Disabled in the DHCPv6 drop-down menu. NOTE: If you enable DHCPv6, any information that you enter in the Address, Gateway and Prefix length fields will be ignored. 5. Click Save. Vertiv™ | Vertiv™ Avocent® MergePoint Unity™ Switch for Dell® Installer/User Guide |... -
Page 30: Dns Settings
3. Select one of the following options from the User Access Level drop-down menu: User, User Administrator or Appliance Administrator. 4. Select a number 1 - 4 from the User Preemption Level drop-down menu. 5. Click Save. Vertiv™ | Vertiv™ Avocent® MergePoint Unity™ Switch for Dell® Installer/User Guide |... -
Page 31: Virtual Media
6. Select the checkbox next to each IQ module for which you want to enable virtual media and click Enable VM. -or- Select the checkbox next to each IQ module for which you want to disable virtual media and click Disable VM. Vertiv™ | Vertiv™ Avocent® MergePoint Unity™ Switch for Dell® Installer/User Guide |... -
Page 32: Local Virtual Media Settings
You can also configure the amount of time before the scan moves to the next target device in the sequence. NOTE: The Scan button is disabled if you are connected remotely or via modem. Vertiv™ | Vertiv™ Avocent® MergePoint Unity™ Switch for Dell® Installer/User Guide |... -
Page 33: Dsview Server Ip Addresses
When a user account is added, the user may be assigned to any of the following access levels: Appliance administrators, User administrators and Users. Table 3.6 Allowed Operations by Access Level ACCESS LEVEL OPERATION APPLIANCE ADMINISTRATOR USER ADMINISTRATOR USERS Configure interface system-level settings Vertiv™ | Vertiv™ Avocent® MergePoint Unity™ Switch for Dell® Installer/User Guide |... -
Page 34: Snmp Settings
SNMP traps from the switch. If you select Enable SNMP, the unit will respond to SNMP requests over UDP port 161. Vertiv™ | Vertiv™ Avocent® MergePoint Unity™ Switch for Dell® Installer/User Guide |... -
Page 35: Event Settings
2. Type the address of up to four management workstations to which this switch will send events in the SNMP Trap Destination fields, as well as up to four Syslog servers. 3. Click Save. Vertiv™ | Vertiv™ Avocent® MergePoint Unity™ Switch for Dell® Installer/User Guide |... -
Page 36: Configuring Iq Modules
From the side navigation bar, click Unit View - Appliance - ApplianceSettings - Ports - IQ Modulesto open the Appliance IQ Modules screen. 2. Select the checkbox(es) next to the IQ module(s) that you wish to upgrade and click Upgrade. Vertiv™ | Vertiv™ Avocent® MergePoint Unity™ Switch for Dell® Installer/User Guide |... -
Page 37: Power Device Settings
2. Click the name of the unit you wish to configure, and select Sockets. 3. Click the socket name that you wish to modify. 4. Use the drop-down windows to alter the desired settings, and click Save. Vertiv™ | Vertiv™ Avocent® MergePoint Unity™ Switch for Dell® Installer/User Guide |... - Page 38 This page intentionally left blank. Vertiv™ | Vertiv™ Avocent® MergePoint Unity™ Switch for Dell® Installer/User Guide |...
-
Page 39: Kvm Video Viewer
On a Windows client, it is recommended that the JRE (Java Runtime Environment) be installed in the C:\Program Files\ location. If your system automatically installs programs in another location, you may not Vertiv™ | Vertiv™ Avocent® MergePoint Unity™ Switch for Dell® Installer/User Guide |... -
Page 40: Opening A Kvm Session
Select File - Send Text File Contents from the KVM Video Viewer menu. The Open dialog box appears. 2. Browse to the location on the client machine where the file is saved, click the file, then click Open. Vertiv™ | Vertiv™ Avocent® MergePoint Unity™ Switch for Dell® Installer/User Guide |... -
Page 41: Closing A Kvm Video Viewer Session
Disable the entire Scaling menu, thereby not allowing the user to change the resolution while in Full Screen mode. • Perform other tasks when Full Screen mode is enabled, such as turn on Keyboard Pass-through and display the floating menu bar. Vertiv™ | Vertiv™ Avocent® MergePoint Unity™ Switch for Dell® Installer/User Guide |... -
Page 42: Mini-Mode
The choices are (in descending color quantity): Best Color, Medium Color/Medium Compression, Low Color/High Compression or Gray Scale/Best Compression. Vertiv™ | Vertiv™ Avocent® MergePoint Unity™ Switch for Dell® Installer/User Guide |... -
Page 43: Session User List
The DSView server will send the macros groups and their associated macros as part of the preferences saved on the server. One of the macro groups will be used as the default macro group for the DSView Vertiv™ | Vertiv™ Avocent® MergePoint Unity™ Switch for Dell® Installer/User Guide |... - Page 44 Click on the name of the group you want to copy and click Copy. 2. Enter a new name for the copied group and select the group type. 3. Click OK. Vertiv™ | Vertiv™ Avocent® MergePoint Unity™ Switch for Dell® Installer/User Guide |...
-
Page 45: Virtual Media
The client may also add and map an ISO or floppy image file as a virtual drive on the target device. You may have one CD drive and one mass storage device mapped concurrently. Vertiv™ | Vertiv™ Avocent® MergePoint Unity™ Switch for Dell® Installer/User Guide |... -
Page 46: Requirements
In the Mapping dialog box, from the drop-down menu, select the drive with the image file and click browse. Browse to the location of the file and click Open. Vertiv™ | Vertiv™ Avocent® MergePoint Unity™ Switch for Dell® Installer/User Guide |... -
Page 47: Creating An Image
Select Virtual Media - Create Image from the KVM Video Viewer menu. 2. Browse to the location where you want to create the image. 3. After the image has been created, check the Mapped checkbox to map the image. Vertiv™ | Vertiv™ Avocent® MergePoint Unity™ Switch for Dell® Installer/User Guide |... -
Page 48: Session Options
If Mouse Synchronization is enabled, it is not necessary to disable mouse acceleration on the target device. The Video Viewer window offers five appearance choices for the local mouse cursor. You can also choose no cursor or the default cursor. Vertiv™ | Vertiv™ Avocent® MergePoint Unity™ Switch for Dell® Installer/User Guide |... -
Page 49: Certificate
NOTE: Video adjustment is a per target setting. Vertiv™ | Vertiv™ Avocent® MergePoint Unity™ Switch for Dell® Installer/User Guide |... - Page 50 3. Move the Contrast slider bar and then fine-tune the setting by clicking the Min (-) or Max (+) buttons to adjust the parameter for each icon pressed. The adjustments display immediately in the Video Viewer window. 4. When finished, click Close. Vertiv™ | Vertiv™ Avocent® MergePoint Unity™ Switch for Dell® Installer/User Guide |...
-
Page 51: Cursor Commands
Use the drop-down menu to select a reader and card to map. 3. Click Map Card to send a request to the target server to map the smart card to the remote device. Vertiv™ | Vertiv™ Avocent® MergePoint Unity™ Switch for Dell® Installer/User Guide |... -
Page 52: Video Recording
Opens the File dialog box to browse for and open a DVC file either created by the Record function on the KVM Video Viewer Open or downloaded from an appliance or service processor. Vertiv™ | Vertiv™ Avocent® MergePoint Unity™ Switch for Dell® Installer/User Guide |... - Page 53 Select Tools - Export Video from the KVM Videw Viewer menu. 2. Browse for the source file. 3. Browse for the exported file. 4. Use the drop-down menu to select the resolution. 5. Click Export. Vertiv™ | Vertiv™ Avocent® MergePoint Unity™ Switch for Dell® Installer/User Guide |...
- Page 54 This page intentionally left blank. Vertiv™ | Vertiv™ Avocent® MergePoint Unity™ Switch for Dell® Installer/User Guide |...
-
Page 55: Ldap
The Access Type radio buttons specify how a query is sent to each LDAP target device. When using LDAP, all usernames, passwords and other information sent between an appliance and LDAP server are Vertiv™ | Vertiv™ Avocent® MergePoint Unity™ Switch for Dell® Installer/User Guide |... -
Page 56: Ldap Search Parameters
NOTE: These options cannot be changed if the LDAP Priority is set to LDAP Disabled on the Overview screen. 5.1.3 LDAP Query parameters On the LDAP Query page, you can configure the parameters used when performing user authentication queries. Vertiv™ | Vertiv™ Avocent® MergePoint Unity™ Switch for Dell® Installer/User Guide |... - Page 57 The Access Control Attribute field specifies the name of the attribute that is used when the query modes are set to User Attribute or Group Attribute. The default value is info. Vertiv™ | Vertiv™ Avocent® MergePoint Unity™ Switch for Dell® Installer/User Guide |...
-
Page 58: Appliance And Target Device Query Modes
User Admin or Appliance Admin privileges to the appliance. You can access the ADUC by selecting Start - Programs - Administrative Tools - Active Directory Users and Computers. Figure 5.1 Active Directory - KVM User Vertiv™ | Vertiv™ Avocent® MergePoint Unity™ Switch for Dell® Installer/User Guide |... -
Page 59: Setting Up Active Directory For Performing Queries
6. Create one or more groups under the group container organizational unit. 7. Add the usernames and the target device/appliance objects to the groups you created in step Vertiv™ | Vertiv™ Avocent® MergePoint Unity™ Switch for Dell® Installer/User Guide |... - Page 60 NOTE: If none of the three values are found, the user is granted user level access to any appliance or target device listed in a group with the username. Vertiv™ | Vertiv™ Avocent® MergePoint Unity™ Switch for Dell® Installer/User Guide |...
-
Page 61: Appendices
2. Enable Debug Messages: This menu option turns on console status messages. Because this can significantly reduce performance, you should only enable debug messages when instructed to do so by Vertiv™ Technical Support. When you are finished viewing the messages, press any key to exit this mode. - Page 62 0. Exit: This menu selection returns you to the ready prompt. If the Console menu interface password is enabled, you must exit the Console main menu so the next user is prompted with the Username and Password login screen. Vertiv™ | Vertiv™ Avocent® MergePoint Unity™ Switch for Dell® Installer/User Guide |...
-
Page 63: Appendix C: Using Serial Iq Modules
DSR/CD Mode: This option allows you to control how the switch and CD lines operate. Available options are Always on and Toggle. When in Toggle mode, DSR and CD lines are turned off for Vertiv™ | Vertiv™ Avocent® MergePoint Unity™ Switch for Dell® Installer/User Guide |... - Page 64 Clear History Key Sequence: This option allows you to define the key combination that clears the history buffer while in History mode. The default key sequence is Ctrl-F11. Vertiv™ | Vertiv™ Avocent® MergePoint Unity™ Switch for Dell® Installer/User Guide |...
-
Page 65: Creating A Dsriq-Srl Module Macro
The DSRIQ-SRL module maintains a buffer containing 240 lines minimum, or 10 screens, of output. When the history buffer is full, it will add new lines at the bottom of the buffer and delete the oldest lines at the top of the buffer. Vertiv™ | Vertiv™ Avocent® MergePoint Unity™ Switch for Dell® Installer/User Guide |... -
Page 66: Dsriq-Srl Module Pinouts
In to SRL CTS - Clear to Send CTS - Clear to Send Out of SRL RTS - Request to Send N/C - Not Connected N/C - Not Connected Vertiv™ | Vertiv™ Avocent® MergePoint Unity™ Switch for Dell® Installer/User Guide |... -
Page 67: Using Mpuiq-Srl Modules
CTS - Clear to Send DCD/DSR - Data Set Ready RXD - Receive Data GND - Signal Ground N/C - Not Connected TXD - Transmit Data DTR - Data Terminal Ready Vertiv™ | Vertiv™ Avocent® MergePoint Unity™ Switch for Dell® Installer/User Guide |... - Page 68 PIN NO. SIGNAL NAME INPUT/OUTPUT RTS - Request to Send Vertiv™ | Vertiv™ Avocent® MergePoint Unity™ Switch for Dell® Installer/User Guide |...
-
Page 69: Appendix D: Utp Cabling
Table 5.4 UTP Wiring Standards EIA/TIA 568A EIA/TIA 568B white/green white/orange green orange white/orange white/green blue blue white/blue white/blue orange green white/brown white/brown brown brown Vertiv™ | Vertiv™ Avocent® MergePoint Unity™ Switch for Dell® Installer/User Guide |... -
Page 70: Cabling Installation, Maintenance And Safety Tips
Always obey all local and national fire and building codes. Be sure to firestop all the cables that penetrate a firewall. Use plenum rated cable where it is required. Vertiv™ | Vertiv™ Avocent® MergePoint Unity™ Switch for Dell® Installer/User Guide |... -
Page 71: Appendix E: Cable Pinout Information
DESCRIPTION PIN NUMBER DESCRIPTION No Connection (N/C) Transmit Data (TXD) No Connection (N/C) Signal Ground (SG) No Connection (N/C) No Connection (N/C) Receive Data (RXD) No Connection (N/C) Vertiv™ | Vertiv™ Avocent® MergePoint Unity™ Switch for Dell® Installer/User Guide |... -
Page 72: Appendix F: Technical Specifications
10/100/1000 Ethernet Connector 8-pin modular USB Device Port Number 4 (4 and 8 port) or 5 (16 and 32 port) Type USB 2.0 MODEM Port Number Type RS-232 serial Vertiv™ | Vertiv™ Avocent® MergePoint Unity™ Switch for Dell® Installer/User Guide |... - Page 73 Level Model designation. The designation that is referenced in the EMC and/or safety reports and certificates are printed on the label Approvals and applied to this product. Markings Vertiv™ | Vertiv™ Avocent® MergePoint Unity™ Switch for Dell® Installer/User Guide |...
-
Page 74: Appendix G: Sun Advanced Key Emulation
- Command (left)(2) Command (left)(2) Win (GUI) left(1) Command (right)(2) Win (GUI) right (1) (1)Windows 95 104-key keyboard. (2)The Command key is the Sun Meta (diamond) key. Vertiv™ | Vertiv™ Avocent® MergePoint Unity™ Switch for Dell® Installer/User Guide |... -
Page 75: Special Considerations For Japanese Sun Usb And Korean Sun Usb Keyboards (Usb Iq Modules Only)
SUN USB KEYBOARD KOREAN SUN USB KEYBOARD JAPANESE SUN USB KEYBOARD Right-Alt 0xE6 AltGraph Hangul Katakana/Hiragana Windows Application 0x65 Compose Hanja Compose Hangul 0x90 Hanja 0x91 Katakana/Hiragana 0x88 Han/Zen Han/Zen 0x35 Vertiv™ | Vertiv™ Avocent® MergePoint Unity™ Switch for Dell® Installer/User Guide |... -
Page 76: Appendix H: Kvm Session Optimization
Zero screen movement = 0 pkts/sec (avg. 0.9kbps download | 0.4kbps upload) • Continuous mouse circles movement on screen = 30 pkts/sec (avg. 212kbps download | 246kbps upload) Vertiv™ | Vertiv™ Avocent® MergePoint Unity™ Switch for Dell® Installer/User Guide |... - Page 77 Continuous mouse circles movement on screen = 30 pkts/sec (avg. 470kbps download | 245kbps upload) • Rapidly opening and closing full-screen windows = 40-50 pkts/sec (avg. 750kbps download | 180kbps upload) Vertiv™ | Vertiv™ Avocent® MergePoint Unity™ Switch for Dell® Installer/User Guide |...
- Page 78 VertivCo.com | Vertiv Headquarters, 1050 Dearborn Drive, Columbus, OH, 43085, USA © 2018 Vertiv Co. All rights reserved. Vertiv and the Vertiv logo are trademarks or registered trademarks of Vertiv Co. All other names and logos referred to are trade names, trademarks or registered trademarks of their respective owners. While every precaution has been taken to ensure accuracy and completeness herein, Vertiv Co.
Need help?
Do you have a question about the Avocent MergePoint Unity and is the answer not in the manual?
Questions and answers