Table of Contents
Advertisement
Quick Links
Advertisement
Table of Contents

Related Manuals for Vertiv AutoView AV104


Summary of Contents for Vertiv AutoView AV104
- Page 1 Vertiv™ AutoView™ AV104/AV108/AV116 Switch Installer/User Guide...
- Page 2 EMI Statements Products which are certified for EMC in the regions or countries indicated will have the required marking or statement on the product label. The applicable statement for that country is listed below. Taiwan 警 告 使 用 者 這 是 甲 類 的 資 訊 產 品 , 在 居 住 的 環 境 中 使 用 時 , 可 能 會 造 成 射 頻 干 擾 , 在 這 種 情 況 下 , 使 用 者 會 被...
-
Page 3: Table Of Contents
2.3.1 Local port commands 2.4 Enabling Port Binding 2.4.1 Pass-through USB port commands 2.5 Operating Scan Mode 2.5.1 Scan mode commands 2.6 Cascading Units 2.7 Upgrading Firmware 3 Appendix Appendix A: Product Specification Vertiv | Vertiv™ AutoView™ AV104/AV108/AV116 Switch Installer/User Guide |... - Page 4 Vertiv | Vertiv™ AutoView™ AV104/AV108/AV116 Switch Installer/User Guide |...
-
Page 5: Product Overview
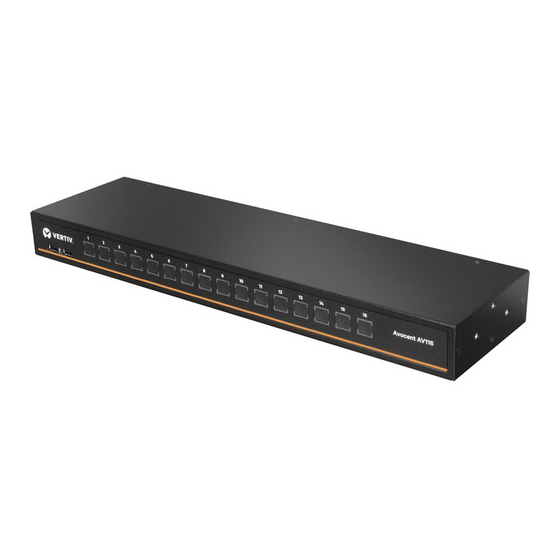
1 PRODUCT OVERVIEW The Vertiv™ AutoView™ AV104/AV108/AV116 is a single-user analog switch that supports up to four, eight or 16 target devices and can be 0U or 1U rack-mounted or used as a desktop device. It supports USB keyboard, mouse and VGA video at the local user interface and USB and VGA or DisplayPort video at the target devices. - Page 6 This page intentionally left blank. Vertiv | Vertiv™ AutoView™ AV104/AV108/AV116 Switch Installer/User Guide |...
-
Page 7: Basic Operation
12 feet. A third custom cable supports cascading between switches. It is identical to the VGA cables but is one foot in length. Contact your Vertiv™ representative to purchase the custom cables. Depending on the model, you can switch between target devices using the front panel buttons, the on- screen display or hotkeys. -
Page 8: Using Keystroke Commands
Table 2.3 Activation Sequence Commands KEY SEQUENCE ACTION Ctrl+Ctrl+H+1+Enter Activates the default command mode (Ctrl+Ctrl). Ctrl+Ctrl+H+2+Enter Changes the activation sequence to Alt + Alt. Ctrl+Ctrl+H+3+Enter Changes the activation sequence to Shift + Shift. Vertiv | Vertiv™ AutoView™ AV104/AV108/AV116 Switch Installer/User Guide |... -
Page 9: Using The On-Screen Display
A green circle appears next to powered targets, a locked icon appears next to a target bound to a port via USB pass-through and an unlocked icon appears next to an unbound target. To bind or unbind a target: Use the arrow keys to navigate to the target and press Enter. Vertiv | Vertiv™ AutoView™ AV104/AV108/AV116 Switch Installer/User Guide |... - Page 10 NOTE: The scan time value indicates seconds. The default scan time is 30 seconds. 2. Enter a value between 02 and 60. 3. Press Enter to save the scan time. 4. Press S to start the scan. To view the firmware version: Press V. Vertiv | Vertiv™ AutoView™ AV104/AV108/AV116 Switch Installer/User Guide |...
-
Page 11: Switching Between Targets
KVM session regardless of the target you select through the front panel buttons, keystroke commands or the on-screen display. When binding is Vertiv | Vertiv™ AutoView™ AV104/AV108/AV116 Switch Installer/User Guide |... -
Page 12: Pass-Through Usb Port Commands
When you initiate interval scanning, USB pass-through port binding is automatically disabled. When interval scanning is stopped, USB pass-through port binding is automatically enabled unless you disable it by keystroke command (Ctrl+Ctrl+B-]+Enter) or through the on-screen display. Vertiv | Vertiv™ AutoView™ AV104/AV108/AV116 Switch Installer/User Guide |... -
Page 13: Cascading Units
Secondary switch targets - You can only connect target devices to secondary switches. Secondary switches do not support third-tier switch connections. Secondary switch connected to port 1 on the 16-port primary switch Vertiv | Vertiv™ AutoView™ AV104/AV108/AV116 Switch Installer/User Guide |... -
Page 14: Upgrading Firmware
2. Remove the Flash drive from the switch and insert it into a computer. 3. Navigate to and open the version.txt file on the Flash drive to view the unit's firmware version. Vertiv | Vertiv™ AutoView™ AV104/AV108/AV116 Switch Installer/User Guide |... -
Page 15: Appendix
3 APPENDIX This section contains the Product Specifications. Appendix A: Product Specification The following table lists the product specifications for the Vertiv™ AutoView™ AV104/AV108/AV116 switches. Table 3.1 Product Specification SPECIFICATION DESCRIPTION Enclosure Metal Power input connector 100-240 V, 50-60 Hz AC, single IEC 60320 C14 connector •... - Page 16 This page intentionally left blank. Vertiv | Vertiv™ AutoView™ AV104/AV108/AV116 Switch Installer/User Guide |...
- Page 18 VertivCo.com | Vertiv Headquarters, 1050 Dearborn Drive, Columbus, OH, 43085, USA © 2017 Vertiv Co. All rights reserved. Vertiv and the Vertiv logo are trademarks or registered trademarks of Vertiv Co. All other names and logos referred to are trade names, trademarks or registered trademarks of their respective owners. While every precaution has been taken to ensure accuracy and completeness herein, Vertiv Co.
Need help?
Do you have a question about the AutoView AV104 and is the answer not in the manual?
Questions and answers