Table of Contents
Advertisement
Quick Links
Advertisement
Table of Contents

Related Manuals for John Lewis JLFSEC612


Summary of Contents for John Lewis JLFSEC612
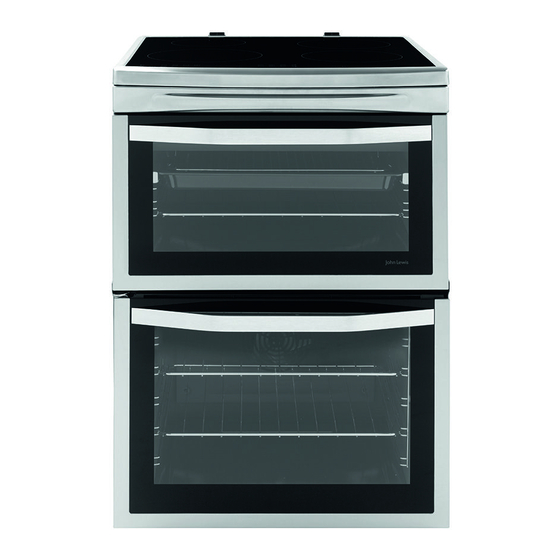
- Page 1 Cooker JLFSEC612 User Manual...
-
Page 2: Table Of Contents
Contents Examples of cooking applications Safety information Hob - Care and cleaning Children and vulnerable people safety General Safety General information Cleaning the hob Safety instructions Oven - Daily use Installation Electrical Connection Oven Control Panel Indicators on the display Care and Cleaning Top oven functions Internal light... - Page 3 What to do if... Thermaflow® or Conventional Cooking Service data Main Oven Installation Grilling in general Technical data Dual Grill - Top Oven Location of the appliance Thermal Grilling - Main Oven Levelling of the appliance Low temperature cooking Electrical installation Defrost Covering terminal board Oven - Care and cleaning...
-
Page 4: Safety Information
Safety information Before the installation and use of the appliance, carefully read the supplied instructions. The manufacturer is not responsible for any injuries or damages that are the result of incorrect installation or usage. Always keep the instructions in a safe and accessible location for future reference. - Page 5 This appliance is intended for use up to an altitude of 2000 m above • sea level. This appliance is not intended to be used on a ships, boats or • vessels. Do not install the appliance behind a decorative door in order to •...
- Page 6 Ensure that the appliance is switched off before replacing the lamp • to avoid the possibility of electric shock. If the mains power supply cable is damaged, it must be replaced by • the manufacturer, its Authorised Service Centre or similarly qualified persons to avoid an electrical hazard.
-
Page 7: Safety Instructions
Safety instructions • Make sure that the parameters on the rating Installation plate are compatible with the electrical ratings of the mains power supply. Warning! Only a qualified • Always use a correctly installed shockproof person must install this socket. appliance. -
Page 8: Care And Cleaning
• Make sure that the ventilation openings are not • Discoloration of the enamel or stainless steel blocked. has no effect on the performance of the • Do not let the appliance stay unattended during appliance. operation. • Use a deep pan for moist cakes. Fruit juices •... -
Page 9: Internal Light
abrasive products, abrasive cleaning pads, solvents or metal objects. • If you use an oven spray, obey the safety instructions on the packaging. • Do not clean the catalytic enamel (if applicable) with any kind of detergent. Internal light • The type of light bulb or halogen lamp used for this appliance is only for household appliances. -
Page 10: Product Description
Product description General overview 1. Control panel and hob 2. Air vents for the cooling fan 3. Heating element 4. Lamp 5. Shelf support, removable 6. Fan 7. Shelf positions Cooking surface layout 1. Induction cooking zone 1400 W with the Power function 2500 W 2. -
Page 11: Accessories
Accessories • Wire shelf For cookware, cake tins, roasts. • Grill- / Roasting pan To bake and roast or as pan to collect fat. • Trivet For roasting and grilling. Use the trivet only with the Grill- / roasting pan. •... -
Page 12: Before First Use
Before first use Preheating Warning! Refer to Safety chapters. Preheat the empty appliance to burn off the remaining grease. Initial Cleaning Preheat the two ovens. Heat up one oven at a time. Remove all accessories and removable shelf Set the functions listed below, if supports from the appliance. -
Page 13: Hob - Daily Use
Hob - Daily use Warning! Refer to Safety chapters. Hob control panel Use the sensor fields to operate the appliance. The displays, indicators and sounds tell which functions operate. Sensor Function Comment field ON / OFF To activate and deactivate the hob. Lock / The Child Safety Device To lock / unlock the control panel. -
Page 14: Heat Setting Displays
Sensor Function Comment field To set a heat setting. Power function To activate and deactivate the function. Heat setting displays Display Description The cooking zone is deactivated. The cooking zone operates. STOP+GO function operates. Automatic Heat Up function operates. Power function operates. There is a malfunction. -
Page 15: The Heat Setting
Power function • you use incorrect cookware. The symbol comes on and the cooking zone deactivates This function makes more power available to automatically after 2 minutes. the induction cooking zones. The function can • you do not deactivate a cooking zone or change be activated for the induction cooking zone only the heat setting. -
Page 16: Stop+Go
Minute Minder When you deactivate the hob, you You can use this function as a Minute Minder also deactivate this function. when the hob is activated and the cooking zones do not operate. The heat setting display shows The Child Safety Device To activate the function: touch . - Page 17 Cooker User Manual...
-
Page 18: Hob - Hints And Tips
Hob - Hints and tips Minimum cookware diameter Warning! Refer to Safety chapters. Cooking zone Cookware diame- ter (mm) Cookware Left rear 125 - 140 For induction cooking zones a Right rear 145 - 180 strong electro-magnetic field creates the heat in the cookware Right front 145 - 180 very quickly. - Page 19 Heat setting Use to: Time Hints (min) Keep cooked food warm. as neces- Put a lid on the cookware. sary 1 - 2 Hollandaise sauce, melt: butter, choc- 5 - 25 Mix from time to time. olate, gelatine. 1 - 2 Solidify: fluffy omelettes, baked eggs.
-
Page 20: Hob - Care And Cleaning
Hob - Care and cleaning Warning! Refer to Safety chapters. General information • Clean the hob after each use. • Always use cookware with clean bottom. • Scratches or dark stains on the surface have no effect on how the hob operates. •... -
Page 21: Oven - Daily Use
Oven - Daily use Warning! Refer to Safety chapters. Oven Control Panel Use the sensor fields to operate the appliance Sensor Function Comment field – Display Shows the current settings of the appliance. ON / OFF To activate or deactivate the oven. Oven selection To move between top and main oven. -
Page 22: Indicators On The Display
Indicators on the display Name Description Top / Main oven indicator Shows which oven operates. Oven function indicator Shows the function which is active. Lamp / Defrost indicator Shows that the Lamp / Defrost function is active. Heat-up and residual heat in- Shows that the Heat-up / residual heat is active. -
Page 23: Main Oven Functions
Symbol Oven function Application Oven Lamp To activate the lamp without a cooking function. Main oven functions Symbol Oven function Application Thermaflow® To bake on one shelf position and to dry food. Set the temperature 20 - 40 °C lower than for Conventional Cooking. -
Page 24: Changing The Oven Temperature
The display shows the recommended If you activate the Fast heat up function, temperature. horizontal bars on the display flash to show that If you do not change the this temperature in less the function operates. than approximately 5 seconds, the appliance Lock and Child Safety Device starts to heat. -
Page 25: Trivet And Grill- / Roasting Pan
Wire shelf and the deep pan together: 2. Put the deep pan into the oven on the necessary shelf position. Push the deep pan between the guide bars of You can use the trivet to grill flat dishes in large the shelf support and the wire shelf on the guide quantities and to toast. - Page 26 Put the wire shelf on the telescopic runners so that the feet point downwards. Put the baking tray or deep pan on the telescopic runners. Put the wire shelf on the deep pan. Put the wire shelf and the deep pan on the telescopic runners.
-
Page 27: Oven - Clock Functions
Oven - Clock functions Clock functions table Clock function Application TIME OF DAY To set, change or check the time of day. DURATION To set how long the appliance operates. To set when the appliance deactivates. TIME DELAY To combine DURATION and END function. MINUTE MINDER To set countdown time. -
Page 28: Oven - Hints And Tips
Oven - Hints and tips Main oven Warning! Refer to Safety chapters. The main oven is particularly suitable for cooking larger quantities of food. The temperature and baking times Baking in the tables are guidelines only. They depend on the recipes and •... -
Page 29: Conventional Baking - Top Oven
Baking results Possible cause Remedy The cake is too dry. The oven temperature is too low. The next time you bake, set a high- er oven temperature. The cake is too dry. The baking time is too long. The next time you bake, set a shorter baking time. -
Page 30: Conventional Baking - Main Oven
Food Temperature (°C) Time (min) Shelf position Fish Pie (Potato Topped) 190 - 200 20 - 30 Fruit Pies, Crumbles 190 - 200 30 - 50 Milk Puddings 150 - 170 90 - 120 Pasta Lasagne etc. 170 - 180 40 - 50 Pastry: Choux 180 - 190... -
Page 31: Thermaflow® Baking - Main Oven
Food Temperature (°C) Time (min) Shelf position Cakes: Apple Pie 170 - 180 50 - 60 - Shortbread 140 - 160 45 - 60 Fish 170 - 190 30 - 40 Fruit Pies, Crumbles 180 - 200 30 - 50 Milk Puddings 150 - 170 60 - 90... -
Page 32: Pizza Setting
Food Temperature (°C) Time (min) Shelf posi- tion Cakes: Madeira 140 - 160 60 - 80 Cakes: Rich Fruit 130 - 140 120 - 150 Cakes: Christmas 130 - 140 180 - 270 Cakes: Apple Pie 160 - 170 50 - 60 - Shortbread 130 - 150 45 - 60... -
Page 33: Roasting
Roasting • If necessary, turn the roast after 1/2 to 2/3 of the cooking time. • To keep meat more succulent: • Use heat-resistant ovenware to roast. Refer to – roast lean meat in the roasting tin with the the instructions of the ovenware manufacturer. lid or use roasting bag. -
Page 34: Dual Grill - Top Oven
Dual Grill - Top Oven Food Time (min) Shelf position Bacon Rashers 5 - 6 Beefburgers 10 - 20 Chicken Joints 20 - 40 Chops - Lamb 15 - 25 2 - 3 Chops - Pork 20 - 25 2 - 3 Fish - Whole / Trout / Makarel 10 - 12 Fillets - Plaice / Cod... -
Page 35: Low Temperature Cooking
Food Quantity (kg) Temperature Time (min) Shelf posi- (°C) tion Pork: Meatloaf 0.75 - 1 160 - 170 45 - 60 Pork: Knuckle of pork 0.75 - 1 150 - 170 90 - 120 (pre-cooked) Veal: Roast veal 160 - 180 90 - 120 Veal: Knuckle of veal 1.5 - 2... -
Page 36: Defrost
Food Quantity Temperature Preheating time (min) Shelf po- (°C) sition Rare Medium Roast beef (well done) 1200 - 1600 g 120 - 130 160 - 170 Rib of beef 600 - 1000 g 55 - 75 95 - 110 Shoulder of beef, boneless 3.5 cm high 70 - 80 Tenderloin of beef, whole... -
Page 37: Oven - Care And Cleaning
Oven - Care and cleaning Catalytic cleaning Warning! Refer to Safety chapters. Caution! Do not clean the catalytic surface with oven Notes on cleaning sprays, abrasive cleaning agents, soap or other cleaning • Clean the front of the appliance with a soft agents. -
Page 38: Removing The Shelf Supports
Removing the shelf supports Removing and cleaning the door glasses - top oven To clean the oven, remove the shelf supports. 1. Pull the front of the shelf support away from The door glass in your product can the side wall. be different in type and shape from the examples you see in the image. -
Page 39: Replacing The Lamp
Use the same oven lamp type. 4. Install the glass cover. 2. Pull up the trim. 3. Remove the glass panels. To replace the glass panels, do the same steps in reverse. Before you lower the trim, attach the A trim part to the door. -
Page 40: Troubleshooting
Troubleshooting Warning! Refer to Safety chapters. What to do if... Problem Possible cause Remedy You cannot activate the appliance. The appliance is not connected to Check if the appliance is correctly an electrical supply or it is connec- connected to the electrical supply. ted incorrectly. - Page 41 Problem Possible cause Remedy Automatic Heat Up function does The highest heat setting is set. The highest heat setting has the not operate. same power as the function. The sensor fields become hot. The cookware is too large or you Put large cookware on the rear put it too near to the controls.
-
Page 42: Service Data
Problem Possible cause Remedy The display shows an error code There is an electrical fault. Deactivate the appliance with the that is not in this table. house fuse or the safety switch in the fuse box and activate it again. If the display shows the error code again, contact the Customer Care Department. -
Page 43: Installation
Installation Electrical installation Warning! Refer to Safety chapters. Warning! The manufacturer is not responsible if you do Technical data not follow the safety precautions from Safety chapters. Dimensions This appliance is supplied without a main plug or Height 894 - 912 mm a main cable. -
Page 44: Covering Terminal Board
Covering terminal board • The recommended cross-section area is six square millimetres (6 mm²). • When you refit the mains terminal cover, make sure that the lower tabs are located inside the bottom edge of the aperture, before you fix the two screws into the top edge of the mains terminal cover. -
Page 45: Energy Efficiency
Energy efficiency Product information for hob according to EU 66/2014 Model identification JLFSEC612 Type of hob Hob inside Freestanding Cooker Number of cooking zones Heating technology Induction Diameter of circular cooking zones Left front 21.0 cm (Ø) Left rear 14.0 cm Right front 18.0 cm... -
Page 46: Oven - Energy Saving
Top oven: 105.6 Energy Efficiency Index Main oven: 104.7 Top oven: A Energy efficiency class Main oven: A Top oven: 0.75 kWh/cycle Energy consumption with a standard load, conventional mode Main oven: 0.99 kWh/cycle Top oven: not applicable Energy consumption with a standard load, fan-forced mode Main oven: 0.89 kWh/cycle Number of cavities Heat source... -
Page 47: Repairs - After Sales Service
Shopping is easy with John Lewis Shops manual, the next step is to contact John Lewis John Lewis, Aberdeen 01224 625 000 technical support on: John Lewis, Basingstoke 01256 406200... - Page 48 John Lewis, Croydon 020 8662 4730 John Lewis, Stratford 020 8532 3500 John Lewis, Horsham 01403 214 740 John Lewis, The Trafford Centre 0161 491 4040 John Lewis, Ipswich 01473 275 850 John Lewis, Watford 01923 244 266 John Lewis, Newbury 01635 263 980...
- Page 49 ENVIRONMENTAL CONCERNS marked with the symbol with the household Recycle materials with the symbol . Put the waste. Return the product to your local packaging in relevant containers to recycle it. recycling facility or contact your municipal office. Help protect the environment and human health by recycling waste of electrical and electronic appliances.
- Page 50 Cooker User Manual...
- Page 51 Cooker User Manual...
- Page 52 867337541-A-292017 ( Subject to change without notice. )
Need help?
Do you have a question about the JLFSEC612 and is the answer not in the manual?
Questions and answers