Table of Contents
Advertisement
Advertisement
Table of Contents

Related Manuals for John Lewis JLFSMFC 601


Summary of Contents for John Lewis JLFSMFC 601
- Page 1 JLFSMFC 601 Multifunction Cooker Instruction manual...
-
Page 2: Important Safety Information
These warnings have been provided in the interest of safety. You MUST read them carefully before installing or using the appliance.If you are unsure of the meanings of the these warnings con- tact the John Lewis branch from which you purchased the appliance. Installation •... -
Page 3: Maintenance And Cleaning
• Do not place or store sealed cans, aerosols, flam- mable liquids, highly inflammable materials or fusible objects (e.g. plastics film, plastic, aluminium) inside, on, above or near the cooker. • Do not hang towels, dishcloths or clothes from the oven or its handles. -
Page 4: Table Of Contents
Contents Important safety information Guide to using the instruction manual The following symbols will be found in the text to guide Description of the appliance you throughout the instructions: Installation Technical specifications Safety instructions Electrical connection Gas connection Stability chain Hints and tips Description of the hob Assembly... -
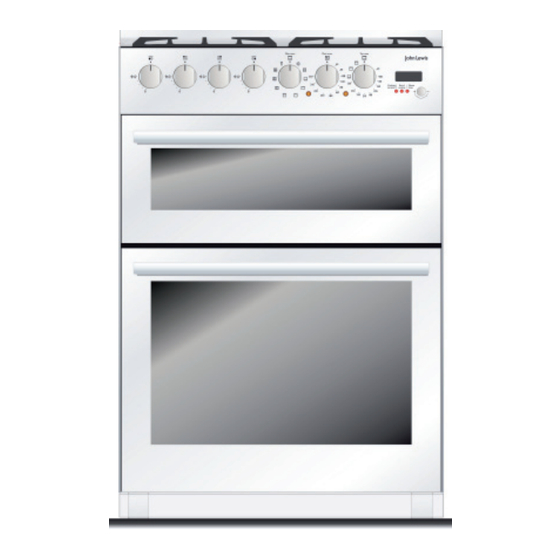
Page 5: Description Of The Appliance
Description of the appliance Control panel Conventional top oven Multifunction main oven... -
Page 6: Installation
Installation It is dangerous to alter the specifications or attempt to modify this product in any way. Care must be taken to ensure that the appliance does not stand on the electrical supply cable (not supplied). Any electrical work required to install this appliance should be carried out by a qualified electrician or competent person. -
Page 7: Electrical Connection
Electrical connection Proceed as follows: WARNING: This appliance must be earthed. Do not earth this appliance to the gas supply piping. • Open the terminal board box, unscrew the screw A Connect to 230 - 240V AC supply only. that locks the cable; •... -
Page 8: Gas Connection
Gas connection The cooker is designed to match the depth of standard The room containing the appliance should have an air 600mm worktops. An adaptor back plate should, the- supply in accordance with B.S. 5440 part 2. refore, be fitted within the shaded area shown to allow 1. -
Page 9: Stability Chain
Stability chain The cooker is fitted with a stability device such as The wall behind the cooker between the hotpla- a proprietary stability chain as shown and firmly te and 450mm above, and across the width of the secured to the fabric of the building.Whatever the cooker, must be an incombustible material such as position, remember to leave enough room for the ceramic wall tiles.This appliance is designed not to... -
Page 10: Description Of The Hob
Description of the hob Triple ring burner 3.90 kW Simmer burner 1.00 kW Semi-rapid burner 1.75 kW Rapid burner 3.00 kW Assembly Fitting the adjustable feet Should it be necessary to move the cooker, screw the feet in completely and carry out the final levelling adjustment only when the Before assembling the cooker remove all gas and electrical connections have been... -
Page 11: The Control Panel
The control panel The control panel Description of electric oven knobs All the commands and controls for cooking with The main oven is controlled by two knobs: function switch knob and thermostat knob. They allow you to the hob and ovens are on the control panel. choose the most suitable type of heating for diffe- rent cooking requirements, by switching on the hea- Description of hob burner knob... -
Page 12: Conversion From Natural Gas To Lpg
Conversion from natural gas to LPG It is important to note that this model is designed Minimum flow of non-valved for use with natural gas but can be converted for cooking hob taps use with butane or propane gas (conversion kit •... -
Page 13: Using The Hob
Using the hob Switching off the burners Before use make sure the Burner caps and Pan supports are correctly fitted. At the end of the cooking, return the knob to position . Suggestions for using the hob bur- During normal use the cooker will get hot. ners correctly Caution should therefore be used. -
Page 14: Using The Ovens
Using the ovens bottom element to cook foods from the base. During normal use the cooker will get hot. TOP HEAT. The heat distributes from the top Caution should therefore be used. Avoid lea- element. Ideal for browning the top of dishes ving the oven door open during use and im- without grilling. -
Page 15: Electronic Programmer
Electronic programmer The electronic programmer is a high-technology component which, by using only one knob, allows you to use all the functions that are usually made with more than one knob. This simple system easily allows you to use all the cooking programmes of your appliance. In addition to turning clockwise and anti-clockwise, it can be used as a push button. -
Page 16: Conventional Oven (Top Oven)
stat knob) as described on page 11-13. At the pre-programmed time the oven switches on and the display shows the remaining cooking time and the LED lights flash. At the end of the pre-programmed time the timer switches off, the display shows „END‰ and a warning alarm will sound. - Page 17 Conventional oven (Top oven) CONVENTIONAL COOKING with heat distri- bution from above and from below. With the same knob is possible to set the temperature till a maximum of 260 C °. BOTTOM HEAT with a maximum temperature of 260 °C;...
-
Page 18: Maintenance And Cleaning
Maintenance and cleaning Cleaning the pan supports and Before cleaning or carrying out mainte- burners nance, switch off the power supply to the cooker and close the gas taps. To clean the pan supports and hob burners, remove them Do not clean the surfaces of the cooker from their housing by lifting them upwards as shown when they are still hot. -
Page 19: Cleaning The Oven
Cleaning the oven Replacing the light bulb In order to maintain the oven’s efficiency and for hygienic Before carrying out maintenance, switch reasons, it should be cleaned regularly, each time it is used off the power supply to the cooker. if possible, after leaving it to cool: in this way it is possible to remove any residue more easily preventing it from bur- ning on the next time the oven is used. -
Page 20: Special Maintenance
Special maintenance Periodically, it is necessary to maintain or replace some parts that are subject to wear and tear. Specific instructions are given below for each type of maintenance. Before carrying out maintenance, switch off the power supply to the cooker and clo- se the gas taps. -
Page 21: Something Not Working
Something not working If the appliance is not working correctly, please carry out IMPORTANT : If you call out an engineer the following checks before contacting your local Service to a fault listed below, or to repair a fault Force agent. caused by incorrect use or installation, a charge will be made even if the appliance is under guarantee. -
Page 22: Repairs - After Sales Service
“Something Not Working”. the appliance yourself. Repairs carried out by inexpe- rienced persons may cause injury or serious malfunctio- ning. Contact your local John Lewis branch. When you contact your local Service Force Centre you details: will need to give the following Your name, address and post code. - Page 23 NOTES...
- Page 24 John Lewis Partnership 171 Victoria Street London SW1E 5NN www.johnlewis.com 822 930 410 -A-01 11/06 ZS3625 COD. 03201779...
Need help?
Do you have a question about the JLFSMFC 601 and is the answer not in the manual?
Questions and answers