Table of Contents
Advertisement
Advertisement
Table of Contents

Related Manuals for John Lewis JLFSMC607


Summary of Contents for John Lewis JLFSMC607
- Page 1 JLFSMC607 JLFSMC609 Multi function cooker Instruction manual...
-
Page 2: Important Safety Information
Important safety information Thank you for purchasing this appliance. This manual is an integral part of the appliance and therefore must be kept in its entirety and in an accessible place for the whole working life of the cooker. Please read the instructions and warnings carefully before use to ensure safe and satisfactory operation of this product. - Page 3 replaced by qualified personnel. Never place saucepans with bases which are not perfectly flat and smooth on the cooking surface. Unstable cookware can lead to scalding. During use the appliance becomes very hot. Take care not to touch the heating elements inside the ovens.
-
Page 4: Table Of Contents
Contents For the user Important safety information 2 Guide to using the instruction manual Environmental information Description of the appliance The control panel Using your appliance Before the first use Use of the Ovens Oven functions Using the grill Cooking advice Cooking process information table Automatic programmer Use of the hob... -
Page 5: Environmental Information
Environmental information Our product's packing is made of non-polluting materials, which are therefore compatible with the environment and recyclable. Please help by disposing of the packaging correctly. You can obtain the addresses of collection, recycling and disposal centres from your retailer or from the competent local organisations. -
Page 6: Description Of The Appliance
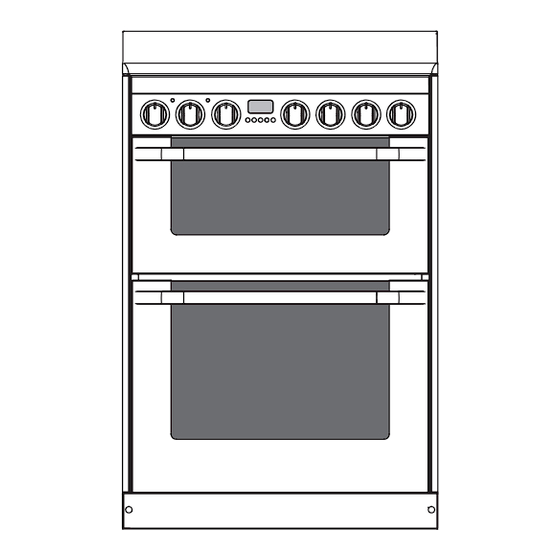
Description of the appliance 1 Front control panel 2 Oven light (auxiliary oven) 3 Oven guide for shelf and pan (auxiliary oven) 4 Oven door (auxiliary oven) 5 Oven light 6 Oven fan 7 Oven guide for shelf and pan 8 Oven door... -
Page 7: The Control Panel
The control panel 1 Auxiliary oven function/thermostat knob 2 Oven function knob 3 Oven thermostat knob 4 Automatic programmer 5 Front left cooking zone knob 6 Rear left cooking zone knob 7 Rear right cooking zone knob 8 Front right cooking zone knob... -
Page 8: Using Your Appliance
Using your appliance Before the first use • Remove all packaging and accessories from inside the ovens. • The inside of the appliance should be cleaned to remove all manufacturing residues. • Using the oven for the first time, heat them to the maximum temperature for as long as it takes to burn off any production oil residues which could give a nasty... - Page 9 To use the main oven: 1 Turn the function selecor knob clockwise to the desired function. 2 Turn the temperature selector knob clockwise to the desired temperature. The orange light comes on to indicate that the oven is warming up. When it goes out it means that the required temperature has been reached.
-
Page 10: Oven Functions
Oven functions When using any of the functions in the main or auxiliary oven (except grilling) it is always recommended that you pre-heat the oven. Static (main - auxiliary) As the heat comes from above and below at the same time, this system is particularly suitable for certain types of food. - Page 11 Circular (main) The combination of the fan and the circular element (incorporated in the rear of the oven) enables different foods to be cooked on several levels, as long as they need the same temperature and cooking time. Hot air circulation ensures instant and uniform distribution of heat.
-
Page 12: Using The Grill
Using the grill Warning! Keep the oven door closed during grilling. Warning! During and after use of the grill the accessible parts can be very hot; it is therefore necessary to keep children away from the appliance. Caution! The duration of cooking should not last more than 30 minutes. -
Page 13: Cooking Advice
Cooking advice General advice • We recommend preheating the oven before putting the food in. Place the food in the oven only once the cooking light is lit with a steady light. • For cooking on several levels, we recommend using a fan-assisted function to achieve uniform cooking at all heights. -
Page 14: Cooking Process Information Table
Cooking process information table Types of food Weight Lasagne 3 Kg Oven-Baked pasta Roast veal 1 Kg Pork Iron 1 Kg Shoulder of pork 1 Kg Roast rabbit 1 Kg Turkey breast 1 Kg Roast neck of 1 Kg pork Roast chicken 1 Kg Pork chops... -
Page 15: Automatic Programmer
Automatic programmer 1 Minute-timer key 2 Cooking period key 3 End time key 4 Decrease time key 5 Increase time key Before setting the programmer for semi/automatic cooking, activate the desired function and temperature. Set the clock: When using the oven for the first time, or after a power failure, the display flashes regularly and indicates 00:00. - Page 16 To set the oven to switch off automatically at a set time: Use this function if you have already started cooking and want the oven to switch-off at a set time. (for example at 19.30). 1 Press the “end time” key, the display lights up, showing the current time.
-
Page 17: Use Of The Hob
Use of the hob Caution! Before lighting the hob burners check that the flame caps are in the correct position and that their burner caps are in place, making sure that the holes A in the flame caps correspond to the spark plugs and thermocouples. -
Page 18: Hob Burners
In the event of a power failure the burners can be lit with a match or gas lighter. The flame failure devices will continue to function normally. Practical advice for using the hob burners For better use of the burners and lower gas consumption, use covered vessel that are proportional in size to the burner to prevent the flame from licking the sides. -
Page 19: Cleaning Your Appliance
Cleaning your appliance Warning! Before any intervention, disconnect the power supply of the device Caution! Never use a steam jet to clean the appliance. Cleaning stainless steel To keep stainless steel in good condition, it must be cleaned regularly when you are done using the cooker, after it has cooled. -
Page 20: Cleaning The Door Glazing
Removing the guide frames Removing the guide frames enables the sides to cleaned more easily. To remove the guide frames: Cleaning the door glazing The door glazing should always be kept thoroughly clean. Use absorbent paper towels, remove stubborn dirt with a damp sponge and ordinary detergent. - Page 21 The burners The burners can be left to soak in hot water and detergent. The cooking hob should be regularly cleaned; best after every use, once the residual heat signal lamps have gone off. Smudges from aluminium-bottom pans can be easily cleaned off with a cloth dampened in vinegar.
-
Page 22: Extraordinary Maintenance
Extraordinary maintenance The oven may require extraordinary maintenance or replacement of parts subject to wear such as seals, bulbs, and so on. The following instructions describe how to carry out these minor maintenance operations. Warning! Before any intervention, disconnect the power supply of the device. -
Page 23: Removing The Door
Removing the door 1 Open the door completely. Insert a pintle into the hole in the hinge. Repeat for both hinges. 2 Grasp the door on both sides with both hands, lift it forming an angle of around 30° and remove it. 3 To reassemble the door, put the hinges in the relevant slots in the oven, making sure that grooved sections A are resting... -
Page 24: Removing The Internal Glass Panels
Removing the internal glass panels The glass in the door should always be kept thoroughly clean. To facilitate cleaning, it is possible to remove the door (see Removing the door) and place it on a canvas, or open it and lock the hinges in order to extract the glass panels. - Page 25 indicated by the arrows (1). Then pull the front of the glass panel upwards (2) 3 It is now possible to clean the external glass panel and the panels removed previously. Use absorbent kitchen roll. In the case of stubborn dirt, wash with a damp sponge and neutral detergent.
-
Page 26: Something Not Working
Something not working Probem - The oven is not wired in or switch on at the wall. The oven doesn't - There is a power failure. work - An automatic cooking program has been set. - The oven is dirty. The oven smokes - Food has spilled over. -
Page 27: Installation Of The Appliance
Installation of the appliance Distances The appliance must be installed by a qualified technician and according to the standards in force. Depending on the type of installation, this appliance belongs to class 2, subclass1 (Fig. A - Fig. B) or class 1 (Fig. C). It may be installed next to walls, one of which must be higher than the appliance, at a minimum distance of 50 mm from the side... -
Page 28: Room Ventilation And Combustion Extraction
220-240V ~ three-core cable (3 x 2.5 mm²) Complete wiring up to power supply with an appropriately rated five-core plug (see data plate) or, in case of operation from a 220- 240V power supply, with a three-core plug. Make sure that plug and wall socket are of the same type and are in conformity with regulations in force. -
Page 29: Adaptation To Different Types Of Gas
then tighten the adapter B to it as indicated in the figure. Screw the assembly to the moveable connector A of the appliance, placing the seal C between them. When making the connection, make sure that no stress of any kind is applied to the cooker and that the hose does not touch any sharp edges. -
Page 30: Burner And Nozzle Characteristics Table
Burner and nozzle characteristics table Rated heating Burner capacity (kW) Auxiliary 1.05 Semi rapid Triple crown Rated heating Burner capacity (kW) Auxiliary 1.05 Semi rapid Triple crown LPG – G30/G31 28/37 mbar Reduced Nozzle diameter flowrate 1/100 mm 1600 NATURAL GAS – G20 20 mbar Nozzle diameter 1/100 mm Flowrate Flowrate... -
Page 31: Levelling The Appliance
Levelling the appliance After making the electrical and/or gas connections, level the appliance on the floor by means of its four adjustable feet. The appliance must be properly levelled to ensure stability. Rear top skirtboard Caution! Always install the rear top skirtboard which is an integral part of the appliance. - Page 32 3 Use the same height on the wall to drill the holes for fastening the brackets. The distance between the centres of the holes is given in the diagram above. 4 Before tightening the brackets fully to the wall, check that the index on the brackets is at the same height as the index on the back of the appliance.
-
Page 33: Installation Checklist
Installation checklist The qualified technician should complete this checklist and leave it with the owner of the cooker. Date of installation: Cooker model numer: Cooker serial number: Please tick to confirm that the following checks have been completed: The cooker is level Gas soundness checks complete Simmer settings checked and adjusted if necessary... -
Page 35: Spare Parts
Your appliance comes with a three year guarantee, if it is not working properly consult the fault finding guides within this instruction book (Something not working). If a fault occurs which you can not resolve through following the advice and information contained within this instruction manual, the next step is to contact our extended warranty administrators on... - Page 36 John Lewis Partnership 171 Victoria Street London SW1E 5NN www.johnlewis.com ANC Number JLFSMC607 Date 0111 JLFSMC609...
Need help?
Do you have a question about the JLFSMC607 and is the answer not in the manual?
Questions and answers