Table of Contents
Advertisement
Quick Links
Advertisement
Table of Contents

Subscribe to Our Youtube Channel
Related Manuals for Advantech EKI-1334


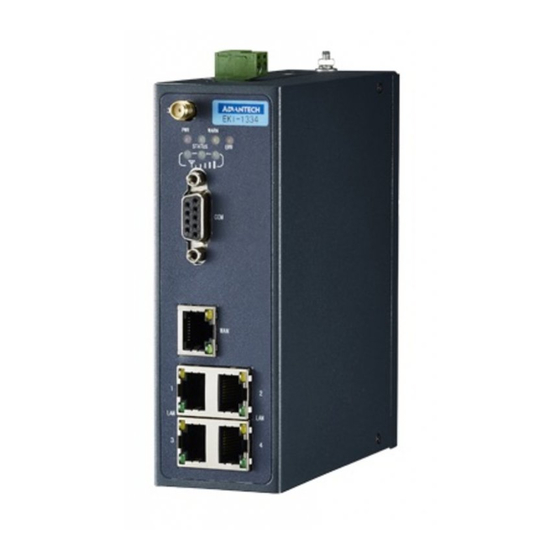
Summary of Contents for Advantech EKI-1334
- Page 1 User Manual EKI-1334...
- Page 2 No part of this manual may be reproduced, copied, translated or transmitted in any form or by any means without the prior written permission of Advantech Co., Ltd. Information provided in this manual is intended to be accurate and reliable. How- ever, Advantech Co., Ltd.
-
Page 3: Declaration Of Conformity
EMI leakage, we strongly recommend the use of CE-compliant industrial enclo- sure products. Technical Support and Assistance Visit the Advantech web site at http:support.advantech.com.cn where you can find the latest information about the product. Contact your distributor, sales representative, or Advantech's customer service center for technical support if you need additional assistance. -
Page 4: Safety Instructions
The sound pressure level at the operator's position according to IEC 704-1:1982 is no more than 70 dB (A). DISCLAIMER: This set of instructions is given according to IEC 704-1. Advantech disclaims all responsibility for the accuracy of any statements contained herein. - Page 5 Don't touch any components on the CPU card or other cards while the PC is on. Disconnect power before making any configuration changes. The sudden rush of power as you connect a jumper or install a card may damage sensitive elec- tronic components. EKI-1334 User Manual...
- Page 6 EKI-1334 User Manual...
-
Page 7: Table Of Contents
Antenna Installation ..............9 2.3.3 Power Supply................9 2.3.4 Connect..................9 2.3.5 Build Connection between EKI-1334 and PC ......10 2.3.6 Start to configure your EKI-1334 (Optional)........ 12 2.3.7 Connect EKI-1334 with Internet ..........14 Quick IPSec VPN Configuration.............. 15 Reset to Factory Defaults................ - Page 8 EKI-1334 User Manual viii...
-
Page 9: Chapter 1 Overview
Chapter Overview Sections include: Introduction Package Checklist Features & Specifications Product Models... -
Page 10: Introduction
Introduction EKI-1334 are M2M wireless routers that integrate 3G network and virtual private network (VPN) technologies. The products meet fundamental needs of field communication in industry, support international commercial UMTS (HSPA+) and GPRS network. The design of the EKI-1334 fully incorporated the requirements of industrial users, adopted multi-level software detection mechanism. -
Page 11: Package Checklist
Package Checklist We put each EKI-1334 cellular router in a box with standard accessories. Additionally, there’re optional accessories can be ordered. When you receive our package, please check carefully, and if there’re items missing or appearing to be damaged, please contact with your Advantech sales representative. -
Page 12: Product Features
Dynamic IP: Support DHCP, applied as Server/Client Dynamic DNS: – Support Dynamic DNS-IP Binding – Provide DDNS analyze to help access dynamic data center Flux Management: Support rate limiting, Firewall Function: – Package filtering – Port Mapping EKI-1334 User Manual... -
Page 13: Environmental Limits
Input Voltage: 9 ~ 26 V 1.3.5 Physical Characteristics Housing: Steel, providing IP30 protection Dimensions (mm): Back Side View Front View 1.3.6 Advanced Industrial Characteristics Physical Characteristics: Shell: Metal, IP30 1.3.7 Warranty Warranty Period: 5 year EKI-1334 User Manual... - Page 14 EKI-1334 User Manual...
-
Page 15: Chapter 2 Hardware Installation
Chapter Hardware Installation Sections include: Typical Application Panel Layout Quick Connect to Internet Quick IPSec VPN Configuration Reset to Factory Defaults... -
Page 16: Typical Application
Typical Application EKI-1334 can be used to connect your device (with RS232/Ethernet Interface) to Internet via GPRS/ 3G cellular network. Meanwhile, to ensure the security and access, EKI-1334 support VPN, enabling remote access and secure data transmis- sion through Internet. -
Page 17: Quick Connection To Internet
------ Signal: 20-31 (Perfect signal level) Quick Connection to Internet 2.3.1 Insert SIM Card Open EKI-1334 SIM/UIM card case at the bottom, insert the SIM card and close the case. 2.3.2 Antenna Installation After install the EKI-1334, connect the interface of enhanced antenna to the interface of skin antenna and screw tightly. -
Page 18: Build Connection Between Eki-1334 And Pc
2.3.5 Build Connection between EKI-1334 and PC EKI-1334 Router can auto-distribute IP address for PC. Please set the PC to auto- matically obtain IP address via DHCP. (Based on Windows Operation System): Open “Control Panel”, double click “Network Connections” icon, and enter “Net- work Connections”... - Page 19 192.168.2.0/24, for example, set IP: 192.168.2.10, Net Mask: 255.255.255.0, Default Gateway: 192.168.2.1) Click “OK”, EKI-1334 will allocate an IP address: 192.168.2.x, and a gateway: 192.168.2.1(the default address of EKI-1334). After configure TCP/IP protocols, you can use ping command to check whether the link between PC and Router is built correctly.
-
Page 20: Start To Configure Your Eki-1334 (Optional)
Then the PC and EKI-1334 are correctly connected. Else if it shows: The connection is not built, you need to check step by step starting from Section 2.3.4. 2.3.6 Start to configure your EKI-1334 (Optional) After you have finished the former steps, you can configure the EKI-1334: Open IE browser, input the default IP address of the Router: http://192.168.2.1,... - Page 21 Click “Network”=>“LAN”, change the IP address to 192.168.1.254: Click “Apply”, then you will see: Now the IP address of EKI-1334 has been reset, and in order to enter the configura- tion page, you need to set your PC in the same subnet as EKI-1334, for example: 192.168.1.10/24 then input the updated IP address (192.168.1.254) in your IE...
-
Page 22: Connect Eki-1334 With Internet
2.3.7 Connect EKI-1334 with Internet Follow the configuration steps below to enable EKI-1334 to connect to the internet. Click “Network”=>“Dialup”, enter dialup configuration interface: Please check the APN, Dialup Number, Username and Password: Dialup Number, Username and Password are provided by local mobile operator. -
Page 23: Quick Ipsec Vpn Configuration
After correctly configuring, EKI-1334 can now access Internet. Open IE Browser, input www.google.com, you should see the Google home page: Quick IPSec VPN Configuration If you need to build a VPN tunnel to access to your remote PLC through Internet or you need to ensure security of the data transmission, here’s a quick configuration... - Page 24 Subnet. Local Subnet: IPSec local subnet protected. E.g.: 172.16.16.0. Local Net Mask: IPSec local Net Mask protected. E.g.: 255.255.255.252. Remote Subnet: IPSec remote subnet protected. E.g.: 172.16.0.0. Remote Net Mask: IPSec remote Net Mask protected. E.g.: 255.240.0.0. EKI-1334 User Manual...
- Page 25 “Add” to add a new tunnel. Now you have successfully built a high-security IPSec tunnel. And the PC in IPSec client subnet can get access to the server’s subnet. Open command in your PC, then ping a PC in the server’s subnet: EKI-1334 User Manual...
-
Page 26: Reset To Factory Defaults
Legend: On-- Off-- Blink-- Press and hold RESET button while turning on EKI-1334: When you see ERROR LED turns on (about 10 seconds after power on), release the RESET button: After a few seconds, the ERROR LED will turn off, now press RESET button... -
Page 27: Web Approach
Then you will see ERROR and STATUS LED blink, which means reset to factory defaults succeed! Factory default settings: IP: 192.168.2.1 Net Mask: 255.255.255.0 Serial parameter: 19200-8-N-1 2.5.2 Web Approach Login the web interface of EKI-1334 , select “System”-->”Config Management”: Click “Restore default configuration” to Reset EKI-1334. EKI-1334 User Manual... - Page 28 EKI-1334 User Manual...
-
Page 29: Chapter 3 Advanced Configuration
Chapter Advanced Configuration Sections include: Configuration on Web CLI Configuration... -
Page 30: Configuration On Web
First, connect your devices to EKI-1334 with a cable or a HUB (switch), then set the IP of PC and EKI-1334 in the same subnet, for example: Set PC IP to 192.168.2.50, net mask: 255.255.255.0, gateway (default IP of EKI-1334: 192.168.2.1):... - Page 31 Open IE browser, input the IP address of EKI-1334: http://192.168.2.1 (default IP of EKI-1334). Then you’ll see the Login Window pop up, you need to login as Administrator. Input the username and password (default: adm/123456). Click “Login” to enter configure interface:...
-
Page 32: System
Example Language Choose language of configuration web Chinese English Router Name Set name of EKI-1334 Router My Router Host Name Name the device/PC linked with EKI-1334 Router My Router Time Name Description Default Router Time Display router time 2000-01-01 8:00:00... - Page 33 Serial data bits Parity Set parity bit of serial data. None Stop Bit Set stop bit of serial data. Hardware Flow Control Enable Hardware Flow Control Disable Software Flow Control Enable Software Flow Control Disable Admin Access EKI-1334 User Manual...
- Page 34 Service Type HTTP/HTTPS/TELNET/SSHD/Console 80/443/23/22/Blank Enable—allow manage Router by LAN(e.g.: HTTP) Local Access Enable Disable—forbid manage Router by LAN. Enable—allow to manage EKI-1334 by WAN. (e.g.: HTTP) Remote Access Enable Disable—forbid to manage EKI-1334 by WAN. (e.g.: HTTP) Control services server can be set at...
- Page 35 Name Description Router Configuration Import/Backup configuration file Restore default configu- Click to reset EKI-1334 (to enable RESET, you need to reboot EKI- ration 1334) Used to configure the APN, username, password and other param- Network Provider (ISP) eters of major operators...
- Page 36 Click “Browse”, choose the upgrade file; Click “update”, and then click “sure” to begin update, the window will show as below. Upgrade firmware succeed, and click “reboot” to restart EKI-1334 . Reboot If you need to reboot system, please click ”System”=>”Reboot”, then click ”OK” to restart system.
-
Page 37: Network
3.1.3 Network Network settings include Dialup, LAN, DNS, DDNS, Static Route, and etc. Dialup EKI-1334 User Manual... - Page 38 Enable Static IP if your SIM card can get static IP Static IP Disable address Connection Mode Optional Always Online, Always Online When Dial fails, EKI-1334 will redial after the Redial Interval 30 seconds interval Show Advanced Options Enable configure advanced options Disabled Initial Commands...
- Page 39 Set Time Range 2 14:00-18:00 Time Range 3 Set Time Range 3 0:00-0:00 Description Describe configuration Blank This page is to set the type of WAN port: Name Description Default Static IP; Dynamic Address(DHCP); Type Disabled ADSL Dialup(PPPoE); Disabled EKI-1334 User Manual...
- Page 40 Multi-IP Settings(can set 8 additional IP address at the most) IP address Set the additional IP address of LAN Blank Net Mask Set Net Mask Blank Description Describe the settings Blank WAN-Dynamic Address (DHCP) EKI-1334 User Manual...
- Page 41 Set Peer IP Blank Set connection mode (Connect on Demand/Always Always Connection Mode Online/ Manual) Online Advanced Options Show advanced Enable advanced configuration Disabled options Service Name Name the service Blank TX Queue Length Set TX Queue Length EKI-1334 User Manual...
- Page 42 “Networks”à “Dialup” and change dialup mode into “Trigger by SMS”. Multi-IP Settings (Support additional 8 IP addresses at the most) IP Address Set additional IP Address of LAN Blank Description Description about this IP address Blank EKI-1334 User Manual...
- Page 43 Name Description Default Primary DNS Set Primary DNS Blank Secondary DNS Set Secondary DNS Blank DDNS (Dynamic DNS) Name Description Default Current Address Show the current IP address Blank Service Type Select DDNS Provider Disabled EKI-1334 User Manual...
-
Page 44: Service
255.255.255.0 Gateway Set the gateway of destination Blank Interface Optional LAN/WAN port access to destination Blank Description Describe static route Blank 3.1.4 Service Service settings include DHCP Service, DNS Forwarding, VRRP and other related parameters. DHCP Service EKI-1334 User Manual... - Page 45 Disabled Designate IP address<=>DNS couples (20 at the most) IP Address Set IP address <=> DNS couples Blank Set the name of IP address <=> DNS Host Blank couples Description Describe IP address <=> DNS couples Blank EKI-1334 User Manual...
- Page 46 10 (bigger number stands for Priority (range 1—254) higher priority) Advertisement Interval Set ad interval 60 sec Virtual IP Set Virtual IP Blank Optional: None/Password Authentication Type None type Virtual MAC Set Virtual MAC Blank Monitor Set Monitor None VRRP-II EKI-1334 User Manual...
- Page 47 Phone List blocked to send SMS to router Note! Before using this function, please make sure you have a SIM card in the EKI-1334 that has SMS function. Otherwise, please contact local mobile operator to get one. EKI-1334 User Manual...
-
Page 48: Firewall
Source IP address Set Source IP address Blank Source Port Set Source Port Blank Destination IP Set destination IP Blank Destination Port Set destination port Blank Action Accept/Deny Accept Click to enable login Disable Description Describe your configuration Blank EKI-1334 User Manual... - Page 49 Set Virtual IP for Router Blank Source IP Range Set range of source IP address Blank Virtual IP Set virtual IP Blank Real IP Set real IP Blank Enable logging concerned with virtual IP Disable Description Describe this configuration Blank EKI-1334 User Manual...
- Page 50 DMZ (All Port Mapping) Mapping all the ports and then external PC can get access to all the ports of internal device behind EKI-1334. Caution! This function cannot map the admin port of EKI-1334 (e.g.: 80 TCP) to the device’s port. Name...
-
Page 51: Qos
Set the limit speed of inbound 100000kbit/s Bandwidth bandwidth IP BM Limit Name Description Default Enable Click to enable Disable IP Address Set IP Address Blank Rate Set Rate 100 kbit/s Priority Set the Priority Medum Description Describe this configuration Blank EKI-1334 User Manual... -
Page 52: Vpn
3.1.7 This page introduces the parameters in EKI-1334 Web. IPSec Settings To build an IPSec VPN Tunnel, you need to first set IPSec properties on this page, then go to IPSec Tunnels to add your VPN: IPSec Settings Description: Select to Enable or Disable NATT, normally we need to enable, unless you ensure there is no NAT routers in the network. - Page 53 Tunnel Name To name the tunnel IPSec_tunnel_1 Set the destination address of Destination Address Blank IPSec VPN Server Auto Activate/Trigged by Data/ Startup Mode Enable Passive/Manually Activated Optional: Main Mode or Negotiation Mode Main Mode Aggressive Mode EKI-1334 User Manual...
- Page 54 Set ICMP Detection Server Blank ICMP Detection Local IP Set ICMP Detection Local IP ICMP Detection Interval Set ICMP Detection Interval 30sec ICMP Detection Timeout Set ICMP Detection Interval 5sec ICMP Detection Max Set ICMP Detection Max Retries Retries EKI-1334 User Manual...
- Page 55 Set Remote Virtual IP 0.0.0.0 Remote Subnet Address Set Remote Subnet Address 0.0.0.0 Remote Subnet Net Mask Set Remote Subnet Net Mask 255.255.255.0 Set Tunnel Key Blank Click Enable NAT Function Disable Description Add Description Blank L2TP Clients EKI-1334 User Manual...
- Page 56 Set Max Retries for Link Max Retries for Link Detection Detection Enable NAT Click Enable NAT Disable Set MTU parameters 1500 Set MRU parameters 1500 Enable Debug Mode Click Enable Debug Mode Disable Expert Options Set Expert Options Blank PPTP Clients EKI-1334 User Manual...
- Page 57 Enable MPPE Click Enable MPPE Blank Enable MPPC Click Enable MPPC Blank Set MTU parameters 1500 Set MRU parameters 1500 Enable Debug Mode Click Enable Debug Mode Blank Expert Options For Advantech R&D only Blank OpenVPN Settings EKI-1334 User Manual...
- Page 58 Set shared key or TLS-AUTH static password Remote Subnet, Remote Net Set the static route of the router, always towards the subnet mask of its peer Link Detection Interval, Link Always use default Detection Timeout Renegotiate Interval Always use default EKI-1334 User Manual...
- Page 59 Username (using Username/password mode) or Common Username/Common Name Name in CA (CA mode) Local Static Route The client subnet Remote Static Route The server subnet Caution! CA can only be produced by customer’s PC; EKI-1334 cannot produce EKI-1334 User Manual...
- Page 60 Import or Export (CA) Certifi- Import/Export CA Certificate Blank cate Import or Export Certificate Import/Export Certificate (CRL) Blank (CRL) Import or Export Public Key Import/Export Public Key Certificate Blank Certificate Import or Export Private Certifi- Import/Export Private Key Certificate Blank cate EKI-1334 User Manual...
-
Page 61: Tools
32 Bytes Expert Options Advanced parameters Blank Trace Route Name Description Default Host Destination for Trace Route Blank Max Hops Set Max Hops Time Out Set Time Out 3 sec Protocol Optional: ICMP/UDP Expert Options Advanced parameters Blank EKI-1334 User Manual... -
Page 62: Status
Status contains System, Modem, WLAN, Network Connections, Route Table, Device List and Log. System Status This page shows the status of system, including Name, Model Type, Current Version and etc. Modem Status This page shows the status of Modem, including signal level. EKI-1334 User Manual... - Page 63 Network Connections This page shows the network connections via WAN or LAN Route Table This page shows the route table of EKI-1334 . Device List This page shows the devices linked with EKI-1334 . EKI-1334 User Manual...
- Page 64 This page shows the log of system, including download log file. Under certain situation when there’re problems that can’t be diagnosed at the moment, you’ll be asked to provide the diagnose log to Advantech engineers. EKI-1334 User Manual...
-
Page 65: Cli Configuration
This chapter will show you how to configure via CLI. 3.2.1 CLI Operation Input telnet LAN IP to login CLI configuration. For example: After connection is succeed, input username and password of EKI-1334 . The default username/password is adm/123456. Caution! Password will not be showed. EKI-1334 User Manual... - Page 66 Login to User Mode This screenshot is the config-view of IR700. Enter privileged mode, password is 123456 EKI-1334 User Manual...
-
Page 67: Cli Command
Enter configured mode, then you could configure parameters you want to set 3.2.2 CLI command Configure username and password Enable serial function Configure serial port parameters, like baudrate, parity, stop bit and so on. Enable advanced options of dialup Configure ICMP server Configure LAN IP EKI-1334 User Manual... - Page 68 Enable DHCP function Configure DHCP IP pool: 192.168.2.10-192.168.2.20 Enable HTTP function Configure HTTP service port Enable HTTP local access Enable HTTP remote access Check device ID After configuration, please don’t forget to commit and reboot router! EKI-1334 User Manual...
-
Page 69: Faq
Appendix... -
Page 70: Faq
Whether the IP Address of your computer is the same subnet with EKI-1334 and the gateway address is EKI-1334 LAN address. EKI-1334 is powered on, have a ping to detect EKI-1334 from your PC and find packet loss? Please check if the network crossover cable is in good condition. -
Page 71: Support
EKI-1334? Check if the IP Address of the PC and EKI-1334 are in the same subnet and the gateway address is EKI-1334 LAN address. EKI-1334 is powered on, but can`t configure through the web interface? ... - Page 72 No part of this publication may be reproduced in any form or by any means, electronic, photocopying, recording or otherwise, without prior written permis- sion of the publisher. All brand and product names are trademarks or registered trademarks of their respective companies. © Advantech Co., Ltd. 2015...
Need help?
Do you have a question about the EKI-1334 and is the answer not in the manual?
Questions and answers