Table of Contents
Advertisement
Advertisement
Table of Contents

Related Manuals for ProLights Eclipse FC


Summary of Contents for ProLights Eclipse FC
-
Page 1: User Manual
ECLIPSEFS LED PROFILER ECLIPSEFS OPTIC 14° / 19° / 26° / 36° / 50° USER MANUAL... - Page 2 In order to improve the quality of products, PROLIGHTS reserves the right to modify the characteristics stated in this instruction manual at any time and without prior notice.
-
Page 3: Table Of Contents
ECLIPSEFS TABLE OF CONTENTS Safety General instructions Warnings and installation precautions 1 Introduction 1. 1 Description 1. 2 Technical specifications 1. 3 The configurations 1. 4 Operating elements and connections 2 Installation 2. 1 Mounting 3 Functions and settings 3. 1 Operation 3. -
Page 4: Eclipsefs
ECLIPSEFS WARNING! Before carrying out any operations with the unit, carefully read this instruction manual and keep it with cure for future reference. It contains important information about the installation, usage and maintenance of the unit. SAFETY General instruction • The products referred to in this manual conform to the European Community Directives and are there- fore marked with and approved for the North American Market. -
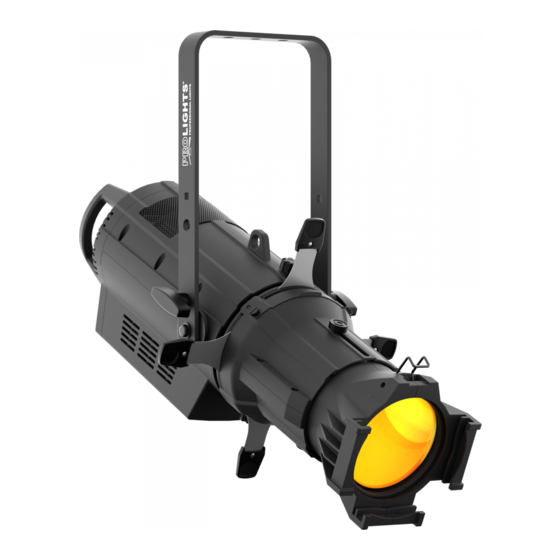
Page 5: Introduction
ECLIPSEFS - 1 - INTRODUCTION 1.1 DESCRIPTION ECLIPSEFS is a Full Color LED Elipsoidal designed to deliver a full range of pastels, whites or saturates smoothly, consistently, and both with or without gobos. The ECLIPSEFS’s RGB+Lime LED engine has been specially engineered to provide a full spectrum and full output in the most discerning environments, regardless of which role the ECLIPSEFS is playing. - Page 6 ECLIPSEFS • RDM: RDM ready for fixture remote monitor and settings • Display: Black OLED high resolution display • Firmware Upgrade: Yes, via USB-DMX interface (UPBOX2) not included • Master/Slave: for synchronized operation of more units linked in a chain ELECTRONICS •...
-
Page 7: The Configurations
ECLIPSEFS ECLIPSEFS + OPTIC 268.8mm/ 663.3mm/26,11in 10,58in Technical drawing Fig.1 1.3 THE CONFIGURATIONS Configuration Middle part, compatible with Reflector Housing 14°, 19°, 26°, 36°, 50° optics ECLIPSEFS Optics for ECLIPSE profiler, Optics for ECLIPSE profiler, 14° beam 19° beam Optics for ECLIPSE profiler, Optics for ECLIPSE profiler, 26°... -
Page 8: Operating Elements And Connections
ECLIPSEFS 1.4 OPERATING ELEMENTS AND CONNECTIONS Rear panel Fig.2 1. MOUNTING BRACKET 11. CONTROL PANEL with display and 4 button 2. LOCKING KNOB for the mounting bracket used to access the control panel functions 3. HANDLE and manage them. 4. ECLIPSEFS 12. -
Page 9: Installation
ECLIPSEFS - 2 - INSTALLATION 2.1 MOUNTING ECLIPSEFS may be set up on a solid and even surface. The unit can also be mounted upside down to a cross arm. For fixing, stable mounting clips are required. The mounting place must be of sufficient stability and be able to support a weight of 10 times of the unit’s weight. -
Page 10: Functions And Settings
ECLIPSEFS - 3 - FUNCTIONS AND SETTINGS 3.1 OPERATION Connect the supplied main cable to a socket (100-240 VAC-50/60 Hz). Then the unit is ready for operation and can be operated via a DMX controller or it independently performs its show program in succession. To switch off, disconnect the mains plug from the socket. -
Page 11: Menu Structure
ECLIPSEFS 3.3 MENU STRUCTURE MENU ð ð CONNECT DMX Address Value (1-512) ð DMX Mode 3CHRGBL 4CHRGBL 5CHRGBL 13CH ð RDM ID Name EclipseFS RDM Mode Password PID Code SET UP ð ð Temperature Temperature. C/F Max Temp 60~90°C/140~194°C(90°C) Screen ð... - Page 12 ECLIPSEFS Current XXXX(Hours) ð INFORMATION Time Info Fixture Life XXXX(Hours) Near Led driver Temp Temp Info (depends on fixture) Software Ver. 1U01 V1.2.00 ... ð ð STATIC Play DMX Receive Slave Receive Master / Alone/DMX Presets Master / Alone Color MIX Green Blue Lime...
-
Page 13: Static Mode
ECLIPSEFS 3.4 STATIC MODE This fixture has the ability to accept custom static color settings. Access these chases via the control panel on the back of the fixture. • Press the button MODE so many times until the display shows STATIC, then press the button ENTER. •... -
Page 14: Dmx Mode
ECLIPSEFS • Select Mode through the buttons UP/DOWN, then press the button ENTER. • Select the desired DMX configuration (1CH - 3CH - 3CHRGB - 4CH RGBL- 5CH - 5CHRGBL - 8CH - 13CH) through the buttons UP/DOWN. The tables on page 15 indicate the operating mode and DMX value. The ECLIPSEFS is equipped with 5-pole XLR connections. - Page 15 ECLIPSEFS port RDM. The number and type of RDM parameters depend on the RDM controller (not included) is used. • Press the button MODE so many times until the display shows CONNECT, then press the button ENTER. • Press the UP/DOWN button to scroll through the menu, then select RDM ID and press the ENTER button. •...
-
Page 16: Connection Of The Dmx Line
ECLIPSEFS 3.12 CONNECTION OF THE DMX LINE DMX connection employs standard XLR connectors. Use shielded pair-twisted cables with 120Ω imped- ance and low capacity. The following diagram shows the connection mode: DMX - INPUT DMX - OUTPUT XLR plug XLR socket Pin1 : GND - Shield Pin2 : - Negative Pin3 : + Positive... -
Page 17: Dmx Control
ECLIPSEFS 3.14 DMX CONTROL FUNCTION Value 8CH 13CH RGBL RGBL Dimmer Dimmer(Close to Open) 000 - 255 Dimmer fine Dimmer fine 0->100% 000 - 255 CTC 2000K ->10000K 000 - 255 CTC Fine CTC Fine Red 0->100% 000 - 255 Red fine Red fine 0->100% 000 - 255... -
Page 18: Setup
ECLIPSEFS 3.15 SETUP You can change the parameters for the device by following these steps: Temperature Through the Max Temperature function can be displayed the temperature inside the fixture, near the lamp. • Press the button MODE so many times until the display shows SETUP, then press the button ENTER. •... - Page 19 ECLIPSEFS • Press ENTER button to store. • Press the MODE button to go back or to meet the waiting time to exit the setup menu. Calibration Select this function to calibrate and adjust code and channel: • Press the button MODE so many times until the display shows ADVANCED, then press the button ENTER. •...
-
Page 20: Maintenance
ECLIPSEFS - 4 - MAINTENANCE 4.1 MAINTENANCE AND CLEANING THE UNIT • Make sure the area below the installation place is free from unwanted persons during setup. • Switch off the unit, unplug the main cable and wait until the unit has cooled down. •... - Page 21 ECLIPSEFS...
- Page 22 ECLIPSEFS...
Need help?
Do you have a question about the Eclipse FC and is the answer not in the manual?
Questions and answers