Table of Contents
Advertisement
Kit Specific Component List
27697 / 27797
HARDWARE CONTENT
Item
Part #
Description
A
26498-009
Harn – USB Display Cable .........................1
B
26498-006
Harn – Main Harness ..................................1
C
27050
3H/3P Display ...............................................1
D
24503
Fuse ATM 3A ..............................................1
E
24501
Fuse Holder ATM .......................................1
F
24502
Fuse Holder ATO/ATC ...............................1
G
24661
Heat Shrinkable Butt Splice 14-16GA ............1
H
24752
Heat Shrinkable Butt Splice 10-12GA ............3
I
24748
Ring Terminal 3/8" 10-12GA .........................2
J
24524
Ins. Female .187" Term. 14-16GA ................1
K
24594
Ins. Female .250" Term. 14-16GA ................1
MANIFOLD CONTENT
Item Part #
Description ....................................Qty
AE
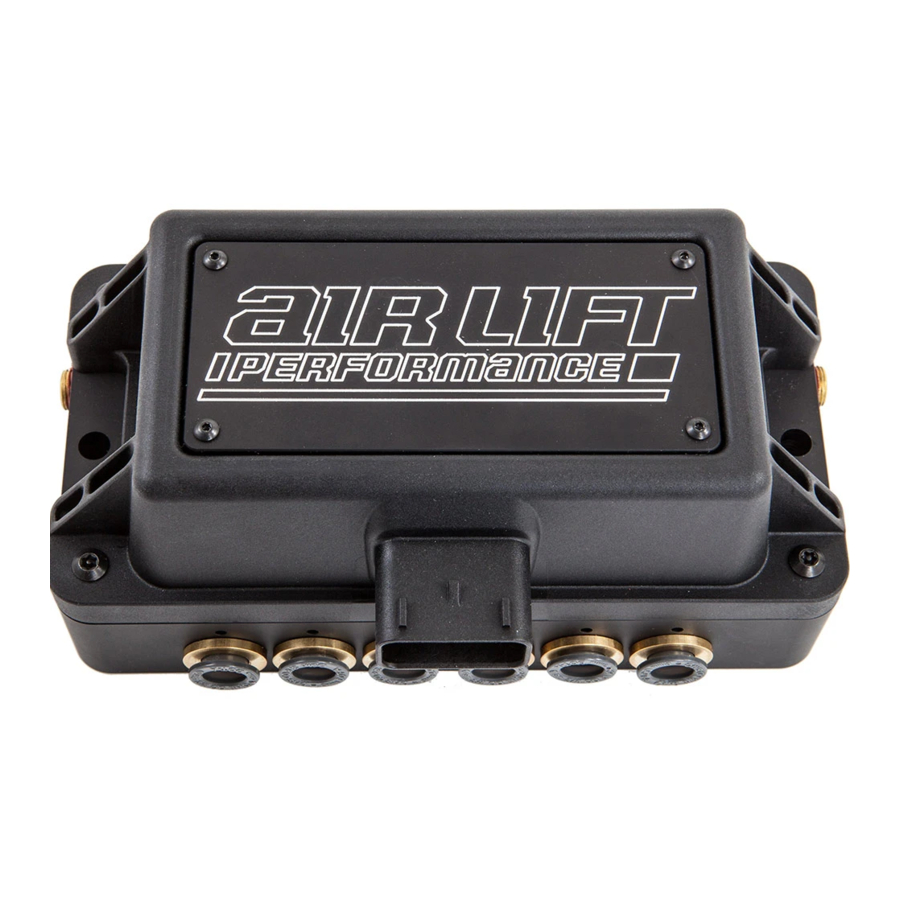
72614
Manifold ECU 3/8" .................................... 1
AF
20947
Air Line 3/8" ..........................................60 ft.
COMPRESSOR
Item
Part #
Description ....................................Qty
AG
16444
Compressor ................................................1
HEIGHT CONTENT
Item
Part #
Description ....................................Qty
W
34977
HPACK- Height Sensor Linkage .................4
X
26894
Height Sensor Assembly ............................4
Y
26953-012
Harn-12FT RL Height Sensor* ...................1
Z
26953-013
Harn-12FT RR Height Sensor* ...................1
AA
26953-020
Harn-20FT FL Height Sensor* ....................1
* FL = Front left corner
RL = Rear left corner
FR = Front right corner
RR = Rear right corner
Missing or damaged parts? Call Air Lift Company customer service at (800) 248-0892 for replacement parts.
STOP!
MN-994 • (021602) • ECR 8432
Image may not depict actual kit.
Qty
Item Part #
L
24561
M
24542
N
10466
O
17103
P
18542
Q
17263
R
17494
S
10530
T
24504
U
24505
V
24547
FILTER CONTENT
Item
Part #
AI
11217
AJ
11517
AK
17173
AL
20937
AM
22677
AN
21048
TANK
Item
Part #
AH
11955
AH
12955
Item Part #
AB
26953-021
AC
10466
AD
17497
AO
11998
Tank Fittings and Tank Hardware are listed on back of sheet
Installation Manual
Description ....................................Qty
ATM Fuse Tap Adapter ................................1
ATO/ATC Fuse Tap Adapter ........................1
Zip Tie 8" Black ...........................................20
Screw 5/16"-18 x 1" Zinc...............................2
Flat Washer 5/16" Stainless .........................2
Screw 1/4"-14 x 1" Self-Tapping Zinc ...........1
Screw 1/4"-14 x 2" Self-Tapping Zinc ...........2
Hose Cutter Kit..............................................1
Fuse Low-Profile Mini 3A ..............................1
Low-Profile Mini Fuse Tap ............................1
Fuse ATO/ATC 30A ....................................1
Description ....................................Qty
P Clamp, 1.5" Cushion ...............................1
Miniature Filter ............................................1
Screw #14-1/4 x 3/4" Self-Tapping .............1
Hose 1/4" Dia Poly ..................................5 ft.
Tee Fitting - 1/4" FNPT x (2) 1/4" PTC .......1
Pressure-Relief Valve .................................1
Description ....................................Qty
4 Gallon 5 Port Tank ...................................1
4 Gallon 5 Port Tank (Polished) .................1
Description ....................................Qty
Harn-20FT FR Height Sensor* ...................1
Zip Tie 8" Black .........................................20
Screw 10-16 x 1 3/4" Self-Tapping Zinc ............ 8
Height Sensor Spacer ......................................... 4
Advertisement
Chapters
Table of Contents

Related Manuals for Air Lift Performance 3P


Summary of Contents for Air Lift Performance 3P
- Page 1 Tank Fittings and Tank Hardware are listed on back of sheet FR = Front right corner RR = Rear right corner Missing or damaged parts? Call Air Lift Company customer service at (800) 248-0892 for replacement parts. STOP! MN-994 • (021602) • ECR 8432...
- Page 2 3/8” Flat Washer SAE .........8 18435 3/8”-16 Nylon Nut ........4 17188 3/8”-16 x 1.25 Hex Cap Screw ....4 Missing or damaged parts? Call Air Lift Company customer service at (800) 248-0892 for replacement parts. STOP! MN-994 • (021602) • ECR 8432...
-
Page 3: Installation Guide
Air Lift Performance 3H /3P ™ ™ INSTALLATION GUIDE For maximum effectiveness and safety, please read these instructions completely before proceeding with installation. Failure to read these instructions can result in an incorrect installation. - Page 4 Download the App for the Best #lifeonair The Air Lift Performance 3 mobile app allows for full integration of your new 3H/3P control system on compatible mobile devices. Simply download the FREE app to not only take full control of your system, but to always have the latest system firmware with updates directly from the app.
-
Page 5: Table Of Contents
Notation Explanation ..........3 Installing the Air Lift Performance 3H/3P Kit ..4 Layout Overview . -
Page 6: Component List
Screw 10-16 x 1 3/4” Self Tapping Zinc ... 8 11998 Height Sensor Spacer ....... 4 Missing or damaged parts? Call Air Lift customer service at (800) 248-0892 for replacement parts. STOP! * FL = Front left corner RL = Rear left corner... -
Page 7: Introduction
The information includes step-by-step installation information, installation templates and a troubleshooting guide. Air Lift Company reserves the right to make changes and improvements to its Air Lift Performance products and publications at any time. For the latest version of this manual, contact Air Lift Company at (800) 248-0892 or visit airliftperformance.com. -
Page 8: Installing The Air Lift Performance 3H/3P Kit
Installation Manual Installing Air Lift Performance 3H/3P Kit LAYOUT OVERVIEW For a complete installation diagram, see pages 16-17. See page 2 for a complete parts list. NOTE Layout 1. Plan component location first. Ideally, the manifold should be located at a level above the compressor and tank to avoid compressor ingested water from gathering in the manifold (fig. -
Page 9: Tank (Optional)
Installation Manual TANK (OPTIONAL) Tank pre-assembly 1. Determine tank location and orientation prior to installing fittings. 2. Before installing fittings, apply liquid pipe sealant or Teflon tape (not supplied) around the male threads, leaving the first two threads uncovered. NEVER BACK OFF AN INSTALLED PIPE FITTING TO ACHIEVE PROPER ALIGNMENT. CAUTION LOOSENING INSTALLED PIPE FITTINGS WILL CORRUPT THE SEAL AND CONTRIBUTE TO LEAKAGE AND FAILURE. -
Page 10: Filter
AIR COMPRESSORS TAKE IN MOISTURE (HUMIDITY) FROM THE OUTSIDE AIR CAUTION SOURCE, AND WILL DEPOSIT THAT MOISTURE IN THE AIR TANK. THE AIR LIFT PERFORMANCE 3H/3P SYSTEM INCLUDES A FILTER THAT WILL GREATLY REDUCE THE POTENTIAL FOR MOISTURE TO ENTER THE MANIFOLD. HOWEVER, TANKS MUST BE REGULARLY PURGED TO ELIMINATE THE POSSIBILITY OF WATER ENTERING THE MANIFOLD. - Page 11 The supplied harness is only capable of powering a single compressor. If installing NOTE dual compressors, a second dedicated power wire is required. Contact an AIR LIFT PERFORMANCE retailer to purchase the optional second compressor harness kit (part number: 27703).
- Page 12 Installation Manual 3. Display • Route the main harness display cable as desired to the preferred operating location. • Attach the 4’ display cable to the main harness cable, and to the back of the display. 4. Height sensor harness (optional) •...
-
Page 13: Installing Air Lines
Installation Manual INSTALLING AIR LINES 1. Route and attach the air lines from the manifold to the air springs and from the manifold to the filter, as well as from the filter to the tank, if not mounting filter directly to tank. •... -
Page 14: Manifold
Installation Manual MANIFOLD BEST PRACTICE IS TO LOCATE THE MANIFOLD UNIT INSIDE THE VEHICLE. IF CAUTION EXTERNAL MOUNTING IS DESIRED, THE MANIFOLD SHOULD BE LOCATED IN AN AREA SHIELDED FROM DIRECT WATER SPRAY FROM TIRES OR CAR WASHES. 1. Position the manifold in desired location. Make sure the manifold mounting surface is flat. -
Page 15: Compressor (Optional)
Installation Manual COMPRESSOR (OPTIONAL) 1. Prepare the compressor intake. If it is mounted inside the vehicle, attach the filter to port on end of compressor (fig. 14). If the compressor is located outside the vehicle, snorkel the inlet filter to dry location inside vehicle using components supplied with compressor (fig. -
Page 16: Height Sensors
Installation Manual IF THE PRESSURE-BASED SYSTEM IS ALREADY INSTALLED BEFORE HEIGHT WARNING SENSOR INSTALLATION, MAKE SURE TO TURN OFF RISE ON START TO AVOID UNINTENDED AIRING UP. (SEE USER GUIDE.) HEIGHT SENSORS Installation of height sensors is a trial-and-error process and requires patience. The goal is to use as much of the sensor range as possible which will maximize height adjustment accuracy. - Page 17 Installation Manual 6. Understand whether the suspension or wheel assembly is the limiting factor when the vehicle is aired out. This will ensure proper accommodation of sensor arm travel. 7. If using self-tapping screws into the frame, make sure there are no wires or brake/air/ fuel lines on the other side before installing screw.
- Page 18 Installation Manual SELECTING SENSOR ARM HOLE Max angle of travel for this sensor is 120 degrees, which can be correlated to the necessary suspension travel as seen in the table below (table 2). Any significant over-extension or over-compression may damage and possibly destroy the sensor or sensor linkage. First hole Second hole Third hole fig.
- Page 19 Installation Manual LINKAGE ASSEMBLY/MODIFICATION 1. Locate the linkage and ensure the rod is threaded all the way on (fig. 22). Thread both ends all the way down fig. 22 2. Next put the suspension in the mid-position with respect to full suspension travel (fig. 23). Mid-position Min. fig. 23 Max. 3. Fasten by finger tightening the linkage to the sensor arm and ensure the sensor arm is at mid-position with respect to the sensor (fig. 24). fig. 24 4. Loosen if needed in order to extend to reach the lower mounting point. If loosening the linkage to extend it is required, make sure to have at least 5 threads of engagement on both ends (fig. 25).
- Page 20 Installation Manual MN-946...
- Page 21 Installation Manual Heat-shrinkable butt splice MN-946...
- Page 22 Installation Manual HEIGHT SENSORS, CONT. FROM PAGE 15 6. Remove the rod linkage from the sensor arm and measure 1/2” back from the mark. This will show where to cut the rod (fig. 27). Mark Rod cover fig. 27 Cut here 1/2” 7. Before cutting the rod, thread the jam nut back on the rod. Use the nut to deburr the rod end. (fig. 28).
- Page 23 Installation Manual VERIFYING SUSPENSION RANGE Use the paper height sensor tool on page 25 or electronic sensor tool in the display to make sure the range is sufficient to provide accurate measurements (fig. 31). (See User’s Guide) Next, manually air the vehicle up and down to see if there is any issue with the travel of the sensor using the height sensor install tool.
-
Page 24: Troubleshooting Guide
Installation Manual Troubleshooting Guide For technical assistance please contact our customer service department by calling (800) 248-0892, Monday through Friday. For calls from outside the USA or Canada, dial (517) 322-2144 or email techsupport@airliftcompany.com. PROBLEM CAUSE SOLUTION Compressor doesn’t run. Check for a blown fuse, bad relay, poor ground, or Replace the 30A or 3A fuse if blown. -
Page 25: Permissible Modifications
Installation Manual Permissible Modifications 1. If extending the height sensor harness is necessary because of the size of the vehicle, order one of two kits: a. 27700 Kit-Height Sensor 4’ Ext (2 extension harnesses) b. 27701 Kit-Height Sensor 8’ Ext (2 extension harnesses) 2. - Page 26 Installation Manual Permissible Modifications, Cont. 4. The keypad on the 3H/3P display can be rotated for horizontal applications but it must not be rotated so that the keypad is above the screen (fig. 34). It will not power up in this position. a. Rotate the keypad after removing the two screws on the back of the 3H/3P display unit (fig. 35). Once they are removed, the keypad can be pulled out and rotated.
-
Page 27: Display Mounting Template
Installation Manual Display Mounting Template IMPORTANT: PRINT THIS MANUAL AT 100% SCALE. THIS MANUAL CONTAINS DRILLING CAUTION TEMPLATES, WHICH WOULD BE RENDERED INCORRECT IN DIMENSION IF PRINTED WITH ANY SCALING. USING AN INCORRECT TEMPLATE TO DRILL HOLES MAY CAUSE DAMAGE TO YOUR VEHICLE. REFER TO THE ONE-INCH SCALE (FIG. -
Page 29: Height Sensor Install Tool
Installation Manual Height Sensor Install Tool 120˚ 120˚ 100˚ 100˚ 80˚ 80˚ 60˚ 60˚ 120˚ 120˚ 100˚ 100˚ 80˚ 80˚ 60˚ 60˚ Cut out the height sensor tools and position each one as shown at right depending on the height sensor orientation. -
Page 31: Manifold Mounting Template
Installation Manual Manifold Mounting Template 3 1/2” 5/16-18 thread pitch (1/4-14 through-bolts included with kit) 1 3/4” 6 15/16” 6 3/8” MN-946... - Page 33 Installation Manual HOLE PATTERN FOR 16444 COMPRESSOR 8 1/2” 3 5/16” MN-946...
- Page 35 Installation Manual Notes MN-946...
-
Page 36: Limited Warranty And Returns Policy
Air Lift Company, for all Air Lift Performance products, except its Air Lift Performance 3H™ and 3P™ systems, warrants to the original purchaser for a period of one year from the date of original purchase that the Air Lift Performance damper kits will be free from defects in workmanship and materials for the normal expected life of the part when used on cars and trucks as specified by Air Lift Company and under normal operating conditions, subject to the requirements and exclusions set forth below. -
Page 37: Replacement Information
Installation Manual Replacement Part Information If replacement parts are needed, contact the local dealer or call Air Lift customer service at (800) 248-0892. Most parts are immediately available and can be shipped the same day. Contact Air Lift Company customer service at (800) 248-0892 first if: •... - Page 38 Thank you for purchasing Air Lift Performance products! Air Lift Company • 2727 Snow Road • Lansing, MI 48917 or P.O. Box 80167 • Lansing, MI 48908-0167 Toll Free (800) 248-0892 • Local (517) 322-2144 • Fax (517) 322-0240 • airliftperformance.com...
- Page 39 Air Lift Performance 3H /3P ™ ™ C o n t r o l S y s t e m U S E R G U I D E For maximum effectiveness and safety, please read these instructions completely before operating.
- Page 40 Download the App for the Best #lifeonair The Air Lift Performance 3 mobile app allows for full integration of your new 3H/3P control system on compatible mobile devices. Simply download the FREE app to not only take full control of your system, but to always have the latest system firmware with updates directly from the app.
- Page 41 TABLE OF CONTENTS Introduction . . . . . . . . . . . . . . . . . . . . . . . . . . . . . . . . . . . . .4 Important Safety Notices .
-
Page 42: Introduction
It is the sole responsibility of the user, and Air Lift Company will not be held liable for, anything that may happen to the operator or the vehicle as a result of the user’s choice to alter these default values below recommended minimums. -
Page 43: Main Controls
3H/3P User Guide Main Controls Mode Indicator Tank pressure Front Left Bag Front Right Bag Pressure Pressure Rear Left Bag Rear Right Bag Pressure Pressure System Messages Fault Indicator Manually increase and decrease front left bag pressure. User-defined Button (See Page 7 Preset Ride All-Up Button) (Middle Button) -
Page 44: Quick Reference Guide
3H/3P User Guide Quick Reference Guide Main Menu Sub-Menu Data Default Screen Brightness Level 1-10 Level 7 Brightness Sleeping Level 1-10 Level 4 Sleep Time 5-60 Sec 10 Sec All-Up All-Up Button Front-Down All-Up Preset Display All-Down Front-Up All-Down Button Air-Out Preset Air-Out... -
Page 45: Getting Started
3H/3P User Guide Getting Started This User Guide is designed to demonstrate all the different menu options and default settings that will help make using this system easy and enjoyable. 1. To get to the main menu screen, push the middle (preset ride) button simultaneously with either the up (preset high) button or down (preset low) button. - Page 46 3H/3P User Guide Display BRIGHTNESS Set the brightness for the display while in use. 1. Level 1-10 2. Use the up and down buttons to increase or decrease luminosity in 10% increments. 3. Level 7 (default) BRIGHTNESS SLEEPING Set the brightness for the display after it goes into sleep mode.
-
Page 47: Operation
3H/3P User Guide Operation RISE-ON-START This setting brings the vehicle to ride height at key-on if below ride height. 1. Off (default) 2. On PRESET MAINTAIN When enabled, the Preset Maintain will maintain the selected preset, whether pressure or height. 1. - Page 48 3H/3P User Guide Setup SENSOR TOOL (HEIGHT MODE MUST BE ENABLED) This tool is used to ensure that the range of the height sensors as installed are sufficient to provide optimal accuracy for the system. (Each time that this tool is used it will reset and initially show low range until the suspension is cycled to tell the system its range.) 1.
-
Page 49: Factory Reset
3H/3P User Guide Setup, Cont. COMPRESSOR (SETUP, CONT .) DUAL/SINGLE Set based on whether a dual or single compressor setup is installed. If using a second compressor and harness, dual must be selected for proper operation. 1. Single (default) 2. Dual MAX PRESSURE Set the maximum tank pressure. - Page 50 3H/3P User Guide Calibration WIZARD Run this program to complete calibration. At any time, cancel calibration by pressing “stop.” 1. Make sure the vehicle is on a level surface and select “Yes.” 2. Verify that the front wheels are straight to prevent damage to fenders, then select “Yes.”...
- Page 51 3H/3P User Guide Calibration, Cont. WIZARD 13. Height Sensor Calibration (Upper) a. If Auto Sensor Calibration was selected, the system will cycle the suspension to calibrate its upper limit position. b. If Manual Calibration was selected, the system will now ask for the user to set the “Upper Limits.”...
-
Page 52: Calibration Detail Explained
3H/3P User Guide Calibration Detail Explained AUTO SENSOR LIMITS When the program is completing the auto sensor calibration, make sure the wheels are straight and all people stand clear as the vehicle will move up and down during calibration. The user doesn’t have to do anything during this portion of the calibration. - Page 53 3H/3P User Guide Calibration Detail Explained, Cont. HEIGHT Below is what the wizard is doing during height calibration. The system will actuate suspension through it’s entire height range to calibrate height mode. 1. Movement calibration A message will indicate completion of the movement •...
-
Page 54: Firmware Updates
The app, which is free and requires no additional hardware, is available in the Apple App Store and for Android devices in Google Play. Search for Air Lift Performance. • Operation of the mobile app is similar to operation of the 3H/3P controller. - Page 55 3H/3P User Guide Firmware Updates, Cont. SWITCHING TO LANDSCAPE MODE Users have the option of changing the orientation of the 3H/3P controller to landscape mode. • To change modes, update the firmware and choose “Keypad Normal,” “Keypad Right” or “Keypad Left.” •...
-
Page 56: Additional Information
3H/3P User Guide Additional Information PRESET MODES There are three standard preset modes used in this system. If the user chooses, the all-up and all-down buttons can be set as two additional presets which will follow the same requirement for operation below (see page 9). Presets are viewed, used and changed/saved with the following procedures: User-defined preset... - Page 57 Bluetooth identification address. Users may need to provide this information when calling Air Lift Company customer service. The manifold or display software can be updated using the mobile app. Check www.airliftperformance.com/firmware periodically for firmware updates.
-
Page 58: System Messages
3H/3P User Guide System Messages Label Fault Problem NOTICE Calibration not completed Customer attempts to use presets prior to calibration. Manifold upside down, The manifold has been mounted in an unacceptable NOTICE please re-mount orientation. Leak detected on corner A leak has been detected between manifold and the air CAUTION (FL, FR, RL, RR*) spring that is causing a drop in air pressure. - Page 59 3H/3P User Guide System Messages Label Fault Problem Corner height sensor Height sensor range is near limit of operation at the given CAUTION near limit (FL, FR, RL, corner. RR*) The system has detected no increase in tank pressure CAUTION Compressor freeze when compressor commanded on and compressor may be blocked.
-
Page 60: Viair Duty Cycle/Working Pressure
Duty cycle at rated pressure: 50% @ 200 PSI, 100% @ 100 PSI Users have the option of installing several other compressors. Below are examples with their duty cycles and working pressures. Air Lift P/N Max Working VIAIR Compressor Pressure... - Page 61 3H/3P User Guide Notes MN-948...
- Page 62 Canada, dial (517) 322-2144. Thank you for purchasing Air Lift Performance products! Air Lift Performance • 2727 Snow Road • Lansing, MI 48917 or P.O. Box 80167 • Lansing, MI 48908-0167 Toll Free (800) 248-0892 • Overseas (517) 322-2144 Fax (517) 322-0240 • www.airliftperformance.com...
Need help?
Do you have a question about the Performance 3P and is the answer not in the manual?
Questions and answers