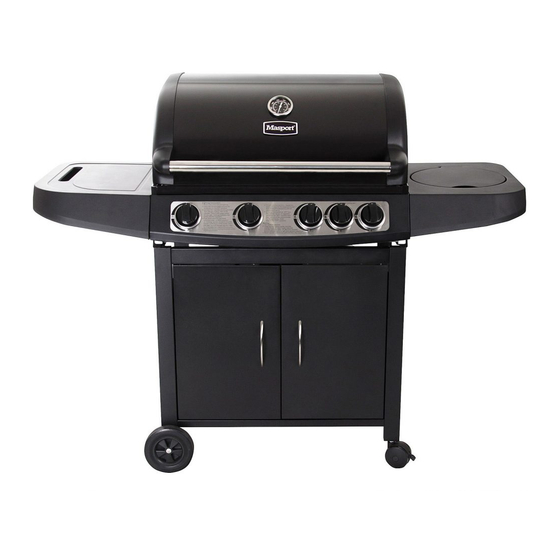
Masport LIFESTYLE 3 Owner's Manual
Hide thumbs
Also See for LIFESTYLE 3:
- Owner's manual (16 pages) ,
- Owner's manual (28 pages) ,
- Owner's manual (18 pages)
Table of Contents
Advertisement
Barbecues
Lifestyle & Maestro
OWNER'S MANUAL
Please read these instructions carefully before assembly, to
reduce risk of fire, burn hazard or other injury.
Keep these instructions in a safe place for future use.
This manual covers a range of barbecues which include: Masport
Lifestyle 3, Lifestyle and Maestro barbecues.
www.masport.com
Part N
: 559823.C.3
o
Advertisement
Table of Contents

Summary of Contents for Masport LIFESTYLE 3
- Page 1 Please read these instructions carefully before assembly, to reduce risk of fire, burn hazard or other injury. Keep these instructions in a safe place for future use. This manual covers a range of barbecues which include: Masport Lifestyle 3, Lifestyle and Maestro barbecues. www.masport.com Part N : 559823.C.3...
-
Page 2: Table Of Contents
• The Manufacturer or their Agents can accept no liability for the • When turning off the barbecue, shut off the gas at the supply period from the date of purchase, Masport will replace or repair the unsuitability of, or any damage to, food that is cooked on this source before turning off all the burner controls. -
Page 3: Parts - Lifestyle Barbecues
Parts - LIFESTYLE BARBECUES Assembly Instructions - LIFESTYLE BARBECUES NOTE: Before beginning assembly, ensure all listed parts and hardware are included. *IMAGE IS FOR ILLUSTRATION PURPOSE ONLY When assembling the barbecue, ensure it is sitting on a flat surface. Two persons required for assembly. STEP 1 Make sure Left Cabinet Panel (2) is positioned as shown. - Page 4 STEP 3 STEP 6 Position the Trolley Back Panel (9) between the Left and Right Cabinet Panels (2 and 3) and lower it until it rests on the Trolley Base (4). Assemble the bottle opener (25) using 2pcs Screw M6x10 (23). Securely attach the Rear Trolley Panel (9) using 60mm Screws (20) inserted through the Left and Right Trolley Panels (2 and 3).
- Page 5 STEP 8 STEP 10 Loosen the screws located on the left and right side plates of the Grill Body Assembly (1). Lift, lower, and hook the Left Side Shelf (13) over Connect the Ignition Lead wire to the Spark Electrode. the loosened screws, securing it to the Grill Body Assembly (1).
-
Page 6: Parts - Maestro Barbecues
STEP 12 PARTS - MAESTRO BARBECUES Place cooking grid and plate (17) into the grill. NOTE: If your barbecue has the grill/hotplate configuration, place the flame tamers only beneath the grill. Door brace Grill & Plate Grill Body Assembly & Hood Warming rack STEP 13 Position the Warming Rack (18) with the crossbars facing down and insert the ends into the corresponding holes on the inside the Burner... -
Page 7: Assembly Instructions - Maestro Barbecues
ASSEMBLY INSTRUCTIONS - MAESTRO BARBECUES STEP 4 Assemble the Door Stop (8) using 4pcs Screw M6x10 (18). STEP 1 Assemble 2 x pcs Castors (5) to the front of the Base tray (4), assemble 2 x pcs Castors (6) to the rear of the Base tray using 16pcs Screw M6x10 (18) and 16pcs Spring Washer (20). - Page 8 STEP 6 STEP 8 Remove all packaging from inside the Hood (1). Remove cooking grills/plates. The Hood/Grill assembly (1) is very heavy and requires two persons to lift it into Open the lid of the Right Side Shelf (14) and insert the end of the Burner (16) into the corresponding hole in the Right Side Shelf (12). place.
- Page 9 STEP 11 STEP 13 Insert the grill/s or grill/hotplate as shown. Should for any reason the barbecue requires manual lighting then a long match should be fitted to the lighting stick, lit and placed into position. Activate the main burner closest to the lit match. Once this burner is lit, activate the next burner in-line and continue this action to NOTE: light all burners.
-
Page 10: Rotisserie Assembly Instructions
Attaching the Rotisserie Bracket onto the BBQ grill: Rotisserie Assembly Instructions Open the BBQ hood. Use two screws provided with the rotisserie bracket in the mounting holes provided in the side panel of the grill Tools needed for assembly body. Crosshead screwdriver, 10mm A/F spanner. -
Page 11: Installation
Installation Operation Both ends open Gas Shutoff Valve This barbecue is for outdoor use only and should be placed in Tighten in this direction WARNING! a well-ventilated area. Take care to ensure that the minimum Bleeder Valve Screw clearances guidelines are followed. Before proceeding, be certain you understand the safety POL regulator and hose... - Page 12 MAIN BURNER AND SIDE BURNER LIGHTING (INTEGRATED protective cover should always be fitted to the barbecue to protect 10. Turn the knob anticlockwise to adjust the heat from High ( )” – IGNITION) your investment from the ailments when not in use. "Medium"...
-
Page 13: Care And Maintenance
CARE OF STAINLESS STEEL IN YOUR BBQ blockage (debris, insects) in either the burner portholes, the primary WHEN TO LOOK FOR SPIDERS Care and Maintenance air inlet, or the neck of the stainless steel burners. Use a pipe Your BBQ features Stainless Steel components. All Stainless You should inspect the burners at least once a year or immediately cleaner to clear obstructions. -
Page 14: Technical Data
If using a cover for your barbecue, check your BBQ every few dealer or Masport, please have this serial number handy as it will quickly allow us to identify the barbecue. The use of unauthorised parts can create unsafe conditions and weeks. - Page 16 Head Office - New Zealand 1-37 Mt Wellington Highway. Panmure, P.O. Box 14 349 Auckland 1060, New Zealand...


Need help?
Do you have a question about the LIFESTYLE 3 and is the answer not in the manual?
Questions and answers