Table of Contents
Advertisement
Quick Links
Barbecues
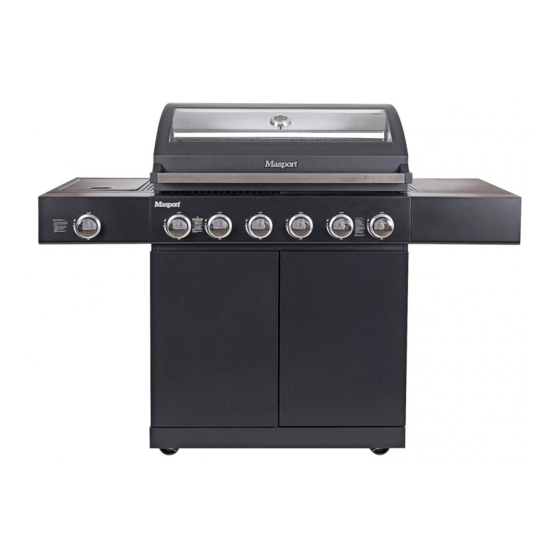
Masport 4/6 Burner Tasman Series
OWNER'S MANUAL
Please read these instructions carefully before assembly, to
reduce risk of fire, burn hazard or other injury.
Keep these instructions in a safe place for future use.
This manual covers the Masport 4/6 Burner Tasman Series barbecue.
www.masport.com
Part N
: 546565.A.3
o
546565.A.3 - May 2019
PANTONE 648C
Advertisement
Table of Contents

Related Manuals for Masport Tasman Series


Summary of Contents for Masport Tasman Series
- Page 1 Please read these instructions carefully before assembly, to reduce risk of fire, burn hazard or other injury. Keep these instructions in a safe place for future use. This manual covers the Masport 4/6 Burner Tasman Series barbecue. www.masport.com Part N : 546565.A.3...
-
Page 2: Table Of Contents
CONTENTS INTRODUCTION SAFETY INFORMATION SYMBOLS IN THIS OWNER’S MANUAL IMPORTANT SAFETY INFORAMTION WARRANTY INFORMATION DISPOSAL OF PACKAGING IMAGES ASSEMBLY INSTRUCTIONS FOR BBQ FOR MODELS WITH ROTISSERIE - ASSEMBLY INSTRUCTIONS LEAK TESTING INSTALLATION OPERATION TROUBLESHOOTING EXPLODED VIEW - COMPONENT LIST TECHNICAL DATA... -
Page 3: Introduction
INTRODUCTION DANGER! If you smell gas: Shut off gas to the appliance; This product has many features for making its use more pleasant Extinguish any open flame: and enjoyable. Safety, performance, and dependability have been Open lid; given top priority in the design of this product making it easy to If odor continues, keep away from the appliance maintain and operate. -
Page 4: Warranty Information
Masport will replace or repair the • Leak test all gas lines and connections before use. defective part free of charge. Refer to the warranty for details. Do •... -
Page 5: Images
BG2294B-BL& BG2296B-BLAssembly IMAGES instructions NOTE: The following pages contain assembly instructions for various model options. Please ensure you identify your BBQ model so that the correct instructions can be follwoed. When assembling the cabinet, leave all of the screws loose until completey assembled, then tighten all screws. 546565.A.3 - May 2019... -
Page 6: Assembly Instructions For Bbq
ASSEMBLY INSTRUCTIONS FOR BBQ Product Description Carton Identification Product Part Number Open the carton by removing the shipping straps then slitting along both ends. Cut the tape only by a small amount in the middle, finish by lifting the carton flaps with your hand. Unpack the entire carton, this carton will be used as a surface protector as the cabinet is being built. - Page 7 Step 2 Attach the Cart Side Panel. Use two M6*12mm screws (B) to attach cabinet left side panel (7) and two more STEP 2. ATTACH THE CART SIDE PANEL. screws to attach cabinet right side panel (8) both to the Bottom panel (2). Use two M6*12mm screws (B) to attach cabinet left side panel (7) and two more screws to attach cabinet right side panel (8) both to the Note: Door hinge brackets should be at the front.
- Page 8 Step 4 Attach the Cart Front Beam and Triangle Plates. a) Attach cart front beam (10) to the cart side panels with four M6*12mm screws (B). STEP 4: ATTACH THE CART FRONT BEAM AND TRIANGLE PLATES. b) Attach each triangle plate (21) to a side panel and to the Bottom panel with Attach cart front beam (10) to the cart side panels with four M6*12mm screws (B).
- Page 9 Step 6 Attach the Fat Tray Brackets STEP 6. ATTACH THE FAT TRAY BRACKETS. Attach the left and right Fat tray Brackets (15/ 16) to the left and right side panels Attach the left and right Fat Tray Brackets (15/16) to the left and right side panels with two M6*12mm screws (B) on each side, as shown. with two M6*12mm screws (B) on each side, as shown.
- Page 10 Step 8 Attach the Doors. a) Attach door hinges (22) to the cabinet left (7) & right (8) side panels top and bottom, each hinge with four M4*10mm screws (C). STEP 8. ATTACH THE DOORS. b) Attach the doors (11) to the hinges with two M4*10mm screws (C) on each Attach door hinges (22) to the cabinet left (7) and right (8) side panels top and bottom, each hinge with four M4*10mm screws (C).
- Page 11 Step 10 Attach the Firebox. (Use two people for this step) a) Place the firebox and hood assembly (1) onto the cabinet, then carefully open the hood while holding the assembly steady. STEP 10. ATTACH THE FIREBOX. (USE TWO PEOPLE FOR THIS STEP) b) Fix the firebox onto the cabinet from inside the firebox with four M6 washers Place the firebox and hood assembly (1) onto the cabinet, then carefully open the hood while holding the assembly steady.
- Page 12 Step 12 Attach the Side Burner Control Panel and Side Shelf Front Panel a) Attach the side burner control panel (3) to the side burner shelf (2) with four M4*8mm screws (G). STEP 12. ATTACH THE SIDE BURNER CONTROL PANEL AND SIDE SHELF FRONT PANEL. Attach the side burner control panel (3) to the side burner shelf (2) with four M4*8mm screws (G).
- Page 13 Step 14 Attach the Side Burner Shelf. a) Hang the side burner assembly onto the protruding screws, insert and STEP 14. ATTACH THE SIDE BURNER SHELF. partially tighten three M6*12mm screws (B) into the lower holes as shown. Hang the side burner assembly onto the protruding screws, insert and partially tighten three M6*12mm screws (B) into the lower holes b) Align the side burner control panel to the main bbq control panel, then as shown.
- Page 14 STEP 16. ATTACH THE SIDE BURNER. Fit the spill tray and side burner through the shelf and engage the side burner tube onto the valve nozzle as shown. Fix the spill tray and side burner firmly in place with three M4*10mm screws and fibre washers as shown. Make sure the side burner tube is properly engaged onto the valve nozzle.
- Page 15 Step 17 Preparation to Attach Right Side Shelf. Screw two M6*12mm screws (B) into the upper holes on right side panel of firebox, leave the screw heads protruding approximately 5mm out. STEP 17. PREPARATION TO ATTACH RIGHT SIDE SHELF. Screw two M6*12mm (B) into the upper holes on the right side panel of the firebox, leave the screw heads protruding approximately 5mm out.
- Page 16 STEP 19. FIT THE GREASE CUP AND FOIL CUP. IMPORTANT Step 19 Fit the Grease Cup and Foil Cup Put the foil cup (26) into the grease cup (25), then slide the grease cup into the grease cup bracket. Put the grease cup foil cup (26) into the grease cup (25), then slide the grease cup into the grease cup bracket.
- Page 17 CONFIGURE THE ALFRESCO ISLAND WITH SEPARATELY AVAILABLE UNITS (CONTINUED) If joining your barbeque to an optional sink unit or to an optional range unit, open the cart door for that optional unit, then connect that unit to your barbeque with four M6*16mm screws (A) AS SHOWN. f joining your barbeque to an optional sink unit and an optional rnage unit all together, open the cart doors for the sink and the range units, connect the first unit to your barbeque with four M6*16mm screws (A) as shown, then connect the second unit to the first unit with another four M6*16mm screws (A) as shown.
-
Page 18: For Models With Rotisserie - Assembly Instructions
OPTIONAL ROTISSERIE - ASSEMBLY LEAK TESTING INSTRUCTIONS WHEN TO TEST: TOOLS NEEDED FOR ASSEMBLY The BBQ gas bottle, regulator & hose assembly should be checked for leaks, using the soapy water leak test, every time you reconnect Crosshead screwdriver, 10mm A/F spanner, 2x 8mm A/F Spanners. your regulator to the BBQ gas bottle. - Page 19 OTHER PRECAUTIONS In the case of balconies, at least 20% of the total of the side, back and front wall areas shall be and remain open and Do not obstruct any of the ventilation openings in the barbecue unrestricted. body. Also, position the gas supply cylinder inside the cabinet, in the cylinder base positioning hole.
-
Page 20: Operation
OPERATION WARNING! Before proceeding, be certain you understand the safety information contained in this manual. This barbecue is not designed to be used with MANUAL IGNITION: Light here with a more than 66% of the cooking area as a solid 90mm match or plate. - Page 21 WARNING! sections of meat should be secured so they do not hang down Cooking with the hood closed and the burners on high and interfere with the rotation of the spit rod. creates a fire risk. Insert the pointed end of the spit rod into the motor. Lay the other end of the spit rod onto the opposite bracket.
-
Page 22: Troubleshooting
USE ONLY THE 5/8” x 18 GAS CONNECTION HOSE AND REGULATOR PROVIDED! If a replacement is necessary, please contact either our Masport Customer Service Department or your local dealer. The use of unauthorised parts can create unsafe conditions and environment. -
Page 23: Exploded View - Component List
EXPLODED VIEW - COMPONENT LIST COMPONENT LIST 3. Side Burner 5. Side shelf 1. Body Assy. * 1 2.Side Burner 4. Side Shelf Assy. Control Panel. * 1 control panel. Assy. * 1 pc * 1 pc * 1 pc 6. - Page 24 BG2294B/6B-BOLT PACK M6 Flat M6 Spring M6*16 Screw M6*12 Screw M4*10 Screw Washer Washer 16pcs 41pcs 24pcs * 16pcs * 16pcs M4*8 Screw F. M6 *4pcs 18pcs CARE AND MAINTENANCE CLEAN WATER AND WIPE Regularly clean your barbecue between uses and especially A soft cloth and clean warm water should always be the first choice after extended periods of storage.
- Page 25 The BBQ does not reach temperature. require any further assistance with your barbecue from your local The BBQ heats unevenly. dealer or Masport, please have this serial number handy as it will The burners make popping noises. quickly allow us to identify the barbecue.
-
Page 26: Technical Data
MASPORT LIMITED using the appliance 1-37 Mt Wellington Highway, Panmure, Auckland 1060, New Zealand USE OUTDOOR ONLY MASPORT AUSTRALIA PTY LIMITED WARNING: Parts of this Manufactured by: 27 Commercial Drive, Dandenong South, appliance may be very hot, Victoria 3175, Australia keep young children away For storage and cylinder exchange, disconnect hose at the cylinder only, do not disconnect hose from the appliance. - Page 27 546565.A.3 - May 2019...
- Page 28 Masport Limited 1-37 Mt Wellington Highway, Panmure Auckland 1060 New Zealand P: 0800 627 767 Masport Australia Pty Limited 1/40 Abbots Road, Dandenong South Victoria 3175 Australia P: 1300 366 225 Copyright Masport Limited © 546565.A.3 - May 2019 PANTONE 648C...
Need help?
Do you have a question about the Tasman Series and is the answer not in the manual?
Questions and answers