Table of Contents
Advertisement
Advertisement
Chapters
Table of Contents

Related Manuals for Technogym Unica


Summary of Contents for Technogym Unica
- Page 2 Technogym , The Wellness Company , Unica (figurative) and Wellness Mate ® are trademarks owned by Technogym s.p.a. in Italy and other countries. “Smartkey” and “TGS Key” refers to the mark illustrated here ® registered by Technogym s.p.a. in Italy and other countries.
-
Page 3: Table Of Contents
1.3.3 Place of installation ................... 19 1.3.4 Unpacking ....................20 1.3.5 Assembly ....................21 1.3.6 Disassembly ....................39 1.3.7 Lifting and moving Unica ................. 39 Maintenance ..................... 42 1.4.1 Routine maintenance ................42 Lubrication of the guides ................ 42 Adjusting the cable tension ..............43 Cleaning ..................... - Page 4 Storage....................... 46 Disposal ..................... 46 Using Unica ..................47 Easy start for pectoral fly and chest press ......... 48 Exercises ....................49 Mid lat pull down ................49 Rowing ....................50 Up/right row ..................51 Chest press ..................52 Pectoral fly ..................53 Shoulder press .................
-
Page 5: Introduction
Introduction This manual, written in the manufacturer’s original language and then translated into the language of the destination country, is an integral part of UNICA, and must always be kept with the equipment; the manual must also accompany the equipment in the event of its being relocated or sold. -
Page 6: Important Safety Instruction
- Close supervision is necessary when Unica is used by, on or near children, invalids or disabled persons. - Use Unica only for its intended use as described in this manual. Only perform the exercises for which the equipment has been designed, following the instructions given in this manual. - Page 7 - Never operate Unica if it has a damaged cord or plug, if it is not working properly, if it has been dropped or damaged, or dropped into water. In this case, contact the Technogym Technical Support service. - Do not carry Unica by supply cord or use cord as handle.
-
Page 8: Personal Safety
Personal safety Do not use Unica in presence of small children or pets. Completely assemble Unica before using it. Check the unit before each use. Do not continue to operate Unica when it is not working properly. Assemble and operate Unica on a solid, level surface. -
Page 9: Technical Information
Technical information... -
Page 10: Identification Of The Manufacturer And The Equipment
The identification plate with the equipment’s serial number and barcode is affixed to the rear of the weight stack column, at the top. A Name and address of the manufacturer B CE Mark C Serial number D Warnings 04048001 Unica - User’s manual... -
Page 11: Description Of The Equipment
1.2 Description of the equipment 1.2.1 Technical data A’ 04048002 Width in rest position 1200 mm (47 inch) A’ Maximum width in exercise pos. 1600 mm (63 inch) Length 1840 mm (72 inch) Height 2070 mm (82 inch) Weight of the equipment 150 kg (331lb) Weight stack... -
Page 12: Principal Components
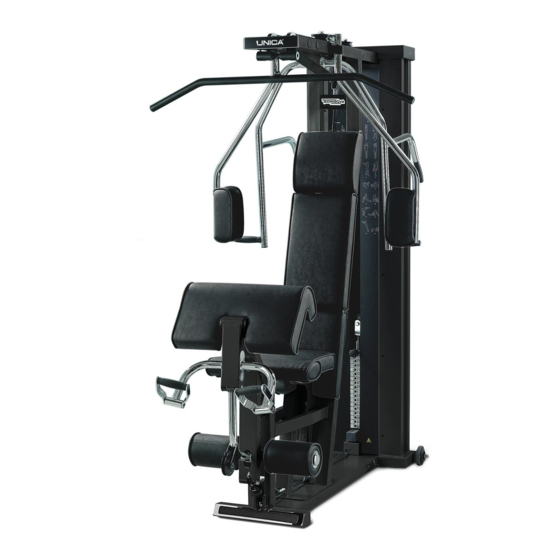
1.2.2 Principal components Unica_ET_cmyk.tif Unica - User’s manual... - Page 13 1 - set of weight stack plates, for a total of 90 kg 2 - padded back or chest rest 3 - lat bar 4 - arm pads 5 - lever arms with horizontal and vertical handgrips 6 - lower hook: low cable attachment for leg extension, pulley (handle included in the accessories), leg raises (ankle strap included in the accessories), triceps and biceps exercises (handle included in the accessories)
-
Page 14: Accessories
18 - set of tools for assembly and adjustments 19 - oil for lubrication 20 - User’s manual 21 - warranty certificate for Unica and Wellness Mate 22 - wheels for moving the equipment 23 - screws for assembly 24 - service box containing some of the accessories 25 - replacement fuses for Wellness Mate (2.0A fast type) - Page 15 Attaching the HANDLE (14) to the lower hook 00871011 Attaching the PULLEY HANDLE (15) to the lower hook 00871009 Attaching the ANKLE STRAP (16) to the lower hook 04048003 Attaching the LAT BAR (3) to the lower hook 04048004 1.2 Description of the equipment...
-
Page 16: Safety Devices And Labels
The weight stack is protected by an external a guard, which has a crushing hazard warning sticker affixed to it. This warning sticker is affixed to all the parts of the equipment where there is a residual crushing hazard. 99834110 00182003 04048005 Unica - User’s manual... -
Page 17: Installation And Assembly
1.3 Installation and assembly 1.3.1 Description of the packing The equipment comes partially disassembled and packed in suitable materials, on a pallet. The packing consists of: - one cardboard box containing the weight stack column; - one cardboard box containing the floor mat, the weight stack column guard, the lever arms with... -
Page 18: Lifting And Handling The Packed Materials
To prevent injury to persons or damage to property, carefully choose the most appropriate type of lifting and transport equipment for the place of installation. The lifting and handling instructions are provided on the packing materials. Unica - User’s manual... - Page 19 Pagina 19 da sostituire con foglio ripiegato file: pag_rip_19-20-21-22_Uk.pdf...
- Page 20 Pagina 20 da sostituire con foglio ripiegato file: pag_rip_19-20-21-22_Uk.pdf...
- Page 21 Pagina 21 da sostituire con foglio ripiegato file: pag_rip_19-20-21-22_Uk.pdf...
- Page 22 Pagina 22 da sostituire con foglio ripiegato file: pag_rip_19-20-21-22_Uk.pdf...
- Page 23 Lift the centre frame (3) and rest it on the weight stack column (2). You are advised to leave the cardboard from the packaging under the frame to avoid damaging the floor. Insert either the pallet or a wedge about 100 mm thick under the top part of the weight stack column.
- Page 24 (2). Warning The excess cable must be fully inserted inside the column of the weight stack (2). 00182052 Mount the encoder unit tightening 04048011 the two hexagonal head screws (follow instructions in Step 17). 04048028 Unica - User’s manual...
- Page 25 Step 2 Place the front frame (4) on the centre frame (3) and on the platform (1). Remove the foot rest bar (5) and fix the front frame (4) to the platform (1) locking down the two hexagonal head screws; 02226003 then fit the two plugs.
- Page 26 Fit the plug on the screw. 02226004 Danger The front frame must FIRST be fixed to the platform and THEN to the centre frame; NOT the reverse. Unica - User’s manual...
- Page 27 Step 4 Check that the cable (10) is correctly routed through all the pulleys of the centre frame (3). 00182061 Step 5 Remove the screw securing the weight stack (7) to the base of the column (2). 00182052 1.3 Installation and assembly...
- Page 28 Step 6 Fix the centre frame (3) to the upper part of the weight stack column (2) using the two hexagonal-head screws and washers and lock down. 02226010 Unica - User’s manual...
- Page 29 Step 7 Place UNICA upright. Danger Due to the weight of the equipment, this operation should be carried out with care. Before righting the equipment, make sure that the weight stack is resting on the rubber pads. If working on a slippery floor (marble, ceramic, parquet), place a rubber mat under the equipment frame.
- Page 30 Step 8 Fit the guard (9), spacers and washers and lock down the two hexagonal head screws. 02226005 Unica - User’s manual...
- Page 31 Step 9 Unwind the cable (10) as illustrated in the figure. Finally fit the cable end piece (12) on the fastener (13), tightening the three screws (14) 00182055 to a torque of 16 Nm. 04048013 04048014 1.3 Installation and assembly...
- Page 32 Route the cable of the lower hook (11) as illustrated in the figure. Finally fit the cable end piece (12) on the fastener (13), tightening the three screws (14) 04048015 to a torque of 16 Nm. 04048016 04048017 Unica - User’s manual...
-
Page 33: Assembly
Step 11 Assemble the pulley (15) on the weight stack (7), screwing the screw (16). Check that all the cables are correctly routed in the corresponding pulleys. Remove the weight selector pin and rest the crosspiece on the weight stack. 01478003 Lock down the screw (16) - Page 34 Step 12 Mount the two arms (21) and the two angled lever arms (9), tightening the tapered screws. 04048018 Unica - User’s manual...
- Page 35 Step 13 Back off the four screws (2 on each side) to disassemble the padded rest (8). Insert the Wellness Mate (20) support tube in the clamp. Insert the screw 02226007 in the support tube (20). Step 14 Lock down the two clamp screws so that the tube can be rotated.
- Page 36 Step 15 Plug the connectors into each other, then reassemble the padded rest. 00871029 Step 16 Plug the connectors into each other, then tighten the four screws using the Philips screwdriver. 01478007 Unica - User’s manual...
- Page 37 Step 17 Fit the encoder unit under the weight stack, screwing the two supplied screws into the holes without tightening them. Check that the encoder unit is positioned correctly: if it is properly positioned you will hear a ‘click’ when you pull out the weight selector pin.
- Page 38 Step 18 Connect the power cable to the equipment inlet socket. The label next to the main switch specifies the current 04048019 limit (10 A). Unica - User’s manual...
-
Page 39: Disassembly
1.3.6 Disassembly To disassemble UNICA carry out the above steps in reverse order. 1.3.7 Lifting and moving Unica To move the equipment, screw the two wheels provided into the special holes on the sides of the weight stack column (2). - Page 40 Insert the ring provided into the footrest (5) and the bottom hook into the lever with the padded rollers (6), as shown in the figures. 01478008 01478009 01478010 Unica - User’s manual...
- Page 41 Lift the front part using the anatomical handgrips (22) and move the equipment. 04048020 If the type of floor does not allow the equipment to be moved on wheels, it must be moved using conventional lifting and handling equipment. Danger The equipment must be moved with great caution, due to the risk of it tipping over.
-
Page 42: Maintenance
Before lubricating, clean the guides with a paper towel. To access the guides, loosen the screws (24) (five on each side) and slide the two STRETCHING and TRAINING panels 04048027 outwards to remove. Unica - User’s manual... -
Page 43: Adjusting The Cable Tension
Adjusting the cable tension During the initial period of use, the weight stack cable will lengthen slightly, due to the natural settling of its internal fibers. The cable must therefore be re-tightened by turning the special adjusting screw (16) situated near the pulley above the weight stack plates. -
Page 44: Cleaning
To cleaning the frame and the padded parts, it is recommended to use a moist synthetic chamois; to clean the chrome parts, use the special cloth supplied with the equipment. Do not use products which contain solvents. Warning Be careful not damage the DRAWINGS AND INSTRUCTIONS ON THE STICKERS. Unica - User’s manual... -
Page 45: Special Maintenance - Technical Service
1.4.2 Special maintenance – Technical service Any operation not described in paragraph 1.4.1 “Routine Maintenance” is considered to be special maintenance. In case of need, contact the Technogym Technical Support service. The Technogym Technical Support service provides: - telephone assistance ®... -
Page 46: Storage
20% and 90%. 1.6 Disposal It is always good practice to ensure that Unica can never constitute a hazard; therefore do not leave the equipment where children might use it as a toy. Do not dispose of the equipment in public areas or in private areas accessible to the public. -
Page 47: Using Unica
Using Unica... -
Page 48: Easy Start For Pectoral Fly And Chest Press
This function reduces the load on the upper lever arms of Unica (used for pectoral fly and chest press), allowing you to lower them using your legs before grasping or releasing them;... -
Page 49: Exercises
2.2 Exercises Warning Carefully check the illustrations of the exercises and pay particular attention to the position you should have on the equipment. Mid lat pull down This is the basic exercise for toning the muscles of the upper back. It is suitable for training for all types of sports and for correcting certain posture defects. -
Page 50: Rowing
- pull towards your chest, keeping your elbows aligned with the handgrips. Squeeze your 00871033 shoulder blades together and down while you are pulling. Warning Adjust the seat height so that the handgrips are initially at eye level. Unica - User’s manual... -
Page 51: Up/Right Row
Up/right row This is a lifting exercise which strengthens the upper back and shoulder muscles. It is important for the prevention of shoulder pain. Muscles used: deltoid and trapezius Movement: - attach the bar to the lower hook and grasp it with your hands close together, palms facing downward - standing facing the weight stack, pull the bar... -
Page 52: Chest Press
Warning Adjust the seat height so that your elbows are at shoulder height. To avoid straining the shoulder joint, use the easy start function at the beginning and end of the exercise. Unica - User’s manual... -
Page 53: Pectoral Fly
Pectoral fly This exercise isolates the pectoral muscles. Muscles used: pectorals and anterior deltoid Movement: - detach the low cable used for leg training to activate the easy start function - sit down with your back toward the backrest - with the help of the easy start function, place your forearms behind the padded rests and grasp the bars, as shown in the figure. -
Page 54: Shoulder Press
- sit on the equipment and grasp the lower handgrips, as shown in the figure - lean forward with your upper body until your chest is on the padded rest - extend your arms, without moving your torso. 00871037 Unica - User’s manual... -
Page 55: Triceps Extension
Triceps extension This is an arm extension exercise, essential in training for sports that involve throwing, which requires power in the arms. Muscles used: triceps Movement: - attach the lat bar to the hook - standing with your back toward the weight stack, bring the bar to chest height - grasp the bar with your hands about 15 cm apart... -
Page 56: Arm Curl
- rest your arms on the front of the padded rest, with your elbows in line with the fulcrum of the lever - grasp the handgrips and curl your forearm toward your arm, without moving your torso. 00871039 Unica - User’s manual... -
Page 57: Leg Extension
Leg extension This is the basic movement for isolating the quadriceps muscle, and is used with opportune adjustments both for athletic training and rehabilitation. Muscles used: quadriceps Movement: - attach the low cable for training the legs - sit down, leaning slightly backward 00871078 - place your feet behind the thrust rollers - push against the rollers with your shins and... -
Page 58: Abdominal Crunch
Muscles used: rectus abdominis Movement: - attach the lat bar to the hook - sit down, holding the bar behind your neck - curl your torso forward, contracting your abdominal muscles. 00871041 Unica - User’s manual... -
Page 59: Side Leg Raise
- attach the ankle strap to one leg - attach the ankle strap to the lower hook (using its extension cable) - stand with one hip toward Unica, and the leg with the ankle strap on the outside, resting 00871042... -
Page 60: Leg Adduction
- attach the ankle strap to one leg - attach the ankle strap to the lower hook (using the extension cable) - stand with one hip toward Unica, and the leg with the ankle strap toward the equipment, 00871043 resting the hand on the side with the ankle... -
Page 61: Rear Leg Kick
Rear leg kick This is the basic movement for isolated training of the gluteus. Muscles used: gluteus and hamstrings Movement: - attach the ankle strap to one leg - attach the ankle strap to the lower hook (using the extension cable) - stand in front of the equipment, far enough away from it for the cable to be taut - rest your hands on the padding, so that your... -
Page 62: Standing Calf
- standing in front of the equipment, grasp the bar with your palm facing down; your hands must be spaced shoulder width apart - rise onto the toes of your foot, moving only your calves; keep your legs and arms straight. 00871045 Unica - User’s manual... -
Page 63: Biceps Curl
Biceps curl Compared with the seated biceps curl (8), the standing curl allows you to use heavier weights and also strengthens the shoulder muscles which stabilize the movement. Muscles used: biceps Movement: - attach the bar to the lower hook - standing in front of the equipment, grasp the bar with your palms facing toward you - your hands must be shoulder-width apart,... -
Page 64: 90° Triceps Kickback
00871047 - grasp the handle with your palm facing down; place your other hand on the padded rest - extend your forearm upward, keeping your elbow close to your side. Unica - User’s manual... -
Page 65: 90° Lateral Raise
Muscles used: deltoid, trapezius, rhomboids Movement: - attach the handle to the lower hook - standing with your side toward Unica, bend forward at the hips so that your back is nearly parallel to the floor, knees slightly flexed 00871048 - the arm you are working is on the outer side and flexed, as shown in the figure;... -
Page 66: Midlat Pull Down Reverse
- sit down with your back against the backrest - grasp the bar with your palms facing toward - pull the bar down to your chest. 00871066 The exercise can also be done using a standard grip (see exercise 1). Unica - User’s manual... -
Page 67: Pulley
Pulley This movement works all the muscles of the back. Muscles used: rear upper body muscles. Movement: - attach the pulley handle to the lower hook - pull out the foot-rest and secure it using the pin provided - sit on the mat in front of the equipment with your legs slightly flexed 00871050 - grasp the handle and, keeping your torso... -
Page 68: Pullover
- sit down with your back against the backrest - grasp the bar with your hands close together, and elbows flexed at a 90° angle - without changing the angle of your elbows, pull the handle down to below chest level. 00871077 Unica - User’s manual... -
Page 69: Curl Up
Curl up This is the basic movement for isolating the rectus abdominis muscles. Muscles used: abdominals Movement: - lie on your back on the mat 00871049 - place your hands on your chest - curl your chest upward, pressing your lower back against the mat. -
Page 70: Stretching
For the first two weeks, it is recommended to repeat each figure twice, for 15 seconds each time; then increase the stretching time by 5 seconds a week to reach 45 seconds. Your breathing should be slow, regular and controlled; do not hold your breath during stretching. Unica - User’s manual... - Page 71 Latissimus dorsi 00871051 Musculus obliquus 00871052 Deltoids 00871053 2.3 Stretching...
- Page 72 Triceps 00871054 Pectorals 00871055 Quadriceps 00871056 Unica - User’s manual...
- Page 73 Lower back (erector spinae) 00871057 Posterior muscles 00871058 Hip flexors (iliopsoas) 00871059 Hip adductors 00871060 2.3 Stretching...
- Page 74 Latissimus dorsi 00871061 Hamstring and abductors 00871062 Calves 00871063 Thigh abductors 00871064 Unica - User’s manual...
- Page 75 Adductors 01478012 Hamstring 01478013 Lumbar (spinal column) 00871071 Hamstring 00871072 2.3 Stretching...
- Page 76 Paravertebrals 00871073 Quadriceps 00871074 Unica - User’s manual...
-
Page 78: Wellness Mate
This manual, written in the manufacturer’s original language and then translated into the language of the destination country, is an integral part of Wellness Mate, and must always be kept with the device. The manual must also accompany Wellness Mate in the event of its being relocated or sold. Keep this manual in a know and readily accessible place,and protected from humidity and heat. - Page 79 Contents Technical information ................ 5 Description of Wellness Mate ..............6 1.1.1 Main components..................6 1.1.2 Technical data ....................7 1.1.3 Safety devices and labels ................8 1.1.4 Wiring connection ..................9 1.1.5 Grounding instructions ................10 Maintenance ....................11 1.2.1 Routine maintenance ................
- Page 80 Training with the TGS key ................ 30 3.5.1 Range Of Motion (ROM)................33 3.5.2 The pacer and speed of movement ............34 Training not programmed on the TGS key ..........38 3.6.1 Free training ....................44 Maximal strength test (1RM) ..............45 3.7.1 Test programmed on the TGS key............
-
Page 81: Technical Information
Technical information... -
Page 82: Description Of Wellness Mate
Description of Wellness Mate 1.1.1 Main components Control panel: this allows the user to manage every available function, from setting the training programmes to displaying messages and data about the training. 00871001 Power supply unit: this contains the supply unit and the electronic boards for acquiring the data coming from the encoder unit and from the control panel. -
Page 83: Technical Data
TGS Reading Device (F): located in the bottom part of Wellness Mate. Reads and saves the training data on the TGS key (G). 00871004 1.1.2 Technical data Power supply 100-230 VAC Mains frequency 50-60 Hz Rated power 40 W Fuses 2x2A fast type EN 50082-1 EN 50081-1... -
Page 84: Safety Devices And Labels
1.1.3 Safety devices and labels Fuses The fuses protect the electrical parts of the equipment. When the current reaches too high a value, the fuses melt thus preventing any damage to the inside electronic parts. A few spare fuses are provided with the fusibili equipment (2A fast type). -
Page 85: Wiring Connection
1.1.4 Wiring connection Before connecting Wellness Mate to the power mains, make sure that the features of the wiring system comply with current laws. Check the data on the sticker on the back of the power supply unit. Danger The wall socket must be in a place where the socket can be put in and taken out easily and safely. -
Page 86: Grounding Instructions
1.1.5 Grounding instructions The product must be grounded. If it should malfunction or breakdown, grounding provides a path of least resistance for electric current to reduce the risk of electric shock. The product is equipped with a cord having an equipment- grounding conductor and a grounding plug. -
Page 87: Maintenance
1.2 Maintenance 1.2.1 Routine maintenance It is good practice to keep Wellness Mate clean and dust-free all the time, according to common rules of health and hygiene. In order to clean, please proceed as follows: - turn the device off by setting the switch in position 0; - take the power source out of the wall socket;... -
Page 88: Non-Routine Maintenance: Replacing The Fuses
1.2.2 Non-routine maintenance: replacing the fuses Warning Before replacing, you must turn Wellness Mate off, setting the switch in position 0 and taking the plug out of the wall socket. Take out the fuse holder, located at the bottom of the power supply unit, next to the sockets, by pressing on the lever. -
Page 89: Technical Service
Fax: ++41-91-6001405 - on-site Support Service - sending of original spare parts. e-mail: service@technogym.com When contacting the Technogym Technical Support service, please specify the following details: - device model - date of purchase - serial number - precise description of the problem. -
Page 90: Disposal Of Wellness Mate
1.3 Disposal of Wellness Mate It is always good practice to ensure that Wellness Mate can never constitute a hazard; therefore do not leave the device where children might use it as a toy. Therefore, whenever it is left without running for a long time, or if you intend to dispose of the device, you must cut power off by detaching the power supply cable. -
Page 91: Precautions For Correct Use
Precautions for correct use 2 2 2 2 2... - Page 92 Wellness Mate has been designed and made for installation on strength training equipment. Therefore, the requirements in terms of location are the same as those for the equipment it is to be applied on. If the equipment is installed in a public place of entertainment, its location must comply with all the suitability requirements laid down in current legislation on the subject.
-
Page 93: Using Wellness Mate
Using Wellness Mate... - Page 94 The control panel is easy and quick to use. Training data can be read easily and are constantly updated during the exercise: the load selected via the pin; the number of the sets and repetitions which have been performed or have to be performed;...
-
Page 95: Starting Up And Turning Off
The next message on the control panel shows: 0226011 - the software version (1.0.1) - the name of the equipment: UNICA - the serial number. To allow the software to complete self- configuration, use the pin to select 5 kg,... - Page 96 Wellness Mate is now ready and waiting to receive instructions from the user (stand by). During this standby phase, TRY THE NEW the display shows several alternating STRENGTH TRAINING messages, for example inviting the user WITH THE TGS KEY to try the new strength training with the 15:30 MENU TGS key.
-
Page 97: Control Panel
3.2 Control panel The control panel consists of: a display, showing messages and data; 4 buttons, allowing the user to dialogue with the software; the TGS™ reading device, for the TGS key. 00871001 The messages appearing on the display guide the user step by step in using the software in the most correct and immediate manner, through messages and data requests. -
Page 98: Interacting With The Software: Messages And How To Use The Buttons
3.2.1 Interacting with the software: messages and how to use the buttons During the performance of the exercise, the display will show the training data: suggested range and speed speed of each repetition power employed, SECS expressed in Watts how much time has gone by since the SETS LOAD... - Page 99 During programming of a workout, the software will need information from the user and will demand data; in order to answer the questions appearing on the display the user will have to use the 4 buttons. The function of each button is described on the bottom line of the text appearing on the display.
- Page 100 4 the fourth button to the right may be used to: - confirm the number suggested or the text highlighted on the display and to proceed, if the symbol OK appears - freeze the image on the display and prevent it from passing on automatically to the next message, if the symbol STOP appears - see the help message, if the symbol ? appears (see 3.4).
- Page 101 Let us go back to the previous example: When programming a new exercise, the user must specify how many sets he WORKOUT wants to do. HOW MANY SETS DO YOU WANT TO DO? The number of sets suggested is 3: to do more, press the third button, which as a ( );...
-
Page 102: Stand By: Getting Started
3.3 Stand by: getting started After turning on, Wellness Mate carries out a quick self-configuration (see 3.1) and then goes into standby while awaiting instructions from the user. Various TRY THE NEW STRENGTH TRAINING suggestions appear alternately on the WITH THE TGS KEY display during this stage, for example 15:30 M E N U... - Page 103 • press the third button to the right a new message will appear to see the help message (?) explaining how to begin, starting from stand by (see paragraph 3.4) • lift the workload to start an all the data of the exercise are exercise directly displayed: speed and range of each repetition, power expressed...
-
Page 104: Help Messages (?)
3.4 Help messages (?) Help messages - which are activated via the question mark (?) button - are messages which tell the user what do in the situation he is in. For example, if you press the question mark button (?) in standby, a new HELP MESSAGE: INSERT THE TGS KEY message will appear explaining what to do... - Page 105 Another example: title TEST - WORKLOAD HELP MESSAGE: text SELECT THE SUGGESTED THE SUGGESTED LOAD IS OR DESIRED WORKLOAD 85.5 help message initial message The title of the initial message shows The title shows it is a help message. the situation the user is in: he has chosen to do a test and has reached the moment to choose the workload from the weight stack.
-
Page 106: Training With The Tgs Key
3.5 Training with the TGS key The TGS key can be used for saving the results of the various training sessions, and tracking the user’s performance over time. In fact, with the TGS key and Wellness Link users are able to: - view their training program over the Internet;... - Page 107 The data on the first sets follow: TGS - EXERCISE - the number of repetitions (e.g. 12) - the workload to be selected on the 12 REPETITIONS weight stack (e.g., 22,5 kg). 22.5 KG WORKLOAD Press to go back to the previous message;...
- Page 108 During the exercise, the bottom part of the display shows the following: - which set is being done and how many sets make up the exercise (in the example here, the first of 3 sets is being done); - the number of repetitions done (in SETS LOAD example 2);...
-
Page 109: Range Of Motion (Rom)
3.5.1 Range Of Motion (ROM) Generally speaking, it is on the basis of the first two repetitions that the software calculates the specific range of motion (o ROM, range of motio n) of the user and then displays it during the exercise. This way, the user will have a point of reference throughout the workout allowing him to verify the range of performance of each repetition. -
Page 110: The Pacer And Speed Of Movement
3.5.2 The pacer and speed of movement The speed with which the lit-up ROM band lights up is equal to the speed developed by the user; the pacer, on the other hand, shows the user the suggested speed at which the exercise should be performed. The pacer moves under the ROM display range, from one end to the other, in order to suggest performing... - Page 111 At the end of each set, the middle of the display will show chequered flags, accompanied by an acoustic signal. If the user continues with other repetitions, Wellness Mate will go on displaying data on speed and range of motion and will count the repetitions which were performed;...
- Page 112 TGS - NEXT EXERCISES workout are listed. UNICA BIKE RECLINE Use both middle buttons to run through RUN FORMA the lines of text (the list may be longer than the display);...
- Page 113 If you want to do one set more than those scheduled on the TGS key, all you have to do is lift the load again when the message or the message NEXT EXERCISES appears. Wellness Mate will behave as it does for every other set END OF WORKOUT scheduled on the TGS key.
-
Page 114: Training Not Programmed On The Tgs Key
3.6 Training not programmed on the TGS key This function allows you to set customised exercises. The results may or may not be saved on the TGS key. Press the button MENU during standby. There are 4 possibilities: use the middle buttons to skim through the text until the word lights up. - Page 115 To set the repetitions, proceed in the same manner. The message too is similar ( WORKOUT MANY REPETITIONS DO YOU WANT TO DO SELECT THE DESIRED WORKLOAD After setting the number of sets and repetition, select the workload. Press OK to continue. The next message invites you to start the exercise.
- Page 116 A chequered flag in the middle of the display advises the user that the set has been completed. After the workload has been put back in place, the display shows the image of the TO SAVE: TGS key (if it has not already been fitted into the reading device): the set which has been done can be saved on the TGS key (A) or else you can move on to the following sets...
- Page 117 Saving data on the TGS key To save the data for the set which you have EXERCISE DONE ... just completed, put the TGS key into the SIDE LEG RAISE reading device; with the next message, REAR LEG KICK specify which kind of exercise was STANDING CALF BICEPS CURL performed.
- Page 118 During the rest time the display will show the number of repetitions for next set and REST TIME 72 SECS the selected workload. NEXT SELECTED The user may start the next series REPETITIONS LOAD 27.5 whenever he thinks best: before the end of the suggested rest time, or else after.
- Page 119 B2 - a list of exercises still to be done or to be completed on the training program will appear TGS - NEXT EXERCISES UNICA BIKE Use both middle buttons to run RECLINE RUN FORMA through the lines of text (the list may be longer than the display);...
-
Page 120: Free Training
Warning If the use of the TGS key or of the buttons has been disabled from the configuration menu, the workout chosen on the menu but not programmed on the TGS key will not be available (for the configuration menu, see chapter 4). The workout programmed on the TGS key will be available. -
Page 121: Maximal Strength Test (1Rm)
3.7 Maximal strength test (1RM) The maximal strength test lets you know the 1RM (1 Repetition Maximum), i.e. the maximum weight you can lift with a single articular swing in one repetition. Use of the TGS key is not necessary: it can be programmed directly by the trainer in the training program saved on the TGS key, or else it can be set directly by the user on Wellness Mate. - Page 122 Information In the case of exercises performed using one arm or leg at a time (rear leg kick, leg adduction, side leg raise; 90° lateral raise, 90° triceps kick back, rear raise and inverse pull exercises for arms) to test both limbs it is necessary to run two tests.
- Page 123 The test starts as soon as the user lifts the workload. During the exercise, the display shows the number of the test being done, the number of repetitions which have been done and the selected workload. TEST REPS LOAD 22.5 Range and speed of motion and the relevant messages are displayed in the same way as with TGS key training (see paragraph 3.5).
- Page 124 If the user does 10 or more the clock have elapsed, the display will repetitions with the maximum show an invitation to perform 10 more selectable load on Unica, the repetitions, waiting for the first one to machine will not prompt for a be carried out.
-
Page 125: Test Not Programmed On The Tgs Key
3.7.2 Test not programmed on the TGS key If the test was not programmed on the TGS key, you will have to select it from : during the stand by press . There are four possibilities: MENU MENU skim through the text using the middle buttons until the word lights up. - Page 126 After providing your personal data, because UNICA offers various possibilities, you must TEST - TYPE OF EXERCISE specify which kind of exercise you want to SIDE LEG RAISE REAR LEG KICK do: skim through with the middle buttons STANDING CALF...
-
Page 127: Saving Range Of Motion On The Tgs Key
3.8 Saving range of motion on the TGS key Generally speaking, it is on the basis of the first two repetitions that the software calculates the specific range of motion (o ROM) of the user and then displays it during the exercise. This way, the user will have a point of reference throughout the workout allowing him to verify the range of performance of each repetition. - Page 128 Take the TGS key out after updating the training program, when the message appears. REMOVE TGS KEY Information It is possible to save on the TGS key the specific ROM for each of the exercises that can be performed on UNICA. Wellness Mate - User's manual...
-
Page 129: Checking The Training Program
3.9 Checking the training program During the workout, you can use the TRAINING PROGRAM function to check the contents of the training program saved on the TGS key. This function allows you to see: - how many and which exercises make up the training program, - how many and which exercises have already been done, - how many and which exercises still have to be done or completed. - Page 130 Wellness Mate shows the list of exercises which are included in the training program, TRAINING PROGRAM preceded by a symbol specifying whether UNICA BIKE they have already been done or not. RECLINE The list will certainly be longer than what...
-
Page 131: Modifying The Configuration Of Wellness Mate
Modifying the configuration of Wellness Mate... - Page 132 To access the configuration menu from 15:30 stand by press the first two buttons to the left simultaneously. The CONFIGURATION menu will appear: - press USER to access the configuration of Wellness Mate (paragraph 4.1) or of CONFIGURATION USER the ROM (paragraph 4.2); SERVICE - the SERVICE branch is specifically CALIBRATION...
-
Page 133: Configuring The Wellness Mate Parameters
4.1 Configuring the Wellness Mate parameters After you select USER on the configuration menu, you will be asked for a PASSWORD: 2 4 0 6. Use both middle buttons to display the first digit, then press OK; proceed in the same way for each digit. - Page 134 After confirming the MACHINE CONFIGURATION option, the following messages will appear on the display: - language LANGUAGE The language which has been set may not ENGLISH be changed. - unit of measure UNIT OF MEASURE Choose the unit of measure you want with USA=0 EUR=1 the number (1 for the European system;...
- Page 135 - displaying the images during the exercise DISPLAY IMAGES NO=0 YES=1 If you select option 1, the images commenting the speed and range of motion will be displayed during the exercises; if you select option 0 these images will not be displayed. Press OK to confirm and continue.
- Page 136 - enabling buttons KEYPAD ENABLE NO=0 YES=1 The option 0 disables the use of the buttons and therefore it also disables the TEST WORKOUT functions on the main AND TRAINING PROGRAM menu. The reader for the TGS key stays active. When you insert a TGS key, the buttons work normally again.
- Page 137 - repetition for ROM acquisition SET ROM DURING REP (2-10) Specify after how many repetitions the software must set the ROM value. Press OK to confirm and continue. - time out to reset TIME OUT Specify after how many seconds the SECS software must stay in stand by from when the weight pack goes back to its rest...
- Page 138 - default value of the rest time during the test TEST: REST TIME SECS Specify how many seconds the software must suggest between the various parts of a test. Press OK to confirm and continue. - hour SET CURRENT TIME Specify the exact time for the clock on the HOUR display during stand by.
-
Page 139: Configuring The Rom
4.2 Configuring the ROM When in stand by, press both the first two buttons on the left simultaneously. The CONFIGURATION menu will appear. Select the item USER, then press OK to confirm. Introduce the requested PASSWORD (2 4 0 6), as described at 4.1. On the new menu, skim through the new menu using the middle buttons until the item ROM CONFIGURATION lights up, then press OK to confirm. -
Page 140: Realigning The Weight Stack
4.3 Realigning the weight stack If the workload shown on the display during performance of the exercises is not the same as the selected workload, you must realign the software at the weight stack of the equipment. From stand by, simultaneously press the first two buttons to the left and the CONFIGURATION menu will appear. -
Page 141: Setting Brightness And Contrast
4.4 Setting brightness and contrast To set display brightness and contrast, 15:30 MENU press the image which appears during stand by. When the next message appears, use the arrows to choose brightness or contrast, DISPLAY SETTINGS then confirm by pressing OK. BRIGHTNESS Use the same middle buttons ( and ) to CONTRAST... -
Page 143: Glossary
Glossary... - Page 144 1RM, from stand by mode, without 1 Repetition Maximum. Repetition programming the sets and Maximum. Indicates the maximum repetitions ( paragraph 3.6.1). weight which can be lifted with complete range of motion for a Pacer, single repetition. It is calculated by light on the Range of Motion display the maximum strength test which shows the target speed for...
- Page 145 Sets, Training program, consists of a number of consecutive the user’s personal training repetitions. Different sets are program, consisting of a list of separated by a rest period, called exercises and the corresponding the rest time. workloads. The training program can be subdivided into various Stand by, sessions;...
- Page 147 ITALY FRANCE Technogym S.p.A. Technogym France S.a.r.l. Via Giorgio Perticari, 20 4, Rue Nieuport - B.P. 109 47035 Gambettola(FC) 78143 VELIZY CEDEX Tel. 0547 56047 Ph. +33 1 34582585 Fax +33 1 34582588 Fax 0547 650505 E-mail: info@technogym france.fr E-mail: informazioni@technogym.com UNITED KINGDOM U.S.A.
Need help?
Do you have a question about the Unica and is the answer not in the manual?
Questions and answers