Table of Contents
Advertisement
Advertisement
Table of Contents

Related Manuals for PerkinElmer Lambda XLS


Summary of Contents for PerkinElmer Lambda XLS
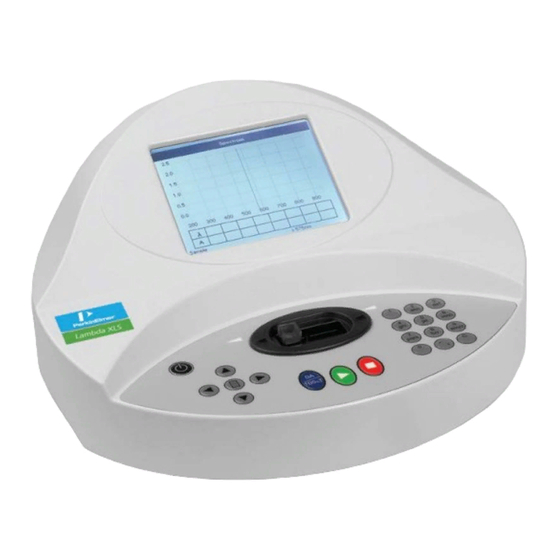
- Page 1 UV-VIS SPECTROSCOPY XLS/XLS+ AMBDA User’s Guide...
- Page 2 The information contained in this document is subject to change without notice. Except as specifically set forth in its terms and conditions of sale, PerkinElmer makes no warranty of any kind with regard to this document, including, but not limited to, the implied warranties of merchantability and fitness for a particular purpose.
-
Page 3: Table Of Contents
Switching on the Instrument ..............22 Using the Software ................. 23 Methods and Favorites ................27 Folder Options ................. 27 Method Options ................30 Lambda XLS/XLS+ Instrument Methods ........... 32 Utilities ....................33 Date and Time ................34 Regional..................34 Printer .................... 35 Preferences .................. - Page 4 Appendices ..................85 Appendix 1: Specifications ............... 86 Appendix 2: Customer Care Contacts ............87 Index ..................... 89...
-
Page 5: Introduction
Introduction... -
Page 6: About This Manual
6 . Lambda XLS/XLS+ User's Guide About this Manual This user’s guide describes the installation and operating procedures for your Lambda XLS/XLS+ UV/Vis spectrometer. The manual contains the following sections: • Introduction; • Safety Information; • Installing your Instrument; Using your Instrument;... -
Page 7: Conventions Used In This Manual
“+” is used to show that you have to press two keys at the same time, for example, ALT+F. All eight digit numbers are PerkinElmer part numbers unless stated otherwise. Unless stated otherwise, in this manual “instrument” refers to the Lambda XLS or Lambda XLS+ instrument. Notes, cautions and warnings Three terms, in the following standard formats, are also used to highlight special circumstances and warnings. - Page 8 8 . Lambda XLS/XLS+ User's Guide...
-
Page 9: Safety Information
Safety Information... -
Page 10: General Safety
10 . Lambda XLS/XLS+ User's Guide General Safety The Lambda Bio/XLS instruments conform to the requirements of the Low Voltage Directive 2006/95/EC, EMC Directive 2004/108/EC and the IVD Directive 98/79/EC. Standards to which conformity is declared: • EN 61010-1 Safety requirements for electrical equipment for measurement, control and laboratory use. -
Page 11: Decontamination Certificates
Decontamination certificates can be found at the following web address or be provided by Customer Care. http://www.perkinelmer.com/LambdaBioXLSSupport It is the responsibility of the user to ensure a safe working environment is provided to the engineer or staff by appropriate risk assessments and, if appropriate, decontamination procedures before work commences. -
Page 12: Waste Disposal
12 . Lambda XLS/XLS+ User's Guide Waste Disposal Waste containers may contain corrosive or organic solutions and small amounts of the substances that were analyzed. If these materials are toxic, you may have to treat the collected effluent as hazardous waste. Refer to your local safety regulations for proper disposal procedures. -
Page 13: Unpacking And Installation
Code (CEC) Part 1, CSA C22.1 and CSA C22.2 No. 0. • Inspect the instrument for any signs of damage caused in transit. If any damage is discovered, access the Troubleshooting Guide on the PerkinElmer website http://www.perkinelmer.com/LambdaBioXLSSupport and follow the process there. If Appendix 2:... - Page 14 14 . Lambda XLS/XLS+ User's Guide...
-
Page 15: Installing Your Instrument
Installing your Instrument... -
Page 16: Unpacking
16 . Lambda XLS/XLS+ User's Guide Unpacking Take great care when installing your instrument, and follow the procedures described in this manual. CAUTION 1. Check that you have the items listed in the following table. Part Number Description L7110189/L7110192 Lambda XLS/XLS+ (if applicable) -
Page 17: Connecting To The Line Power Supply
Installing your Instrument . 17 Connecting to the Line Power Supply Electrical Hazard To prevent potential injury to yourself and damage to the instrument, make any electrical connections in the system before connecting to the WARNING line power supply. The instrument automatically adjusts to the correct operating voltage. Connect to the supply outlet with power supply provided and the power cord that is ... - Page 18 18 . Lambda XLS/XLS+ User's Guide...
-
Page 19: Using Your Instrument
Using your Instrument... -
Page 20: Overview Of The Instrument
The Lambda XLS/XLS+ instrument is a simple-to-use UV/Visible spectrometer with a CCD array detector (1024 pixels). To access the folders and functions on your Lambda XLS/XLS+ instrument, navigate around the display using the alphanumeric keys and the navigation arrows on the keypad. - Page 21 Using your Instrument . 21 The Cancel/Back/Stop key Cancels a selection and returns to the previous folder, goes Back to previous screen in a method or Stops a measurement. The OK/Next/Run/Scan key, enters or confirms a selection, moves to the Next screen or takes a measurement.
-
Page 22: Switching On The Instrument
You should NOT use the instrument under these circumstances. Instead, make a note of the error message and refer to the Troubleshooting Guide on the PerkinElmer website to address the problem. -
Page 23: Using The Software
Using your Instrument . 23 Using the Software The home page contains a list of folders and functions or methods. Each item in the list is numbered and is opened by using the associated number on the keypad. Opening a folder takes you to another screen of further options. -
Page 24: Taking Measurements
24 . Lambda XLS/XLS+ User's Guide Taking measurements After the method settings have been entered, press OK to start measurements. The results screen for the method is displayed. Figure 5 A typical results screen 1. Insert the Reference sample in the sample holder, and press OA/100%T to take the reference measurement. - Page 25 Using your Instrument . 25 Options Within each method you are able to select various options that define the way results are treated. These options may be specific to the method, allow you to print the results or view method settings. Press Options to view the Options menu.
- Page 26 26 . Lambda XLS/XLS+ User's Guide If you are not using a previously stored method, it is advisable to check that these options have been appropriately set for your experiment before running your samples. Preferences NOTE: Setting the History method setting to On (see on page 36) will cause the instrument to store its last settings.
-
Page 27: Methods And Favorites
Using your Instrument . 27 Methods and Favorites The Methods folder allows you to store user-modified methods, based on the default instrument methods, which can be saved using the Options menu. You can save up to 9 methods in each folder. To retrieve previously stored methods, press the appropriate keypad number to enter the Methods folder. - Page 28 28 . Lambda XLS/XLS+ User's Guide Folder Names 1. Open the Methods folder. 2. Press to display the available Options. 3. Press 1 to select Folder Names. 4. Select the Folder you wish to rename using the left and right arrows, and then press the down arrow.
-
Page 29: Sd Memory Card
Using your Instrument . 29 SD Memory Card If an SD Memory Card is installed in your instrument, then you can access the SD Memory Card folder option. The options Backup Folder or Backup All Folders allow you to copy a methods folder or all of the methods folders on your instrument, respectively, to the SD Memory Card. -
Page 30: Method Options
30 . Lambda XLS/XLS+ User's Guide 5. Select the Folder using the left and right arrows. 6. Press OK NOTE: The LED next to the card will be lit while methods are saved to the card. The card should not be removed from the instrument while the LED is lit as this could corrupt your data. - Page 31 Using your Instrument . 31 Unlock Method 1. Open the appropriate methods folder. 2. Press to display the available Options. 3. Press 3 to select Unlock Method. 4. Select the method to be unlocked using the left and right arrows, and then press the down arrow.
-
Page 32: Lambda Xls/Xls+ Instrument Methods
32 . Lambda XLS/XLS+ User's Guide Lambda XLS/XLS+ Instrument Methods The pre-defined methods available on your Lambda XLS/XLS+ instrument are: Single Wavelength • Multi Wavelength • • Spectrum • Concentration • Standard Curve • Kinetics • Absorbance Ratio. Figure 8 Lambda XLS home page NOTE: If you have an SD Memory Card installed in your instrument that contains methods, the SD Memory Card folder will be added to the home page. -
Page 33: Utilities
Using your Instrument . 33 Utilities You can use the Utilities folder to modify the instrument setup. From the home page, press the appropriate keypad number to enter the Utilities folder. The Utilities screen is displayed. Figure 9 The Utilities screen The Utilities are: Date and Time Set correct time and date. -
Page 34: Date And Time
34 . Lambda XLS/XLS+ User's Guide Date and Time 1. Press 1 to select Date and Time. The Date and Time screen is displayed. 2. Using the keypad numbers or left and right arrows, enter the Day, Month, Year, Hour and Minute. -
Page 35: Printer
Using your Instrument . 35 3. Select the Number Format (the type of decimal separator) using the left and right arrows. The options are “,” or “.”. 4. Press OK to store the settings and return to the Utilities folder. Printer 1. -
Page 36: Preferences
36 . Lambda XLS/XLS+ User's Guide Preferences 1. Press 4 to select Preferences. The Preferences screen is displayed. 2. Select whether Games are turned available using the left and right arrow keys. The options are Yes or No. 3. Define the Theme (the on-screen layout of folders). -
Page 37: Contrast
Using your Instrument . 37 Contrast Ambient temperature can affect the display. The contrast function can optimize the display for local conditions. The procedure is as follows: 1. Press 5 to select Contrast. The Contrast screen is displayed. 2. Adjust the Brightness using the left and right arrows, and then press the down arrow. 3. -
Page 38: Sample Handling
Make sure that the cell is inserted in the correct alignment. The cell holder supplied with the instrument accepts standard 10–40mm (Lambda XLS) • or 10 mm (Lambda XLS+) pathlength quartz, glass or plastic cells. -
Page 39: Instrument Methods
Instrument Methods... -
Page 40: Single Wavelength
40 . Lambda XLS/XLS+ User's Guide Single Wavelength The Single Wavelength method makes absorbance (A) and percentage transmission (%T) measurements on samples by measuring the amount of light that has passed through a sample relative to a reference (this can be air). - Page 41 Instrument Methods . 41 5. Press OK to start measurements. The Single Wavelength results screen is displayed. 6. Insert the reference sample and press This reference measurement will be used for all subsequent samples until repeated. 7. Insert your first sample and press The result at the selected wavelength is displayed on screen.
- Page 42 42 . Lambda XLS/XLS+ User's Guide Press to display the available Options, which you can select using the keypad numbers: Method Settings Returns to the Method Settings screen. Print Prints the result using the printer selected in the Utilities folder.
-
Page 43: Multi Wavelength
Instrument Methods . 43 Multi Wavelength The Multi Wavelength method can provide absorbance readings at up to 5 wavelengths. The procedure is as follows: 1. From the home page, press 1 to open the Standard Methods folder. The Standard Methods screen is displayed. 2. - Page 44 44 . Lambda XLS/XLS+ User's Guide 6. Press OK to start measurements. The Multi Wavelength results screen is displayed. 7. Insert the Reference sample and press This reference measurement will be used for all subsequent samples until repeated. 8. Insert your first sample and press A spectrum covering the range of wavelengths is displayed, with cursors marking the chosen wavelengths.
- Page 45 Instrument Methods . 45 Press to display the available Options, which you can select using the keypad numbers: Method Settings Returns to the Method Settings screen. Print Prints the data on the results screen (the absorbance table) using the printer selected in the Utilities folder.
-
Page 46: Spectrum
46 . Lambda XLS/XLS+ User's Guide Spectrum The Spectrum method enables you to collect an absorption spectrum, and determine peak heights and positions. The procedure is as follows: 1. From the home page, press 1 to open the Standard Methods folder. - Page 47 Instrument Methods . 47 5. Select the Mode using the left and right arrows, and then press the down arrow. The options are Absorbance or %Transmission. 6. Press OK to start measurements. The Spectrum results screen is displayed. 7. Insert the Reference sample and press This reference measurement will be used for all subsequent samples until repeated.
- Page 48 48 . Lambda XLS/XLS+ User's Guide Press to display the available Options, which you can select using the keypad numbers: Method Settings Returns to the Method Settings screen. Print Prints the result using the printer selected in the Utilities folder.
- Page 49 Instrument Methods . 49 Add Peak/Delete Add Peak manually adds a peak position to the peak table in the Peak results screen at the position set by the cursor. The entry in the peak table is then displayed in inverse shading to discriminate between User Defined Peaks and Auto-Detect peaks.
- Page 50 50 . Lambda XLS/XLS+ User's Guide Graph Scale Displays the Graph Scale settings screen. This enables you to set up a defined graph by defining the limits in either or both of the axes. Zoom Mode: This sets up the operation of the Zoom keys (up and down arrows).
-
Page 51: Concentration
Instrument Methods . 51 Concentration The Concentration method makes simple concentration measurements on samples by measuring the amount of light that has passed through a sample relative to a reference (this can be air). The concentration is determined by measuring the absorbance at a specific wavelength and then multiplying by a factor. - Page 52 52 . Lambda XLS/XLS+ User's Guide 4. Select the Mode using the left and right arrows, and then press the down arrow. The options are Enter Factor (where a known factor is entered), Measure Standard (where the factor is calculated from a calibration sample) or Enter Neg. Factor (where a known negative factor is entered).
- Page 53 Instrument Methods . 53 7. Press OK to start measurements. The Concentration results screen is displayed. 8. Insert the Reference sample and press This reference measurement will be used for all subsequent samples until repeated. 9. If you selected Measure Standard, insert your standard and press OK The Run Standard screen is displayed.
- Page 54 54 . Lambda XLS/XLS+ User's Guide 10. Press Run to run the standard. The Factor is calculated and displayed. 11. Insert your first sample and press The Concentration of the sample is displayed. 12. Repeat Step 11 for each sample.
- Page 55 Instrument Methods . 55 Press to display the available Options, which you can select using the keypad numbers: Method Settings Returns to the Method Settings screen. Print Prints the result using the printer selected in the Utilities folder. Show Graph Toggles the graph on and off.
-
Page 56: Standard Curve
56 . Lambda XLS/XLS+ User's Guide Standard Curve This method enables the construction of a multi-point calibration curve from standards of known concentration that can then be used to quantify unknown samples. This instrument has the advantage of being able to store this curve as a method, using up to nine standards. - Page 57 Instrument Methods . 57 4. Enter the number of Standards to be used in the standards curve using the keypad numbers or left and right arrows, and then press the down arrow. The options are 1–9. 5. Enter the Units and then press the down arrow. You can enter text up to 8 characters long using the keypad, or press Options display the Units screen and access a list of pre-defined units.
- Page 58 58 . Lambda XLS/XLS+ User's Guide 9. Press Next The Standard Curve – Standards screen is displayed. 10. Enter the concentration values for each standard using the keypad numbers and the up and down arrows to move between the different standard boxes.
- Page 59 Instrument Methods . 59 12. If you selected Standards, insert the reference sample and then press This reference measurement will be used for all subsequent samples until repeated. If you selected Manual, enter the known absorbance value for each concentration using the keypad.
- Page 60 60 . Lambda XLS/XLS+ User's Guide If you selected Replicates, then when all replicates have been measured press Next to return to the Standards screen. 15. Press OK to accept the calibration. The Standard Curve results screen is displayed. 16. If you selected Manual, insert the reference sample and then press This reference measurement will be used for all subsequent samples until repeated.
- Page 61 Instrument Methods . 61 17. Insert your first sample and then press The absorbance of the sample is measured, and its concentration is calculated and displayed. 18. Repeat Step 17 for each sample. Press to display the available method options, which you can select using the ...
-
Page 62: Kinetics
62 . Lambda XLS/XLS+ User's Guide Kinetics Kinetics studies, where the change in absorbance needs to be followed as a function of time at a fixed wavelength, can readily be performed using the Kinetics method. Reagent test kits are routinely used for the enzymatic determination of compounds in food, beverage and clinical laboratories by measuring NAD/NADH conversion at 340 nm. - Page 63 Instrument Methods . 63 2. Press 6 to open the Kinetics method. The Kinetics – Method Settings 1 screen is displayed. Enter all numerical values using the keypad numbers or the left and right arrows. 3. Set the Wavelength by using the keypad numbers or left and right arrows, and then press the down arrow.
- Page 64 64 . Lambda XLS/XLS+ User's Guide 7. Press Next The Kinetics – Method Settings 2 screen is displayed. 8. Select the measurement Mode using the left and right arrows, and then press the down arrow. The options are Delta A (the change in absorbance over the measurement duration, or...
- Page 65 Instrument Methods . 65 10. Set the Factor by which the absorbance is multiplied to give the concentration using the left and right arrows. The available range is from 0.01 to 9999. 11. Press OK to start measurements. The Kinetics results screen is displayed. 12.
- Page 66 66 . Lambda XLS/XLS+ User's Guide Press to display the available method options, which you can select using the keypad numbers: Method Settings Returns to the Method Settings screen. Print Prints the data on the results screen using the printer selected in the Utilities folder.
-
Page 67: Absorbance Ratio
Instrument Methods . 67 Absorbance Ratio The Absorbance Ratio method makes simple absorbance ratio measurements on samples, by measuring the amount of light that has passed through a sample relative to a blank (this can be air) at two wavelengths. The procedure is as follows: 1. - Page 68 68 . Lambda XLS/XLS+ User's Guide 6. If background correction is On, enter Wavelength 3, from which the background correction will be obtained. 7. Press Next The Absorbance Ratio – Method Settings screen is displayed. 8. Select the Pathlength using the left and right arrows, and then press the down arrow.
- Page 69 Instrument Methods . 69 11. Enter the volume of Diluent by using the keypad numbers. The available range is from 0.01 to 9999. 12. Press OK to calculate the dilution factor and return to the Method Settings screen. 13. Select the Units of measurement using the left and right arrows, and then press the down arrow.
- Page 70 70 . Lambda XLS/XLS+ User's Guide 18. Repeat Step 17 for each sample. Press to display the available method options, which you can select using the keypad numbers: Method Settings Returns to the Method Settings screen. Print Prints using the printer selected in the Utilities folder.
-
Page 71: Accessories
Accessories... -
Page 72: Accessories And Consumables
Lambda Bio/XLS Print Utility and Cable L7110232 Lambda Bio/XLS Spare Printer Paper (20 Rolls) L7110233 Lambda Bio/XLS Bluetooth Accessory A range of cells and microcells are also available from PerkinElmer that are suitable for use with the Lambda XLS/XLS+ instrument. -
Page 73: Printer Installation And Configuration
Accessories . 73 Printer Installation and Configuration The Printer Accessory (L7110230) is an optional accessory that allows you to print your data as you run your samples, directly from your instrument. Printer installation 1. Turn off the line power supply and disconnect the power cable. 2. -
Page 74: Printer Configuration
74 . Lambda XLS/XLS+ User's Guide 5. Plug the accessory cable into the printer. Locating bosses Printer Accessory cable 6. Lower the printer onto the locating bosses and push down firmly. 7. Reconnect the power cable. Printer configuration 1. Switch the instrument on and then open the Utilities folder. -
Page 75: Loading Or Changing The Printer Paper
Accessories . 75 Loading or changing the printer paper 1. Lift off the paper cover. 2. Lock the platen and turn the knob to feed the paper. Platen lock released 3. Feed in the paper. Sometimes it helps if the platen lock is released. Platen locked 4. -
Page 76: Bluetooth Accessory Installation
76 . Lambda XLS/XLS+ User's Guide Bluetooth Accessory Installation 1. Remove the power cable from the instrument. 2. Turn the instrument over and remove the two cap head screws using the 3 mm hexagonal wrench provided. Cap head screws 3. Turn the instrument back over and lift the accessory cover vertically upwards to remove... - Page 77 Accessories . 77 5. Plug the accessory cable into the Bluetooth module. 6. Plug the two lugs on the Bluetooth module into the innermost slots in the base of the case. 7. Lower the accessory cover vertically downwards onto the instrument, engaging the PCB in the innermost slots in the accessory cover.
- Page 78 78 . Lambda XLS/XLS+ User's Guide 10. Switch the instrument on and open the Utilities folder. 11. Press 3 to open the Printer folder. 12. Select Computer (Bluetooth) as the Printer option using the arrow keys. 13. Press OK to save the settings.
-
Page 79: Lambda Bio/Xls Print Utility
Accessories . 79 Lambda Bio/XLS Print Utility There are two software applications comprising the Lambda Bio/XLS Print Utility. The Lambda Bio/XLS Report Utility is an application running separately under Windows XP that enables you to connect via a USB cable to a PC onto which the software has been installed. - Page 80 80 . Lambda XLS/XLS+ User's Guide...
-
Page 81: Maintenance
Maintenance... -
Page 82: General Maintenance
There are no user-serviceable parts in this instrument. If WARNING you have any problems, access the Troubleshooting Guide on the PerkinElmer website and work through the process there: http://www.perkinelmer.com/LambdaBioXLSSupport If you do not have access the Troubleshooting Guide, or have any further problems, contact Customer Care (see Appendix 2: Customer Care on page 87 for more information). - Page 83 Maintenance . 83 2. Lower the sample holder out of the instrument. Thumbscrews Figure 10 Position of cell holder thumbscrews...
-
Page 84: Storage And Shipping
The unit should be kept in its packaging in a dry, non condensing environment, free from dust or dirt, in the range −10 to 50 °C. Should you need to return your instrument to PerkinElmer, a decontamination certificate is required before the instrument is shipped. Decontamination certificates can be obtained from PerkinElmer. -
Page 85: Appendices
Appendices... -
Page 86: Appendix 1: Specifications
86 . Lambda XLS/XLS+ User's Guide Appendix 1: Specifications Specifications are measured after the instrument has warmed up at a constant ambient temperature and are typical of a production unit. Specification Lambda XLS Lambda XLS+ Wavelength range 190–1100 nm Wavelength scanning range 200–950 nm... -
Page 87: Appendix 2: Customer Care Contacts
Appendices . 87 Appendix 2: Customer Care Contacts NOTE: If you experience any problems with your instrument, please refer to the Troubleshooting Guide at http://www.perkinelmer.com/LambdaBioXLSSupport before contacting Customer Care. Customer Care USA: 1 00 762 4000 (In the USA) (+1) 203 925 4602... - Page 88 88 . Lambda XLS/XLS+ User's Guide...
-
Page 89: Index
Appendices . 89 Index Absorbance Ratio ........ 67 Maintenance ........82 Accessories ......... 72 Methods ..........27 Add Peak ..........49 Absorbance Ratio ......67 Concentration ........51 Kinetics ........... 62 Method folders ......... 27 Bluetooth Installation ......76 Method Options ....... 30 Multi Wavelength ...... - Page 90 90 . Lambda XLS/XLS+ User's Guide Standard Methods Absorbance Ratio ......67 Using the Software ......23 Concentration ........51 Utilities..........33 Kinetics ..........62 Regional .......... 34 Multi Wavelength ......43 Single Wavelength ......40 Spectrum ......... 46 Standard Curve ........ 56 Zoom Mode .........
Need help?
Do you have a question about the Lambda XLS and is the answer not in the manual?
Questions and answers