Advertisement

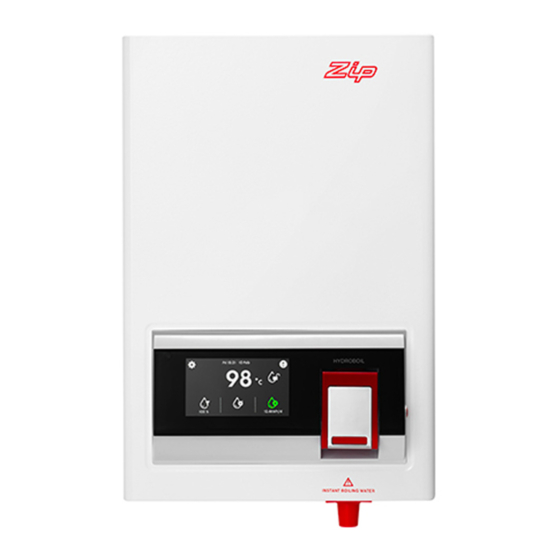
Zip Hydroboil
Installation and Operating Instructions
303062 Zip Hydroboil 3 Litre White
303061 Zip Hydroboil 3 Litre Stainless Steel
305062 Zip Hydroboil 5 Litre White
305061 Zip Hydroboil 5 Litre Stainless Steel
307062 Zip Hydroboil 7.5 Litre White
307061 Zip Hydroboil 7.5 Litre Stainless Steel
Page 1 of 24
804546 03.17 1.00

Advertisement

Table of Contents
loading
Need help?

Need help?

Do you have a question about the 303061 and is the answer not in the manual?

Questions and answers

Subscribe to Our Youtube Channel

Summary of Contents for Zip 303061

  • Page 1 Zip Hydroboil ™ Installation and Operating Instructions 303062 Zip Hydroboil 3 Litre White 303061 Zip Hydroboil 3 Litre Stainless Steel 305062 Zip Hydroboil 5 Litre White 305061 Zip Hydroboil 5 Litre Stainless Steel 307062 Zip Hydroboil 7.5 Litre White 307061 Zip Hydroboil 7.5 Litre Stainless Steel Page 1 of 24 804546 03.17 1.00...
  • Page 2: Table Of Contents

    Contents Read These Warnings First ........................3 Installation Requirements ......................... 3 Installation Procedures ..........................4 Step 1 – Positioning ........................ 4 Step 2 – Fastening ........................4 Step 3 – Connecting ........................ 5 3.1 Plumbing ........................ 5 3.2 Venting ........................5 3.3 Electrical.........................
  • Page 3: Read These Warnings First

    This appliance must be earthed. If the power supply cord is damaged it must be replaced by a Zip authorised agent or a qualified electrician. Do not remove the cover of the heater under any circumstances without first isolating the heater from the power supply.
  • Page 4: Installation Procedures

    Installation Requirements d) Outlet drainage to a sink draining board or to a drip tray. Approximate Weight When Filled e) Access to drainage from a vent situated at the base of the 3.0 Litre models 12.5 kg heater. 5.0 Litre models 16.5 kg f) In all installation instances the walls of the heater must be 7.5 Litre models...
  • Page 5: Step 3 - Connecting

    Installation Procedures Remove Filter Guard Remove filter guide as shown in picture above. Install plumbing and wiring and prepare pipe ends and wiring ends as shown. Screw heater chassis to the wall using screws or bolts suited to the wall. Screws or bolts must be capable of supporting the heater weight when filled.
  • Page 6: Electrical

    Installation Procedures long, has no more than 3 right angle bends, and visibly discharges to a waste water drain. For concealed vent plumbing, connect plumbing to the vent outlet from the heater rear using a elbow protruding 45 mm from the wall. Alternatively attach a tun dish to the wall as shown and plumb away to waste.
  • Page 7: Step 5 - Installing Case Cover

    Installation Procedures Step 5 – Installing the Cover Fit the case wrapper to unit as shown in the picture below. Note, make sure the fi lter guide has already been installed before installing the cover. 2. Use screws and bolts provided to fasten case wrapper onto unit.
  • Page 8: Step 7 - Commissioning - Filter Flush

    Installation Procedures Step 7 – Commissioning - Filter Flush Remove the plug on the left side of the unit and check that the filter flush valve is in the correct position to perform a filter flush, as shown in fig.1. Use a flat blade screw driver or 8mm allen key and rotate the filter flush valve 180°...
  • Page 9: Step 8 - Commissioning - Calibration

    Installation Procedures Once water is available, close the dispense tap Touch “Start” and allow 5 litres of water to outlet. flow through the filter (this takes about 10min of flushing). Water must trickle out of the Warning: The element will be turned on at vent outlet (at 0.5L/min).
  • Page 10: Operating Procedures

    Tap Operation Safety feature. Zip Hydroboil has a unique safety device designed to reduce the incidence of accidental operation of the tap. The tap can be “Locked” to prevent the Hydroboil from dispensing hot water. In order to “lock” the tap, ensure the safety button is protruding from the right hand side of the control panel and the locked indicator is shown.
  • Page 11: Menu Operation

    Menu Operation 1.HOME SCREEN The Zip Hydroboil has a touch screen feature for easy setup and operation adjustment. CURRENT DATE / TIME NAVIGATE TO FAULT INDICATOR MAIN MENU TOUCH FOR DETAILS SAFETY LOCK BUTTON STATE SLEEP MODE FILTER INDICATION DAILY ENERGY...
  • Page 12 Menu Operation Safety Lock Button State 2 MAIN AND SETTINGS MENU From the home screen touch the button. Locked (cannot dispense water) The following main menu will be shown. Unlocked (can dispense water) This is the red lock button on the right side of the tap, see page 10 “Operating Procedure”.
  • Page 13 ► Usage & Light – It will sleep when water has not 2.3 SETTINGS – SLEEP MODES been dispensed for 2h or when it is dark. Zip Hydroboil can be programed to automatically save energy when not in use. Note: The dark and light thresholds are set using light calibration (see section 3.1).
  • Page 14 Menu Operation From the home screen touch [Filter] From home screen touch [Timer] Choose which fi lter setting to adjust (Internal or The sleep on/off times can be conveniently adjusted External). The following applies to either fi lter. in groups (Everyday, Weekdays, and Weekends). After adjusting a group, an individual day can be adjusted or checked by choosing the “Individual”...
  • Page 15 Menu Operation After installing a new fi lter, touch [Flush Filter] to enter the fl ush sequence (refer to the Filter Flush diagram on page 8). Press [Continue] to reset the filter counter. 2.4.3 SETTINGS - FILTER LOG Set the valve on the side of the unit to the “Filter From the home screen touch [Filter Flush”...
  • Page 16 3.4 INSTALL – POWER CYCLE can be checked from the Home screen when dark- ening the room. After 10 seconds the screen will go This will perform a power reset should the Zip grey and show the“SLEEP SCREEN” (see section technical support recommend this.
  • Page 17: Wall Mounting Template Dimensions

    Wall Mounting Template Dimensions Page 17 of 24 804546 03.17 1.00...
  • Page 18: Problem Solving

    (see step 6, page 7). Water isolating valve turned off. Check water supply valve. Fails to dispense water. Blocked filter, blocked meter tube, Contact Zip authorised agent. Blocked strainer, solenoid fault, level sensor fault, faulty electronics. Incorrect temperature setting. Check temperature setting (see section 2.2*).
  • Page 19: Earthing Continuity Verification

    Warning! Not changing filtration cartridges when required, may cause the water to become biologically unsafe. If the Zip Hydroboil is switched off for a long period of time (e.g. More than a weekend), run water through the outlet for at least 5 minutes before consumption.
  • Page 20: Spare Parts

    Spare Parts Item Kit Number Description Item Kit Number Description 94496 HB 3 Ltr Tank Assy 94459 Side release plug 94497 HB 5 Ltr Tank Assy 94460 Seal transfer tube 94498 HB 7.5 Ltr Tank Assy 94510 Metering Tube 94499 HB Fascia &...
  • Page 21: Exploded View Diagram

    Exploded View Diagram Page 21 of 24 804546 03.17 1.00...
  • Page 22: Cleaning

    Cleaning Cleaning Case Do not use strong, corrosive, spray or abrasive cleaners. Clean the case with a soft cloth or sponge and mild soapy water. End of life disposal In order to help preserve our environment we ask that you dispose of this product correctly.
  • Page 23 NOTES Page 23 of 24 804546 03.17 1.00...
  • Page 24: Contact Details

    Telephone (02) 9796 3100 Free Call 1 800 638 633 As Zip policy is one of continuous product improvement, changes to specifi cations may be made without prior notice. Images in this booklet have been modifi ed and may not be true representations of the fi nished goods.

This manual is also suitable for:

305062Hydroboil series303062307062305061307061

Table of Contents