ZyXEL Communications GS1900-8 User Manual
Gbe smart managed switch.
gs1900 series
Hide thumbs
Also See for GS1900-8:
- User manual (240 pages) ,
- Brochure & specs (4 pages) ,
- Specifications (4 pages)
Table of Contents
Advertisement
GS1 9 0 0 Se r ie s
GbE Sm art Managed Swit ch
Version 2.10
Edit ion 2, 04/ 2016
Quick Start Guide
Use r 's Gu ide
D e fa u lt Login D e t a ils
I P Addr ess
ht t p: / / 192.168.1.1 ( I n- band port s)
User Nam e
www.zyxel.com
Password
adm in
1234
Copyright © 2016 ZyXEL Com m unicat ions Corporat ion
Advertisement
Table of Contents

Related Manuals for ZyXEL Communications GS1900-8


Summary of Contents for ZyXEL Communications GS1900-8
- Page 1 GS1 9 0 0 Se r ie s GbE Sm art Managed Swit ch Version 2.10 Edit ion 2, 04/ 2016 Quick Start Guide Use r ’s Gu ide D e fa u lt Login D e t a ils I P Addr ess ht t p: / / 192.168.1.1 ( I n- band port s) User Nam e...
- Page 2 IMPORTANT! READ CAREFULLY BEFORE USE. KEEP THIS GUIDE FOR FUTURE REFERENCE. Not e: This guide is a reference for a ser ies of product s. Ther efore som e feat ures or opt ions in t his guide m ay not be available in your product . Screenshot s and graphics in t his book m ay differ slight ly from your product due t o differences in your product firm ware or your com put er operat ing syst em .
- Page 3 Contents Overview Contents Overview User’s Guide ............................14 Getting to Know Your Switch ........................15 Hardware Installation and Connection ....................19 Hardware Overview ..........................24 ZON Utility ...............................32 The Web Configurator ..........................33 Getting Start ............................41 Technical Reference ..........................51 Monitor: System ............................52 Monitor: Port ............................55 Monitor: VLAN ............................62 Monitor: MAC Table ..........................68 Monitor: Link Aggregation ........................70...
- Page 4 Table of Contents Table of Contents Contents Overview ..........................3 Table of Contents ..........................4 Part I: User’s Guide ..................14 Chapter 1 Getting to Know Your Switch......................15 1.1 Introduction ............................15 1.1.1 Bridging Example ........................15 1.1.2 Gigabit Ethernet to the Desktop ....................16 1.1.3 IEEE 802.1Q VLAN Application Example ................16 1.1.4 IPv6 Support ..........................17 1.2 Ways to Manage the Switch ......................18...
- Page 5 Table of Contents 5.1 Overview ............................33 5.2 Access ...............................33 5.3 Navigating the Web Configurator ......................34 5.3.1 Title Bar ...........................34 5.3.2 Navigation Panel ........................35 Chapter 6 Getting Start ............................41 6.1 Overview ............................41 6.1.1 What You Can Do in this Chapter ....................41 6.2 Getting Start ............................41 6.2.1 Wizard .............................42 Part II: Technical Reference................
- Page 6 Table of Contents 9.2 VLAN ..............................62 9.2.1 VLAN ............................62 9.2.2 Port ............................63 9.2.3 VLAN Port ..........................64 9.3 Guest VLAN ............................65 9.4 Voice VLAN ............................66 Chapter 10 Monitor: MAC Table ..........................68 10.1 Overview ............................68 10.1.1 What You Can Do in this Chapter ..................69 10.2 MAC Table ............................69 Chapter 11 Monitor: Link Aggregation.........................70...
- Page 7 Table of Contents 14.2.4 MST Port ..........................82 14.2.5 STP Statistics ........................83 Chapter 15 Monitor: LLDP .............................85 15.1 Overview ............................85 15.1.1 What You Can Do in this Chapter ..................85 15.2 LLDP ...............................85 15.2.1 Statistics ..........................85 15.2.2 Remote Information .......................86 15.2.3 Overloading ...........................87 Chapter 16 Monitor: Security ..........................88 16.1 Overview ............................88...
- Page 8 Table of Contents 19.1 Overview ............................99 19.1.1 What You Can Do in this Chapter ..................99 19.2 Port ..............................99 19.2.1 The Port Edit Screen ......................100 19.3 EEE ...............................101 19.3.1 The EEE Edit Screen ......................102 19.4 PoE ..............................102 19.4.1 The Global Screen .......................103 19.4.2 The Port Screen ........................103 19.4.3 The PoE Edit Screen ......................105 19.5 Bandwidth Management .......................108...
- Page 9 Table of Contents 21.2.1 The Static MAC Screen .......................125 21.2.2 The Static MAC Add Screen ....................126 21.2.3 The Filtering MAC Screen ....................126 21.2.4 The Filtering MAC Add Screen ...................127 21.2.5 The Dynamic Age Screen ....................127 Chapter 22 Configuration: Link Aggregation ....................129 22.1 Overview ............................129 22.1.1 What You Can Do in this Chapter ..................129 22.2 Link Aggregation ...........................129...
- Page 10 Table of Contents 25.2.7 The Add/Edit Profile Screen ....................146 25.2.8 The Throttling Screen ......................147 25.2.9 The Add/Edit Throttling Screen ...................147 Chapter 26 Configuration: Spanning Tree ......................149 26.1 Overview ............................149 26.2 Spanning Tree ..........................149 26.2.1 The Global Screen .......................149 26.2.2 The STP Port Screen ......................150 26.2.3 The STP Port Edit Screen ....................151 26.2.4 The CIST Screen .........................152 26.2.5 The CIST Port Screen ......................154...
- Page 11 Table of Contents 28.3 Trust Mode ............................178 28.3.1 The Global Screen .......................178 28.3.2 The Port Screen ........................178 28.3.3 The Trust Mode Edit Screen ....................179 Chapter 29 Configuration: Security........................181 29.1 Overview ............................181 29.2 Port Security ..........................181 29.2.1 The Global Screen .......................181 29.2.2 The Port Screen ........................181 29.2.3 The Port Edit Screen ......................182 29.3 Protected Port ..........................183...
- Page 12 Table of Contents 31.2.2 The Local Screen ........................197 31.2.3 The Local Add/Modify Screen ....................197 31.2.4 The Remote Screen ......................198 31.2.5 The Remote Add/Modify Screen ..................198 31.3 SNMP ............................199 31.3.1 The Global Screen .......................199 31.3.2 The Community Screen .......................200 31.3.3 The Community Add/Modify Screen ...................200 31.3.4 The Group Screen .......................201 31.3.5 The Group Add/Modify Screen ...................202 31.3.6 The User Screen .........................202...
- Page 13 Table of Contents 32.5 Manage Configuration Files ......................218 32.5.1 Overview ..........................218 32.6 Reset to Factory Defaults ......................219 32.6.1 Overview ..........................219 32.6.2 Reset the Switch to Factory Defaults ...................219 32.7 Network Diagnostics ........................219 32.7.1 Port Test ..........................219 32.7.2 IPv4 Ping Test ........................220 32.7.3 IPv6 Ping Test ........................221 32.7.4 Trace Route .........................222 32.8 Reboot ............................223...
-
Page 14: User's Guide
User’s Guide... -
Page 15: Getting To Know Your Switch
H A P TE R Getting to Know Your Switch This chapt er int roduces t he m ain feat ures and applicat ions of t he Swit ch. 1.1 Introduction The GS1900 series is a new generat ion Gigabit Et hernet ( GbE) Web- Managed Swit ch. This User ’s Guide covers t he following m odels: Table 1 GS1900 Series Com parison Table GS1 9 0 0 - 8... -
Page 16: Gigabit Ethernet To The Desktop
Chapter 1 Getting to Know Your Switch Figure 1 Bridging Applicat ion Backbone Sales 1.1.2 Gigabit Ethernet to the Desktop The Swit ch is an ideal solut ion for sm all net works which dem and high bandwidt h for a group of heavy t raffic users. -
Page 17: Ipv6 Support
Chapter 1 Getting to Know Your Switch direct ly t alk t o or hear from st at ions t hat are not in t he sam e group( s) unless such t raffic first goes t hrough a rout er. For m ore inform at ion on VLANs, refer t o Chapt er 9 on page 1.1.3.1 Tag-based VLAN Example... -
Page 18: Ways To Manage The Switch
Chapter 1 Getting to Know Your Switch 1.2 Ways to Manage the Switch Use any of t he following m et hods t o m anage t he Swit ch. • Web Configurat or. This is recom m ended for everyday m anagem ent of t he Swit ch using a ( support ed) web browser. -
Page 19: Hardware Installation And Connection
H A P TE R Hardware Installation and Connection This chapt er shows you how t o inst all and connect t he Swit ch. 2.1 Freestanding Installation Make sure t he Swit ch is clean and dry. Set t he Swit ch on a sm oot h, level surface st rong enough t o support t he weight of t he Swit ch and t he connect ed cables. -
Page 20: Hardware Installation
Do t he following t o at t ach your Swit ch t o a wall. See t he following t able for how far apart t o place t he screws. Table 2 Dist ance bet ween t he cent ers of t he holes for wall m ount ing GS1900-8 GS1900-8HP GS1900-10HP... -
Page 21: Rack Mounting
Chapter 2 Hardware Installation and Connection The Switch should be wall-mounted horizontally. The Switch's side panels with ventilation slots should not be facing up or down as this position is less safe. 2.2.2 Rack Mounting The Swit ch can be m ount ed on an EI A st andard size, 19- inch rack or in a wiring closet wit h ot her equipm ent . -
Page 22: Mounting The Switch On A Rack
Chapter 2 Hardware Installation and Connection Figure 5 At t aching t he Mount ing Bracket s ( GS1900- 16 and GS1900- 24E) Figure 6 At t aching t he Mount ing Bracket s ( GS1900- 24, GS1900- 24HP , GS1900- 48, GS1900- 48HP) Using a # 2 Philips screwdriver, inst all t he M3 flat head screws t hrough t he m ount ing bracket holes int o t he Swit ch. - Page 23 Chapter 2 Hardware Installation and Connection Figure 7 Mount ing t he Swit ch on a Rack ( GS1900- 16 and GS1900- 24E) Figure 8 Mount ing t he Swit ch on a Rack ( GS1900- 24, GS1900- 24HP , GS1900- 48, GS1900- 48HP) Using a # 2 Philips screwdriver, inst all t he M5 flat head screws t hrough t he m ount ing bracket holes int o t he rack.
-
Page 24: Hardware Overview
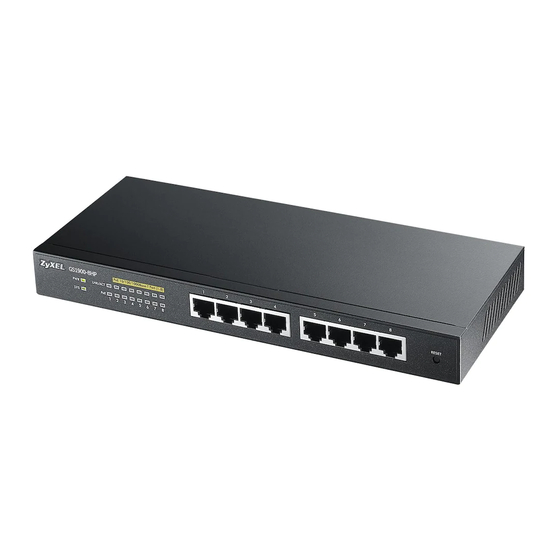
H A P TE R Hardware Overview This chapt er describes t he front panel and rear panel of t he Swit ch and shows you how t o m ake t he hardware connect ions. 3.1 Front Panel Connections The following figures show t he front panels of t he Swit ch. -
Page 25: Ethernet Ports
Chapter 3 Hardware Overview Figure 12 Front Panel: GS1900- 16 Figure 13 Front Panel: GS1900- 24E Figure 14 Front Panel: GS1900- 24 Figure 15 Front Panel: GS1900- 24HP Figure 16 Front Panel: GS1900- 48 Figure 17 Front Panel: GS1900- 48HP 3.1.1 Ethernet Ports The Swit ch has 1000Base-T aut o- negot iat ing, aut o- crossover Et hernet port s. -
Page 26: Default Ethernet Settings
Chapter 3 Hardware Overview An aut o- negot iat ing port can det ect and adj ust t o t he opt im um Et hernet speed ( 10/ 100/ 1000 Mbps) and duplex m ode ( full duplex or half duplex) of t he connect ed device. An aut o- crossover ( aut o- MDI / MDI -X) port aut om at ically works wit h a st raight- t hrough or crossover Et hernet cable. -
Page 27: Transceiver Removal
Chapter 3 Hardware Overview The Swit ch aut om at ically det ect s t he inst alled t ransceiver. Check t he LEDs t o verify t hat it is funct ioning properly. Figure 19 I nst alled Transceiver 3.1.2.2 Transceiver Removal Use t he following st eps t o rem ove a t ransceiver. - Page 28 Chapter 3 Hardware Overview Figure 23 Rear Panel: GS1900- 8HP Revision A1 Revision B1 Figure 24 Rear Panel: GS1900- 10HP Figure 25 Rear Panel: GS1900- 16 Figure 26 Rear Panel: GS1900- 24E Figure 27 Rear Panel: GS1900- 24 Figure 28 Rear Panel: GS1900- 24HP GS1900 Series User’s Guide...
-
Page 29: Power Connection
Chapter 3 Hardware Overview Figure 29 Rear Panel: GS1900- 48 Figure 30 Rear Panel: GS1900- 48HP 3.2.1 Power Connection Make sure you are using t he correct power source and t hat no obj ect s obst ruct t he airflow of t he fans. -
Page 30: Leds
Chapter 3 Hardware Overview 3.3 LEDs Aft er you connect t he power t o t he Swit ch, view t he LEDs t o ensure proper funct ioning of t he Swit ch and as an aid in t roubleshoot ing. Table 3 LED Descript ions COLOR STATUS... - Page 31 Chapter 3 Hardware Overview Table 4 LED Descript ions ( cont inued) ( GS1900- 8HP ( Revison B1) and GS1900- 10HP Only) COLOR STATUS DESCRIPTION Left Am ber The link t o a 10/ 100 Mbps Et hernet net work is up. Blinking The syst em is t ransm it t ing/ receiving t o/ from a 100/ 1000 Mbps Fiber net work.
-
Page 32: Zon Utility
H A P TE R ZON Utility This chapt er describes t he screens for ZON Ut ilit y. 4.1 ZyXEL One Network (ZON) Utility Screen ZON Ut ilit y is a program designed t o help you deploy and m anage a net work m ore efficient ly. I t det ect s devices aut om at ically and allows you t o do basic set t ings on devices in t he net work wit hout having t o be near it . -
Page 33: The Web Configurator
H A P TE R The Web Configurator 5.1 Overview The Swit ch W e b Configur a t or allows easy m anagem ent using an I nt ernet browser. I n order t o use t he Web Configurat or, you m ust : •... -
Page 34: Navigating The Web Configurator
Chapter 5 The Web Configurator 5.3 Navigating the Web Configurator The following sum m arizes how t o navigat e t he web configurat or from t he Ge t t ing St a r t screen. This guide uses t he GS1900- 10HP screens as an exam ple. The screens m ay vary slight ly for different m odels. -
Page 35: Navigation Panel
Chapter 5 The Web Configurator Click OK and confirm at t he pop- up screen t o com plet e t he t ask. Click Ca nce l and confirm at t he pop- up screen t o discard t he changes. Figure 17 Web Configurat or: Logout Screen 5.3.2 Navigation Panel Use t he m enu it em s on t he navigat ion panel t o open screens t o configure Swit ch feat ures. -
Page 36: Monitor Menu
Chapter 5 The Web Configurator Monitor Menu The m onit or m enu screens display st at us and st at ist ics inform at ion. Table 7 Monit or Menu Screens Sum m ary FOLDER OR LINK FUNCTION Syst em This link t akes you t o a screen where you can see general ident ificat ion inform at ion for t he Swit ch. -
Page 37: Configuration Menu
Chapter 5 The Web Configurator Table 7 Monit or Menu Screens Sum m ary ( cont inued) FOLDER OR LINK FUNCTION CI ST Displays CI ST inst ance st at us. CI ST Port Displays CI ST port st at us. Displays MST inst ance st at us. - Page 38 Chapter 5 The Web Configurator Table 8 Configurat ion Menu Screens Sum m ary ( cont inued) FOLDER OR LINK FUNCTION VLAN This link t akes you t o screens where you can configure VLAN, guest VLAN, and voice VLAN set t ings. VLAN VLAN Configure VLAN set t ings.
- Page 39 Chapter 5 The Web Configurator Table 8 Configurat ion Menu Screens Sum m ary ( cont inued) FOLDER OR LINK FUNCTION MST Port Configure MST port set t ings. LLDP Configure global, port , local inform at ion, MED net w ork policy, and MED port set t ings.
-
Page 40: Maintenance Menu
Chapter 5 The Web Configurator Table 8 Configurat ion Menu Screens Sum m ary ( cont inued) FOLDER OR LINK FUNCTION Trap Configure t rap set t ings. Trap Dest inat ion Configure t rap dest inat ion set t ings. Error Disable This link t akes you t o a screen where you can configure CPU prot ect ion and error disable recovery. -
Page 41: Getting Start
H A P TE R Getting Start 6.1 Overview Use t he Ge t t in g St a r t screens t o check st at us inform at ion about t he Swit ch. 6.1.1 What You Can Do in this Chapter •... -
Page 42: Wizard
Chapter 6 Getting Start Table 10 Get t ing St art ( cont inued) LABEL DESCRIPTION Device I nform at ion Syst em Nam e This field displays t he nam e used t o ident ify t he Swit ch on any net work. Model Nam e This field displays t he m odel nam e of t his Swit ch. - Page 43 Chapter 6 Getting Start Figure 37 Get t ing St art > St art up > 1 St ep 1 Set up I P Each field is described in t he following t able. Table 11 Get t ing St art > St art up > 1 St ep 1 Set up I P LABEL DESCRIPTION Host Nam e...
- Page 44 Chapter 6 Getting Start Figure 38 Get t ing St art > St art up > 2 St ep 2 Set up user nam e/ password Each field is described in t he following t able. Table 12 Get t ing St art > St art up > 2 St ep 2 Set up user nam e/ password LABEL DESCRIPTION Usernam e...
- Page 45 Chapter 6 Getting Start Each field is described in t he following t able. Table 13 Get t ing St art > St art up > 3 St ep 3 Finish LABEL DESCRIPTION Host Nam e This field displays a host nam e. I P Address The Swit ch needs an I P address for it t o be m anaged over t he net work.
- Page 46 Chapter 6 Getting Start Each field is described in t he following t able. Table 14 Get t ing St art > VLAN > 1 St ep 1 Creat e VLAN LABEL DESCRIPTION Creat e VLAN I D ( 1- Type a num ber bet ween 1 and 4094 t o creat e a VLAN I D.
- Page 47 Chapter 6 Getting Start Figure 42 Get t ing St art > VLAN> 3 St ep 3 Finish Each field is described in t he following t able. Table 16 Get t ing St art > VLAN > 3 St ep 3 Finish LABEL DESCRIPTION Current ly VLAN I D...
- Page 48 Chapter 6 Getting Start Figure 43 Get t ing St art > QoS > 1 St ep 1 QoS ( Qualit y of Service) Each field is described in t he following t able. Table 17 Get t ing St art > QoS > 1 St ep 1 QoS ( Qualit y ofOf Service) LABEL DESCRIPTION Highest...
-
Page 49: Link Aggregation
Chapter 6 Getting Start Each field is described in t he following t able. Table 18 Get t ing St art > QoS > 2 St ep 2 Finish LABEL DESCRIPTION Highest Displays sum m ary result s. Medium Displays sum m ary result s. Displays sum m ary result s. - Page 50 Chapter 6 Getting Start Table 19 Get t ing St art > Link aggregat ion > 1 St ep 1 Link aggregat ion LABEL DESCRIPTION Group 8 Click and drag icons locat ed on t he left t o desired preference. Next Click N e x t t o show t he next screen.
-
Page 51: Technical Reference
Technical Reference... -
Page 52: Monitor: System
H A P TE R Monitor: System 7.1 Overview This sect ion provides inform at ion for Syst e m in M onit or. Use t he Syst e m screens t o view general Swit ch set t ings. 7.1.1 What You Can Do in this Chapter •... -
Page 53: Ipv6
Chapter 7 Monitor: System The following t able describes t he labels in t his screen. Table 21 Monit or > Syst em > I P > I Pv4 LABEL DESCRIPTION DHCP St at e This field displays t he st at e of Dynam ic Host Configurat ion Prot ocol RFC 2131 and RFC 2132 ( DHCP) . -
Page 54: Information
Chapter 7 Monitor: System Table 22 Monit or > Syst em > I P > I Pv6 ( cont inued) LABEL DESCRIPTION DHCPv6 DUI D DUI D( DHCP Unique I dent ifier) . The DHCP server will provide t he I P address based on t he DUI D inform at ion from client . DHCPv6 DNS Prim ary DNS server I Pv6 address form DHCP . -
Page 55: Monitor: Port
H A P TE R Monitor: Port 8.1 Overview This sect ion provides inform at ion for Por t in M on it or. Use t he Por t screens t o view general Swit ch port set t ings. 8.1.1 What You Can Do in this Chapter •... -
Page 56: Port Counters
Chapter 8 Monitor: Port Table 24 Monit or > Port > Port > St at us ( cont inued) LABEL DESCRIPTION St at e This is port adm in set t ing st at e. Link St at us This field displays Up, D ow n or N ot Pr e se nt . I t displays Up when t he port is linked up or D ow n when it is not . - Page 57 Chapter 8 Monitor: Port Table 25 Monit or > Port > Port > Port Count ers ( cont inued) LABEL DESCRIPTION Mode This field displays t he m ode. Port 1 I nt erface m ib Count ers iflnOct et s This field displays t he iflnOct et s.
-
Page 58: Bandwidth Utilization
Chapter 8 Monitor: Port Table 25 Monit or > Port > Port > Port Count ers ( cont inued) LABEL DESCRIPTION et herSt at sPkt s128t o255Oct et s This field displays t he et herSt at sPkt s128t o255Oct et s. et herSt at sPkt s256t o511Oct et s This field displays t he et herSt at sPkt s256t o511Oct et s. - Page 59 Chapter 8 Monitor: Port 8.3 PoE Not e: The PoE funct ion and t he following screens are available for m odels ending in “ HP” only. The Swit ch support s bot h t he I EEE 802.3af Power over Et hernet ( PoE) and I EEE 802.3at High Power over Et hernet ( PoE) st andards.
-
Page 60: Bandwidth Management
Chapter 8 Monitor: Port Table 27 Monit or > Port > PoE LABEL DESCRIPTION Allocat ed Power( W) This field displays t he t ot al am ount of power t he Swit ch has reserved for PoE aft er negot iat ing wit h t he connect ed PoE device( s) . -
Page 61: Storm Control
Chapter 8 Monitor: Port Table 28 Monit or > Port > Bandwidt h Managem ent > Bandwidt h Cont rol ( cont inued) LABEL DESCRIPTION I ngress View t he m axim um bandwidt h allowed in kilobit s per second ( Kbps) for t he incom ing Rat eLim it ( Kbps) t raffic flow on a port . -
Page 62: Monitor: Vlan
H A P TE R Monitor: VLAN 9.1 Overview This sect ion provides inform at ion for VLAN in M on it or. A VLAN ( Virt ual Local Area Net work) allows a physical net work t o be part it ioned int o m ult iple logical net works. -
Page 63: Port
Chapter 9 Monitor: VLAN Figure 57 Monit or > VLAN > VLAN > VLAN Each field is described in t he following t able. Table 30 Monit or > VLAN > VLAN > VLAN LABEL DESCRIPTION VLAN VLAN I D This is t he VLAN ident ificat ion num ber. -
Page 64: Vlan Port
Chapter 9 Monitor: VLAN Table 31 Monit or > VLAN > VLAN > Port ( cont inued) LABEL DESCRIPTION Accept Fram e This field displays t he t ype t hat is accept ed by t he fram e. Type Specifes t he t ype of fram es allowed on a port . -
Page 65: Guest Vlan
Chapter 9 Monitor: VLAN Table 32 Monit or > VLAN > VLAN > VLAN Port ( cont inued) LABEL DESCRIPTION Port Displays t he port index value. Mem bership Displays t he st at us of t he VLAN group: For bidde n , Ex clu de d, Ta gge d or Un t a gge d. 9.3 Guest VLAN When 802.1x port aut hent icat ion is enabled on t he Swit ch and it s port s, client s t hat do not have t he correct credent ials are blocked from using t he port ( s) . -
Page 66: Voice Vlan
Chapter 9 Monitor: VLAN Each field is described in t he following t able. Table 33 Monit or > VLAN > Guest VLAN LABEL DESCRIPTION Global St at e This field displays t he st at e of global guest VLAN. Port Port This field displays a port num ber. - Page 67 Chapter 9 Monitor: VLAN Table 34 Monit or > VLAN > Voice VLAN ( cont inued) LABEL DESCRIPTION Port This field displays a port num ber. St at e This field displays t he st at e of a port . GS1900 Series User’s Guide...
-
Page 68: Monitor: Mac Table
HAPTER Monitor: MAC Table 10.1 Overview This sect ion provides inform at ion for M AC Ta ble in M on it or. The M AC Ta ble screen ( a MAC t able is also known as a filt ering dat abase) shows how fram es are forwarded or filt ered across t he Swit ch’s port s. -
Page 69: What You Can Do In This Chapter
Chapter 10 Monitor: MAC Table 10.1.1 What You Can Do in this Chapter • The M AC Ta ble screen ( Sect ion 10.2 on page 69) displays view filt er and MAC t able of t he Swit ch. 10.2 MAC Table Use t his screen t o view filt er st at ic and MAC t able set t ings. -
Page 70: Monitor: Link Aggregation
HAPTER Monitor: Link Aggregation 11.1 Overview This sect ion provides inform at ion for Link Aggr e ga t ion in M onit or. Link aggregat ion ( t runking) is t he grouping of physical port s int o one logical higher- capacit y link. You m ay want t o t runk port s if for exam ple, it is cheaper t o use m ult iple lower- speed links t han t o under- ut ilize a high- speed, but m ore cost ly, single- port link. - Page 71 Chapter 11 Monitor: Link Aggregation Each field is described in t he following t able. Table 36 Monit or > Link Aggregat ion > LAG LABEL DESCRIPTION Displays t he link aggregat ion st at us index value. Nam e This field displays t he nam e.
-
Page 72: Monitor: Loop Guard
HAPTER Monitor: Loop Guard 12.1 Overview This sect ion provides inform at ion for Loop Gua r d in M onit or. Loop guard is designed t o handle loop problem s on t he edge of your net work. This can occur when a port is connect ed t o a Swit ch t hat is in a loop st at e. -
Page 73: What You Can Do In This Chapter
Chapter 12 Monitor: Loop Guard Figure 67 Loop Guard - Probe Packet The Swit ch also shut s down port N if t he probe packet ret urns t o swit ch A on any ot her port . I n ot her words loop guard also prot ect s against st andard net work loops. - Page 74 Chapter 12 Monitor: Loop Guard Figure 69 Monit or > Loop Guard Each field is described in t he following t able. Table 37 Monit or > Loop Guard LABEL DESCRIPTION Loop Guard St at us Port This field displays a port num ber. St at us This field displays t he st at us.
-
Page 75: Monitor: Multicast
HAPTER Monitor: Multicast 13.1 Overview This sect ion provides inform at ion for M ult ica st in M on it or. Tradit ionally, I P packet s are t ransm it t ed in one of eit her t wo ways - Unicast ( 1 sender t o 1 recipient ) or Broadcast ( 1 sender t o everybody on t he net work) . -
Page 76: Statistics
Chapter 13 Monitor: Multicast Each field is described in t he following t able. Table 38 Monit or > Mult icast > I GMP > Vlan LABEL DESCRIPTION VLAN I D Displays t he ident ificat ion for t he VLAN. Operat e St at us Displays t he st at us of t he operat ion. -
Page 77: Group
Chapter 13 Monitor: Multicast Each field is described in t he following t able. Table 39 Monit or > Mult icast > I GMP > St at ist ics LABEL DESCRIPTION Clear Click Cle a r t o reset t he fields t o t he fact ory default s. Refresh Click Re fr e sh t o reload t he page. -
Page 78: Router
Chapter 13 Monitor: Multicast Figure 73 Monit or > Mult icast > I GMP > Group Each field is described in t he following t able. Table 40 Monit or > Mult icast > I GMP > Group LABEL DESCRIPTION Clear Click Cle a r t o delet e t he dynam ic groups. -
Page 79: Monitor: Spanning Tree
HAPTER Monitor: Spanning Tree 14.1 Overview This sect ion provides inform at ion for Spa n ning Tr e e in M on it or. The Swit ch support s Spanning Tree Prot ocol ( STP) , Com m on and I nt ernal Spanning Tree ( CI ST) , and Mult iple Spanning Tree ( MST) . -
Page 80: Cist Port
Chapter 14 Monitor: Spanning Tree Each field is described in t he following t able. Table 42 Monit or > Spanning Tree > CI ST LABEL DESCRIPTION St at e This field displays t he st at e. Bridge This is t he unique ident ifier for t his bridge, consist ing of t he bridge priorit y plus t he MAC I ndent ifier address. - Page 81 Chapter 14 Monitor: Spanning Tree Each field is described in t he following t able. Table 43 Monit or > Spanning Tree > CI ST Port LABEL DESCRIPTION Port This field displays t he port num ber. I ndent ifier This field displays t he ident ifier ( in priorit y / port num ber) .
-
Page 82: Mst Port
Chapter 14 Monitor: Spanning Tree Each field is described in t he following t able. Table 44 Monit or > Spanning Tree > MST LABEL DESCRIPTION MST I D This is t he unique ident ifier for t his MST. Select a num ber from t he drop- down m enu t o display result s. -
Page 83: Stp Statistics
Chapter 14 Monitor: Spanning Tree Table 45 Monit or > Spanning Tree > MST Port ( cont inued) LABEL DESCRIPTION I ndent ifier ( Priorit y This field displays t he ident ifier ( in priorit y / port num ber) . / Port I d) I nt ernal Pat h Pat h cost is t he cost of t ransm it t ing a fram e on t o a LAN t hrough t hat port . - Page 84 Chapter 14 Monitor: Spanning Tree Each field is described in t he following t able. Table 46 Monit or > Spanning Tree > STP St at ist ics LABEL DESCRIPTION Port This field displays t he port num ber. Configurat ion This field displays t he configurat ion BDPUs received.
-
Page 85: Monitor: Lldp
HAPTER Monitor: LLDP 15.1 Overview This sect ion provides inform at ion for LLD P in M on it or. Link Layer Discovery Prot ocol ( LLDP) , defined as I EEE 802.1ab, enables LAN devices t hat support LLDP t o exchange t heir configured set t ings. This helps elim inat e configurat ion m ism at ch issues. 15.1.1 What You Can Do in this Chapter •... -
Page 86: Remote Information
Chapter 15 Monitor: LLDP Each field is described in t he following t able. Table 47 Monit or > LLDP > St at ist ics LABEL DESCRIPTION Clear Click Cle a r t o clear st at ist ics. Refresh Click Re fr e sh t o reload t he page. -
Page 87: Overloading
Chapter 15 Monitor: LLDP Table 48 Monit or > LLDP > Rem ot e I nform at ion ( cont inued) LABEL DESCRIPTION Act ion Det ail Click D e t a il t o show m ore inform at ion about t his ent ry. Delet e Click D e le t e t o rem ove t he ent ry. -
Page 88: Monitor: Security
HAPTER Monitor: Security 16.1 Overview This sect ion provides inform at ion for Se cur it y in M on it or. This link t akes you t o a screen where you can view t he set t ings or t raffic st at ist ics which cont ain det ailed inform at ion about specific act ivit ies. -
Page 89: Port
Chapter 16 Monitor: Security Each field is described in t he following t able. Table 50 Monit or > Securit y > Port Securit y LABEL DESCRIPTION Global St at us This field displays t he st at us of global cont rol inform at ion. Port Port This field displays a port num ber. -
Page 90: Authenticated Hosts
Chapter 16 Monitor: Security 16.3.2 Authenticated Hosts Use t his screen t o view t he Swit ch’s 802.1x securit y aut hent icat ed host st at us. Click M onit or > Se cur it y > 8 0 2 .1 X > Aut he nt ica t e d H ost s t o access t his screen. Figure 85 Monit or >... -
Page 91: Monitor: Management
HAPTER Monitor: Management 17.1 Overview This sect ion provides inform at ion for M a n a ge m e n t in M on it or. This chapt er describes how t o view m anagem ent set t ings on t he Swit ch. 17.1.1 What You Can Do in this Chapter •... -
Page 92: Error Disable
Chapter 17 Monitor: Management Each field is described in t he following t able. Table 53 Monit or > Managem ent > Syslog LABEL DESCRIPTION Logging Filt er Select Target Select Buffe r e d or Fla sh . Buffered: Login saved t o t em porary m em ory. Flash: Login saved t o perm anent m em ory. - Page 93 Chapter 17 Monitor: Management Figure 87 Monit or > Managem ent > Error Disable Each field is described in t he following t able. Table 54 Monit or > Managem ent > Error Disable LABEL DESCRIPTION Global Recovery View t he num ber of seconds ( from 30 t o 2592000) for t he t im e int erval of t he recovery. I nt erval Error Disabled This field displays t he support ed feat ures t hat allow t he Swit ch t o shut down a port or...
-
Page 94: The Ipv4 Screen
HAPTER Configuration: System 18.1 Overview This sect ion provides inform at ion for Syst e m in Configur a t ion . 18.1.1 What You Can Do in this Chapter • The I P screen ( S ect ion 18.2 on page 94) displays I Pv4 and I Pv6 set t ings. -
Page 95: The Ipv6 Screen
Chapter 18 Configuration: System The following t able describes t he labels in t his screen. Table 55 Configurat ion > Syst em > I P > I Pv4 LABEL DESCRIPTION I Pv4 Address Mode Select St at ic t o define t he I Pv4 net work propert ies or DHCP t o allow t he device t o define t he propert ies. -
Page 96: The System Time Screen
Chapter 18 Configuration: System Table 56 Configurat ion > Syst em > I P > I Pv6 ( cont inued) LABEL DESCRIPTION I Pv6 Address Ent er t he I Pv6 address of t he Swit ch in t he I P dom ain. Gat eway Ent er t he I Pv6 address of t he default out going gat eway. -
Page 97: The Sntp Server Screen
Chapter 18 Configuration: System Table 57 Configurat ion > Syst em > Tim e ( cont inued) LABEL DESCRIPTION Daylight Saving Ent er t he daylight saving t im e offset value in m inut es. Tim e Offset St art Dat e Select t he st art dat e of t he daylight saving t im e period from t he dropdown list s. - Page 98 Chapter 18 Configuration: System Figure 92 Configurat ion > Syst em > Syst em I nform at ion The following t able describes t he labels in t his screen. Table 59 Configurat ion > Syst em > Syst em I nform at ion LABEL DESCRIPTION Syst em I nform at ion...
-
Page 99: Configuration: Port
HAPTER Configuration: Port 19.1 Overview This sect ion provides inform at ion for Por t in Con figu r a t ion. 19.1.1 What You Can Do in this Chapter • The Port screen ( Sect ion 19.2 on page 99) displays general port set t ings. -
Page 100: The Port Edit Screen
Chapter 19 Configuration: Port Table 60 Configurat ion > Port > Port > Port ( cont inued) LABEL DESCRIPTION Port Nam e Displays a descript ive nam e t hat ident ifies t his port . The lengt h of t he nam e can be up t o 32 alpha- num erical charact ers. - Page 101 Chapter 19 Configuration: Port The following t able describes t he labels in t his screen. Table 61 Configurat ion > Port > Port > Edit LABEL DESCRIPTION Port Edit Port List Displays t he list of port index num bers t hat are being configured. Port Nam e Ent er a descript ive nam e t hat ident ifies t his port .
-
Page 102: The Eee Edit Screen
Chapter 19 Configuration: Port The following t able describes t he labels in t his screen. Table 62 Configurat ion > Port > EEE > EEE LABEL DESCRIPTION Edit Select t his check box t o configure t he propert ies of a port . Click t he Edit but t on change t he propert ies of t he port . -
Page 103: The Global Screen
Chapter 19 Configuration: Port 19.4.1 The Global Screen I n t he navigat ion panel, click Configur a t ion > Por t > PoE > Globa l t o display t he screen as shown. Use t his screen t o configure Power over Et hernet ( PoE) global set t ings. Figure 97 Configurat ion >... - Page 104 Chapter 19 Configuration: Port Figure 98 Configurat ion > Port > PoE > Port The following t able describes t he labels in t his screen. Table 65 Configurat ion > Port > PoE > Port LABEL DESCRIPTION Edit Select one or m ore port s in t he first colum n of t he t able and click t his t o configure PoE set t ings for t he port s.
-
Page 105: The Poe Edit Screen
Chapter 19 Configuration: Port Table 65 Configurat ion > Port > PoE > Port ( cont inued) LABEL DESCRIPTION Power- Up This shows how t he Swit ch provides power t o t he connect ed PD at power- up. 8 0 2 .3 a f - t he Sw it ch follows t he I EEE 802.3af Power over Et hernet st andard t o supply power t o t he connect ed PDs during power- up. - Page 106 Chapter 19 Configuration: Port Figure 99 Configurat ion > Port > PoE > Port > Edit The following t able describes t he labels in t his screen. Table 66 Configurat ion > Port > PoE > Port > Edit LABEL DESCRIPTION Port...
- Page 107 Chapter 19 Configuration: Port Table 66 Configurat ion > Port > PoE > Port > Edit ( cont inued) LABEL DESCRIPTION Wide Range This field is available on GS1900- 8HP ( Revision B1) and GS1900- 10HP only. Det ect ion Select whet her t o enable a wider det ect ion range for t he PD or not .
-
Page 108: The Bandwidth Control Screen
Chapter 19 Configuration: Port 19.5 Bandwidth Management Bandwidt h m anagem ent m eans defining a m axim um allowable bandwidt h for incom ing and/ or out- going t raffic flows on a port . 19.5.1 The Bandwidth Control Screen Use t his screen t o view Egress Bandwidt h Managem ent set t ings and select port s for configurat ion. -
Page 109: The Port Rate Edit Screen
Chapter 19 Configuration: Port Table 67 Configurat ion > Port > Bandwidt h Managem ent > Bandwidt h Cont rol ( cont inued) LABEL DESCRIPTION I ngress Rat e Displays t he m axim um bandwidt h allowed in kilobit s per second ( Kbps) for t he incom ing Lim it ( Kbps) t raffic flow on a port . -
Page 110: Storm Control
Chapter 19 Configuration: Port 19.6 Storm Control Broadcast st orm cont rol lim it s t he num ber of broadcast , m ult icast and dest inat ion lookup failure ( DLF) packet s t he Swit ch receives per second on t he port s. When t he m axim um num ber of allowable broadcast , m ult icast and/ or DLF packet s is reached per second, t he subsequent packet s are discarded. -
Page 111: The Port Edit Screen
Chapter 19 Configuration: Port 19.6.2 The Port Edit Screen Use t his screen t o configure St orm Cont rol set t ings for individual port s. Click Con figu r a t ion > Por t > St or m Con t r ol > Por t > Edit t o open t his screen. Figure 103 Configurat ion >... -
Page 112: Configuration: Vlan
HAPTER Configuration: VLAN 20.1 Overview This sect ion provides inform at ion for VLAN in Configur a t ion . A VLAN ( Virt ual Local Area Net work) allows a physical net work t o be part it ioned int o m ult iple logical net works. -
Page 113: Vlan
Chapter 20 Configuration: VLAN 20.2 VLAN Use t his screen t o view and configure VLAN set t ings. 20.2.1 The VLAN Screen Use t his screen t o view VLAN set t ings. Click Configu r a t ion > V LAN > VLAN > VLAN t o open t his screen. -
Page 114: The Port Screen
Chapter 20 Configuration: VLAN The following t able describes t he labels in t his screen. Table 72 Configurat ion > VLAN > VLAN > VLAN > Add LABEL DESCRIPTION VLAN VLAN List Pr im a r y privat e VLANs can associat e wit h several ( secondary) Com m u n it y privat e VLANs and up t o one ( secondary) I sola t e d privat e VLAN. -
Page 115: The Port Edit Screen
Chapter 20 Configuration: VLAN The following t able describes t he labels in t his screen. Table 73 Configurat ion > VLAN > VLAN > Port LABEL DESCRIPTION Port Edit Select t his check box t o configure t he propert ies of a port . Click t he Edit but t on change t he propert ies of t he port . -
Page 116: The Vlan Port Screen
Chapter 20 Configuration: VLAN Table 74 Configurat ion > VLAN > VLAN > Port > Edit ( cont inued) LABEL DESCRIPTION Accept ed Type Select All from t he drop- down list box t o accept all unt agged or t agged fram es on t his port . This is t he default set t ing. - Page 117 Chapter 20 Configuration: VLAN Figure 108 Configurat ion > VLAN > VLAN > VLAN Port The following t able describes t he labels in t his screen. Table 75 Configurat ion > VLAN > VLAN > VLAN Port LABEL DESCRIPTION VLAN Port VLAN I D Select t he I D of t he VLAN you want t o configure.
-
Page 118: Guest Vlan
Chapter 20 Configuration: VLAN 20.3 Guest VLAN When 802.1x port aut hent icat ion is enabled on t he Swit ch and it s port s, client s t hat do not have t he correct credent ials are blocked from using t he port ( s) . You can configure your Swit ch t o have one VLAN t hat act s as a guest VLAN. -
Page 119: The Port Screen
Chapter 20 Configuration: VLAN Table 76 Configurat ion > VLAN > Guest VLAN > Global ( cont inued) LABEL DESCRIPTION Guest VLAN I D Ent er t he global guest VLAN I D. Apply Click Apply t o save t he changes. Cancel Click Ca nce l t o discard t he changes. -
Page 120: Voice Vlan
Chapter 20 Configuration: VLAN Figure 112 Configurat ion > VLAN > Guest VLAN > Port > Edit The following t able describes t he labels in t his screen. Table 78 Configurat ion > VLAN > Guest VLAN > Port > Edit LABEL DESCRIPTION Port... -
Page 121: The Oui Screen
Chapter 20 Configuration: VLAN Figure 113 Configurat ion > VLAN > Voice VLAN > Global The following t able describes t he labels in t his screen. Table 79 Configurat ion > VLAN > Voice VLAN > Global LABEL DESCRIPTION Global St at e Select En a ble t o act ivat e t he global voice VLAN feat ure. -
Page 122: The Oui Add/Edit Screen
Chapter 20 Configuration: VLAN Figure 114 Configurat ion > VLAN > Voice VLAN > OUI The following t able describes t he labels in t his screen. Table 80 Configurat ion > VLAN > Voice VLAN > OUI LABEL DESCRIPTION Click Add t o creat e a new OUI ent ry. -
Page 123: The Port Screen
Chapter 20 Configuration: VLAN The following t able describes t he labels in t his screen. Table 81 Configurat ion > VLAN > Voice VLAN > OUI > Add/ Edit LABEL DESCRIPTION OUI Address Ent er an OUI address. A t elephony OUI address is a globally unique ident ifier assigned t o a vendor by I EEE. -
Page 124: The Port Edit Screen
Chapter 20 Configuration: VLAN Table 82 Configurat ion > VLAN > Voice VLAN > Port ( cont inued) LABEL DESCRIPTION Port Displays t he port index value. St at e Displays t he Voice VLAN port securit y m ode st at e. When t he funct ion is enabled, all non- t elephonic MAC addresses in t he Voice VLAN will be blocked for 10 seconds. -
Page 125: The Static Mac Screen
HAPTER Configuration: MAC Table 21.1 Overview This sect ion provides inform at ion for M AC Ta ble in Con figu r a t ion. The M AC Ta ble screen ( a MAC t able is also known as a filt ering dat abase) shows how fram es are forwarded or filt ered across t he Swit ch’s port s. -
Page 126: The Static Mac Add Screen
Chapter 21 Configuration: MAC Table Table 84 Configurat ion > MAC Table > St at ic MAC ( cont inued) LABEL DESCRIPTION VLAN Displays t he VLAN group t o which t his fram e belongs. Port Displays t he port from which t he above MAC address was learned. Act ion Click D e le t e t o rem ove t he MAC address. -
Page 127: The Filtering Mac Add Screen
Chapter 21 Configuration: MAC Table The following t able describes t he labels in t his screen. Table 86 Configurat ion > MAC Table > Filt ering MAC LABEL DESCRIPTION MAC Filt ering Click Add t o creat e a new Filt e r in g M AC ent ry. MAC Address Displays t he filt ering obj ect MAC address from which t his incom ing fram e cam e. - Page 128 Chapter 21 Configuration: MAC Table Figure 122 Configurat ion > MAC Table > Dynam ic Age The following t able describes t he labels in t his screen. Table 88 Configurat ion > Dynam ic Age LABEL DESCRIPTION Dynam ic MAC Age Aging Tim e Ent er t he aging t im e of t he MAC address.
-
Page 129: Configuration: Link Aggregation
HAPTER Configuration: Link Aggregation 22.1 Overview This sect ion provides inform at ion for Link Aggr e ga t ion in Con figu r a t ion. This chapt er shows you how t o logically aggregat e physical links t o form one logical, higher bandwidt h link. -
Page 130: The Lag Management Screen
Chapter 22 Configuration: Link Aggregation Figure 123 Configurat ion > Link Aggregat ion > Global The following t able describes t he labels in t his screen. Table 89 Configurat ion > Link Aggregat ion > Global LABEL DESCRIPTION Global LACP St at e Select En a ble t o act ivat e t he link aggregat ion cont rol prot ocol. -
Page 131: The Lag Add Screen
Chapter 22 Configuration: Link Aggregation The following t able describes t he labels in t his screen. Table 90 Configurat ion > Link Aggregat ion > LAG Managem ent LABEL DESCRIPTION LAG Managem ent Click Add t o creat e a new LAG M a n a ge m e n t ent ry. Displays t he link aggregat ion group ( LAG) , t hat is, one logical link cont aining m ult iple port s. -
Page 132: The Lag Port Screen
Chapter 22 Configuration: Link Aggregation The following t able describes t he labels in t his screen. Table 91 Configurat ion > Link Aggregat ion > LAG Managem ent > Add LABEL DESCRIPTION LAG Managem ent Select t he link aggregat ion group ( LAG) . Nam e Ent er t he nam e of t his ent ry. -
Page 133: The Lag Port Edit Screen
Chapter 22 Configuration: Link Aggregation 22.2.5 The LAG Port Edit Screen Use t his screen t o edit a LAG port . Click Configur a t ion > Link Aggr e ga t ion > LAG Por t > Edit t o open t his screen. -
Page 134: The Lacp Port Edit Screen
Chapter 22 Configuration: Link Aggregation Figure 128 Configurat ion > Link Aggregat ion > LACP Port The following t able describes t he labels in t his screen. Table 94 Configurat ion > Link Aggregat ion > LACP Port LABEL DESCRIPTION LACP Port Edit... - Page 135 Chapter 22 Configuration: Link Aggregation The following t able describes t he labels in t his screen. Table 95 Configurat ion > Link Aggregat ion > LACP Port > Edit LABEL DESCRIPTION LACP Port Port List Displays t he list of port index num bers t o be configured. Priorit y Ent er a value for t he port priorit y.
-
Page 136: Configuration: Loop Guard
HAPTER Configuration: Loop Guard 23.1 Overview This sect ion provides inform at ion for Loop Gua r d in Con figu r a t ion. This chapt er shows you how t o configure t he Swit ch t o guard against loops on t he edge of your net work. -
Page 137: The Loop Guard Port
Chapter 23 Configuration: Loop Guard Table 96 Configurat ion > Loop Guard ( cont inued) LABEL DESCRIPTION Recovery Tim e Ent er t he period ( in seconds) for which a port will be kept disabled in t he event of a loop is det ect ed ( and t he port act ion shut s down t he port ) . - Page 138 Chapter 23 Configuration: Loop Guard Figure 132 Configurat ion > Loop Guard > Port > Edit The following t able describes t he labels in t his screen. Table 98 Configurat ion > Loop Guard > Port > Edit LABEL DESCRIPTION Port Port List...
-
Page 139: The Mirror Screen
HAPTER Configuration: Mirror 24.1 Overview This sect ion provides inform at ion for M ir r or in Con figu r a t ion. 24.2 Mirror Port m irroring allows you t o copy a t raffic flow t o a m onit or port ( t he port you copy t he t raffic t o) in order t hat you can exam ine t he t raffic from t he m onit or port wit hout int erference. - Page 140 Chapter 24 Configuration: Mirror The following t able describes t he labels in t his screen. Table 99 Configurat ion > Mirror LABEL DESCRIPTION Mirror Mirroring Select En a ble t o act ivat e port m irroring on t he Swit ch or D isa ble t o disable t he feat ure. Monit or Port The m onit or port is t he port you copy t he t raffic t o in order t o exam ine it in m ore det ail wit hout int erfering wit h t he t raffic flow on t he original port ( s) .
-
Page 141: Configuration: Multicast
HAPTER Configuration: Multicast 25.1 Overview This sect ion provides inform at ion for M ult ica st in Con figu r a t ion. Tradit ionally, I P packet s are t ransm it t ed in one of eit her t wo ways - Unicast ( 1 sender t o 1 recipient ) or Broadcast ( 1 sender t o everybody on t he net work) . -
Page 142: The Vlan Screen
Chapter 25 Configuration: Multicast Table 100 Configurat ion > Mult icast > I GMP ( cont inued) LABEL DESCRIPTION Snooping Select v2 or v3 depending on t he snooping version you require. Version Unknown Select t o send t he I Pv4 unknown m ult icast fram e t o t he rout er port . The following opt ions Mult icast Act ion are available: •... -
Page 143: The Edit Igmp Screen
Chapter 25 Configuration: Multicast Table 101 Configurat ion > Mult icast > I GMP > VLAN ( cont inued) LABEL DESCRIPTION St at e Displays t he swit ch current VLAN querier ent ry as En a ble or D isa ble . Version Displays t he swit ch current VLAN querier ent ry version. -
Page 144: The Router Port Screen
Chapter 25 Configuration: Multicast Table 102 Configurat ion > Mult icast > I GMP > VLAN > Modify ( cont inued) LABEL DESCRIPTION Last Mem ber Query Count Ent er t he num ber of queries. I nt erval ( sec) Ent er t he am ount of t im e ( in seconds) bet ween t he I GMP group- specific queries sent by an upst ream port when an I GMP Done m essage is received. -
Page 145: The Profile Screen
Chapter 25 Configuration: Multicast Figure 138 Configurat ion > Mult icast > I GMP > Rout er Port > Add/ Modify The following t able describes t he labels in t his screen. Table 104 Configurat ion > Mult icast > I GMP > Rout er Port > Add/ Modify LABEL DESCRIPTION I GMP Rout er Edit... -
Page 146: The Add/Edit Profile Screen
Chapter 25 Configuration: Multicast Figure 139 Configurat ion > Mult icast > I GMP > Profile The following t able describes t he labels in t his screen. Table 105 Configurat ion > Mult icast > I GMP > Profile LABEL DESCRIPTION I GMP Profile... -
Page 147: The Throttling Screen
Chapter 25 Configuration: Multicast Table 106 Configurat ion > Mult icast > I GMP > Profile > Add/ Edit ( cont inued) LABEL DESCRIPTION Group To Ent er t he profile end group I P address. Mat ch Act ion Select t he act ion of t he profile as t o be Pe r m it or D e ny. - Page 148 Chapter 25 Configuration: Multicast Figure 142 Configurat ion > Mult icast > I GMP > Throt t ling > Add/ Edit The following t able describes t he labels in t his screen. Table 108 Configurat ion > Mult icast > I GMP > Throt t ling > Add/ Edit LABEL DESCRIPTION I GMP Port Throt t ling...
-
Page 149: Configuration: Spanning Tree
HAPTER Configuration: Spanning Tree 26.1 Overview This sect ion provides inform at ion for Spa n ning Tr e e in Configu r a t ion . The Swit ch support s Spanning Tree Prot ocol ( STP) , Rapid Spanning Tree Prot ocol ( RSTP) and Mult iple Spanning Tree Prot ocol ( MSTP) as defined in t he following st andards. -
Page 150: The Stp Port Screen
Chapter 26 Configuration: Spanning Tree Figure 143 Configurat ion > Spanning Tree The following t able describes t he labels in t his screen. Table 109 Configurat ion > Spanning Tree LABEL DESCRIPTION Global St at e Select t o En a ble or D isa ble t he Spanning-Tree funct ion. BPDU Forward Select t he bridge prot ocol dat a unit s forward ( BPDU) opt ion t o be Floodin g or Filt e r in g. -
Page 151: The Stp Port Edit Screen
Chapter 26 Configuration: Spanning Tree Figure 144 Configurat ion > Spanning Tree > STP Port The following t able describes t he labels in t his screen. Table 110 Configurat ion > Spanning Tree > STP Port LABEL DESCRIPTION STP Port Edit Select t his check box t o configure t he propert ies of a port . -
Page 152: The Cist Screen
Chapter 26 Configuration: Spanning Tree Figure 145 Configurat ion > Spanning Tree > STP Port > Edit The following t able describes t he labels in t his screen. Table 111 Configurat ion > Spanning Tree > STP Port > Edit LABEL DESCRIPTION STP Port... - Page 153 Chapter 26 Configuration: Spanning Tree Figure 146 Configurat ion > Spanning Tree > CI ST The following t able describes t he labels in t his screen. Table 112 Configurat ion > Spanning Tree > CI ST LABEL DESCRIPTION CI ST I nst ance Priorit y Configure priorit y of CI ST bridge I D.
-
Page 154: The Cist Port Screen
Chapter 26 Configuration: Spanning Tree 26.2.5 The CIST Port Screen Use t his screen t o view t he CI ST Por t set t ings. Click Configu r a t ion > Spa n ning Tr e e > CI ST Por t t o open t his screen. -
Page 155: The Mst Screen
Chapter 26 Configuration: Spanning Tree Figure 148 Configurat ion > Spanning Tree > CI ST Port > Edit The following t able describes t he labels in t his screen. Table 114 Configurat ion > Spanning Tree > CI ST Port > Edit LABEL DESCRIPTION STP CI ST Port... -
Page 156: The Mst Port Screen
Chapter 26 Configuration: Spanning Tree Table 115 Configurat ion > Spanning Tree > MST ( cont inued) LABEL DESCRIPTION VLAN Count Displays t he VLAN count . Priorit y Displays t he priorit y for each port here. Act ion Edit Click Edit t o m ake changes t o t he ent ry. -
Page 157: The Mst Port Edit Screen
Chapter 26 Configuration: Spanning Tree Figure 151 Configurat ion > Spanning Tree > MST Port The following t able describes t he labels in t his screen. Table 117 Configurat ion > Spanning Tree > MST Port LABEL DESCRIPTION MST Port MST I D Select t he MST port I D num ber from t he dropdown list . - Page 158 Chapter 26 Configuration: Spanning Tree Figure 152 Configurat ion > Spanning Tree > MST Port > Edit The following t able describes t he labels in t his screen. Table 118 Configurat ion > Spanning Tree > MST Port > Edit LABEL DESCRIPTION STP MST Port...
-
Page 159: Configuration: Lldp
HAPTER Configuration: LLDP 27.1 Overview This sect ion provides inform at ion for LLD P in Configur a t ion . Use t he Lin k La ye r D iscove r y Pr ot ocol ( LLD P) screens t o configure LLDP Swit ch set t ings. 27.2 LLDP This page allows t he user t o inspect and configure t he current LLDP port set t ings. -
Page 160: The Port Screen
Chapter 27 Configuration: LLDP Table 119 Configurat ion > LLDP > Global ( cont inued) LABEL DESCRIPTION Transm ission Ent er t he t ransm ission int erval value. I nt erval The swit ch periodically t ransm it s LLDP fram es t o it s neighbors for having t he net work discovery inform at ion up- t o- dat e. -
Page 161: The Port Edit Screen
Chapter 27 Configuration: LLDP Figure 154 Configurat ion > LLDP > Port The following t able describes t he labels in t his screen. Table 120 Configurat ion > LLDP > Port LABEL DESCRIPTION LLDP VLAN Edit Select t his check box t o configure t he propert ies of a port . Click t he Edit but t on change t he propert ies of t he port . -
Page 162: The Local Information Screen
Chapter 27 Configuration: LLDP Figure 155 Configurat ion > LLDP > Port > Edit The following t able describes t he labels in t his screen. Table 121 Configurat ion > LLDP > Port > Edit LABEL DESCRIPTION LLDP Port Port List Displays t he index num ber of t he LLDP port ( s) . - Page 163 Chapter 27 Configuration: LLDP Figure 156 Configurat ion > LLDP > Local I nform at ion The following t able describes t he labels in t his screen. Table 122 Configurat ion > LLDP > Local I nform at ion LABEL DESCRIPTION Local Device Sum m ary...
-
Page 164: The Local Information Edit Screen
Chapter 27 Configuration: LLDP Table 122 Configurat ion > LLDP > Local I nform at ion ( cont inued) LABEL DESCRIPTION Capabilit ies Ca pa bilit ie s Su ppor t e d describes t he neighbor unit 's capabilit ies. The possible Support ed capabilit ies are: 1. - Page 165 Chapter 27 Configuration: LLDP Figure 157 Configurat ion > LLDP > Local I nform at ion > Edit The following t able describes t he labels in t his screen. Table 123 Configurat ion > LLDP > Local I nform at ion > Edit LABEL DESCRIPTION MED Port Locat ion...
- Page 166 Chapter 27 Configuration: LLDP Table 123 Configurat ion > LLDP > Local I nform at ion > Edit ( cont inued) LABEL DESCRIPTION Locat ion Coordinat es Lat it ude La t it u de SHOULD be norm alized t o wit hin 0- 90 degrees wit h a m axim um of 4 digit s. I t is possible t o specify t he direct ion t o eit her N or t h of t he equat or or Sou t h of t he equat or.
-
Page 167: The Med Network Policy Screen
Chapter 27 Configuration: LLDP Table 123 Configurat ion > LLDP > Local I nform at ion > Edit ( cont inued) LABEL DESCRIPTION Locat ion ECS Em ergency Call Service ( e.g. E911 and ot hers) , such as defined by TI A or NENA. ELI N Em ergency Call Service ELI N ident ifier dat a form at is defined t o carry t he ELI N ident ifier as used during em ergency call set up t o a t radit ional CAMA or I SDN t runk- based PSAP . - Page 168 Chapter 27 Configuration: LLDP Figure 159 Configurat ion > LLDP > MED Net work Policy > Add/ Edit The following t able describes t he labels in t his screen. Table 125 Configurat ion > LLDP > MED Net work Policy > Edit LABEL DESCRIPTION MED Port Locat ion Edit...
-
Page 169: The Med Port Screen
Chapter 27 Configuration: LLDP Table 125 Configurat ion > LLDP > MED Net work Policy > Edit ( cont inued) LABEL DESCRIPTION VLAN I D Ent er t he VLAN I D ( VI D) for t he port as defined in I EEE 802.1Q- 2003. A value of 1 t hrough 4094 is used t o define a valid VLAN I D. -
Page 170: The Med Port Add/Edit Screen
Chapter 27 Configuration: LLDP Table 126 Configurat ion > LLDP > MED Port ( cont inued) LABEL DESCRIPTION Locat ion Displays t he Loca t ion value. Displays t he PoE value. I nvent ory Displays t he I n ve n t or y value. 27.2.9 The MED Port Add/Edit Screen Use t his screen t o configure t he M ED Por t Edit set t ings. - Page 171 Chapter 27 Configuration: LLDP Table 127 Configurat ion > LLDP > MED Port > Edit ( cont inued) LABEL DESCRIPTION Apply Click Apply t o save t he changes. Cancel Click Ca nce l t o discard t he changes. GS1900 Series User’s Guide...
-
Page 172: Configuration: Qos
HAPTER Configuration: QoS 28.1 Overview This sect ion provides inform at ion for QoS ( Qualit y of Service) in Configur a t ion . 28.2 General Qualit y of Service ( QoS) refers t o bot h a net work's abilit y t o deliver dat a wit h m inim um delay, and t he net working m et hods used t o cont rol t he use of bandwidt h. -
Page 173: The Port Edit Screen
Chapter 28 Configuration: QoS The following t able describes t he labels in t his screen. Table 128 Configurat ion > QoS > General LABEL DESCRIPTION QoS Port Edit Select t his check box t o configure t he propert ies of a port . Click t he Edit but t on change t he propert ies of t he port . -
Page 174: The Queue Screen
Chapter 28 Configuration: QoS 28.2.3 The Queue Screen Use t his screen t o view t he Que ue set t ings. Click Con figu r a t ion > QoS > Ge n e r a l > Que ue t o open t his screen. - Page 175 Chapter 28 Configuration: QoS Figure 165 Configurat ion > QoS > General > CoS Mapping The following t able describes t he labels in t his screen. Table 131 Configurat ion > QoS > General > CoS Mapping LABEL DESCRIPTION CoS t o Queue Mapping Class of Service ( CoS) Displays a list ing of t he CoS, range: 0 - 7.
-
Page 176: The Dscp Mapping Screen
Chapter 28 Configuration: QoS 28.2.5 The DSCP Mapping Screen Use t his screen t o configure t he D SCP M a pping set t ings. Click Configur a t ion > QoS > Ge n e r a l >... -
Page 177: The Ip Precedence Mapping Screen
Chapter 28 Configuration: QoS 28.2.6 The IP Precedence Mapping Screen Use t his screen t o configure t he I P Pr e ce de nce M a ppin g set t ings. Click Configur a t ion > QoS > Ge ne r a l >... -
Page 178: Trust Mode
Chapter 28 Configuration: QoS Table 133 Configurat ion > QoS > General > I P Precedence Mapping ( cont inued) LABEL DESCRIPTION Queue t o I P Precedence Mapping Queue I D Displays a list ing of Queue I D, range: 0 - 7. I P Precedence Click t he drop- down m enu t o m ap a Queue I D t o a specific I P precedence. -
Page 179: The Trust Mode Edit Screen
Chapter 28 Configuration: QoS Figure 169 Configurat ion > QoS > Trust Mode > Port The following t able describes t he labels in t his screen. Table 135 Configurat ion > QoS > Trust Mode > Port LABEL DESCRIPTION QoS Port Edit Select t his check box t o configure t he propert ies of a port . - Page 180 Chapter 28 Configuration: QoS Figure 170 Configurat ion > QoS > Trust Mode > Port > Edit The following t able describes t he labels in t his screen. Table 136 Configurat ion > QoS > Trust Mode > Port > Edit LABEL DESCRIPTION QoS Port Trust Edit...
-
Page 181: Configuration: Security
HAPTER Configuration: Security 29.1 Overview This sect ion provides inform at ion for Se cur it y in Configur a t ion . 29.2 Port Security 29.2.1 The Global Screen Use t his screen t o view t he Globa l set t ings. Click Configur a t ion > Se cu r it y > Por t Se cur it y t o open t his screen. -
Page 182: The Port Edit Screen
Chapter 29 Configuration: Security Figure 172 Configurat ion > Securit y > Port Securit y > Port The following t able describes t he labels in t his screen. Table 138 Configurat ion > Securit y > Port Securit y > Port LABEL DESCRIPTION Port... -
Page 183: Protected Port
Chapter 29 Configuration: Security Figure 173 Configurat ion > Securit y > Port Securit y > Port > Edit The following t able describes t he labels in t his screen. Table 139 Configurat ion > Securit y > Port Securit y > Port > Edit LABEL DESCRIPTION Port Securit y Edit... -
Page 184: The Protected Port Edit Screen
Chapter 29 Configuration: Security Figure 174 Configurat ion > Securit y > Prot ect ed Port The following t able describes t he labels in t his screen. Table 140 Configurat ion > Securit y > Prot ect ed Port LABEL DESCRIPTION Prot ect ed Port... -
Page 185: The Global Screen
Chapter 29 Configuration: Security Table 141 Configurat ion > Securit y > Port Securit y > Port > Edit ( cont inued) LABEL DESCRIPTION St at e Select En a ble or D isa ble for t he Pr ot e ct e d Por t st at us. Apply Click Apply t o save t he changes. -
Page 186: The Port Edit Screen
Chapter 29 Configuration: Security Figure 177 Configurat ion > Securit y > 802.1X > Port The following t able describes t he labels in t his screen. Table 143 Configurat ion > Securit y > 802.1X > Port LABEL DESCRIPTION Port Edit Select t his check box t o configure t he propert ies of a port . - Page 187 Chapter 29 Configuration: Security Figure 178 Configurat ion > Securit y > 802.1X > Port > Edit The following t able describes t he labels in t his screen. Table 144 Configurat ion > Securit y > 802.1X > Port > Edit LABEL DESCRIPTION 802.1X Port Edit...
-
Page 188: The Global Screen
Chapter 29 Configuration: Security 29.5.1 The Global Screen Use t his screen t o view t he Globa l set t ings. Click Configur a t ion > Se cu r it y > D oS > Globa l t o open t his screen. -
Page 189: The Port Edit Screen
Chapter 29 Configuration: Security The following t able describes t he labels in t his screen. Table 146 Configurat ion > Securit y > DoS > Port LABEL DESCRIPTION Port Edit Select t his check box t o configure t he propert ies of a port . Click t he Edit but t on change t he propert ies of t he port . -
Page 190: Dos Attack Types
Chapter 29 Configuration: Security 29.5.4 DoS Attack Types The following t able describes t he t ypes of DoS at t acks t hat t he Swit ch can prevent when you enable t he DoS feat ure on t he Swit ch and t he port ( s) . Table 148 DoS At t ack Types TYPE PACKET TYPE... -
Page 191: Auth Method
HAPTER Configuration: AAA 30.1 Overview This sect ion provides inform at ion for AAA in Con figu r a t ion . Use t he AAA screens t o configure aut hent icat ion, aut horizat ion and account ing set t ings on t he Swit ch. -
Page 192: The Radius Screen
Chapter 30 Configuration: AAA 30.2.2 The Auth Method Add/Modify Screen Use t his screen t o configure t he Aut h M e t hod set t ings. Click Configur a t ion > AAA > Aut h M e t hod > Add/ M odify t o open t his screen. Figure 183 Configurat ion >... -
Page 193: The Radius Add/Modify Screen
Chapter 30 Configuration: AAA The following t able describes t he labels in t his screen. Table 151 Configurat ion > AAA > RADI US LABEL DESCRIPTION Server Click Add t o creat e a new Se r ve r ent ry. Server Displays t he server nam e( s) as an I P address or a dom ain nam e. -
Page 194: Tacacs
Chapter 30 Configuration: AAA Table 152 Configurat ion > AAA > RADI US > Add/ Modify ( cont inued) LABEL DESCRIPTION Aut hent icat ion Ent er t he aut hent icat ion port num ber( s) as a value bet ween 0 and 65535. Port Key St ring Ent er t he aut hent icat ion key st ring: 0 - 63 ASCI I Alphanum eric Charact ers. -
Page 195: The Tacacs+ Add/Modify Screen
Chapter 30 Configuration: AAA 30.4.2 The TACACS+ Add/Modify Screen Use t his screen t o configure t he TACACS+ set t ings. Click Con figu r a t ion > AAA > TACACS+ > Add/ M odify t o open t his screen. Figure 187 Configurat ion >... -
Page 196: Configuration: Management
HAPTER Configuration: Management 31.1 Overview This sect ion provides inform at ion for M a n a ge m e n t in Configu r a t ion . Use t he M a n a ge m e n t screens t o configure set t ings on t he Swit ch. The following subm enus are accessed from t his sect ion: Syslog, SN M P, Er r or D isa ble , H TTP/ H TTPS, Use r s, Re m ot e Acce ss Cont r ol. -
Page 197: The Local Screen
Chapter 31 Configuration: Management 31.2.2 The Local Screen Use t his screen t o view t he Loca l set t ings. Click Configur a t ion > M a n a ge m e n t > Syslog > Loca l t o open t his screen. -
Page 198: The Remote Screen
Chapter 31 Configuration: Management Table 157 Configurat ion > Managem ent > Syslog > Local > Add/ Modify ( cont inued) LABEL DESCRIPTION Apply Click Apply t o save t he changes. Cancel Click Ca nce l t o discard t he changes. 31.2.4 The Remote Screen Use t his screen t o view t he Re m ot e set t ings. -
Page 199: Snmp
Chapter 31 Configuration: Management The following t able describes t he labels in t his screen. Table 159 Configurat ion > Managem ent > Syslog > Rem ot e > Add/ Modify LABEL DESCRIPTION Rem ot e Server Ent er a server I P address or dom ain nam e. Server Port Ent er a server port num ber. -
Page 200: The Community Screen
Chapter 31 Configuration: Management 31.3.2 The Community Screen Use t his screen t o view t he Com m unit y set t ings. Click Configur a t ion > M a na ge m e nt > SN M P > Com m unit y t o open t his screen. -
Page 201: The Group Screen
Chapter 31 Configuration: Management The following t able describes t he labels in t his screen. Table 162 Configurat ion > Managem ent > SNMP > Com m unit y > Add/ Modify LABEL DESCRIPTION SNMP Com m unit y Com m unit y Ent er a st ring ident ifying t he com m unit y nam e t hat t his ent ry should belong t o. -
Page 202: The User Screen
Chapter 31 Configuration: Management 31.3.5 The Group Add/Modify Screen Use t his screen t o configure t he Gr ou p set t ings. Click Con figu r a t ion > M a n a ge m e n t > SN M P > Gr oup >... -
Page 203: The User Add/Modify Screen
Chapter 31 Configuration: Management The following t able describes t he labels in t his screen. Table 165 Configurat ion > Managem ent > SNMP > User LABEL DESCRIPTION SNMP User Click Add t o creat e a new SNMP user. User Nam e Displays a st ring ident ifying t he user nam e t hat t his ent ry belongs t o. -
Page 204: The Trap Screen
Chapter 31 Configuration: Management The following t able describes t he labels in t his screen. Table 166 Configurat ion > Managem ent > SNMP > User > Add/ Modify LABEL DESCRIPTION SNMP User User Nam e Ent er a st ring ident ifying t he user nam e t hat t his ent ry belongs t o. The allowed st ring lengt h is 1 t o 30, and t he allowed cont ent is ASCI I charact ers from 33 t o 126. -
Page 205: The Trap Destination Screen
Chapter 31 Configuration: Management The following t able describes t he labels in t his screen. Table 167 Configurat ion > Managem ent > SNMP > Trap LABEL DESCRIPTION SNMP Trap SNMP Aut hfailure Select t he SNMP ent it y is perm it t ed t o generat e aut hent icat ion failure t raps. Possible Trap St at e m odes are: •... -
Page 206: The Error Disabled Screen
Chapter 31 Configuration: Management 31.3.10 The Trap Destination Add/Modify Screen Use t his screen t o configure t he Tr a p D e st ina t ion set t ings. Click Con figu r a t ion > M a na ge m e nt >... -
Page 207: The Http Screen
Chapter 31 Configuration: Management Figure 203 Configurat ion > Managem ent > Error Disable The following t able describes t he labels in t his screen. Table 170 Configurat ion > Managem ent > Error Disable LABEL DESCRIPTION Error Disabled Set t ings Recovery Ent er t he recovery int erval value. -
Page 208: The Https Screen
Chapter 31 Configuration: Management Figure 204 Configurat ion > Managem ent > HTTP/ HTTPS The following t able describes t he labels in t his screen. Table 171 Configurat ion > Managem ent > HTTP/ HTTPS LABEL DESCRIPTION HTTP St at e Select t he HTTP m ode operat ion. -
Page 209: The Users Screen
Chapter 31 Configuration: Management The following t able describes t he labels in t his screen. Table 172 Configurat ion > Managem ent > HTTP/ HTTPS > HTTPS LABEL DESCRIPTION HTTPS St at e Select t he HTTPS m ode operat ion. Possible m odes are: •... -
Page 210: Remote Access Control
Chapter 31 Configuration: Management 31.6.2 The Users Add/Modify Screen Use t his screen t o configure t he Use r s set t ings. Click Configur a t ion > M a na ge m e nt > Use r s > Add/ M odify t o open t his screen. -
Page 211: The Profile Add/Modify Screen
Chapter 31 Configuration: Management Figure 208 Configurat ion > Managem ent > Rem ot e Access Cont rol The following t able describes t he labels in t his screen. Table 175 Configurat ion > Managem ent > Rem ot e Access Cont rol LABEL DESCRIPTION Global... - Page 212 Chapter 31 Configuration: Management Figure 209 Configurat ion > Managem ent > Rem ot e Access Cont rol > Profile > Add/ Modify The following t able describes t he labels in t his screen. Table 176 Configurat ion > Managem ent > Rem ot e Access Cont rol > Profile > Add/ Modify LABEL DESCRIPTION Managem ent Access List Add...
-
Page 213: Firmware Upgrade
HAPTER Maintenance 32.1 Firmware Upgrade 32.1.1 Overview Firm ware updat es cont ain bug fixes and fixes for securit y vulnerabilit ies. I t is recom m ended t o keep t he Swit ch’s firm ware up t o dat e. You can upgrade t he Swit ch’s firm ware m anually using a file downloaded on your com put er or t hrough t he online web configurat or. -
Page 214: Upgrade The Firmware From A File On Your Computer
Chapter 32 Maintenance Upgrade t he firm ware from a file on a server Follow t he st eps below t o upgrade t he firm ware from a TFTP server. I n M e t h od, choose TFTP. I n Se r ve r I P, ent er t he TFTP server I P address. -
Page 215: Activate The Backup Image
Chapter 32 Maintenance Figure 211 Maint enance > Firm ware > Managem ent The following t able describes t he labels shown under I m a ge s I nfor m a t ion . Table 178 Maint enance > Firm ware > Managem ent LABEL DESCRIPTION Flash Part it ion... -
Page 216: Back Up Configuration Or Log Files To A Server
Chapter 32 Maintenance From t he M a int e na nce screen, display t he Ba ck up screen as shown next . Use t his screen t o back up your current Swit ch configurat ion and log files t o a server or as local files t o your com put er. Figure 212 Maint enance >... -
Page 217: Restore A Configuration File
Chapter 32 Maintenance I n M e t h od, choose H TTP. I n Cont e n t , choose any one file t ype. Click Apply t o display t he Sa ve File screen from which you can save t he configurat ion file in t he cfg form at or t he log file in t he log form at t o your com put er. -
Page 218: Restore The Configuration From A File On Your Computer
Chapter 32 Maintenance Click Apply t o rest ore t o t he chosen file as t he running configurat ion. Click Ca nce l t o discard t he changes. 32.4.3 Restore the configuration from a file on your computer Follow t he st eps below t o rest ore t he configurat ion from a file on your com put er. -
Page 219: Reset To Factory Defaults
Chapter 32 Maintenance 32.6 Reset to Factory Defaults 32.6.1 Overview You can reset t he Swit ch t o it ’s original set t ings. From t he M a int e n a n ce screen, display t he Fa ct or y D e fa ult screen as shown next . Use t his screen t o reset t he Swit ch back t o fact ory default s. -
Page 220: Ipv4 Ping Test
Chapter 32 Maintenance Figure 215 Maint enance > Diagnost ics > Port Test Follow t he st eps t o perform t he port t est . I n Por t Te st , select t he port num ber from t he Por t drop- down list . Click Te st t o st art t he port t est . -
Page 221: Ipv6 Ping Test
Chapter 32 Maintenance Follow t he st eps t o perform a ping t est . I n I P Addr e ss, ent er t he I Pv4 address. I n Coun t , ent er t he num ber of ping packet s. I n I n t e r va l, ent er t he t im e int erval in seconds. -
Page 222: Trace Route
Chapter 32 Maintenance Click Apply t o perform t he ping t est . Click Ca nce l t o discard t he changes. The t est result s are displayed in Re sult s. 32.7.4 Trace Route Click M a int e na nce > D ia gnost ics > Tr a ce in t he navigat ion panel t o open t his screen. Use t his screen t o print t he rout e t hat I P packet s t ake t o a net work host . -
Page 223: Reboot The Switch
Chapter 32 Maintenance 32.8 Reboot 32.8.1 Overview You can reboot t he Swit ch from t he web configurat or. Click M a int e na nce > Re boot in t he navigat ion panel t o open t his screen. Use t his screen t o rest art t he Swit ch wit hout physically t urning t he power off. -
Page 224: Troubleshooting
HAPTER Troubleshooting This chapt er offers som e suggest ions t o solve problem s you m ight encount er. The pot ent ial problem s are divided int o t he following cat egories. • Power, Hardware Connect ions, and LEDs •... -
Page 225: Switch Access And Login
Chapter 33 Troubleshooting One of t he LEDs does not behave as expect ed. Make sure you underst and t he norm al behavior of t he LED. See Sect ion 3.3 on page Check t he hardware connect ions. See Chapt er 2 on page I nspect your cables for dam age. - Page 226 Chapter 33 Troubleshooting • I f you changed t he I P address, use t he new I P addr e ss. • I f you changed t he I P address and have forgot t en i t , see t he t roubleshoot ing suggest ions for forgot t he I P address for t he Swit ch.
-
Page 227: Switch Configuration
Chapter 33 Troubleshooting I cannot see som e of Adva n ce d Applica t ion subm enus at t he bot t om of t he navigat ion panel. The recom m ended screen resolut ion is 1024 by 768 pixels. Adj ust t he value in your com put er and t hen you should see t he rest of Adva nce d Applica t ion subm enus at t he bot t om of t he navigat ion panel. -
Page 228: Customer Support
PP E N D I X Customer Support I n t he event of problem s t hat cannot be solved by using t his m anual, you should cont act your vendor. I f you cannot cont act your vendor, t hen cont act a ZyXEL office for t he region in which you bought t he device. -
Page 229: Appendix A Customer Support
Appendix A Customer Support Korea • ZyXEL Korea Corp. • ht t p: / / www.zyxel.kr Malaysia • ZyXEL Malaysia Sdn Bhd. • ht t p: / / www.zyxel.com .m y Pakistan • ZyXEL Pakist an ( Pvt .) Lt d. •... - Page 230 Appendix A Customer Support Belgium • ZyXEL Com m unicat ions B.V. • ht t p: / / www.zyxel.com / be/ nl/ • ht t p: / / www.zyxel.com / be/ fr/ Bulgaria ZyXEL България • • ht t p: / / www.zyxel.com / bg/ bg/ Czech Republic •...
- Page 231 Appendix A Customer Support Latvia • ZyXEL Lat via • ht t p: / / www.zyxel.com / l v / lv/ hom epage.sht m l Lithuania • ZyXEL Lit huania • ht t p: / / www.zyxel.com / lt / lt / hom epage.sht m l Netherlands •...
- Page 232 Appendix A Customer Support • ht t p: / / www.zyxel.ch/ Turkey • ZyXEL Turkey A.S. • ht t p: / / www.zyxel.com .t r • ZyXEL Com m unicat ions UK Lt d. • ht t p: / / www.zyxel.co.uk Ukraine •...
-
Page 233: North America
Appendix A Customer Support North America • ZyXEL Com m unicat ions, I nc. - Nort h Am erica Headqua rt ers • ht t p: / / www.zyxel.com / us/ en/ Oceania Australia • ZyXEL Com m unicat ions Corporat ion •... -
Page 234: Legal Information
PP E N D I X Legal Information Copyright Copyright © 2016 by ZyXEL Com m unicat ions Cor porat ion. The cont ent s of t his publicat ion m ay not be reproduced in any part or as a whole, t ranscribed, st ored in a ret rieval syst em , t ranslat ed int o any language, or t ransm it t ed in any form or by any m eans, elect ronic, m echanical, m agnet ic, opt ical, chem ical, phot ocopying, m anual, or ot herwise, wit hout t he prior writ t en perm ission of ZyXEL Com m unicat ions Corporat ion. - Page 235 Appendix B Legal Information List of National Codes COUNTRY ISO 3166 2 LETTER CODE COUNTRY ISO 3166 2 LETTER CODE Aust ria Liecht enst ein Belgium Lit huania Bulgaria Luxem bourg Croat ia Malt a Cyprus Net herlands Czech Republic Nor way Denm ark Poland...
- Page 236 Appendix B Legal Information Environment Statment European Union - Disposal and Recycling Information The sym bol below m eans t hat according t o local regulat ions your product and/ or it s bat t er y shall be disposed of separat ely from dom est ic wast e.
- Page 237 Appendix B Legal Information Environmental Product Declaration GS1900 Series User’s Guide...
- Page 238 Appendix B Legal Information 灣 警告使用者 這是甲類的資訊產品,在居住的環境中使用時, 能會造成射頻干擾,在這種情況 ,使用者會被要求採 某些適當的 策 」 安 警告 為了您的安 ,請先閱讀以 警告及指示 : • 請勿將 產品接近水 火焰或放置在高溫的環境 • 避免設備接觸 任何液體 - 勿讓設備接觸水 雨水 高濕 水腐蝕性的液體或其他水份 灰塵及 物 - 勿接觸灰塵 物 沙土 食物或其他不合適的材料 • 雷雨天氣時,不要安裝,使用或維修 設備 有遭 電擊的風險 •...
-
Page 239: European Union
Appendix B Legal Information CANADA The following inform at ion applies if you use t he product wit hin Canada area Industry Canada ICES statement I CAN I CES- 3 ( B) / NMB- 3( B) EUROPEAN UNION The following inform at ion applies if you use t he product wit hin t he European Union. List of national codes COUNTRY ISO 3166 2 LETTER CODE... - Page 240 Appendix B Legal Information • For pluggable devices, t he socket - out let shall be inst alled near t he device and shall be easily accessible. Environment Statement ErP (Energy-related Products) ZyXEL product s put on t he EU m arket in com pliance wit h t he requirem ent of t he European Parliam ent and t he Council published Direct ive 2009/ 125/ EC est ablishing a fram ework for t he set t ing of ecodesign requirem ent s for energy- relat ed product s ( recast ) , so called as "ErP Direct ive ( Energy- relat ed Product s direct ive) as well as ecodesign requirem ent laid down in applicable im plem ent ing m easures, power consum pt ion has sat isfied regulat ion requirem ent s which are:...
- Page 241 Appendix B Legal Information Environmental Product Declaration GS1900 Series User’s Guide...
-
Page 242: Zyxel Limited Warranty
Appendix B Legal Information 灣 安 警告 為了您的安 請先閱讀以 警告及指示 : • 請勿將 產品接近水 火焰或放置在高溫的環境 • 避免設備接觸任何液體 - 勿讓設備接觸水 雨水 高濕 水腐蝕性的液體或其他水份 • 灰塵及 物 - 勿接觸灰塵 物 沙土 食物或其他不合適的材料 • 雷雨天氣時 不要安裝 使用或維修 設備 有遭受電擊的風險 • 勿重摔或撞擊設備 並勿使用不 確的電源變壓器 •... -
Page 243: Index
Index Index Firefox firm ware current version access front panel applicat ions bridging I EEE 802.1Q VLAN hardware inst allat ion cert ificat ions hardware overview viewing Chapt er 31 on page 227 cont act inform at ion cookies copyright inst allat ion current dat e/ t im e freest anding... - Page 244 Index logout pop- up windows Web Configurat or power m odule loop guard disconnect ing how it works product regist rat ion probe packet 72, 73 prot ocol based VLAN and I EEE 802.1Q t agging isolat e t raffic MAC address range m anaging t he device...
- Page 245 Index current ly logged in vent ilat ion holes VLAN, prot ocol based, See prot ocol based VLAN wall m ount ing warrant y not e Web Configurat or access requirem ent s support ed browsers web configurat or ZON Ut ilit y GS1900 Series User’s Guide...