
Summary of Contents for Naigon Electronic Spark Color SC2-R3
- Page 1 SC2-R3 SETUP GUIDE © 2013 by Scott DeBoer, Naigon’s Electronic Creations. Spark Color 2™, Spark™, Igniter™ and Naigon’s Electronic Creations have no affiliation with Lucas Film, Disney, or its subsidiaries.
- Page 2 CONTENTS Introduction ................................4 2.1. Color Mixing ..............................4 2.2. New in SC2-R2 .............................. 4 Getting Started ..............................5 3.1. Important Notes ............................5 3.1.1. 3.7v Power Supply ..........................5 3.1.2. Battery Protection ........................... 5 3.1.3. Battery Brands ............................5 3.1.4.
- Page 3 5.5. EDITING SETTINGS ............................21 5.5.1. Master ..............................21 5.5.2. Blade Effects ............................23 5.5.3. Blade Color ............................. 24 5.5.4. Audio ..............................25 5.5.5. Motion ..............................26 5.5.6. Advanced ............................... 26 5.5.7. Accent ..............................27 5.6. Format Micro SD ............................27 5.7.
-
Page 4: Introduction
INTRODUCTION Introducing the Spark Color 2™, the simple and affordable way to get color mixing into your saber! By combining the simplicity of Spark™ and the powerful color mixing engine from Igniter 2™, Spark Color 2™ allows an amazing depth of features: ... -
Page 5: Getting Started
Alternating clash ported from Igniter™ I2-R2, to have the amazing, vibrant clashes on this board. WS-2812 (NeoPixel) support for RGB string blades. 2.3. NEW IN SC2-R2 The SC2-R2 release adds a few great features. Change the motion for advancing the color to either twisting or holding the aux button and twisting. ... -
Page 6: Battery Size
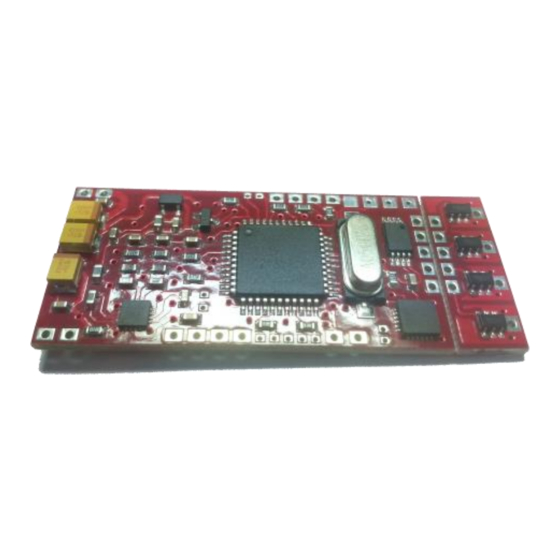
Sayno Tenergy These batteries have the best life and have the most consistent voltage output, allowing for the best experience through the entire life of the battery. If you choose to use another battery your experience will not be guaranteed. Specifically when using the Z6 LED, the only battery that Naigon’s Electronic Creations recommends is the AW 3400mAh 18650 here: http://www.lighthound.com/AW-18650-Protected-3400-mAh-Rechargeable-Lithium-... - Page 7 Figure 1 – Important components on the front of Spark Color 2™. Name Label Description 1. Micro SD card Holds the micro SD card that contains the fonts and holder configuration for Igniter 2™. Make sure that the card is fully inserted before applying power to Igniter 2™.
-
Page 8: Trudrive™ Separation
3.3. TRUDRIVE™ SEPARATION Igniter 2™ will come by default with the TruDrive™ attached to the main board. If it is desired to have the TruDrive™ separate from the main board for the install, then you can detach the two boards. Separation is much easier than with previous board versions and can be performed by hand or with a small set of needle nose pliers or forceps. -
Page 9: Rgb Wiring
Figure 3 – Basic wiring for Spark Color 2™. This will drive a single main LED and would require a removable battery for charging. Note that a resistor between the blue wire and C1- of TruDrive™ would be needed if the LED is red, amber, or red-orange. 4.2. -
Page 10: Rumble Motor And Accessory Wiring
Figure 5 – X4 wiring that uses four unique colors instead of doubling up on one color. This setup allows for more varied colors but is not as intuitive to get correct color mixing. Also, while an RGBW was used only the RED die needed a resistor/diode; if an RGBA is used a second resistor would be needed for the amber die as well. -
Page 11: Color Changing Crystal Wiring
Figure 6 – Diagram with a small shaft-less rumble motor running off the C4- pad. In this application the C4- pad is like the Crystal pad of the original Igniter™. Note that if more than 3.3v is required the power could be hooked to the battery directly. Also, note that the C4- pad can only handle up to 2A. -
Page 12: X-Saber Wiring
Figure 7 – Wiring with an RGB crystal chamber. This will have an RGB led that matches the blade color and pulses with the blade. Note that all three pins of the REB LED have a resistor since power is coming from the battery. I recommend a 22-33ohm for R1, and a 1ohm each for 4.6. -
Page 13: Single Color Cross-Guard Blade
Figure 8 – Wiring with the XDrive for the X-Saber feature. If TriCrees are used then 3 resistors/STTH2L06’s would be needed for the red die. After wiring this feature, not only does X-Saber need to be enabled in the master config, but also c4Percent should be set to 95, and then for each colorset where it is desired to have the side LEDs engaged the color should be set to a non-zero value. - Page 14 Figure 9 – Single color cross-guard wiring. This is almost the same as Spark 2™, the only difference being that the second group is controlled from C4 instead of C2. Note that a resistor or STTH2L06 diode would be needed for each die if the blade color is red or amber. The same as with X-Saber, for each colorset that utilizes this feature c4 needs to be set appropriately in the color set to a non-zero value.
-
Page 15: Full Wiring With Accents
Figure 10 - Wiring a triangular prism style WS2812 blade with 3 parallel strips. It is also possible to do two strips back to back, though that increases the vertical shadowing and doesn’t look as good when looking right at the seams. Notice that there is an extra ground wire from the TruDrive to the main ground;... -
Page 16: Configuration Editing
Figure 11 – Full wiring using all accent LEDs and a recharge port/kill key combo. This wiring will allow most features of Spark Color 2™ to be experienced without getting into super complex wiring. Note that the resistor/diode is needed for the red color. CONFIGURATION EDITING Once Spark Color 2™... -
Page 17: Launching The Application
Now, with both the Saber1 empty directory open and the micro SD card opened, select all the files from the micro SD card, and drag them into the Saber1 directory. When done, all the files should be copied to your hard-drive as shown below. - Page 18 Figure 13 – Igniter™ Config Editor launched after installation. You can then go to File->Open, and the open dialogue will appear. Navigate to the “c:\Igniter\Saber1” folder and then go into one of the fonts to edit. When you see the config.ini appear in the window, double click it or select it and click open to load the program for editing this font.
-
Page 19: Changing Soundfonts
Figure 14 – Navigate to “c:\Igniter\Saber1” in the window, and then one of the font folders (font1 – font9) to edit. When you see config.ini, double click it to open editing for the font. 5.4. CHANGING SOUNDFONTS Changing soundfonts was never easier with the enhancements to the config editor in R5. With the auto-sync of the app open you can switch fonts easily even when directly editing a font in the config editor. - Page 20 Figure 15 – Delete the existing font by selecting all the files, then hold control and uncheck ‘accent.ini’, ‘config.ini’, and ‘backup’ if it is present. Then the selected files font.wav, multi.wav, and the wav folders can be deleted or cut and pasted into a backup location. After the wav files are removed and all that is left is the config files and backup folder, you can copy in all the new wav files from a new font.
-
Page 21: Editing Settings
Figure 16 – After making changes on the disk simply switch back to the app and it will sync with the correct numbers. In this case the blst05.wav was deleted, but this will even work for swapping out an entire font. 5.5. - Page 22 individually; however, the easiest way is simply to pick the dropdown for the LED being used and it will be auto- populated. Figure 17 – Master settings in the config editor. Use the top dropdown to auto-set the 4 drive parameters below. Also set if the main switch is momentary or latching, and if the boot sound is being used.
-
Page 23: Blade Effects
MBUTTON defines if the main button is either latching or momentary. If set to latching, do not enable SWAP BUTTONS, as that is only supported for two momentary switches. SWAP BUTTONS setting is used to swap which buttons are main and aux. This is especially useful if the two buttons are inside a control box, as it allows the top/bottom button to be whichever the user prefers. -
Page 24: Blade Color
Figure 18 – The Blade Effects tab in the Config Editor contains settings for the blade plusing along with the extension and retraction lenghts. The values for INLEN OUTLEN set the length of the blade effect for retraction and extension respectively. Setting these to 0 will auto-detect the length of the sound file and match the blade length to the file, allowing for varying file lengths to work perfectly! 5.5.3. -
Page 25: Audio
Figure 19 – Color set editing in the Spark Color 2™ Config Editor. Edit each color set from this tab, regardless of what font is currently loaded. 5.5.4. AUDIO The audio tab has some settings related to the audio and audio related features. NEW IN R3. -
Page 26: Motion
Figure 20 – Audio settings tab to set when the hum starts mixing in and for the volume. 5.5.5. MOTION The motion tab contains a few simple settings for the on-board motion detection of swings. Use the thresholds to set how easy/hard of a swing is required to register a swing and slash sound respectively. The swngWait is used to set the swing sensitivity;... -
Page 27: Accent
5.5.7. ACCENT Unlike Igniter™ which has complicated accent settings, Spark Color 2™ has simple drop-downs to run the accents. This allows for easy setup and ensures a nice pattern. To change the accent pattern for each mode, simply choose the pattern from the drop down for that mode. To see the pattern in the simulator, make sure that the desired mode is chosen from the Accent mode dropdown. -
Page 28: Copy Files Back To The Micro Sd
Figure 22 - Using SD Formatter to format the micro SD card for use with any of my products, including Spark 2™, Spark Color 2™, Igniter 2™, and Sound Hornet™. To format an SD card, simply select the drive of the micro SD card from the Select card dropdown, type a name into the Volume label field, ensure Quick Format is chosen, and hit format, clicking yes on the prompt that appears. -
Page 29: Idle Mode
To use your saber, with the micro SD card inserted and the wiring correctly completed, insert the battery or pull the kill key. You should hear the boot sound or first font sound play (depending on the config setting), and you should also see the first accent LED blinking rapidly. -
Page 30: Saber Tracks
Entry Label Action Description Aux Button AUX +/- Press Pressing the aux button engages Blaster Block mode. Once in this mode, swinging the saber will perform EzBlaster™, where another Blaster Block will be performed. Keeping the saber still will cause the mode to exit. Aux Button AUX +/- Hold... -
Page 31: Color Editor
In Spark Color 2™ a new Saber Configuration menu is available. To access this menu, when in the idle mode hold down the aux button while the saber is pointing down. From here the two configuration modes can be accessed, along with jumping back into the main idle mode of Spark Color 2™. -
Page 32: Thanks
The motion editor is an app that is used to adjust the motion parameters on the fly. Setting these values will update the motion settings for every font of Spark Color 2™, as well as the sensitivity of this editing mode. Once in the Motion Editor, press the main button to enter editing. - Page 33 Revision History Date Revision 16 February 2015 Initial version of Spark Color 2™ 13 October 2017 Updated for SC2-R3 Page | 33...
Need help?
Do you have a question about the Spark Color SC2-R3 and is the answer not in the manual?
Questions and answers