
Related Manuals for WOOSIM WSP-i250


Summary of Contents for WOOSIM WSP-i250
- Page 1 WSP-i250 MODEL (2inch Rugged Mobile Printer) Rev. 1.4 All specifications are subjected to change without notice. http://www.woosim.com...
- Page 2 Copyright ⓒ2017 by Woosim Systems Inc. All rights reserved. The information contained in this manual is the property of Woosim Systems Inc. And may not be reproduced in whole or in part without the prior written permission of Woosim Systems Inc. Trademark a registered trademark of Woosim Systems Inc.
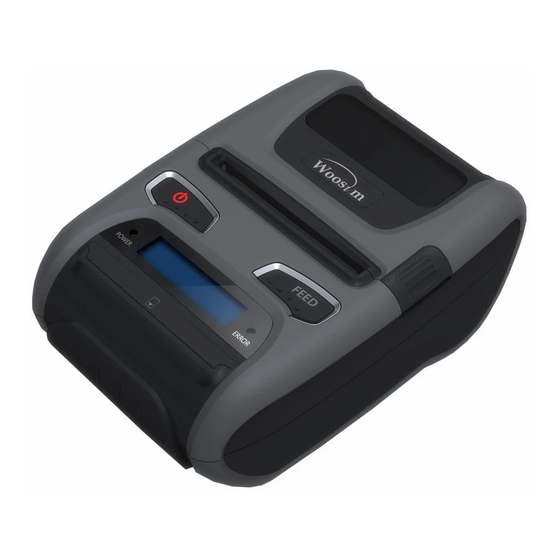
- Page 3 WSP-i250 Rev. 1.4 Introduction The WSP-i250 is the ideal solution for Mobile banking system , Retail, point of sales, Credit card Transaction, other traveling and mobile computing etc. The general features of WSP-i250 printer are as follows: Compact size (92.12×140.56×59.75mm) ...
-
Page 4: Operating Precautions
WSP-i250 Rev. 1.4 Operating Precautions Please follow the precautions below to enjoy and maintain the full performance of the printer. Using the Printer ● Be careful not to drop or bump the printer on a hard surface. ●... - Page 5 WSP-i250 Rev. 1.4 CONTENTS 1. Outline..................................7 1.1. Model classifications............................7 1.2. Symbol ................................7 1.3. Product Part Number System ........................8 1.3. Specifications..............................9 2. Setting up the printer............................11 2.1. Printer & Accessories ............................ 11 2.2.
- Page 6 WSP-i250 Rev. 1.4 6. Consumable Parts..............................30 6.1. Recommended paper............................ 30 6.2. Printing position............................. 30 7. Revision History ..............................31 http://www.woosim.com...
-
Page 7: Outline
WSP-i250 Rev. 1.4 WSP-i250 Model Interface A1 : UART/Bluetooth (Standard) Power None : DC 8.4V Standby symbol IEC 5009, the standby symbol(line partially within a broken circle), Indicates a sleep mode or low power state. Direct current symbol This symbol is found on many electronic devices that either require or produce direct current. - Page 8 WSP-i250 Rev. 1.4 Model name Interface Spec. Wired Wireless RS-232C Bluetooth SC30 IrDA Wireless LAN RS-485 None Parallel None Example) 1. Porti-S40 Serial/Bluetooth Part No. ⇒ S40/A1 2. Porti-SC30 Bluetooth Only Part No. ⇒ SC30/Z1 Note) The above table is the interface format which is supported.
-
Page 9: Specifications
WSP-i250 Rev. 1.4 Item Specifications Print method Direct thermal line printing - Font Size A: 12X24 / Font Size B : 9X24 / Font Size C : 8X16 Character size - KOR : 24X24(16X24) / CHN, JPN : 24X24 - Font A : 32cpl / Font B : 42cpl / Font C : 48cpl... - Page 10 WSP-i250 Rev. 1.4 Item Specifications Battery Rechargeable 7.4V DC, 2200mAh (Li-ion) Battery duration 1 hour continuous printing Input (100~250V AC, 50~60Hz) Battery charger Output(8.4VDC/0.8A), 4hours full charge time -10°C ~ 50°C (operating) Temperature Environment -10°C ~ 70°C (storage) conditions 30% - 80% (operating)
- Page 11 WSP-i250 Rev. 1.4 & & Your printer box should include these items. If any items are damaged or missing, please contact your dealer for assistance. Communication cable Battery charger adaptor WSP-i250 Battery Pack Thermal roll paper Belt clip ▼ OPTIONAL...
- Page 12 WSP-i250 Rev. 1.4 ▶ Part Name [option] http://www.woosim.com...
-
Page 13: Dimensions
WSP-i250 Rev. 1.4 ▶ Standard Model http://www.woosim.com... - Page 14 WSP-i250 Rev. 1.4 ▶ MSR Model http://www.woosim.com...
- Page 15 WSP-i250 Rev. 1.4 Note : Be sure to use paper rolls that meet the specifications. Do not use paper rolls that have the paper glued to the core because the printer can not detect the paper end correctly. 1. Make sure that the printer is not receiving data; otherwise, data may be lost.
-
Page 16: Power Supply
WSP-i250 Rev. 1.4 The following specification is requested for Power supply. Battery Charger : DC 8.4V/0.8A high. Avoid using power supply which its power capacity of power current is extremely Warning : ● Before installing or removing the battery pack, ensure the printer is OFF. -
Page 17: Recharging The Battery Pack
WSP-i250 Rev. 1.4 For recharging the battery pack, install the battery pack in the printer. Insert the Battery Charger to the charge connector of the printer. NOTE : ● While charging the printer, turn off the printer power. ● Do not remove the battery during charging. -
Page 18: Interface
WSP-i250 Rev. 1.4 In keeping on pressing the Feed and Power button simultaneously until after the ERROR lamp blinks 5 times, the printer comes out at the circumstance to change the printer mode. (refer Table 2) ** Only the printer which support iOS Bluetooth interface comes out at the circumstance to change the printer mode. -
Page 19: Bluetooth
WSP-i250 Rev. 1.4 FEED button : changing Printer MODE status. POWER button : changing OPTION status. [Example] The defaults of the printer are : UART : 9600 bps : 8 data bit : No parity : 1 stop bit : Density low :... - Page 20 WSP-i250 Rev. 1.4 When you press FEED button once. You will see present MARK mode in the LCD. ( Use) Press POWER Button once. And then the mark has set to Mark Gap/Hole. When you press FEED button once.
- Page 21 WSP-i250 Rev. 1.4 OPTION MODE Bluetooth WLAN UART UART Protocol UART Protocol UART Communication Bluetooth WLAN Port Protocol Bluetooth Protocol WLAN Bluetooth(iAP) 9600 bps 19200 bps Baud Rate 38400 bps 57600 bps 115200 bps 7 Data bit Data Bit 8 Data bit...
-
Page 22: Wireless Lan
DNS sever IP on LCD is indicated in pressing the Power button once again ※ Since the configuration of Wireless LAN can not be done with the printer in person, you are required to use the Wireless LAN-setting program which WOOSIM offers. http://www.woosim.com... - Page 23 WSP-i250 Rev. 1.4 The WSP-i250 printer has a UART(RS-232C or TTL) or USB interface and is connected by means of a 5 pin mini USB socket. In the following table, the signals present on the Mini- USB socket are listed: ①...
- Page 24 WSP-i250 Rev. 1.4 Category Specification Bluetooth Spec. Bluetooth Ver3.0 / Class2 (10m) Frequency band 2402~2480㎒ Protocol L2CAP, RFCOMM, SDP Profile GAP, SDAP, SPP Category Specification Function Radio frequency transfer Module (IEEE802.11b/g/n standard conformity) Frequency band 2.4GHz Channel 1 to 13 channel...
- Page 25 WSP-i250 Rev. 1.4 Contact Smart Card Reader Module for ISO/IEC-7816 Support Asynchronous Protocol T=0,T=1 Smart Card Connection Short Circuit Current Limitation 6KV ESD Protection on whole Smart Card Interface Connector : Friction Type with Smart Card presence detection 1 SAM (Security Application Module) ...
- Page 26 WSP-i250 Rev. 1.4 Host Command Module Execution Response 500ms timeout Host Command Command Command Module Command is Executio canceled Host Command Command Error Module CheckSumEr Executio http://www.woosim.com...
- Page 27 WSP-i250 Rev. 1.4 BUTTON - FEED Button : When the printer is on, paper can be feed manually by pressing and holding the FEED button for more than one second. - POWER Button: ① When of 5 or more seconds presses and power comes to on or off.
- Page 28 4. And then pattern of characters will be printed out. 5. Self-test will be finished automatically and turned to the standby status. ※ In case printer does not work properly, please contact Woosim customer service center. Please sling it over your shoulder after fixing the shoulder strap to the printer in the order of the illustration.
- Page 29 WSP-i250 Rev. 1.4 Following the instruction of the arrow, please put the belt clip in the hole and turn and fix the screw to the right by using a screw driver. Afterward, you can use it like the picture below.
- Page 30 WSP-i250 Rev. 1.4 Type : Thermal Paper Paper width : 60mm -0/-0.5 Paper thickness : 60±5㎛ Outer diameter : Ø50mm or less Recording side : Outside of roll Cautions 1. Do not paste the paper to the core. And the roll paper which has Near end mark printing on its near end is recommended.
- Page 31 WSP-i250 Rev. 1.4 Date Version Comments Jul. 25. 2014 Initialize Free fall : 2 -> 1.5M : WLAN spec. update p3,8,24 : Paper spec modify (58 -> 60mm) p8,30 Oct. 21. 2014 : Set operation mode method modify p18-20...
Need help?
Do you have a question about the WSP-i250 and is the answer not in the manual?
Questions and answers