Tele Radio Panther PN-R8-1 Safety Instructions
Wireless industrial remote control
Hide thumbs
Also See for Panther PN-R8-1:
- Installation instructions manual (28 pages) ,
- Safety instructions (17 pages)
Table of Contents
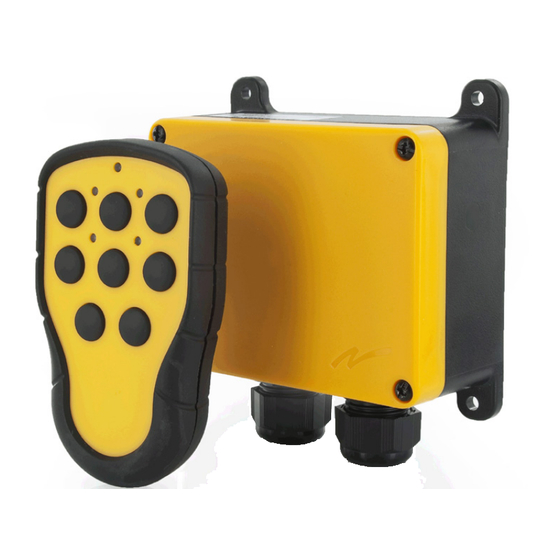
Advertisement
Quick Links
- 1 13. Trabus Programming Connector
- 2 Technical Data Receiver
- 3 Receiver (Base + Relay Expansion Board)
- 4 Receiver (Base Board)
- 5 Transmitter
- 6 Start the Transmitter
- 7 Register the Transmitter in the Receiver
- 8 Erase All Transmitters from the Receiver
- Download this manual
See also:
Instruction and Installation Manual
Advertisement
Table of Contents

Related Manuals for Tele Radio Panther PN-R8-1


Summary of Contents for Tele Radio Panther PN-R8-1
-
Page 1: Safety Instructions
Tele Radio Panther SAFETY INSTRUCTIONS LANGUAGE: ENGLISH (ORIGINAL) ARTICLE CODE: PN-R8-1, PN-R8-2, PN-R8-6, PN-T7-3, PN-T7-4, PN-T7-5. IM-PN-TX001-A02-EN... - Page 3 During the guarantee period, Tele Radio AB may replace the product or faulty parts with new. Work under guarantee must be carried out by Tele Radio AB or by an authorized service centre specified by Tele Radio AB. Make sure that repairs and maintenance are only carried out by qualified personnel.
-
Page 6: Table Of Contents
CONTENTS TECHNICAL DATA RECEIVER Receiver (base board) Receiver (base + relay expansion board) Receiver (base + high voltage expansion board) Current consumption Receiver data TECHNICAL DATA TRANSMITTER Transmitter Batteries Change the batteries SETTINGS Start the transmitter Turn the transmitter off Register the transmitter in the receiver Erase all transmitters from the receiver LED indications... -
Page 7: Technical Data Receiver
TECHNICAL DATA RECEIVER R8-1 (BASE BOARD) 7 8 9 10 11 LEDs 5 1 2 3 4 LED6 Relay 5 Relay 1 Relay 2 Relay 3 Relay 4 LED7 LED8 LED9 LED10 WR/5 12-24 V DC (on/off) (kill) (Buzzer) 1. Relay 1- on/off relay 12. - Page 8 R8-6 (BASE + RELAY EXPANSION BOARD) 28 29 30 31 32 33 LEDs 5 1 2 3 4 LED6 LED6 LED7 LED8 LED9 Relay 9 Relay 11 Relay 6 Relay 7 Relay 8 Relay 10 LED10 LED11 Relay 5 Relay 1 Relay 2 Relay 3 Relay 4...
-
Page 9: Receiver (Base + Relay Expansion Board)
R8-2 (BASE + HIGH VOLTAGE EXPANSION BOARD) LEDs 5 1 2 3 4 LED6 Relay 5 Relay 1 Relay 2 Relay 3 Relay 4 LED7 LED8 LED9 LED10 WR/5 12-24 V DC (on/off) (kill) (Buzzer) 35. Power supply LED 12 23 24 COMMON 24-110 V AC 230 V AC Recommended cable for RS232 is a twisted or shielded cable. -
Page 10: Receiver (Base + High Voltage Expansion Board)
Current consumption RX MODEL SUPPLY VOLTAGE MAX. CURRENT CONSUMPTION R8-1 12-24 V DC <200 mA. R8-2 24-230 V AC <200 mA. R8-6 12-24 V DC <300 mA. Technical data FUNCTIONAL RELAYS: 5/ 11 potential free* functional relays makes/ breaks 8A ACI NUMBER OF CHANNELS: SIZE: 120 x 116 x 50 mm./... -
Page 11: Technical Data Transmitter
TECHNICAL DATA TRANSMITTER 3-BUTTONS TRANSMITTER T5 17 18 19 1st step Top LED (red/green) LED 2 (red) LED 1 (red) 2-step buttons 1-3 NOTE! The right transmitter shows the 2nd step button positions for the second step on the 3-button transmitter. Frequency: 2405-2480 MHz. -
Page 12: Receiver Data
6-BUTTONS TRANSMITTER T4 17 18 19 1st step Top LED (red/green) LED 2 (red) LED 1 (red) LED 4 (red) LED 3 (red) 2nd step 2-step buttons 1-6 NOTE! The right transmitter shows the button positions for the second step on the 6-button transmitter. - Page 13 8-BUTTONS TRANSMITTER T3 17 18 19 1st step Top LED (red/green) LED 2 (red) LED 1 (red) 2nd step LED 4 (red) LED 3 (red) 2-step buttons 1-8 NOTE! The right transmitter shows the button positions for the second step on the 8-button transmitter.
-
Page 14: Transmitter
BATTERIES BATTERY TYPE: 3 x 1.5 V AAA alkaline OPERATING TIME: Approx. 15 h. with continuous usage WARNING! Do not recharge! Attempts to recharge may cause rupture, or the leaking of hazardous liquids which will corrode the equipment. CHANGE THE BATTERIES Remove the clip (2 screws). -
Page 15: Start The Transmitter
SETTINGS DEFAULT STATE • discontinuous radiotransmission • no on/off function The system will start transmitting as soon as the batteries are inserted and a transmitter button is pressed. Radio transmission will end as soon as no transmitter button is being pressed. START THE TRANSMITTER Start the transmitter by pressing any transmitter button. -
Page 16: Register The Transmitter In The Receiver
REGISTER THE TRANSMITTER IN THE RECEIVER Press the receiver Function button until red LED 7 lights up. Press the receiver Select button until LEDs 1-5 light. Press any transmitter button, e.g. button 1 until LEDs 1-10 flash 3 times before going out. ERASE ALL TRANSMITTERS FROM THE RECEIVER Press the receiver Function button and the Select button at the same time until red LED 1-5 go out. - Page 17 RELAY SETTINGS All buttons (step 1 and/ or 2) as well as all relays can be re-mapped using the PC program Settings manager. At delivery, the default relay setting is: R8-1: Transmitter button 1 (1st + 2nd step) activates relay 1 Transmitter button 2 (1st + 2nd step) activates relay 2 Transmitter button 3 (1st + 2nd step) activates relay 3 Transmitter button 4 (1st + 2nd step) activates relay 4...
-
Page 18: Led Indications
LED INDICATIONS LED INDICATIONS DURING START UP All receiver relay-LEDs lit up for 0.5 sec. Indications for settings are shown for 2 sec. Contact your representative if you have problems starting the system. LED INDICATIONS IN PROGRAMMING MODE LED 7 LED 8 yellow LED 9... - Page 19 ERROR LED INDICATIONS LED 7 LED 8 The receiver can not read the start-up (red) (yellow) information. Contact your representative. LED 7 Radio module setup failed. Contact (red) your representative. LED 8 A radio package not coming from a Panther transmitter is received. LED 8 LED 9 A radio package is received, but is not...
-
Page 20: Placement Of Labels With Ic And Fcc Information
PLACEMENT OF LABELS WITH IC AND FCC INFORMATION 1. Product label www.tele-radio.com Model: T00007-03 Freq.: 2405-2480MHz Sn.:XXXXXX 2150 www.tele-radio.com Model: T00007-04 Freq.: 2405-2480MHz Sn.:XXXXXX 2150 www.tele-radio.com Model: T00007-05 Freq.: 2405-2480MHz Sn.:XXXXXX 2150 The product label is placed under the clip on the battery lid. Remove the clip (2 screws). - Page 21 2. IC and FCC ID label The IC label is placed on the left side of the battery clip. The FCC ID label is placed on the right side of the battery clip (see picture). The mobile device is also designed to meet the requirements for exposure to radio waves established by the Federal Communications Commission (USA).
-
Page 22: Fcc Statement
During the guarantee period, Tele Radio may replace the product or faulty parts. Work under guarantee must be carried out by Tele Radio or by an authorized service centre specified by Tele Radio. This is not covered by the guarantee: Faults resulting from normal wear and tear. -
Page 23: Battery Precautions
BATTERY PRECAUTIONS Observe the following warnings. As batteries contains flammable substances such as lithium or other organic solvents, they may cause heating, rupture or ignition. • Risk of explosion if battery is replaced with a battery of an incorrect type. •... -
Page 24: Disposal Of Batteries
DISPOSAL OF BATTERIES An alkaline battery does not contain mercury, cadmium or lead, and is better for the environment than older types of batteries. Alkaline batteries should be disposed through local recycling stations/waste dumps. Contact your local government’s recycling or solid waste department for more information on proper recycling of alkaline batteries in your region. - Page 25 TELE RADIO AB Sweden, Main office Tel. +46 (0)31-748 54 60 www.tele-radio.com e-mail: info@tele-radio.com TELE RADIO ASIA TELE RADIO TURKEY TELE RADIO SVERIGE TELE RADIO GmbH China Turkey Sweden Germany Tel. +86-(0)592-3111168 Tel. +90 216 574 22 94 Tel. +46 (0)31-724 98 00 Tel.
Need help?
Do you have a question about the Panther PN-R8-1 and is the answer not in the manual?
Questions and answers