
Subscribe to Our Youtube Channel
Related Manuals for Tele Radio Tiger D8-1


Summary of Contents for Tele Radio Tiger D8-1
-
Page 1: Installation Instructions
Tele Radio Tiger INSTALLATION INSTRUCTIONS D8-1 ANALOGUE INPUT MODULE LANGUAGE: ENGLISH (ORIGINAL) ARTICLE CODE: D8-1 IM-TG-RX004-A03-EN... - Page 3 During the guarantee period, Tele Radio AB may replace the product or faulty parts with new. Work under guarantee must be carried out by Tele Radio AB or by an authorized service centre specified by Tele Radio AB. Make sure that repairs and maintenance are only carried out by qualified personnel.
-
Page 5: Table Of Contents
CONTENTS Technical data FUNCTIONALITY Clusters and signals HOW TO CONNECT Sensor connections Modbus - Tiger connections SETTINGS Setup the Tiger receiver Setup the Tiger transmitter ALARM LIMIT SETTINGS ON THE RECEIVER Overweight settings Underweight settings 2-point calibration settings System reset Disposal of electronics Contents... - Page 6 Contents...
-
Page 7: Technical Data
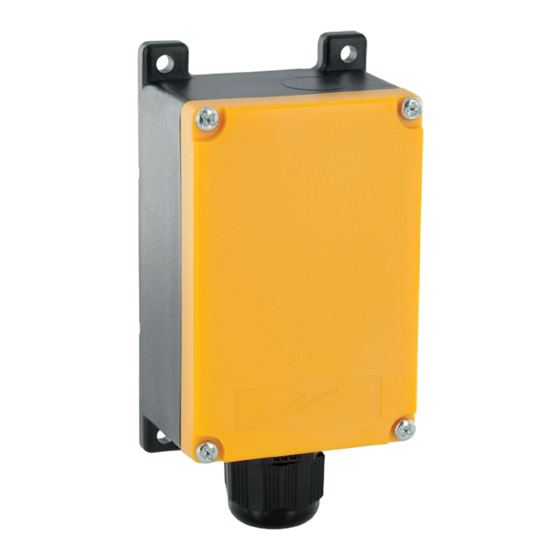
Technical data D8-1 overview 1 2 3 4 5 6 7 8 9 1011 121314 1516 1-16 1. AIN1+ 9. 5-24 V 17. RS485-LED (red) 2. AIN1- 10. 5-24 V 18. POWER-LED 3. AIN2+ 11. GND (green) 4. AIN2- 12. GND 19. - Page 8 D8-1 data Size: 80 x 54 x 38 mm./ 3 x 2 x 1.5 in. Weight: Max. 200 grams/ 7 oz. Degree of protection: IP65 Operating temperature: -20 to 65°C/ -4 to 149 °F Relative operating humidity: 10-90% Relative storage humidity: <95% Storage temperature: -30 to 70°C/ -22 to 158 °F...
-
Page 9: Functionality
Functionality Clusters and signals D8-1 Signal in 1 MODBUS slave Signal in 2 Input D8-1 Signal in 3 MODBUS slave Signal in 4 Signals over RS485/MODBUS TIGER RECEIVER Signal out 1 TIGER Cluster 1 TRANSMITTER Signal out 2 Alarm + warning Cluster 2 flags activates Signal out 3... - Page 10 2.The signals and alarm + warnings flags are distributed over RS485/ MODBUS to the Tiger receiver. 3. Each receiver have 4 clusters for handling the signals. We recommend selecting an empty cluster for each new input signal. E.g. cluster 1 for the 1st input signal, cluster 2 for the 2nd input signal, cluster 3 for the 3rd input signal and cluster 4 for the 4th input signal.
-
Page 11: Sensor Connections
SENSOR CONNECTIONS Connect signal to D8-1- analogue input module The green Power-LED flashes to indicate that the connection is correct. Unbalanced connection Connect a 0-20 mA, 4-20 mA or 0-10V sensor with 2 wires. 1 2 3 4 5 6 7 8 9 1011 121314 1516 Channel 1 Channel 1 1 2 3 4 5 6 7 8... - Page 12 Balanced connection Connect a 0-20 mA, 4-20 mA or 0-10V bridges sensor with 4 wires. 1 2 3 4 5 6 7 8 9 1011 12 1314 1516 Channel 1 1 2 3 4 5 6 7 8 Channel 2 Terminal block Description Channel 1 Channel 2...
-
Page 13: Modbus - Tiger Connections
MODBUS - TIGER CONNECTIONS The Tiger receiver D8 no. 1 1 2 3 4 5 6 7 8 9101112 13 14 1516 9 10 11 12 13 14 Example A 9. RS232 Rx (not used) 10. RS232 Tx (not used) 11. -
Page 14: Settings
SETTINGS Setup the D8-1- analogue input module Connect the D8-1 unit to the PC program Settings Manager. Go to MODBUS_ID and define what Modbus slave address that you want to assign your D8-1 unit, e.g. ‘1’. Go to CALIB_ID and define what signal type that the D8-1 unit will receive, e.g. -
Page 15: Setup The Tiger Transmitter
Setup the Tiger transmitter Download a bindat file to make the transmitter ready to handle feedback information. Alarm limit settings on the receiver NOTE! Use the same weight unit (e.g. ton) in all settings. Overweight settings Set the upper alarm limit Connect the receiver to the PC program Settings Manager. -
Page 16: Underweight Settings
relay(s) that you want to block when the overweight warning limit (e.g. 1000 kg.) is reached. To activate a relay(s)/an indication relay(s) when the over weight warning limit (e.g. 1000 kg.) is reached, select WARNINGWEIGHTHIGH_OR_RELAYS. Check the relay(s) that you want to activate when the overweight warning limit (e.g. - Page 17 Uncheck the relay(s) that you want to block when the under weight warning limit (e.g. 100 kg.) is reached. To activate a relay(s)/an indication relay(s) when the weight equals or falls below the WARNINGWEIGHTLOW_LIMIT (e.g. 100 kg.), select WARNINGWEIGHTLOW_OR_RELAYS. Check the relay(s) that you want to activate when the under weight warning limit (e.g.
- Page 18 (or exceeds) the WarningWeightHigh_Limit, an alarm flag is raised. If the incoming weight at any time goes below 1.200 (kg.), the alarm flag will be lowered. Otherwise the alarm flag will stay raised. Example 2: Underweight settings The WeightLow_Limit is set to 25 (kg). A WeightLow_Hysteresis value is set to 50.
-
Page 19: 2-Point Calibration Settings
2-point calibration settings Select ‘1st point cal’ in the receiver menu. Select the cluster to be calibrated, e.g. ‘1’. Connect a known load to the hook (we recommend no load (zero weight), for the 1st point). Enter the weight of the 1st known load in the receiver menu. Select ‘2nd point cal’... -
Page 20: Disposal Of Electronics
(RoHS) and Directive 2002/96/EC on waste electrical and electronic equip- ment (WEEE), Tele Radio strives to minimize the use of hazardous materials, promotes reuse and recycling, and reduces emissions to air, soil and water. When a com-... - Page 24 TELE RADIO AB Sweden, Main office Tel. +46 (0)31-748 54 60 www.tele-radio.com e-mail: info@tele-radio.com TELE RADIO ASIA TELE RADIO TURKEY TELE RADIO SVERIGE TELE RADIO GmbH China Turkey Sweden Germany Tel. +86-(0)592-3111168 Tel. +90 216 574 22 94 Tel. +46 (0)31-724 98 00 Tel.
Need help?
Do you have a question about the Tiger D8-1 and is the answer not in the manual?
Questions and answers