
Related Manuals for Rear view safety RVS-577FW


Summary of Contents for Rear view safety RVS-577FW
-
Page 1: Instruction Manual
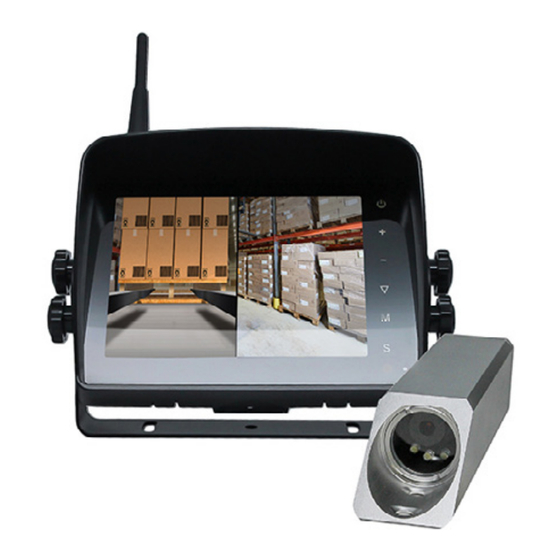
Instruction Manual Wireless Safety Camera System for Forklifts with 5" Dual Screen Display RVS-577FW Reverse With Confidence ™... -
Page 2: Table Of Contents
Disclaimer ........25 Rear View Safety... -
Page 3: Introduction
NOTE! Please read all of the installation instructions carefully before installing the product. Improper installation will void manufacturer’s warranty. Congratulations on purchasing a Safety Camera System! With this manual you will be able to properly install and operate the unit. This system is intended to be installed as a supplement aid to your standard rear view mirror that already exists in your vehicle. -
Page 4: Safety Information
If you back up while looking only at the monitor, you may cause damage or injury. Always back up slowly. Rear View Safety... - Page 5 INSTALLATION: • Electric shock or product or disconnected wire may cause a malfunction may occur if this fire. product is installed incorrectly. • While installing the Rear View System be careful with the wire • Use this product within positioning in order to avoid wire the voltage range specified.
- Page 6 If you have questions about this product, contact: Rear View Safety 1797 Atlantic Avenue Brooklyn, NY 11233 Tel: 1.800.764.1028 IN NO EVENT SHALL SELLER OR MANUFACTURER BE LIABLE FOR ANY DIRECT OR CONSEQUENTIAL DAMAGES OF ANY NATURE, OR LOSSES OR EXPENSES RESULTING FROM ANY DEFECTIVE PRODUCT OR THE USE OF ANY PRODUCT.
-
Page 7: Before Beginning Installation
Before drilling please check that no cable or wiring is on the other side of the wall. Please clamp all wires securely to reduce the possibility of them being damaged while vehicle is in use. Keep all cables away from hot/moving parts and electrical noisy components. We recommend doing a benchmark test before installation to insure that all components are working properly. - Page 8 Warning! 1. This monitor is high voltage. Only professionals should open the monitor's case. 2. Do not watch the video while driving unless you are monitoring the rear view camera display. Rear View Safety...
-
Page 9: System Features
System Features • Dual screen display - Can view 2 cameras simultaneously • Normal/Mirror/Flip/Mir-Flip viewing modes • Split/Auto-scan/Single display modes • Instant Pair - Pair system without leaving your seat • Magnetic camera - Simple installation • Remote control • 4 video inputs - Connect up to 3 additional cameras •... - Page 10 Rear View Safety...
-
Page 11: Monitor Introduction
Monitor Introduction 1. Power indicator/On switch 2. Toggle volume up 3. Toggle volume down 4. Enter menu item/save user settings 5. Enter menu 6. Toggle channels 7. Speaker 8. U-Bracket screw position 9. Mounting attachment Remote Introduction Reverse With Confidence ™... -
Page 12: Remote Introduction
Red wire to positive DC/10-32V power supply • Black wire to ground • Brown wire to reverse power • White wire to left turn signal • Blue wire to right turn signal • Green/yellow wire to other positive power supply Rear View Safety... -
Page 13: Triggers
Triggers When green trigger wire is activated, camera switches to CAM1 When white trigger wire is activated, camera switches to CAM2 (left side camera) When white trigger wire is activated, camera switches to CAM3 (right side camera) When brown trigger wire (reversing) is activated, camera switches to CAM4 (backup camera) This also displays gridlines... - Page 14 When yellow trigger wire is activated, monitor switches to dual display. Volume With Dual Display Use volume toggle buttons to select the channel for audio out. Rear View Safety...
-
Page 15: Menu
Menu Introduction MENU is only allowed for operation under single image mode, not dual display mode. Press MENU to display the following options and settings: MODE/PICTURE/MIR-FLIP/AUTOSCAN/SYSTEM/PAIRING. Mode Press - or + to select MODE. Press to enter. Press - or + to select SPLIT. Select OFF to exit SPLIT menu. Split trigger is disabled when split mode is off. - Page 16 Picture Press - or + to select Picture. Press to enter. Brightness/Contrast/Hue/Volume Press - or + to select BRIGHTNESS/CONTRAST/HUE/VOLUME. Press to enter. Press MENU to return to main menu. Rear View Safety...
- Page 17 Mir-Flip Press - or + to select MIR-FLIP. Press to enter. Press MENU to return to main menu. Press - or + to select NORMAL / MIRROR / MIR-FLIP / FLIP. Press MENU to return main menu. Reverse With Confidence ™...
- Page 18 Press to exit. Press MENU to return to main menu. No video will be displayed under AUTOSCAN mode if a channel is turned OFF. SCANTIME duration is 5-45 seconds. Toggle up/down in 5 second inter- vals. Rear View Safety...
- Page 19 System Press - or + to select SYSTEM. Press to enter. Time: Press - or + to select TIME. Press to enter. Press - or + to adjust. Color-Sys: Press - or + to select COLOR-SYS. Press to enter. Press - or + to adjust.
-
Page 20: Pairing
“PAIRING START 50”. Turn camera on during countdown. The monitor and cameras will synchronize themselves with each other after the camera is powered for 5 seconds. The video will be displayed if in- stant pairing is successful. Repeat the pairing if “No Signal” displays. Rear View Safety... -
Page 21: Monitor Specifications
Monitor Specification LCD Size 5.6" Resolution 640 x 3 (RGB) x 480 Contrast 500:1 Brightness 200 cd/m² Viewing Angle U: 50 / D: 70, R/L 70 Video Inputs Operating Frequency 2400 - 2483.5 MHz Receiving Sensitivity -89 dBm Decompression Form MPEG4 Transmit Output Power 17 dBm Modulation... -
Page 22: Camera Specifications
120ms RF Bit Rate 4Mbps Operating Temperature -20°C ~ 70°C, RH 95% MAX Storage Temperature -30°C ~ 80°C, RH 95% MAX Minimum Illumination 0.1 Lux Power Supply DC 10 ~ 32V Waterproof Rating IP69K Viewing Angle 45° Rear View Safety... -
Page 23: Troubleshooting
Troubleshooting Problem Possible Causes/Solutions No picture/sound Power switch is set OFF. Check power connection/ source. No signal Check camera power supply. Pair the monitor and camera again. Dark Picture Adjust brightness/contrast. No Color Adjust hue. Reverse With Confidence ™... -
Page 24: Warranty
OTHERS OR THE UNAUTHORIZED USE OF NONCONFORMING PARTS; THE DAMAGE IS DUE TO NORMAL WEAR AND TEAR, THIS DAMAGE IS DUE TO ABUSE, IMPROPER MAINTENANCE, NEGLECT OR ACCIDENT; OR THE DAMAGE IS DUE TO USE OF THE REAR VIEW SAFETY, INC. SYSTEM AFTER PARTIAL FAILURE OR USE WITH IMPROPER ACCESSORIES. -
Page 25: Disclaimer
FOR ANY INJURY, LOSS OR DAMAGE, INCIDENTAL OR CONSEQUENTIAL, ARISING OUT OF THE USE OR INTENDED USE OF THE PRODUCT. IN NO EVENT SHALL REAR VIEW SAFETY AND/OR ITS AFFILIATES HAVE ANY LIABILITY FOR ANY LOSSES (WHETHER DIRECT OR INDIRECT, IN... - Page 26 If you have any questions about this product, contact: Rear View Safety, Inc. 1797 Atlantic Avenue Brooklyn, NY 11233 800.764.1028 Better Cameras. Better Service. IT’S OUR GUARANTEE. Rear View Safety...
Need help?
Do you have a question about the RVS-577FW and is the answer not in the manual?
Questions and answers