
Related Manuals for Rear view safety RVS-718-3SC


Summary of Contents for Rear view safety RVS-718-3SC
-
Page 1: Instruction Manual
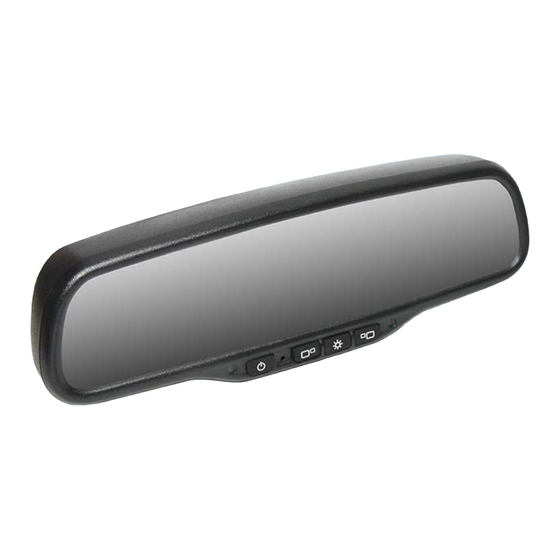
Instruction Manual G-Series Rear View Replacement Mirror Monitor with Three 3.5” Displays RVS-718-3SC Rear View Safety, Inc. © 2015 Reverse With Confidence ™... - Page 2 Troubleshooting......19 Warranty & Disclaimer......20-21 Rear View Safety...
- Page 3 NOTE! Please read all of the installation instructions carefully before installing the product. Improper installation will void manufacturer’s warranty. Congratulations on purchasing a Rear View Backup Camera System! With this manual you will be able to properly install and operate the unit. The Backup Camera System is intended to be installed as a supplement aid to your standard rear view mirror that already exists in your vehicle.
- Page 4 Rear View Camera System. If you back up while looking only at the monitor, you may cause Rear View Safety...
-
Page 5: Installation
INSTALLATION: • Electric shock or product or disconnected wire may cause a malfunction may occur if this fire. product is installed incorrectly. • While installing the Rear View System be careful with the wire • Use this product within positioning in order to avoid wire the voltage range specified. - Page 6 If you have questions about this product, contact: Rear View Safety 1797 Atlantic Avenue Brooklyn, NY 11233 Tel: 1.800.764.1028 IN NO EVENT SHALL SELLER OR MANUFACTURER BE LIABLE FOR ANY DIRECT OR CONSEQUENTIAL DAMAGES OF ANY NATURE, OR LOSSES OR EXPENSES RESULTING FROM ANY DEFECTIVE PRODUCT OR THE USE OF ANY PRODUCT.
- Page 7 Before drilling please check that no cable or wiring is on the other side of the wall. Please clamp all wires securely to reduce the possibility of them being damaged while vehicle is in use. Keep all cables away from hot or moving parts and electrical noisy components. We recommend doing a benchmark test before installation to insure that all components are working properly.
- Page 8 Do not run the cable over sharp edges, do not kink the cable and keep away from HOT and rotating parts. Fasten all cables and secure all excess cable. Connect camera to the camera extension cable which runs inside the vehicle. Figure 1.2 Rear View Safety...
- Page 9 Wiring After connecting the camera to the “camera cable” the camera should be plugged into AV2 input. Connect the RED 12V power wire to an ignition power source and the BLACK 12V ground wire to a chassis ground. The GREEN wire is the REVERSE trigger wire. Connect this wire to the vehicle’s backup light circuit to activate the rear-view image whenever the vehicle shifts into reverse.
- Page 10 There are many methods to remove the original rear-view mirror, however, please don’t force the mirror off the bracket. The manufacturer will not be responsible for any damage caused by an incorrect installation of the mirror. Rear View Safety...
- Page 11 FIGURE 1.2 A good position to install a camera at the rear of car is the top of the license plate, as shown in the image above. Reverse With Confidence ™...
- Page 12 FIGURE 2.2 Rear View Safety...
- Page 13 Reverse With Confidence ™...
- Page 14 In case of sudden emergency braking, the rear video mirror will automatically switch to the video behind the car. It will automatically return to the front video after releasing the brake. The views can also be switched manually by pressing the left, right, or middle buttons. Rear View Safety...
- Page 15 Location Recommendation Of Camera Installation Reverse With Confidence ™...
- Page 16 Reversing: When the car is in reverse, the left screen displays displays RL (rear left), the middle screen displays RM (rear middle), and the right screen displays RR (rear right). The corresponding acro- nyms will appear in the left corner of the screens. Rear View Safety...
- Page 17 Braking: If the screen off before braking, FL will be displayed on the left screen, FM will displayed on the middle screen, and FR will be displayed on the right screen. Basic Functions Highly Reflective Mirror In addition to being a monitor, the system is also highly reflective mir- ror.
- Page 18 Focus: 12cm-infinite Photo Format: JPEG Video Format: Audio: Built in microphone and speaker Temperature: -30c° 70c° Language: English/ Japanese/ French/ Portuguese/ Italy/ Russian/ German/ Spanish Certifications: The DVR mirror has passed E-MARK/FCC/C-TICK and is compliant with ROHS. Rear View Safety...
- Page 19 Problems Diagnoses Solutions Recording frequently stops 1. Motion detection is on 1. Turn off motion detection 2. The SD card is too small to read and store information 2. Use a larger higher class SD card Camera input is working but no 1.
- Page 20 OTHERS OR THE UNAUTHORIZED USE OF NONCONFORMING PARTS; THE DAMAGE IS DUE TO NORMAL WEAR AND TEAR, THIS DAMAGE IS DUE TO ABUSE, IMPROPER MAINTENANCE, NEGLECT OR ACCIDENT; OR THE DAMAGE IS DUE TO USE OF THE REAR VIEW SAFETY, INC. SYSTEM AFTER PARTIAL FAILURE OR USE WITH IMPROPER ACCESSORIES.
- Page 21 FOR ANY INJURY, LOSS OR DAMAGE, INCIDENTAL OR CONSEQUENTIAL, ARISING OUT OF THE USE OR INTENDED USE OF THE PRODUCT. IN NO EVENT SHALL REAR VIEW SAFETY AND/OR ITS AFFILIATES HAVE ANY LIABILITY FOR ANY LOSSES (WHETHER DIRECT OR INDIRECT, IN...
- Page 22 If you have any questions about this product, contact: Rear View Safety, Inc. 1797 Atlantic Avenue Brooklyn, NY 11233 800.764.1028 Better Cameras. Better Service. IT’S OUR GUARANTEE. Rear View Safety...
Need help?
Do you have a question about the RVS-718-3SC and is the answer not in the manual?
Questions and answers