
Related Manuals for SICK DME5000


Summary of Contents for SICK DME5000
- Page 1 B E T R I E B S A N L E I T U N G / O P E R AT I N G I N S T R U C T I O N S DME5000 Entfernungs-Messgerät...
-
Page 2: German Seite
Betriebsanleitung DME5000 Dieses Werk ist urheberrechtlich geschützt. Die dadurch begründeten Rechte bleiben bei der Firma SICK AG. Eine Vervielfältigung des Werkes oder von Teilen dieses Werkes ist nur in den Grenzen der gesetzlichen Bestimmun- gen des Urheberrechtsgesetzes zulässig. Eine Abänderung oder Kürzung des Werkes ist ohne ausdrückliche schriftliche Zustimmung der Firma SICK AG untersagt. -
Page 3: Table Of Contents
10 Wartung ........................45 11 Troubleshooting ......................46 12 Begriffserklärungen ..................... 49 ® 12.1 PROFIBUS ......................49 12.2 RS 422 .........................49 12.3 SSI ........................50 12.4 DeviceNet ......................50 12.5 Hiperface ......................51 8009813/ZJV1/2017-05 © SICK AG • Deutschland • Irrtümer und Änderungen vorbehalten... - Page 4 Hiperface-Schnittstelle ..................70 13.8.1 Typenspezifische Einstellung ............71 13.8.2 Übersicht der unterstützen Befehle ..........71 13.8.3 Übersicht der Hiperface-Standard-Statusmeldungen ....72 13.8.4 Verhalten bei Fehlern und Vorausfallmeldungen ......72 © SICK AG • Deutschland • Irrtümer und Änderungen vorbehalten 8009813/ZJV1/2017-05...
-
Page 5: Verwendete Symbole Und Abkürzungen
Warnhinweise sollen Sie vor Gefahren schützen oder helfen Ihnen, eine Beschädigung des Sensors zu vermeiden. ACHTUNG Typenschild Anhand des Typenschildes kann der Gerätetyp, die Serien-Nummer des Gerätes und die Bestell-Nummer festgestellt werden. Hersteller Gerätetyp Bestell-Nummer Serien-Nummer Produktionsjahr/-monat 8009813/ZJV1/2017-05 © SICK AG • Deutschland • Irrtümer und Änderungen vorbehalten... -
Page 6: Bestimmungsgemäße Verwendung
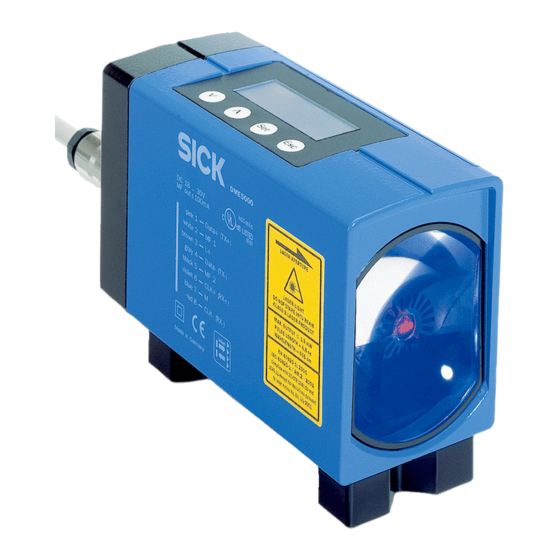
Betriebsanleitung DME5000 Bestimmungsgemäße Verwendung Das DME5000 ist ein optoelektronischer Sensor, der zum Erfassen von Distanzen zu einer linear bewegten Reflexionsfolie eingesetzt wird. Er darf nicht in explosionsgefährdeten Bereichen verwendet werden. © SICK AG • Deutschland • Irrtümer und Änderungen vorbehalten... -
Page 7: Sicherheitshinweise
Lesen Sie die Betriebsanleitung vor der Inbetriebnahme. Anschluss, Montage und Einstellung nur durch Fachpersonal. Schützen Sie das DME5000 bei Inbetriebnahme vor Feuchte und Verunreinigung. Das DME5000 ist kein Sicherheitsmodul gemäß EU-Maschinenrichtlinie. Beachten Sie die nationalen Sicherheits- und Unfallverhütungsvorschriften. -
Page 8: Funktionsweise
Die gemessene Distanz wird, je nach Gerätevariante, über eine SSI-, RS-422-, DeviceNet-, Hiperface- oder PROFIBUS-Schnittstelle an eine Steuerung oder einen Lageregelkreis übertragen. Durch die schnelle Messwertermittlung ist das DME5000 für den direkten Betrieb in einem geschlossenen Lageregelkreis über die SSI-Schnittstelle z. B. mit einem Frequenz- umrichter geeignet. -
Page 9: Inbetriebnahme
DME5000 Inbetriebnahme Montage Das DME5000 und der Reflektor werden so befestigt, dass der Reflektor immer im Sicht- feld des Sensors ist. Das DME5000 wird so ausgerichtet, dass sich der (auch in großen Abständen) gut sicht- bare Lichtfleck im Zentrum des Reflektors befindet. -
Page 10: Vorgehensweise Bei Der Ausrichtung
Vorgehensweise bei der Ausrichtung Bringen Sie Fahrzeug und Reflektor auf kleine Distanz. Richten Sie das DME5000 so aus, dass der Lichtfleck sich im Zentrum des Reflektors befindet. Vergrößern Sie die Entfernung von Fahrzeug zu Reflektor und beobachten Sie dabei den Lichtfleck. -
Page 11: Anordnung Benachbarter Entfernungs-Messgeräte
DME5000 und ISD Reflektor Für die Datenübertragungs-Lichtschranken der Baureihe ISD300 / ISD400-1xxx / ISD400- 6xxx ist unabhängig von der maximalen Reichweite s ein minimaler Strahlabstand von 100 mm einzuhalten. 8009813/ZJV1/2017-05 © SICK AG • Deutschland • Irrtümer und Änderungen vorbehalten... -
Page 12: Elektrischer Anschluss
DME5000 nach Anschlussschema anschließen. Verdrahtungshinweise beachten (siehe Abschnitt 5.2.1), Stecker und Kabel siehe Abschnitt 9.2.2. Abb. 6: Anschlussschema DME5000-xx1 (SSI) DME5000-xx3 (RS 422) Abb. 7: Anschlussschema ® DME5000-xx2 (PROFIBUS © SICK AG • Deutschland • Irrtümer und Änderungen vorbehalten 8009813/ZJV1/2017-05... - Page 13 Inbetriebnahme Betriebsanleitung Kapitel 5 DME5000 Abb. 8: Anschlussschema DME5000-xx4 (DeviceNet) Abb. 9: Anschlussschema DME5000-xx5 (DeviceNet) Abb. 10: Anschlussschema DME5000-xx7 (Hiperface) 8009813/ZJV1/2017-05 © SICK AG • Deutschland • Irrtümer und Änderungen vorbehalten...
-
Page 14: Verdrahtungshinweise
Speziell muss auf die beidseitige Auflage des Kabelschirmes an Schaltschrank und DME5000 geachtet werden. Der Kabelschirm der vorkonfektionierten M16-Kabel ist mit dem Metallstecker und damit mit dem DME5000-Gehäuse verbunden. Der Kabelschirm am Schaltschrank muss großflächig mit der Betriebserde verbunden werden. -
Page 15: Profibus-Terminierung
Abb. 14: Keine „Schweine- schwänzchen“, Schirm kurz und vollflächig anbinden, BEIDE Seiten erden Abb. 15: Schirmanschluss bei Kunststoffgehäusen 5.2.2 PROFIBUS-Terminierung Abb. 16: PROFIBUS- Terminierung (siehe Zubehör Abschnitt 9.2.2) Terminator 8009813/ZJV1/2017-05 © SICK AG • Deutschland • Irrtümer und Änderungen vorbehalten... -
Page 16: Bedienung
Betriebsspannung Infofeld 1 Statusanzeigen Infofeld 2 Funktionstasten Nach ca. 1 s ist das DME5000 betriebsbereit und zeigt, bei freier Sicht auf den Reflektor, den aktuellen Messwert an: © SICK AG • Deutschland • Irrtümer und Änderungen vorbehalten 8009813/ZJV1/2017-05... - Page 17 Kein Clock-Signal ® PROFIBUS Telegrammverkehr Kein Telegrammverkehr DeviceNet Telegrammverkehr Kein Telegrammverkehr RS 422 Continuous mode Request mode Hiperface ‒ Unabhängig vom Busstatus Abhilfemaßnahmen bei Fehlermeldungen/Vorausfallmeldungen siehe Kapitel 11 „Troubleshooting“. 8009813/ZJV1/2017-05 © SICK AG • Deutschland • Irrtümer und Änderungen vorbehalten...
- Page 18 Drücken von Blinkende Anzeige Service signalisiert einen Hardwaredefekt oder Service Über-/Untertemperatur. Tasten Führt durch die Menüstruktur, Code, Parametereingabe, Speichern von Parametern. Verlassen eines Menüunterpunktes. Auswahl von Menüpunkten, Eingabe von Zahlen © SICK AG • Deutschland • Irrtümer und Änderungen vorbehalten 8009813/ZJV1/2017-05...
-
Page 19: Menüstruktur
Kapitel 7 DME5000 Menüstruktur Flussdiagramm Auf der Innenseite der hinteren Umschlagklappe ist die Menüstruktur des DME5000 in Form eines Flussdiagramms dargestellt. Klappen Sie diese Seite aus, um sich während der folgenden Erklärungen besser in der Menüstruktur zurechtzufinden. Erklärungen zur Menüstruktur Code Schutz vor unbeabsichtigtem Verändern der eingestellten Parameter. - Page 20 „Monitor“ angezeigt. Die SSI-Schnittstelle ist voll funktionsfähig (Baudrate und Protokoll unter > 3.2 Serial < einstellen). Multifunktionsausgänge MF1 und MF2 in Betrieb, wie Off (default) unter Punkt 3.3/3.4 eingestellt. ® PROFIBUS © SICK AG • Deutschland • Irrtümer und Änderungen vorbehalten 8009813/ZJV1/2017-05...
- Page 21 Parametrieren des DME5000 mit dem Schnittstellen- adapter (siehe Abschnitt 13.4 „Schnittstellenadapter“) bzw. das Mithören von Messwerten über MF1 und MF2. Multifunktionsausgänge MF1 und MF2 in Betrieb, wie Off (default) unter Punkt 3.3/3.4 eingestellt. 8009813/ZJV1/2017-05 © SICK AG • Deutschland • Irrtümer und Änderungen vorbehalten...
- Page 22 Serial Baudrate Baudrate für RS-422-Schnittstelle (max. 115,2 kBd) 19,2 (default) Baudrate für Monitor-Schnittstelle über MF1 und MF2 (max. 38,44 kBd), nur bei DME5000 mit SSI- bzw. Hiperface-Schnittstelle Genaue Beschreibung siehe Abschnitt 13.4 „Schnittstellenadapter – Monitor-Mode“. Data 7-Datenbit, gerade Parität, 1 Stopbit 7,e,1 8-Datenbit, gerade Parität, 1 Stopbit...
- Page 23 (nur bei SSI- bzw. Hiperface-Variante): Wird angezeigt, Monitor wenn unter 3.1.4, bzw. 3.1.5 die Monitorschnittstelle ON gesetzt wird. Distance MF1 wird als Distanzschaltausgang verwendet. Aktiv bei Überschreitung von „UpperLimit“. Inaktiv bei Unterschreitung von „LowerLimit“. 8009813/ZJV1/2017-05 © SICK AG • Deutschland • Irrtümer und Änderungen vorbehalten...
- Page 24 Messwert OK Hardwarefehler, Ready Laser ausgeschaltet – Busfehler Datenübertragung OK SSI: kein Clocksignal Bus Status PB/DN: kein Tele- grammverkehr RS 422/Hiperface: ‒ RS 422/Hiperface: unabhängig vom Busstatus – (default) © SICK AG • Deutschland • Irrtümer und Änderungen vorbehalten 8009813/ZJV1/2017-05...
- Page 25 (nur bei SSI- bzw. Hiperface-Variante): Wird angezeigt, Monitor wenn unter 3.1.4, bzw. 3.1.5 die Monitorschnittstelle ON gesetzt wird. Distance MF2 wird als Distanzschaltausgang verwendet. Aktiv bei Überschreitung von „UpperLimit“. Inaktiv bei Unterschreitung von „LowerLimit“. 8009813/ZJV1/2017-05 © SICK AG • Deutschland • Irrtümer und Änderungen vorbehalten...
- Page 26 (default) Hardwarefehler, Messwert OK Ready Messfehler, Laser ausgeschaltet – Busfehler Datenübertragung OK SSI: kein Clocksignal Bus Status PB/DN: kein Tele- grammverkehr RS 422/Hiperface: – RS 422/Hiperface: unabhängig vom Busstatus © SICK AG • Deutschland • Irrtümer und Änderungen vorbehalten 8009813/ZJV1/2017-05...
- Page 27 200 ms; bei für 1 internen auf Plausibilität, Fehler > 200 ms Fehlerausgabe Messzyklus, bei Fehlerausgabe länger anliegendem erfolgt nur dann, Fehler erfolgt wenn keine Messung 8009813/ZJV1/2017-05 © SICK AG • Deutschland • Irrtümer und Änderungen vorbehalten...
- Page 28 Menüstruktur Kapitel 7 Betriebsanleitung DME5000 Fehlerausgabe. mehr möglich ist. Temperatur Anzeige der aktuellen Geräteinnentemperatur. Reset Kein Reset Rückstellung auf Default-Werte © SICK AG • Deutschland • Irrtümer und Änderungen vorbehalten 8009813/ZJV1/2017-05...
-
Page 29: Beispiel
Die 1. Ziffer blinkt. Anzeige Schritt 4 Drücken Sie 3 x für das Passwort „000“ (nur Parameteransicht) oder geben Sie mit gewünschte 1. Ziffer (z. B. „3“) ein. Anzeige 8009813/ZJV1/2017-05 © SICK AG • Deutschland • Irrtümer und Änderungen vorbehalten... - Page 30 3. Ziffer (z. B. „4“) ein. Anzeige Schritt 7 Drücken Sie , um die 3. Ziffer „4“ zu bestätigen. Anzeige Das Ausrufezeichen „!“ im Display bestätigt: Parametriermode. Hinweis © SICK AG • Deutschland • Irrtümer und Änderungen vorbehalten 8009813/ZJV1/2017-05...
-
Page 31: Technische Daten
1 x M16-/2 x M12 1 x M16-/1 x M12- 1 x M12-Stecker ® (SSI/RS 422) Stecker (PROFIBUS Stecker (DeviceNet) (DeviceNet) 2 x M12-Stecker (Hiperface) Abb. 22: Maßzeichnung DME5000 am Halter montiert 8009813/ZJV1/2017-05 © SICK AG • Deutschland • Irrtümer und Änderungen vorbehalten... -
Page 32: Zubehör
Reflektor 0,6 x 0,6 m Diamond Grade, montiert Typ: PL240DG Bestell-Nr.: 1017910 Typ: PL560DG Bestell-Nr.: 1016806 Reflektor 1 x 1 m Diamond Grade, montiert Typ: PL880DG Bestell-Nr.: 1018975 Grundplatte: ALMG3 © SICK AG • Deutschland • Irrtümer und Änderungen vorbehalten 8009813/ZJV1/2017-05... -
Page 33: Stecker/Leitungen
, SSI, RS 422 und DeviceNet (nur DME5000-xx4) Leitungsdose M16, 8-polig, gerade, geschirmt Leitungsdose M16, 8-polig, gewinkelt, geschirmt Typ: DOS-1608-GA Bestell-Nr.: 6025726 Typ: DOS-1608-WA Bestell-Nr.: 6025727 Steckeransicht Steckeransicht Grundplatte: ALMG3 8009813/ZJV1/2017-05 © SICK AG • Deutschland • Irrtümer und Änderungen vorbehalten... - Page 34 Schirm verzinntes Kupfergeflecht Legende: 1 = Adernpaar blk/wht 2 = Adernpaar red/vio 3 = Adernpaar pnk/gra 4 = Adernpaar brn/blu 5 = Isolierfolie 6 = Schirm 7 = PUR-Mantel © SICK AG • Deutschland • Irrtümer und Änderungen vorbehalten 8009813/ZJV1/2017-05...
- Page 35 Bestell-Nr.: 6026006 Typ: DOL-12PR-G10 Bestell-Nr.: 6026008 Bus out, Leitungsstecker mit PROFIBUS-Leitung, 5 m, B-cod. Bus out, Leitungsstecker mit PROFIBUS-Leitung, 10 m, B-cod. Typ: STL-12PR-G05 Bestell-Nr.: 6026005 Typ: STL-12PR-G10 Bestell-Nr.: 6026007 8009813/ZJV1/2017-05 © SICK AG • Deutschland • Irrtümer und Änderungen vorbehalten...
- Page 36 - flexiblem Einsatz: > 10 x Leitungsdurchmesser DeviceNet-T-Verteiler Dose M12, 5-polig, auf Stecker, Dose DeviceNet-Abschlusswiderstand, Dose 7/8'', 7/8'', 5-polig 5-polig, gerade Typ: SDO-02D78-SF Bestell-Nr.: 6028330 Typ: DOS-7805-GKEND Bestell-Nr.: 6028329 © SICK AG • Deutschland • Irrtümer und Änderungen vorbehalten 8009813/ZJV1/2017-05...
- Page 37 Shield red V+ Temperaturbereich bewegt –10 ... +70 °C blk V– festverlegt –40 ... +70 °C wht CAN Mantel PUR schwarz Ø 6,7 mm blu CAN Abschirmung Cu verzinnt 8009813/ZJV1/2017-05 © SICK AG • Deutschland • Irrtümer und Änderungen vorbehalten...
- Page 38 REFcos festverlegt –40 ... +70 °C 4 yel +cos Mantel PUR schwarz Ø 6,8 mm 5 gra Data+ Abschirmung Cu verzinnt 6 pnk Data– 7 blu 8 red – © SICK AG • Deutschland • Irrtümer und Änderungen vorbehalten 8009813/ZJV1/2017-05...
-
Page 39: Befestigungstechnik
Kapitel 9 DME5000 9.2.3 Befestigungstechnik Ausrichthalterung DME5000, Edelstahl 1.4571 Typ: BEF-AH-DME5 Bestell-Nr.: 2027721 9.2.4 Wetterschutzgehäuse Wetterschutzgehäuse DME5000, ALMG3 eloxiert Typ: WSG-DME5 Bestell-Nr.: 2027800 DME5000 Halterung nicht im Lieferumfang enthalten. 8009813/ZJV1/2017-05 © SICK AG • Deutschland • Irrtümer und Änderungen vorbehalten... -
Page 40: Umlenkspiegel
Technische Daten Kapitel 9 Betriebsanleitung DME5000 9.2.5 Umlenkspiegel Umlenkung Lichtaustritt nach oben Typ: USP-DME5 Bestell-Nr.: 2027710 9.2.6 Schnittstellenadapter Schnittstellenadapter DME5000 Bestell-Nr.: 1023359 © SICK AG • Deutschland • Irrtümer und Änderungen vorbehalten 8009813/ZJV1/2017-05... -
Page 41: Kühlgehäuse
Versorgungsspannung DC 24 V ±20 % Stromaufnahme 15 A (bei DC 24 V) Technische Details siehe separates Datenblatt Schutzart IP 54 DME5000 Halterung im Kühlgehäuse integriert (im Lieferumfang enthalten). 8009813/ZJV1/2017-05 © SICK AG • Deutschland • Irrtümer und Änderungen vorbehalten... -
Page 42: Technische Daten Dme5000-1Xx
Schock: EN 600 68-2-27/-2-29; Sinus: EN 600 68-2-6, Rauschen: EN 600 68-2-64 Gewicht ca. 1650 g Statistischer Fehler 1 σ, Umfeldbedingungen konstant minimale Einschaltzeit: 10 min. Verpolsicher Darf U -Toleranzen nicht über- oder unterschreiten Nicht verpolgeschützt Max. 100 nF/20 mH © SICK AG • Deutschland • Irrtümer und Änderungen vorbehalten 8009813/ZJV1/2017-05... -
Page 43: Technische Daten Dme5000-2Xx
Schock: EN 600 68-2-27/-2-29; Sinus: EN 600 68-2-6, Rauschen: EN 600 68-2-64 Gewicht ca. 1650 g Statistischer Fehler 1 σ, Umfeldbedingungen konstant minimale Einschaltzeit: 10 min. Verpolsicher Darf U -Toleranzen nicht über- oder unterschreiten Nicht verpolgeschützt Max. 100 nF/20 mH 8009813/ZJV1/2017-05 © SICK AG • Deutschland • Irrtümer und Änderungen vorbehalten... -
Page 44: Technische Daten Dme5000-3Xx
Schock: EN 600 68-2-27/-2-29; Sinus: EN 600 68-2-6, Rauschen: EN 600 68-2-64 Gewicht ca. 1650 g Statistischer Fehler 1 σ, Umfeldbedingungen konstant minimale Einschaltzeit: 10 min. Verpolsicher Darf U -Toleranzen nicht über- oder unterschreiten Nicht verpolgeschützt Max. 100 nF/20 mH © SICK AG • Deutschland • Irrtümer und Änderungen vorbehalten 8009813/ZJV1/2017-05... -
Page 45: Wartung
Wartung Betriebsanleitung Kapitel 10 DME5000 Wartung Das DME5000 ist wartungsfrei. Wir empfehlen in regelmäßigen Abständen Linse und Reflektor zu reinigen, Verschraubungen und Steckverbindungen zu überprüfen. 8009813/ZJV1/2017-05 © SICK AG • Deutschland • Irrtümer und Änderungen vorbehalten... -
Page 46: Troubleshooting
Bei gleichzeitiger ATT- c) Objektiv/Reflektor reinigen. Anzeige: Objektiv/Re- flektor verschmutzt d) Bei gleichzeitiger LSR- d) Laser defekt, Gerät ersetzen. Anzeige: Laser defekt Auswirkung: Messwertausgabe wird auf „O“ gesetzt. © SICK AG • Deutschland • Irrtümer und Änderungen vorbehalten 8009813/ZJV1/2017-05... - Page 47 Spezifikation. < –15 °C: Aufwärmphase ab- warten. Evtl. Gerät mit Heizung verwenden). Gerät zu warm (Innentempe- ratur > 80 °C: Gerät abkühlen). Auswirkung: Messwertausgabe wird auf „0“ gesetzt. 8009813/ZJV1/2017-05 © SICK AG • Deutschland • Irrtümer und Änderungen vorbehalten...
- Page 48 Ersatzgerät für nächsten dauer Wartungszyklus bereithalten. Lichtweg wird durch Nebel oder Lichtweg überprüfen. Staub gedämpft. Objektiv oder Reflektor Optische Grenzflächen beim verschmutzt. nächsten Wartungszyklus reinigen. Geräteinnentemperatur im Umgebungstemperatur Grenzbereich. überprüfen. © SICK AG • Deutschland • Irrtümer und Änderungen vorbehalten 8009813/ZJV1/2017-05...
-
Page 49: Begriffserklärungen
Die Schnittstelle wird mit einem Datenkanal Senden (T) und einem Datenkanal Empfangen (R) betrieben. Die hohe Übertragungssicherheit wird durch die Auswertung der Differenz- spannung zwischen jeweils einem verdrillten Adernpaar erreicht 8009813/ZJV1/2017-05 © SICK AG • Deutschland • Irrtümer und Änderungen vorbehalten... -
Page 50: Ssi
DeviceNet ist ein Feldbussystem und basiert auf der CAN-Spezifikation (Controller Area Network). Die Verbindung erfolgt über Hybridkabel zur Spannungsversorgung und Datenübertragung (nach RS-485). Es gibt zwei standardisierte Kabeltypen: Stammleitung (Trunkcable) Stichleitung (Dropcable) mit kleineren Kabelquerschnitten. © SICK AG • Deutschland • Irrtümer und Änderungen vorbehalten 8009813/ZJV1/2017-05... -
Page 51: Hiperface
Alle diese Informationen können über Hiperface übertragen werden. Hiperface beinhaltet hierzu eine hybride Schnittstelle aus: Analogem Prozessdatenkanal (Sinus-/Cosinussignale) und Bidirektionalem Parameterkanal (RS-485) zur Übertragung der absoluten Position und unterschiedlicher Parameter. 8009813/ZJV1/2017-05 © SICK AG • Deutschland • Irrtümer und Änderungen vorbehalten... -
Page 52: Anhang
Vorgehensweise: GSD Parameter „Preset mode“ auf „Preset mode“ einstellen. gewünschten Preset-Wert über Bit 0 … 24 der Ausgangsdaten zum DME5000 senden (Einheit des Preset-Wertes entspricht der Einstellung des Parameters „Auflösung“). Zur Auslösen des Presets Bit 31 in den Ausgangsdaten aktivieren; dieses Bit kann z. B. - Page 53 Anhang Betriebsanleitung Kapitel 13 DME5000 Der Ausgabewert des DME5000 entspricht danach an der Initialisierungsposition dem eingestellten Preset-Wert. Weitere Infos siehe Abschnitt 13.2, „PROFIBUS-Schnittstelle“. Hinweis Der Multifunktionseingang arbeitet flankengesteuert: Aktiv 0: Aktiv 1: Definitionen Vom Messkern ermittelte aktuelle Distanz zum Reflektor...
-
Page 54: Profibus-Schnittstelle
Servicebereich bzw. auf der DME5000-Produktseite unter http://www.sick.com. Das DME5000 kann wahlweise als Klasse-1- oder Klasse-2- (empfohlen) Encoder arbei- ten. DME5000 ist dabei vom Typ linearer Absolut-Encoder. Angelehnt an das ENCODER- Profil (Klasse 2) ist ein ebenfalls implementiertes SICK-Profil. Beide Profilarten münden in die gleiche GSD-Datei. -
Page 55: Datenformat Master Zu Dme
Offset wird ignoriert übernommen Bit 0, 2, 3, Nicht belegt 4, 5 Encoder Type 7 Octet 10 Measuring step (linear) Octet 11 … 14 nicht belegt Octet 15 … 16 8009813/ZJV1/2017-05 © SICK AG • Deutschland • Irrtümer und Änderungen vorbehalten... - Page 56 Octet 58 … 59 Temperatur (2er Komplement) Octet 60 Pegel Messkanal (2er Komplement) Octet 61 MF-Status Octet 62 Bit 7 Laser ein Laser aus Octet 63 Bit 0 ... 6 Nicht verwendet © SICK AG • Deutschland • Irrtümer und Änderungen vorbehalten 8009813/ZJV1/2017-05...
-
Page 57: Inbetriebnahme Dme5000 Profibus (Beispiel Siemens Step 7)
Diagnosedaten nicht Schnittstelle senden Bei Verwendung des SICK-Profils kann zur Trennung der 7 Diagnosebits (Bit 25 … 31) vom Hinweis Messwert (Bit 0 … 24) das Doppelwort mit der Operation SLD7 nach links und danach mit der Operation SRD7 nach rechts geschoben werden. Hierdurch werden alle 7 Diagnosebits durch „0“... -
Page 58: Schnittstellenadapter
Betriebsanleitung DME5000 13.4 Schnittstellenadapter Der Schnittstellenadapter (Best.-Nr. 1023359) dient als Servicezubehör zur Ankopplung eines DME5000 (außer DME5000-XX5) an einen Laptop mit serieller RS-232-Schnittstelle. Im Lieferumfang des Schnittstellenadapters sind enthalten: Schnittstellenadapter Steckernetzteil 24 V Verbindungskabel Laptop – Schnittstellenadapter (9-polig Sub D) ... -
Page 59: Sleepmodus
Parameter zum Laptop gesendet. 13.5 Sleepmodus Mit der Funktion Sleepmodus kann der Messlaser des DME5000 über den Eingang MF1 aus- und eingeschaltet werden. Bei ausgeschaltetem Laser ist das DME im Standby- Betrieb, die Ready-Anzeige im Display erlischt, als Messwert wird „0“ ausgegeben. -
Page 60: Protokoll
Anhang Kapitel 13 Betriebsanleitung DME5000 13.6.1 Protokoll Abhängig vom gewählten Protokoll überträgt das DME5000 Messwerte, wie unten dargestellt: Protokoll Standard <STX>8122<[sign]><7*[0...9]><ETX> (Anforderung) bzw. <STX>0322<[sign]><7*[0...9]><ETX> (kontinuierlich) CRLF <[sign]><7*[0...9]><CR><LF> <[sign]><7*[0...9]> 13.6.2 Befehle Anforderung Messwert/Status/Geschwindigkeit Messwert (Auflösung 0,1 mm fix) <STX>0122<ETX> Empfangspegel (dB) in Hex-Format <STX>0123<ETX>... -
Page 61: Beispiele Für Befehle (Standard-Protokoll)
vom DME <STX>853501<ETX> danach kontinuierlich vom DME <STX>0335<4*[0...F]><ETX> Beispiel: +2,8 m/s <STX>0335001C<ETX> Kontinuierliche Geschwindigkeitsausgabe aus zum DME <STX>053500<ETX> vom DME <STX>853500<ETX> Negative Werte werden als 2-er-Komplement dargestellt. 8009813/ZJV1/2017-05 © SICK AG • Deutschland • Irrtümer und Änderungen vorbehalten... -
Page 62: Devicenet-Schnittstelle
Grundlage ist die DeviceNet-Spezifikation 2.0, Errata 5. Der Produktname ist „DME5000“. 13.7.2 Konfiguration Die Konfiguration und Inbetriebnahme des DME5000 als DeviceNet-Slave wird anhand der Allen-Bradley-Software „RS Networx for DeviceNet (Revision 4.12)“ gezeigt: Vorgehensweise: DME5000-xx4 8-poligen M16-Gerätestecker aufstecken und anschließen. - Page 63 MF2 Temperature LowerLimit 0 °C 3.4.4.4 MF1 Distance UpperLimit 2000 mm 3.3.3.1 MF1 Distance LowerLimit 1990 mm 3.3.3.2 MF2 Distance UpperLimit 2000 mm 3.4.3.1 MF2 Distance LowerLimit 1990 mm 3.4.3.2 8009813/ZJV1/2017-05 © SICK AG • Deutschland • Irrtümer und Änderungen vorbehalten...
- Page 64 Betriebsanleitung DME5000 Parametrierung von MF1 und MF2 Gerätevarianten DME5000-xx5 sind nur mit einem 5-poligen DeviceNet-Stecker ausgerüs- tet. Die Multifunktionsein- und -ausgänge MF1 und MF2 sind hardwaremäßig nicht verfüg- ACHTUNG bar. Die Parametrierung von MF1 und MF2 ist trotzdem möglich und das Ergebnis kann im Diagnosebyte (siehe Abschnitt 13.7.3 „Datenaustausch“) über den Bus abgefragt werden.
-
Page 65: Datenaustausch
Plausibilitätsfehler signalisiert, dass keine Messung möglich ist, parallel wird Messwert „0“ ausgegeben. 13.7.4 Polled Mode Der Prozessdatenaustausch zwischen DME5000 und DeviceNet-Master erfolgt standard- mäßig über eine Polled I/O connection. Dabei werden die Slaves zyklisch vom Master abgefragt. 8009813/ZJV1/2017-05 © SICK AG • Deutschland • Irrtümer und Änderungen vorbehalten... -
Page 66: Change Of State Mode
Preset siehe Abschnitt 13.1. Ein Preset kann mit dem „Class Instance Editor“ ausgelöst werden: Description: Set single Attribute Class: Instance: >Execute<-Meldung: Execution was completed. © SICK AG • Deutschland • Irrtümer und Änderungen vorbehalten 8009813/ZJV1/2017-05... -
Page 67: Sleepmodus (Laser Aus)
Anhang Betriebsanleitung Kapitel 13 DME5000 13.7.7 Sleepmodus (Laser aus) Die Funktion Sleepmodus kann mit dem „Class Instance Editor“ aktiviert werden: Laser aus Laser ein 8009813/ZJV1/2017-05 © SICK AG • Deutschland • Irrtümer und Änderungen vorbehalten... -
Page 68: Parameter Im Dme5000 Speichern
Description: Get single Attribute Class: Instance: Attribute: Receive Data: Beispiel: B0 → 0 x 100 – 0 x B0 = 0 x 47 → –71dB © SICK AG • Deutschland • Irrtümer und Änderungen vorbehalten 8009813/ZJV1/2017-05... - Page 69 Icob Bus und RDY sind im Display sichtbar. Temperatur Description: Get single Attribute Class: Instance: Attribute: Receive Data: Beispiel: 2B → 0x2B → 43 °C 8009813/ZJV1/2017-05 © SICK AG • Deutschland • Irrtümer und Änderungen vorbehalten...
-
Page 70: Hiperface-Schnittstelle
Zählen der sin/cos-Nulldurchgänge kann deshalb durch eine optionale, steuerungsseitig implementierte Arctan-Interpolation die Auflösung deutlich erhöht werden. Das DME5000 arbeitet, im Gegensatz zu rotativen Systemen, nach dem Messprinzip der Lichtlaufzeitmessung. Der Messkern des DME5000 ermittelt dabei immer einen digitalen Distanzwert, aus welchem die analogen sin/cos-Signale über einen D/A-Wandler erzeugt werden. -
Page 71: Typenspezifische Einstellung
Die entsprechend gekennzeichneten Befehle beinhalten den Parameter „Code 0“. Code 0 ist ein Byte, das zur zusätzlichen Absicherung wichtiger Systemparameter gegen versehentliches Überschreiben ins Protokoll eingefügt ist. Bei Auslieferung ist „Code 0“ = 55h. Für Datenfelder stehen im EEPROM max. 1792 Byte zur Verfügung. 8009813/ZJV1/2017-05 © SICK AG • Deutschland • Irrtümer und Änderungen vorbehalten... -
Page 72: Übersicht Der Hiperface-Standard-Statusmeldungen
Sowohl Fehler als auch Vorausfallmeldungen können im Kommandobyte erkannt werden. Im fehlerfreien Zustand beinhaltet die Antwort auf einen über den RS-485-Parameterkanal zum DME5000 gesendeten Befehl immer das Kommandobyte des Befehls unmittelbar hinter dem Adressbyte. Im Fehlerfall oder bei anliegender Vorausfallmeldung wird im Kommandobyte der Antwort das MSB-Bit gesetzt. - Page 73 10 Maintenance ......................115 11 Troubleshooting ......................116 12 Terms .......................... 119 ® 12.1 PROFIBUS ....................... 119 12.2 RS-422 ......................119 12.3 SSI ........................120 12.4 DeviceNet ......................121 8009813/ZJV1/2017-05 © SICK AG • Germany • Subject to change without notice...
- Page 74 Overview of the Supported Commands ......... 141 13.8.3 Overview of the Hiperface Standard Status Messages ....142 13.8.4 Conduct in Case of Errors and Pre-failure Messages ....142 © SICK AG • Germany • Subject to change without notice 8009813/ZJV1/2017-05...
-
Page 75: Icons And Abbreviations Used
ATTENTION Type Label The type label can be used to determine the device type, serial number and part number. Manufacturer Device type Part number Serial number Production year/month 8009813/ZJV1/2017-05 © SICK AG • Germany • Subject to change without notice... -
Page 76: Intended Use
DME5000 Intended Use The DME5000 is an opto-electronic sensor used to record distances to a reflective tape that is moved linearly. It must not be used in potentially explosive areas. © SICK AG • Germany • Subject to change without notice... -
Page 77: Safety Notes
Connection, mounting and setting must be performed by qualified personnel. Protect the DME5000 from humidity and contamination at commissioning. The DME5000 is not a safety module pursuant to EU machinery directive. Observe the national safety and accident prevention provisions. -
Page 78: Function
Operating Instructions DME5000 Function The distance measuring device DME5000 is a compact optical distance sensor. The DME is installed so that the emitted laser beam hits the reflector. The reflector or device move along the laser beam. The DME receives the light reflected by the reflector and determines the distance between sensor and reflector by time of flight measurement. -
Page 79: Commissioning
The DME5000 and the reflector are attached so that the reflector is always in the sensor's field of view. The DME5000 is aligned so that the light spot is well visible (even at large distances) at the reflector's center. The alignment bracket, available as an accessory, enables easy alignment in X- and Y- directions: Fig. -
Page 80: How To Align
How to Align Move the vehicle and reflector close together. Align the DME5000 so that the light spot is at the center of the reflector. Increase the distance between vehicle and reflector and watch the light spot. -
Page 81: Alignment Of Adjacent Distance Measuring Devices
DME5000 and ISD Reflector For ISD300 / ISD400-1xxx / ISD400-6xxx optical data transmission a minimum beam distance of 100 mm independently of the maximum range s must be kept. 8009813/ZJV1/2017-05 © SICK AG • Germany • Subject to change without notice... -
Page 82: Electrical Connection
Commissioning Chapter 5 Operating Instructions DME5000 Electrical Connection Wire DME5000 according to connection diagram. Observe wiring notes (see section 5.2.1). For plugs and cables, see section 9.2.2. Fig. 6: Connection diagram DME5000-xx1 (SSI) DME5000-xx3 (RS-422) Fig. 7: Connection diagram ®... - Page 83 Commissioning Operating Instructions Chapter 5 DME5000 Fig. 8: Connection diagram DME5000-xx4 (DeviceNet) Fig. 9: Connection diagram DME5000-xx5 (DeviceNet) Fig. 10: Connection diagram DME5000-xx7 (Hiperface) 8009813/ZJV1/2017-05 © SICK AG • Germany • Subject to change without notice...
-
Page 84: Wiring Notes
DME5000 must be ensured. The cable shield of the ready-made M16 cables is connected to the metal plug and thus the DME5000 housing. The cable shield at the switching cabinet must be connected to the operating ground with a large cross-section. -
Page 85: Profibus Termination
BOTH sides Fig. 15: Shield connection in plastic casings 5.2.2 PROFIBUS Termination Fig. 16: PROFIBUS termination (see Accessories section 9.2.2.) Terminating resistor 8009813/ZJV1/2017-05 © SICK AG • Germany • Subject to change without notice... -
Page 86: Operation
Information field 1 Status displays Information field 2 Function buttons After approx. 1 s, the DME5000 is operational and shows the current distance value to the reflector, if in sight. © SICK AG • Germany • Subject to change without notice 8009813/ZJV1/2017-05... - Page 87 DeviceNet Telegram transfer No telegram transfer RS-422 Continuous mode Request mode Hiperface ‒ Independent of bus status For removal measures in error messages/pre-failure messages, see chapter 11 "Troubleshooting". 8009813/ZJV1/2017-05 © SICK AG • Germany • Subject to change without notice...
- Page 88 Flashing Service indication signals a hardware defect or Service over-/undertemperature. Keys Guides through the menu structure, code, parameter input, parameter storage. Leaving a submenu item. Selection of menu items, input of figures © SICK AG • Germany • Subject to change without notice 8009813/ZJV1/2017-05...
-
Page 89: Menu Structure
Menu Structure Flow Chart The menu structure of the DME5000 is displayed on the inside of the rear cover flap in the form of a flow chart. Fold out this page for a better overview of the menu structure during the following explanations. - Page 90 (set baud rate and protocol in > 3.2 Serial <). Multifunctional outputs MF1 and MF2 in operation as set Off (default) in item 3.3/3.4. ® PROFIBUS © SICK AG • Germany • Subject to change without notice 8009813/ZJV1/2017-05...
- Page 91 (see section 13.4 "Interface Adapter") or monitoring of measured values via MF1 and MF2. Multifunctional outputs MF1 and MF2 in operation as set Off (default) in item 3.3/3.4. 8009813/ZJV1/2017-05 © SICK AG • Germany • Subject to change without notice...
- Page 92 "Interface Adapter – Monitor-Mode". Data 7-data bit, even parity, 1 stop bit 7,e,1 8-data bit, even parity, 1 stop bit 8,e,1 8-data bit, no parity, 1 stop bit 8,n,1 (default) © SICK AG • Germany • Subject to change without notice 8009813/ZJV1/2017-05...
- Page 93 (for SSI or Hiperface version only): Displayed if monitor Monitor interface is set to ON in 3.1.4 or 3.1.5. Distance MF1 is used as distance switching output. Active when "UpperLimit" is exceeded. Inactive when below "LowerLimit". 8009813/ZJV1/2017-05 © SICK AG • Germany • Subject to change without notice...
- Page 94 Ready Laser off – Bus error Data transfer OK SSI: no clock signal Bus Status PB/DN: no telegram transfer RS-422/Hiperface: ‒ RS-422/Hiperface: independent of bus status – (default) © SICK AG • Germany • Subject to change without notice 8009813/ZJV1/2017-05...
- Page 95 (for SSI or Hiperface version only): Displayed if monitor Monitor interface is set to ON in 3.1.4 or 3.1.5. Distance MF2 is used as distance switching output. Active when "UpperLimit" is exceeded. Inactive when below "LowerLimit". 8009813/ZJV1/2017-05 © SICK AG • Germany • Subject to change without notice...
- Page 96 Measuring error, Laser off – Bus error Data transfer OK SSI: no clock signal Bus Status PB/DN: no telegram transfer RS-422/Hiperface: – RS-422/Hiperface: independent of bus status – (default) © SICK AG • Germany • Subject to change without notice 8009813/ZJV1/2017-05...
- Page 97 200 ms result in error output. cycle, error output if output only if the error is pending measurement is no for longer. longer possible. Temperature Display of current internal device temperature. 8009813/ZJV1/2017-05 © SICK AG • Germany • Subject to change without notice...
- Page 98 Menu Structure Chapter 7 Operating Instructions DME5000 Reset No reset Reset to default values © SICK AG • Germany • Subject to change without notice 8009813/ZJV1/2017-05...
-
Page 99: Example
Access the input field "CODE 000" with The 1st figure flashes. Display Step 4 Push 3 x for password "000" (parameter view only) or enter the desired 1st figure with (e.g. "3"). Display 8009813/ZJV1/2017-05 © SICK AG • Germany • Subject to change without notice... - Page 100 3rd figure with (e.g. "4"). Display Step 7 Push to confirm the 3rd figure "4". Display The exclamation mark "!" in the display confirms: Parameterization mode. Note © SICK AG • Germany • Subject to change without notice 8009813/ZJV1/2017-05...
-
Page 101: Technical Data
1 x M16-/1 x M12- 1 x M12-plug ® (SSI/RS-422) plug (PROFIBUS plug (DeviceNet) (DeviceNet) 2 x M12-plug (Hiperface) Fig. 22: Dimensional drawing DME5000 mounted on the holder 8009813/ZJV1/2017-05 © SICK AG • Germany • Subject to change without notice... -
Page 102: Accessories
Diamond Grade, mounted Type: PL240DG Part no.: 1017910 Type: PL560DG Part no.: 1016806 Reflector 1 x 1 m Diamond Grade, mounted Type: PL880DG Part no.: 1018975 basic plate: ALMG3 © SICK AG • Germany • Subject to change without notice 8009813/ZJV1/2017-05... -
Page 103: Cables And Connectors
Cable socket M16, 8-pin, straight, shielded Cable socket M16, 8-pin, angle, shielded Type: DOS-1608-GA Part no.: 6025726 Type: DOS-1608-WA Part no.: 6025727 Connector view Connector view basic plate: ALMG3 8009813/ZJV1/2017-05 © SICK AG • Germany • Subject to change without notice... - Page 104 1 = Wire pair blk/wht 2 = Wire pair red/vio 3 = Wire pair pnk/gra 4 = Wire pair brn/blu 5 = Insulation foil 6 = Shield 7 = PUR sleeve © SICK AG • Germany • Subject to change without notice 8009813/ZJV1/2017-05...
- Page 105 Bus out, cable plug with PROFIBUS-cable, 5 m, B-coded Bus out, cable plug with PROFIBUS-cable, 10 m, B-coded Type: STL-12PR-G05 Part no.: 6026005 Type: STL-12PR-G10 Part no.: 6026007 8009813/ZJV1/2017-05 © SICK AG • Germany • Subject to change without notice...
- Page 106 - Flexibly laid cable: > 10 x cable diameter DeviceNet-T distributor socket M12, 5-pin, to plug, socket DeviceNet terminal resistor, socket 7/8'', 7/8'', 5-pin 5-pin, straight Type: SDO-02D78-SF Part no.: 6028330 Type: DOS-7805-GKEND Part no.: 6028329 © SICK AG • Germany • Subject to change without notice 8009813/ZJV1/2017-05...
- Page 107 Temperature range moved –10 ... +70 ℃ blk V– firmly installed wht CAN –40 ... +70 ℃ blu CAN Sleeve PUR black Ø 6.7 mm Shield Cu tinned 8009813/ZJV1/2017-05 © SICK AG • Germany • Subject to change without notice...
- Page 108 -40 ... +70 4 yel +cos ℃ 5 gra Data+ Sleeve PUR black Ø 6.8 mm 6 pnk Data– Shield Cu tinned 7 blu 8 red – © SICK AG • Germany • Subject to change without notice 8009813/ZJV1/2017-05...
-
Page 109: Attachment Method
Alignment bracket DME5000, stainless steel 1.4571 Type: BEF-AH-DME5 Part no.: 2027721 9.2.4 Weather Protection hood Weather protection hood DME5000, ALMG3 anodized Type: WSG-DME5 Part no.: 2027800 DME5000 holder not included in the delivery. 8009813/ZJV1/2017-05 © SICK AG • Germany • Subject to change without notice... -
Page 110: Passive Reflector
Technical Data Chapter 9 Operating Instructions DME5000 9.2.5 Passive Reflector 90° deflection mirror Type: USP-DME5 Part no.: 2027710 9.2.6 Interface Adapter Interface adapterDME5000 Part no.: 1023359 © SICK AG • Germany • Subject to change without notice 8009813/ZJV1/2017-05... -
Page 111: Cooling Casing
Power intake 15 A (at DC 24 V) For technical details, see separate datasheet Protection type IP 54 DME5000 holder integrated in cooling casing (included in the delivery). 8009813/ZJV1/2017-05 © SICK AG • Germany • Subject to change without notice... -
Page 112: Technical Data Dme5000-1Xx
Statistic error 1 σ, ambience conditions consistent at minimum activation time: 10 min Protected against polarity reversal tolerances must not be exceeded or undercut Not protected against polarity reversal Max. 100 nF/20 mH © SICK AG • Germany • Subject to change without notice 8009813/ZJV1/2017-05... -
Page 113: Technical Data Dme5000-2Xx
Statistic error 1 σ, ambience conditions consistent at minimum activation time: 10 min Protected against polarity reversal tolerances must not be exceeded or undercut Not protected against polarity reversal Max. 100 nF/20 mH 8009813/ZJV1/2017-05 © SICK AG • Germany • Subject to change without notice... -
Page 114: Technical Data Dme5000-3Xx
Statistic error 1 σ, ambience conditions consistent at minimum activation time: 10 min Protected against polarity reversal tolerances must not be exceeded or undercut Not protected against polarity reversal Max. 100 nF/20 mH © SICK AG • Germany • Subject to change without notice 8009813/ZJV1/2017-05... -
Page 115: Maintenance
Operating Instructions Chapter 10 DME5000 Maintenance The DME5000 is maintenance-free. We recommend to clean the lens and reflector, check screw and plug connections at regular intervals. 8009813/ZJV1/2017-05 © SICK AG • Germany • Subject to change without notice... -
Page 116: Troubleshooting
Clean lens/reflector well: Lens/reflector contaminated d) If LSR is displayed as d) Laser defective, replace device. well: Laser defective Effect: Measured value output is set to "O". © SICK AG • Germany • Subject to change without notice 8009813/ZJV1/2017-05... - Page 117 Ensure that the light spot is interrupted. visible on the reflector at all times when moving. Effect: Measured value output is set to "0", PLB display lights up. 8009813/ZJV1/2017-05 © SICK AG • Germany • Subject to change without notice...
- Page 118 Light path is damped by mist or Check light path. dust. Lens or reflector contaminated. Clean optical surfaces during next maintenance cycle. Internal device temperature has Check ambient temperature. reached the threshold range. © SICK AG • Germany • Subject to change without notice 8009813/ZJV1/2017-05...
-
Page 119: Terms
The interface is operated with a data channel for transmission (T) and a data channel for reception (R). The high transfer safety is achieved by assessment of the difference voltage between each twisted-pair wire. 8009813/ZJV1/2017-05 © SICK AG • Germany • Subject to change without notice... -
Page 120: Ssi
T = Period duration of a cycle signal GO= Lowest -value bit in gray code tm = Mono flop time 15 µs to 25 µs Tp = Cycle pause © SICK AG • Germany • Subject to change without notice 8009813/ZJV1/2017-05... -
Page 121: Devicenet
For this, Hiperface contains a hybrid interface of: Analog process data channel (sine-/cosine signals) and Bidirectional parameter channel (RS-485) for transfer of absolute position and different parameters. 8009813/ZJV1/2017-05 © SICK AG • Germany • Subject to change without notice... -
Page 122: Annex
Procedure: Set GSD parameter "Preset mode" to "Preset mode". Send desired preset value to the DME5000 via bit 0 … 24 of the output data (preset value unit corresponds to setting of the parameter "Resolution"). To trigger the preset, activate bit 31 in the output data; this bit can originate, e .g. with a proximity initiator, photoelectric switch or switch at the initialization position. - Page 123 PROFIBUS restart (parameter to "Preset Mode") or whether the offset value firmly stored by GSD is transferred to the DME (parameter to "Offset Mode"). 8009813/ZJV1/2017-05 © SICK AG • Germany • Subject to change without notice...
-
Page 124: Profibus Interface
DME5000 13.2 PROFIBUS Interface The DME4000 and DME5000 use an identical GSD file. The current GSD file as well as notes on compatibility of firmware and GSD file can be found in the service area an on the product page at www.sick.com. -
Page 125: Data Format Master To Dme
Bit 0, 2, 3, Not assigned 4, 5 Encoder Type 7 Octet 10 Measuring step (linear) Octet 11 … 14 Not assigned Octet 15 … 16 8009813/ZJV1/2017-05 © SICK AG • Germany • Subject to change without notice... - Page 126 Octet 60 Level measuring channel (complement of 2) Octet 61 MF status Octet 62 Bit 7 Laser on Laser off Octet 63 Bit 0 ... 6 Not used © SICK AG • Germany • Subject to change without notice 8009813/ZJV1/2017-05...
-
Page 127: Commissioning Dme5000 Profibus (Example Siemens Step 7)
Do not send device-specific diagnosis data´ Interface When using the SICK profile, the double word can be pushed to the left with operation Note SLD7 and then to the right with the operation SRD7 to separate the 7 diagnosis bits (bit 25 …... -
Page 128: Interface Adapter
13.4 Interface Adapter The interface adapter (order no. 1023359) is used as service accessory to connect a DME5000 (except DME5000-XX5) to a laptop with serial RS-232 interface. The following is included in the interface adapter scope of delivery: Interface adapter ... -
Page 129: Sleep Mode
MF1/MF2. 13.5 Sleep Mode The sleep mode function can be used to switch the DME5000 laser off and on via input MF1. With the laser off, the DME is in standby operation; the ready display turns off, the measured value "0"... -
Page 130: Protocol
Annex Chapter 13 Operating Instructions DME5000 13.6.1 Protocol Depending on the protocol selected, the DME5000 transfers measured values as displayed below: Protocol Standard <STX>8122<[sign]><7*[0...9]><ETX> (request) or <STX>0322<[sign]><7*[0...9]><ETX> (continuous) CRLF <[sign]><7*[0...9]><CR><LF> <[sign]><7*[0...9]> 13.6.2 Commands Request measured value/status/speed Measured value (resolution 0.1 mm fixed) <STX>0122<ETX>... -
Page 131: Examples For Commands (Standard Protocol)
DME <STX>0335<4*[0...F]><ETX> example: +2.8 m/s <STX>0335001C<ETX> Continuous speed output off for the DME <STX>053500<ETX> from the DME <STX>853500<ETX> Negative values are displayed as complement of 2. 8009813/ZJV1/2017-05 © SICK AG • Germany • Subject to change without notice... -
Page 132: Devicenet Interface
The basis is the DeviceNet specification 2.0, errata 5. The product name is "DME5000". 13.7.2 Configuration Configuration and commissioning of the DME5000 as a DeviceNet slave is explained based on an Allen-Bradley software "RS Networx for DeviceNet (Revision 4.12)": Procedure: DME5000-xx4 ... - Page 133 MF2 Temperature LowerLimit 0 °C 3.4.4.4 MF1 Distance UpperLimit 2,000 mm 3.3.3.1 MF1 Distance LowerLimit 1,990 mm 3.3.3.2 MF2 Distance UpperLimit 2,000 mm 3.4.3.1 MF2 Distance LowerLimit 1,990 mm 3.4.3.2 8009813/ZJV1/2017-05 © SICK AG • Germany • Subject to change without notice...
- Page 134 DME5000 Parameterization of MF1 and MF2 Device versions DME5000-xx5 are only equipped with a 5-pin DeviceNet plug. The multifunction in- and outputs MF1 and MF2 are not available in the hardware. ATTENTION Parameters for MF1 and MF2 can be set anyway and the result can be requested in the diagnosis byte (see section 13.7.3 "Data Exchange") via the bus.
-
Page 135: Data Exchange
13.7.4 Polled Mode The process data exchange between DME5000 and DeviceNet-Master is by default performed by a polled I/O connection. The slaves are cyclically targeted by the master. 8009813/ZJV1/2017-05 © SICK AG • Germany • Subject to change without notice... -
Page 136: Change Of State Mode
13.1. A preset can be triggered with the "Class Instance Editor": Description: Set single Attribute Class: Instance: >Execute< message: Execution was completed. © SICK AG • Germany • Subject to change without notice 8009813/ZJV1/2017-05... -
Page 137: Sleep Mode (Laser Off)
Annex Operating Instructions Chapter 13 DME5000 13.7.7 Sleep Mode (Laser Off) The sleep mode function can be activated with the "Class Instance Editor": Laser off Laser on 8009813/ZJV1/2017-05 © SICK AG • Germany • Subject to change without notice... -
Page 138: Save Parameter In Dme5000
Get single Attribute Class: Instance: Attribute: Receive Data: Example: B0 → 0 x 100 – 0 x B0 = 0 x 47 → –71dB © SICK AG • Germany • Subject to change without notice 8009813/ZJV1/2017-05... - Page 139 Icob Bus and RDY are visible in the display. Temperature Description: Get single Attribute Class: Instance: Attribute: Receive Data: Example: 2B → 0x2B → 43 °C 8009813/ZJV1/2017-05 © SICK AG • Germany • Subject to change without notice...
-
Page 140: Hiperface Interface
In contrast to rotating systems, the DME5000 works according to the measuring principle of time of flight measurement. The measuring core of the DME5000 always determines a digital distance value used to generate the analog sin/cos signals via a D/A converter. -
Page 141: Type-Specific Settings
The commands marked accordingly contain the parameter "Code 0". Code 0 is a byte inserted in the protocol as protection against accidental overwriting of important system parameters.. At delivery, "Code 0" = 55h. In the EEPROM, max. 1792 byte are available for data fields. 8009813/ZJV1/2017-05 © SICK AG • Germany • Subject to change without notice... -
Page 142: Overview Of The Hiperface Standard Status Messages
Both errors and pre-failure messages can be recognized in the command byte. In error-free condition, the answer to a command sent to the DME5000 via the RS-485 parameter channel always contains the command byte of the command directly after the address byte. - Page 143 Aktivierte SSI, RS 422 deaktiviert/SSI activated, RS 422 deactivated Binary = Nicht-Default-Werte/ Nicht wählbar, wird nur angezeigt, wenn SSI-Monitor-Mode ausgewählt ist/ Non-default values Not selectable, only displayed if SSI Monitor Mode is selected 125 µm bei Variante DME5000-XX7 (Hiperface) 125 µm for type DME5000-XX7 (Hiperface)
- Page 144 XXX.XXX m Code Enter value 000 Ver. X.X Profibus Parameter RS 422 siehe nächste Seite/see next page DeviceNet Hiperface 3.2.1 Serial Baudrate 115,2 kBd 38,4 kBd 19,2 kBd 9,6 kBd 4,8 kBd 3.2.2 Data 7, e, 1 8, e, 1 8, n, 1 3.3.1 Act.State...
- Page 145 Aktivierte SSI, RS 422 deaktiviert/SSI activated, RS 422 deactivated Binary = Nicht-Default-Werte/ Nicht wählbar, wird nur angezeigt, wenn SSI-Monitor-Mode ausgewählt ist/ Non-default values Not selectable, only displayed if SSI Monitor Mode is selected 125 µm bei Variante DME5000-XX7 (Hiperface) 125 µm for type DME5000-XX7 (Hiperface)
- Page 146 Phone +36 1 371 2680 Phone +386 591 788 49 E-Mail office@sick.hu E-Mail office@sick.si India South Africa Phone +91 22 4033 8333 Phone +27 11 472 3733 Further locations at www.sick.com E-Mail info@sick-india.com E-Mail info@sickautomation.co.za SICK AG | Waldkirch | Germany | www.sick.com...
Need help?
Do you have a question about the DME5000 and is the answer not in the manual?
Questions and answers