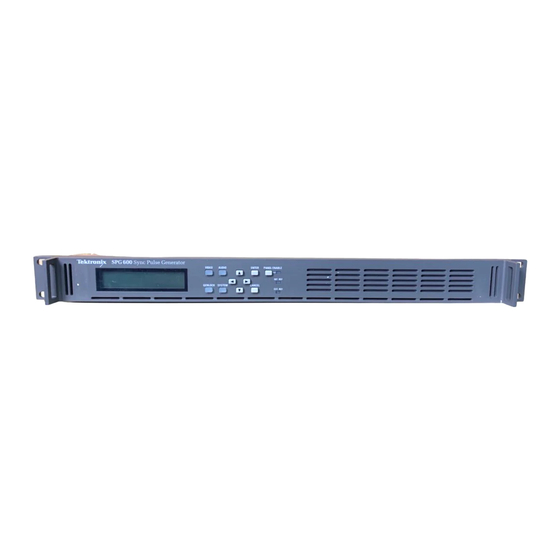
Tektronix SPG600 Instructions Manual
Sync pulse generator rackmount kit
Hide thumbs
Also See for SPG600:
- Service manual (176 pages) ,
- User manual (132 pages) ,
- Quick reference manual (40 pages)
Advertisement
Quick Links
Instructions
SPG600 Sync Pulse Generator
Rackmount Kit
075-0800-01
Warning
The servicing instructions are for use by qualified
personnel only. To avoid personal injury, do not
perform any servicing unless you are qualified to
do so. Refer to all safety summaries prior to
performing service.
www.tektronix.com
*P075080000*
075080001
Advertisement

Summary of Contents for Tektronix SPG600
- Page 1 Instructions SPG600 Sync Pulse Generator Rackmount Kit 075-0800-01 Warning The servicing instructions are for use by qualified personnel only. To avoid personal injury, do not perform any servicing unless you are qualified to do so. Refer to all safety summaries prior to performing service.
- Page 2 Copyright © Tektronix. All rights reserved. Licensed software products are owned by Tektronix or its subsidiaries or suppliers, and are protected by national copyright laws and international treaty provisions. Tektronix products are covered by U.S. and foreign patents, issued and pending. Information in this publication supercedes that in all previously published material.
-
Page 3: Service Safety Summary
Use Care When Servicing With Power On. Dangerous voltages or currents may exist in this product. Disconnect power, remove battery (if applicable), and disconnect test leads before removing protective panels, soldering, or replacing components. To avoid electric shock, do not touch exposed connections. SPG600 Sync Pulse Generator Rackmount Instructions... - Page 4 Service Safety Summary SPG600 Sync Pulse Generator Rackmount Instructions...
-
Page 5: Kit Description
Kit Description This document describes how to install the rackmount kit onto your SPG600 Sync Pulse Generator. The rackmount kit is a collection of parts that, once installed, configures the instrument for mounting into a standard 19-inch equipment rack. This document supports Tektronix modifications ECR31439 and ECR31689. - Page 6 Kit Description Figure 1: Rackmount kit parts SPG600 Sync Pulse Generator Rackmount Instructions...
- Page 7 (0.5 in) 115.7 mm (4.6 in) 514.5 mm (17.3 in) 320.7 mm 544.5 mm (12.6 in) (21.4 in) 43.6 mm (1.7 in) 482.5 mm (19.0 in) Figure 2: SPG600 dimensions with inside tracks installed SPG600 Sync Pulse Generator Rackmount Instructions...
- Page 8 Kit Description SPG600 Sync Pulse Generator Rackmount Instructions...
-
Page 9: Installation Instructions
Installation Instructions This section provides instructions for installing the SPG600 Sync Pulse Generator into a standard 19-inch equipment rack. Minimum Tool Equipment List The following tools are required to install the rackmounting hardware into the equipment rack. All tools are standard tools that are readily available. - Page 10 Right inside track (mount on the Left inside track (mount on the right side of the instrument.) left side of the instrument.) Figure 1: Left and right inside track identification SPG600 Sync Pulse Generator Rackmount Instructions...
-
Page 11: Rackmounting The Instrument
10-32 screws and a bar nut. Leave the screws loose so that you can adjust the overall length of the slide-out track assembly in the rack. 5. Repeat steps 3 and 4 to assemble the left slide-out track assembly. SPG600 Sync Pulse Generator Rackmount Instructions... - Page 12 Inner track Stop latch hole Rear rack 10-32 Panhead screws Flat bar nut Front rack Flat bar nut (use if front rail is not tapped) 10-32 Panhead screw Figure 2: Assembly of slide-out track assemblies SPG600 Sync Pulse Generator Rackmount Instructions...
- Page 13 Use flat head screws if the cabinet rails have countersunk mounting holes; otherwise use panhead screws Mounting Method A Mounting Method B Figure 3: Installation of slide-out track assemblies in rack (top view) SPG600 Sync Pulse Generator Rackmount Instructions...
- Page 14 Repeat for the second mounting hole. Tighten both screws using 25 inch-lbs of torque. 10. Repeat step 9 to install the two screws in the left side of the front. g End of document g SPG600 Sync Pulse Generator Rackmount Instructions...


Need help?
Do you have a question about the SPG600 and is the answer not in the manual?
Questions and answers