Table of Contents
Advertisement
Quick Links
Advertisement
Table of Contents

Summary of Contents for HortiMaX Go!
-
Page 1: User Manual
HortiMaX-Go! User Manual SV 0.0 18/07/2017 160212MAN040 96000001... - Page 2 This product is subject to the General Conditions of HortiMaX B.V.. This document may not be copied or made public by means of print, photocopy, microfilm or any other process, without the written permission of HortiMaX B.V.. Publication date: 18/07/2017 14:39 160212MAN040 Item code: 96000001...
-
Page 3: Table Of Contents
Contents 1 Preface 1.1 Documentation overview 2 Basic navigation and icons 2.1 The home screen 2.1.1 Tiles 2.1.2 Top Bar 2.1.3 Right-hand bar 2.2 Alarm screen 3 Setting up climate control 3.1 Fixed position control 3.2 Stage control 3.2.1 General information 3.2.2 Adjusting the stage limit values 3.2.3 Deactivating a stage 3.2.4 Setting control actions for each stage... -
Page 4: Preface
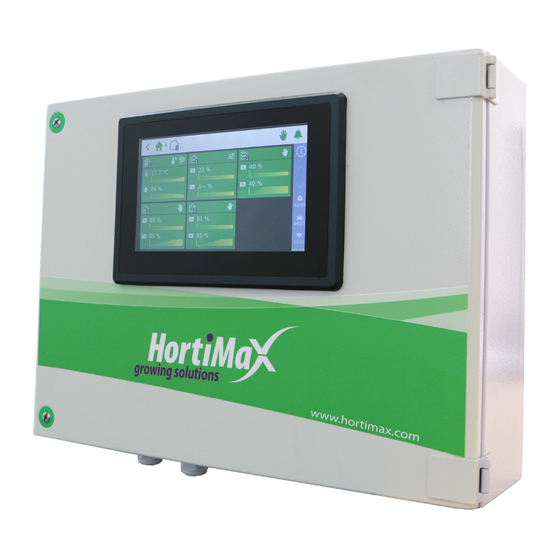
HortiMaX-Go! Preface Welcome to the user manual for the HortiMaX-Go!. This manual is intended for users. It contains specific information on how to operate the HortiMaX-Go!. The HortiMaX-Go! is an easy-to-use and affordable control computer designed specifically for the horticultural sector. With the HortiMaX-Go!, you can control both the irrigation and the climate inside your greenhouse. -
Page 5: Basic Navigation And Icons
Most of the system's display is taken up by tiles. Tiles provide access to the various controls of the HortiMaX-Go!. The tile header and the tile body contain information about the current situation in your greenhouse. The home screen may show the... - Page 6 HortiMaX-Go! Irrigation If an irrigation unit is present, it will be shown on the second unit tile. Under this tile, you will find all the irrigation control settings. Climate Each zone (greenhouse compartment) has its own tile on the zone home screen.
- Page 7 HortiMaX-Go! If a tile header turns red, it means that an alarm has been triggered. In that case, an bell icon will also appear on the right-hand side. Stage information The tile header shows the active temperature stage. Heating The zone temperature is below the desired temperature.
-
Page 8: Top Bar
Tap this button to change the system settings such as time language, location, and system time. This is also where you will find a scanning screen where you can have the HortiMaX-Go! scan for Smart Switches. Below this button, the current time is shown. -
Page 9: Alarm Screen
HortiMaX-Go! Sunrise The time that the sun will rise today. Sunset The time that the sun will set today. 2.2 Alarm screen You can open the alarm screen by tapping the bell icon on the right-hand side of the top bar. This screen contains information about your current alarms and your alarm history. -
Page 10: Setting Up Climate Control
Setting up climate control Once your HortiMaX-Go! has been commissioned, all the connected controls are set to safe fixed positions. Vents and screens are set to 0%. Various other equipment such as heaters or the cooling system are switched off. To enable automatic climate... -
Page 11: Stage Control
3.2 Stage control 3.2.1 General information The HortiMaX-Go! controls the greenhouse climate based on pre-defined 'stages'. The stage screen is represented by the icon . You can open this screen from the various other control screens. The stage screen is where you set:... - Page 12 HortiMaX-Go! Depending on your greenhouse equipment and design, there are various ways of cooling or heating your greenhouse. The ambient temperature can be lowered by opening the roof or side vents, switching the heating system off, switching the cooling system on, or a combination of these actions. The control actions that are applied during each stage will depend on your settings on the stage screen.
-
Page 13: Adjusting The Stage Limit Values
HortiMaX-Go! 3.2.2 Adjusting the stage limit values You can adjust the limit value of a stage or disable a stage in each period. Tap the stage icon for which you want to adjust the limit value: You can now set the limit value at which the stage will be activated: The heating stage will be activated as soon as the measured ambient temperature drops below the pre-set limit value. -
Page 14: Setting Periods
3.2.5 Setting periods The HortiMaX-Go! allows you to set four periods per 24 hours. By setting different periods, you can have target values vary throughout the day. You can enter the period start times in clock time or in relation to sunrise or sunset. At the bottom of the stage... - Page 15 HortiMaX-Go! If you tap the start or end time, a screen will open listing the start times of the four periods: By tapping the different periods, you can choose whether a period should start based on clock time or relative to sunrise or sunset.
-
Page 16: Humidity Control
HortiMaX-Go! Start time after sunset The two circles next to the start times represent the 24-hour clock. White represents the day, black represents the night. The coloured sections with numbers in the inner circle indicate the periods. If periods overlap, the highest period number will apply. - Page 17 HortiMaX-Go! Three columns will appear: The icon is the limit value for the humidification stage; this means it is too dry in your greenhouse. The icons are the limit values for the dehumidification stage; this means it is too humid in your greenhouse.
-
Page 18: Fully Automatic Ventilation Control
HortiMaX-Go! The controller does not check whether the entered stage settings make sense. If the stages are not set correctly, the system may, for example, simultaneously cool and heat your greenhouse under certain conditions. That is why you should always check the stage settings that you have entered carefully. -
Page 19: Manual Control
HortiMaX-Go! 3.4 Manual control Depending on the Smart Switch, the manual control knob has either three modes (On/Off/Auto) or five modes (On/Off/Auto/Open/Close). If the manual control knob is set to the ON position, all controls will be disabled. The tile headers of the controls will turn orange and display the following icon: . -
Page 20: Setting Up Irrigation Control
HortiMaX-Go! Setting up irrigation control The irrigation controls are located under the irrigation unit tile. This tile shows whether the unit is active and the current water flow rate (if measured). Irrigation control consists of a number of components, including the irrigation unit and valve group settings. -
Page 21: Assigning Valves To Valve Groups
HortiMaX-Go! 4.1.2 Assigning valves to valve groups The irrigation program works based on valve groups. A valve group consists of the valves you have selected together with the start conditions and irrigation settings that you have programmed for those valves. -
Page 22: Dosing Fertilizers
If more than one fertilizer is used, you can set the dosing ratio of each fertilizer. The dosing ratio is set for each valve group. By default, the irrigation program uses a ratio of 100% for all available fertilizers. The HortiMaX-Go! supports up to four fertilizer dosing valves. -
Page 23: Start Conditions
HortiMaX-Go! 4.2 Start conditions 4.2.1 Manual starts The irrigation program includes two types of manual starts: the manual valve start and the manual valve group start. The manual valve start can be found in each valve group. If you select the next tile, the ‘Assign valves’... - Page 24 HortiMaX-Go! Time Start irrigation once on the pre-set date and time (with the start - recipe settings applicable at that time) one-off Time Start irrigation on the selected days at a pre-set time (with start - the recipe settings applicable at that time)
-
Page 25: Smart Switches
HortiMaX-Go! Smart Switches Smart Switches are the manual control switches used for the HortiMaX-Go!. In addition to an electrical circuit, these switches feature a processor and software. The Smart Switches perform specific control actions for the equipment connected to them. -
Page 26: Smart Manual Control Switches
HortiMaX-Go! 5.1 Smart manual control switches The manual control knob on the Smart Switches can be used to either disable automatic control and operate the connected equipment manually, or switch the equipment off. If you switch to manual control, the controller will continue to keep track of the status or position of your equipment. -
Page 27: Fieldbus
HortiMaX-Go! 5.3 Fieldbus The switches are connected to each other using a fieldbus system. The fieldbus system enables digital communication between the switches and the controller via a network cable. Each Smart Switch in the network is assigned a unique address. This address is set using the DIP switch during commissioning. -
Page 28: Meteo-Go
HortiMaX-Go! 5.4 Meteo-Go! The Meteo-Go! is the weather station of the HortiMaX- Go!. This compact device is installed outside the greenhouse and collects weather data needed for automatic climate and irrigation control. The following readouts are available: Outside temperature Solar radiation... -
Page 29: Icons Legend
HortiMaX-Go! Icons legend 6.1 System Home Configuration Configuring stage Access to the menu control alarm screen Access to Network Configuring Show QR help configuration settings system settings code Alarm active with bell Alarm tile sounding 6.2 Program components and shortcuts... -
Page 30: Climate Controls
HortiMaX-Go! Alarm limits Readout Statistical Historical information screen information 6.3 Climate controls Roof ventilation Windward side Leeward Side side ventilation Cooling Pad Valve Pad & Fan Screen Central heating Central heating Outside Inflation mixing valve screen valve Humidification Recirculation Hot air... -
Page 31: Other Software Components
HortiMaX-Go! Fertilizer dosing Acid dosing Valve group Assign valves to Valve group Access to sensor Advanced group status calibration setting Manual valve start Time start Radiation sum start Cyclic start Contact start Flow meter 6.5 Other software components Measured flow...
Need help?
Do you have a question about the Go! and is the answer not in the manual?
Questions and answers