Table of Contents
Advertisement
Quick Links
- 1 Agilent Dna 7500 and Dna 12000 Kit
- 2 Equipment Required for a Dna 7500 and Dna 12000 Assay
- 3 Setting up the Chip Priming Station
- 4 Preparing the Gel-Dye MIX
- 5 Loading the Ladder and the Samples
- 6 Dna 7500 and Dna 12000 Ladder Well Results
- 7 Checking Your Agilent Dna 7500 and Dna 12000 Assay Results
- 8 Dna 7500 and Dna 12000 Sample Well Results
- Download this manual
Advertisement
Table of Contents

Related Manuals for Agilent Technologies DNA 7500


Summary of Contents for Agilent Technologies DNA 7500
- Page 1 Agilent DNA 7500 and DNA 12000 Kit Guide Agilent Technologies...
- Page 2 Notices © Agilent Technologies, Inc. 2000-2015, Warranty receive no greater than Restricted Rights as 2016 defined in FAR 52.227-19(c)(1-2) (June The material contained in this docu- 1987). U.S. Government users will receive No part of this manual may be reproduced ment is provided “as is,”...
-
Page 3: Table Of Contents
Contents Contents 1 Agilent DNA 7500 and DNA 12000 Kit 2 Equipment Required for a DNA 7500 and DNA 12000 Assay 3 Setting up the Assay Equipment and Bioanalyzer Setting up the Chip Priming Station Setting up the Bioanalyzer Vortex Mixer... -
Page 4: Agilent Dna 7500 And Dna 12000 Kit
1 Syringe 1 Syringe “This product is provided under a license by Life Technologies Corporation to Agilent Technologies. The purchase of this product conveys to the buyer the non-transferable right to use the purchased amount of the product and components of the product only as described in accompanying product literature. - Page 5 Agilent DNA 7500 and DNA 12000 Kit Table 1 Physical Specifications Type Specification Analysis time 30 minutes Samples per chip Sample volume 1 µL Kit stability 4 months (see box for storage temperatures) Kit size 12 samples/chip = 300 samples/kit...
-
Page 6: Equipment Required For A Dna 7500 And Dna 12000 Assay
Equipment Required for a DNA 7500 and DNA 12000 Assay Equipment Supplied with the Agilent 2100 Bioanalyzer • Chip priming station (reorder number 5065-4401) • IKA vortex mixer Additional Material Required (Not Supplied) • Pipettes (10 μl, 100 μl and 1000 μl) with compatible tips •... -
Page 7: Setting Up The Assay Equipment And Bioanalyzer
• set up the vortex mixer • finally, make sure that you start the software before you load the chip. The DNA 7500 and DNA 12000 assay is a high sensitivity assay. Please read this guide N O T E carefully and follow all instructions to guarantee satisfactory results. -
Page 8: Setting Up The Chip Priming Station
Setting up the Assay Equipment and Bioanalyzer Setting up the Chip Priming Station Setting up the Chip Priming Station Replace the syringe with each new reagent kit. N O T E 1 Replace the syringe: a Unscrew the old syringe from the lid of the chip priming station. -
Page 9: Setting Up The Bioanalyzer
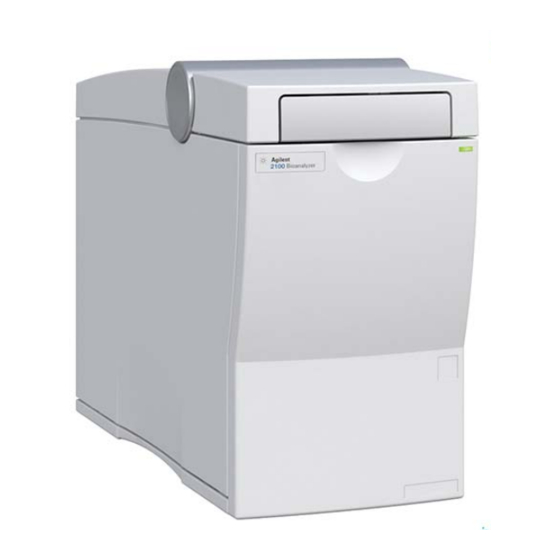
Setting up the Assay Equipment and Bioanalyzer Setting up the Bioanalyzer Setting up the Bioanalyzer 1 Open the lid of the bioanalyzer and make sure that the electrode cartridge is inserted in the instrument. If not, open the latch and insert the electrode cartridge. -
Page 10: Starting The 2100 Expert Software
Setting up the Assay Equipment and Bioanalyzer Starting the 2100 Expert Software Starting the 2100 Expert Software To start the software: 1 Go to your desktop and double-click the following icon. The screen of the software appears in the Instrument context. The icon in the upper part of the screen represents the current instrument-PC communication status: Lid closed, no chip or chip... -
Page 11: Essential Measurement Practices
• Use a new syringe and electrode cleaners with each new kit. • Use loaded chips within 5 min after preparation. Reagents might evaporate, leading to poor results. • Do not touch the Agilent 2100 Bioanalyzer during analysis and never place it on a vibrating surface. Agilent Technologies... -
Page 12: Agilent Dna 7500 And Dna 12000 Assay Protocol
Agilent DNA 7500 and DNA 12000 Assay Protocol After completing the initial steps in “Setting up the Assay Equipment and Bioanalyzer” on page 7, you can prepare the assay, load the chip, and run the assay, as described in the following procedures. - Page 13 Agilent DNA 7500 and DNA 12000 Assay Protocol Preparing the Gel-Dye Mix 2 Vortex the blue-capped vial with DNA dye concentrate (blue ) for 10 seconds and spin down. Make sure the DMSO is completely thawed. 3 Pipette 25 μl of the blue capped dye concentrate (blue ) into a red-capped DNA gel matrix vial (red ).
-
Page 14: Loading The Gel-Dye Mix
Agilent DNA 7500 and DNA 12000 Assay Protocol Loading the Gel-Dye Mix Loading the Gel-Dye Mix Before loading the gel-dye mix, make sure that the base plate of the chip priming station is N O T E in position (C) and the adjustable clip is set to the highest position. Refer to “Setting up... -
Page 15: Loading The Marker
Agilent DNA 7500 and DNA 12000 Assay Protocol Loading the Marker 5 Press the plunger of the syringe down until it is held by the clip. 6 Wait for exactly 30 seconds and then release the plunger with the clip release mechanism. -
Page 16: Loading The Ladder And The Samples
Agilent DNA 7500 and DNA 12000 Assay Protocol Loading the Ladder and the Samples Loading the Ladder and the Samples 1 Pipette 1 μl of the yellow-capped ladder vial (yellow ) in the well marked with the ladder symbol 2 In each of the 12 sample wells pipette 1 μl of sample (used wells) or 1 μl of deionized water... -
Page 17: Inserting A Chip In The Agilent 2100 Bioanalyzer
Agilent DNA 7500 and DNA 12000 Assay Protocol Inserting a Chip in the Agilent 2100 Bioanalyzer Inserting a Chip in the Agilent 2100 Bioanalyzer 1 Open the lid of the Agilent 2100 Bioanalyzer. 2 Check that the electrode cartridge is inserted properly and the chip selector is in position (1). -
Page 18: Starting The Chip Run
Agilent DNA 7500 and DNA 12000 Assay Protocol Starting the Chip Run Starting the Chip Run Please note that the order of executing the chip run may change if the Agilent Security Pack N O T E software (only applicable for Agilent 2100 expert software Revision B.02.02 and higher) is installed. - Page 19 Agilent DNA 7500 and DNA 12000 Assay Protocol Starting the Chip Run 3 To enter sample information like sample names and comments, complete the sample name table. 4 Click the Start button in the upper right of the window to start the chip run.
-
Page 20: Cleaning Electrodes After A Chip Run
Agilent DNA 7500 and DNA 12000 Assay Protocol Cleaning Electrodes after a Chip Run Cleaning Electrodes after a Chip Run When the assay is complete, immediately remove the used chip from the Agilent 2100 Bioanalyzer and dispose of it according to good laboratory practice. -
Page 21: Checking Your Agilent Dna 7500 And Dna 12000 Assay Results
Checking Your Agilent DNA 7500 and DNA 12000 Assay Results DNA 7500 and DNA 12000 Ladder Well Results To check the results of your run, select the Gel or Electropherogram tab in the Data context. The electropherogram of the ladder well window should resemble those shown below. - Page 22 Figure 3 DNA 12000 ladder Major features of a successful ladder run are: • 12 peaks for the DNA 7500 ladder and 13 peaks for the DNA 12000 ladder • All peaks are well resolved • Flat baseline • Correct identification of both markers...
-
Page 23: Dna 7500 And Dna 12000 Sample Well Results
Checking Your Agilent DNA 7500 and DNA 12000 Assay Results DNA 7500 and DNA 12000 Sample Well Results DNA 7500 and DNA 12000 Sample Well Results To review the results of a specific sample, select the sample name in the tree view and highlight the Results sub-tab. - Page 24 In This Book you find the procedures to analyze DNA samples with the Agilent DNA 7500 and DNA 12000 reagent kit and the Agilent 2100 Bioanalyzer instrument. © Agilent Technologies 2000-2015, 2016 Printed in Germany 12/2016 *G2938-90024* *G2938-90024* G2938-90024...