Sign In
Upload
Download
Table of Contents
Contents
Add to my manuals
Delete from my manuals
Share
URL of this page:
HTML Link:
Bookmark this page
Add
Manual will be automatically added to "My Manuals"
Print this page
×
Bookmark added
×
Added to my manuals
Manuals
Brands
HT Manuals
Measuring Instruments
SOLAR I-Ww
User manual
HT SOLAR I-Ww User Manual
Hide thumbs
1
2
Table Of Contents
3
4
5
6
7
8
9
10
11
12
13
14
15
16
17
18
19
20
21
22
23
24
25
26
27
28
29
30
31
32
33
34
35
36
37
38
39
40
41
42
43
44
45
46
47
48
49
50
51
52
53
54
55
56
57
58
59
60
61
62
63
64
65
66
67
68
69
70
71
72
73
74
75
76
77
78
79
80
page
of
80
Go
/
80
Contents
Table of Contents
Troubleshooting
Bookmarks
Table of Contents
Table of Contents
1 Safety Precautions and Procedures
Preliminary Instructions
During Use
After Use
Overvoltage Categories - Definitions
2 General Description
Introduction
Instrument Features
3 Preparation for Use
Initial Checks
Instrument Power Supply
Storage
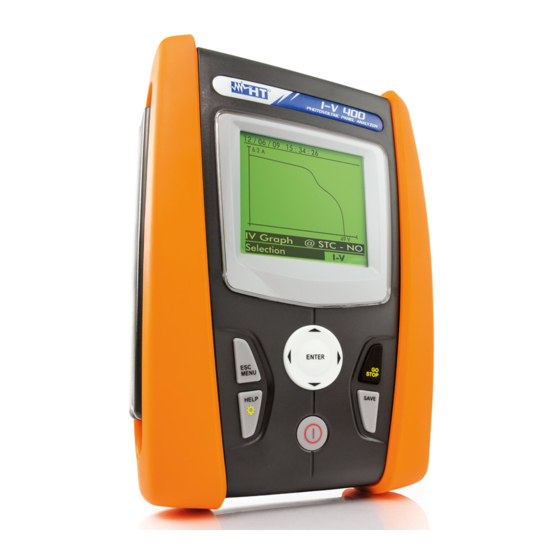
4 Description of Parts
Instrument Description
Keyboard Description
Display Description
Initial Screen
5 Main Menu
SET - Instrument Settings
General
Measurement Units
Date/Time
Remote Unit/Solarim
Irradiance
DC Clamp (SOLAR I-Vw or SOLAR I-Ve)
EFF - SETTINGS for TESTING PV SYSTEMS (SOLAR I-Vw or SOLAR I-Ve)
Settings for PV Systems with Single-MPPT Inverter - Single-Phase AC Output
Instrument Settings
PV Plant Parameters
Settings for PV with Single/Multi MPPT Inverter - Single/Three Phase AC Output
Instrument Settings
PV Plant Parameters
MPP300 Status
Selection of the Compensation Relationship of Temperature Effects
DB - Module Database
How to Define a New PV Module
How to Modify a PV Module
How to Delete a PV Module
6 How to Operate
Testing PV Systems (SOLAR I-Vw or SOLAR I-Ve)
Testing of PV Systems with Single-MPPT Inverter - Single-Phase AC Output
Test PV Systems with Single/Multi-MPPT Inverter - Single/Three-Phase AC Output
I-V Curve Measurement
I-V Curve Measurement by Use of Instrument
I-V Curve Measurement by Use of Remote Unit SOLAR-02
I-V Curve Test by Remote Unit SOLAR-02 in RF Connection
I-V Curve Test by Remote Unit SOLAR-02 in Synchro Recording
Meaning of Measurement Results
Quick Check on PV Modules and Strings (IVCK)
General Information
Preliminary Settings
Fast Check IVCK Without Irradiance Measurement
Fast Check IVCK with Irradiance Measurement
Reset Media
List of Display Messages
7 Storing Data
Saving Test Results of PV Checks (SOLAR I-Vw or SOLAR I-Ve)
Saving Test Results of I-V Curve Test
Managing the Results
Recall Data of PV Checks at Display (SOLAR I-Vw or SOLAR I-Ve)
Recall Data of I-V Curve Tests at Display
View Data - Numerical Screens
View Data - Graphic Screens of I-V Curve
View Data - Graphic Screens of Power
Delete Data
8 Connecting the Instrument to a Pc
Connecting by Optical/Usb Cable C2006
Connecting by Wifi
9 Maintenance
General
Battery Replacement
Instrument Cleaning
End of Life
10 Technical Specifications
Yield Test Technical Feratures (SOLAR I-Vw, SOLAR I-Ve)
I-V Test Technical Features (I-V and IVCK)
Safety Specifications
General
General Characteristics
Environment Conditions
Accessories
11 Appendix
Testing Photovoltaic Systems (SOLAR I-Vw, SOLAR I-Ve)
Notes on MPPT (Maximum Power Point Tracker)
Theoretical Aspects of the I-V Curve Measurement
Typical Errors on I-V Curves and Troubleshooting
12 Service
Warranty Conditions
Advertisement
Quick Links
Download this manual
Copyright HT ITALIA 2017
Release EN 2.00 - 24/03/2017
Table of
Contents
Previous
Page
Next
Page
1
2
3
4
5
Advertisement
Table of Contents
Need help?
Do you have a question about the SOLAR I-Ww and is the answer not in the manual?
Ask a question
Questions and answers
Related Manuals for HT SOLAR I-Ww
Measuring Instruments HT SOLAR I-Ve User Manual
(80 pages)
Measuring Instruments HT SOLAR-02 User Manual
(23 pages)
Measuring Instruments HT SOLAR03 User Manual
(120 pages)
Measuring Instruments HT SOLAR200 User Manual
(72 pages)
Measuring Instruments HT ISO410 User Manual
400 series (88 pages)
Measuring Instruments HT 400 Series User Manual
(88 pages)
Measuring Instruments HT HT9025 User Manual
(100 pages)
Measuring Instruments HT HT9023 User Manual
(58 pages)
Measuring Instruments HT I-V600 User Manual
(81 pages)
Measuring Instruments HT JUPITER User Manual
(44 pages)
Measuring Instruments HT HT60 User Manual
(24 pages)
Measuring Instruments HT PVCHECKs-PRO User Manual
(64 pages)
Measuring Instruments HT I-V400w-SOLAR I-Vw User Manual
(80 pages)
Measuring Instruments HT VEGA74 User Manual
(60 pages)
Measuring Instruments HT HT7 User Manual
(16 pages)
Measuring Instruments HT C2006 Installation Manual
Usb – optical rs232 adapter for ht italia instruments (6 pages)
This manual is also suitable for:
I-v400w
I-v500w
Solar i-ve
Table of Contents
Print
Rename the bookmark
Delete bookmark?
Delete from my manuals?
Login
Sign In
OR
Sign in with Facebook
Sign in with Google
Upload manual
Upload from disk
Upload from URL


Need help?
Do you have a question about the SOLAR I-Ww and is the answer not in the manual?
Questions and answers