Table of Contents
Advertisement
Available languages
Available languages
Quick Links
Advertisement
Chapters
Table of Contents

Related Manuals for HT HT9025


Summary of Contents for HT HT9025
- Page 2 ...
- Page 3 HT9025 - HT9025T MANUALE D’USO USER MANUAL...
- Page 4 HT9025 - HT9025T...
- Page 5 HT9025 - HT9025T PRECAUZIONI E MISURE DI SICUREZZA DESCRIZIONE GENERALE PREPARAZIONE ALL’UTILIZZO NOMENCLATURA ISTRUZIONI OPERATIVE MANUTENZIONE SPECIFICHE TECNICHE ASSISTENZA FIGURE INTERNE PRECAUTIONS AND SAFETY MEASURES GENERAL DESCRIPTION PREPARATION FOR USE NOMENCLATURE OPERATING INSTRUCTIONS MAINTENANCE TECHNICAL SPECIFICATIONS SERVICE INTERNAL FIGURES...
-
Page 6: Table Of Contents
HT9025 - HT9025T 1. PRECAUZIONI E MISURE DI SICUREZZA 1.1. Durante l’utilizzo 1.2. Dopo l’utilizzo 1.3. Definizione di Categoria di misura 2. DESCRIZIONE GENERALE 2.1. Strumenti a Valore medio/Valore Efficace 2.2. Valore Efficace e fattore di cresta 3. PREPARAZIONE ALL’UTILIZZO 3.1. -
Page 7: Precauzioni E Misure Di Sicurezza
HT9025 - HT9025T 1. PRECAUZIONI E MISURE DI SICUREZZA Lo strumento è stato progettato in conformità alla direttiva IEC/EN61010-1, relativa agli strumenti di misura elettronici. Per la Sua sicurezza e per evitare di danneggiare lo strumento, La preghiamo di seguire le procedure descritte nel presente manuale e... -
Page 8: Durante L'utilizzo
HT9025 - HT9025T I seguenti simboli sono usati sullo strumento: ATTENZIONE: attenersi alle istruzioni riportate nel manuale d’uso. Un uso improprio potrebbe causare danni allo strumento o ai suoi componenti Pericolo Alta Tensione: rischi di shock elettrici Lo strumento può operare su conduttori nudi sotto... -
Page 9: Dopo L'utilizzo
HT9025 - HT9025T 1.2. DOPO L’UTILIZZO • Quando le misure sono terminate, posizionare il commutatore su OFF • Se si prevede di non utilizzare lo strumento per un lungo periodo rimuovere la batteria 1.3. DEFINIZIONE DI CATEGORIA DI MISURA La norma IEC/EN61010-1: Prescrizioni di sicurezza per apparecchi... -
Page 10: Descrizione Generale
HT9025 - HT9025T 2. DESCRIZIONE GENERALE Lo strumento esegue le seguenti misure: Funzione Multimetro • Tensione DC fino a 1500V • Tensione AC, AC+DC TRMS • Tensione DC, AC, AC+DC TRMS con bassa impedenza (LoZ) • Tensione e corrente AC TRMS su dispositivi VFD (misure a valle di inverter) •... -
Page 11: Valore Efficace E Fattore Di Cresta
HT9025 - HT9025T 2.1. STRUMENTI A VALORE MEDIO/VALORE EFFICACE Gli strumenti di misura di grandezze alternate si dividono in due grandi famiglie: • Strumenti a VALORE MEDIO: strumenti che misurano il valore della sola onda alla frequenza fondamentale (50 o 60 HZ) •... -
Page 12: Preparazione All'utilizzo
HT9025 - HT9025T 3. PREPARAZIONE ALL’UTILIZZO 3.1. CONTROLLI INIZIALI Lo strumento, prima di essere spedito, è stato controllato dal punto di vista elettrico e meccanico. Sono state prese tutte le precauzioni possibili affinché lo strumento potesse essere consegnato senza danni. -
Page 13: Nomenclatura
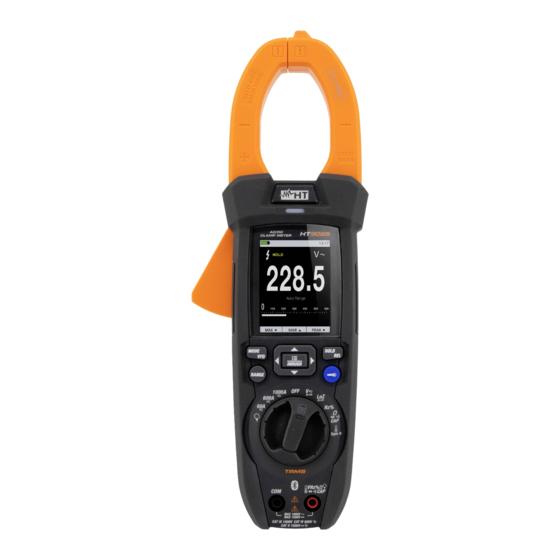
HT9025 - HT9025T 4. NOMENCLATURA 4.1. DESCRIZIONE DELLO STRUMENTO Fig. 1 Descrizione parte anteriore dello strumento Toroide apribile Tasto /INRUSH Polarità positiva corrente DC Tasto RANGE Tasto IR/ (HT9025T) Sensore NCV Tasto (HT9025) Leva apertura toroide Selettore funzioni Display LCD... - Page 14 HT9025 - HT9025T Fig. 2 posteriore Descrizione parte dello strumento Polarità negativa corrente DC Selettore protezione lente (HT9025T) Illuminatore a LED bianco Vite di fissaggio vano batteria Puntatore laser (HT9025T) Coperchio vano batteria Lente termocamera (HT9025T)
- Page 15 HT9025 - HT9025T Fig. 3 Tacche di allineamento Tacche di allineamento Conduttore...
-
Page 16: Descrizione Tasti Funzione
HT9025 - HT9025T 4.2. DESCRIZIONE TASTI FUNZIONE Tasto HOLD/REL La pressione del tasto HOLD/REL attiva il mantenimento del valore della grandezza visualizzata a display. Conseguentemente alla pressione di tale tasto il messaggio “HOLD” appare a display. Premere nuovamente il tasto HOLD/REL per uscire dalla funzione. - Page 17 + immagine termografica (vedere § 5.14). La pressione prolungata (>2s) del tasto IR/ (HT9025T) o semplice del tasto (HT9025) permette l’accensione/spegnimento dell’illuminatore interno a LED bianco (vedere Fig. 2 – parte 2) Tasto /INRUSH ”...
-
Page 18: Descrizione Funzioni Interne
HT9025 - HT9025T 4.3. DESCRIZIONE FUNZIONI INTERNE Descrizione display parte Multimetro Fig. 4 Descrizione simboli presenti a display Simbolo Descrizione Indicazione livello di carica batteria 13.17 Indicazione ora corrente di sistema HOLD Indicazione funzione Data HOLD attiva Indicazione funzione attualmente selezionata 228.5... - Page 19 HT9025 - HT9025T Descrizione display parte Termocamera (HT9025T) Fig. 5 Descrizione simboli presenti a display Simbolo Descrizione Valore impostato dell’emissività dell’oggetto E=0.95 (vedere § 4.3) °C Indicazione unità di misura temperatura Indicazione temperatura associata al cursore fisso centrale Indicazione temperatura del punto più caldo (Hot) dell’immagine...
- Page 20 HT9025 - HT9025T Salvataggio risultato di misura Premere il tasto HOLD/REL per fissare il risultato. Il messaggio “HOLD” appare a display e il tasto virtuale SALVA è mostrato a display (vedere Fig. 7 – parte destra) 2. Premere il tasto per salvare il dato nella memoria interna dello strumento (il tasto SALVA ...
- Page 21 HT9025 - HT9025T Misura MIN/MAX e PICCO Premere il tasto MAX per entrare nella misura dei valori MAX e MIN della grandezza in esame (vedere Fig. 9 – parte centrale). I simboli “MAX” e “MIN” sono mostrati a display 2.
- Page 22 HT9025 - HT9025T Misura di Tensione AC, AC+DC con bassa impedenza (LoZ) Questa modalità permette di eseguire la misura della tensione AC/DC con una bassa impedenza di ingresso in modo da eliminare le letture errate dovute a tensioni parassite per accoppiamenti di tipo capacitivo.
- Page 23 Premere il tasto /INRUSH per accedere al menu generale dello strumento Fig. 12 Menu generale dello strumento (HT9025T e HT9025) 2. Usare i tasti freccia o per la selezione delle voci di menu e i tasti freccia , ...
- Page 24 HT9025 - HT9025T 10. Usare il tasto freccia per la selezione delle opzioni: ON (attivazione), OFF (disattivazione) 11. Premere il tasto freccia , il tasto o il tasto HOLD/REL per confermare e uscire dal menu generale Comando Emissività (HT9025T) o ...
- Page 25 HT9025 - HT9025T Fig. 15 Menu Impostazioni (HT9025T e HT9025) 19. Usare i tasti freccia o e i tasti o per la selezione delle seguenti opzioni: ➢ Suono → tasti attivazione/disattivazione suono associato alla pressione dei tasti funzione ➢...
- Page 26 HT9025 - HT9025T Comando Memoria (richiamo e cancellazione immagini) o per 24. Selezionare la voce “Memoria” e premere il tasto accedere all’area di memoria interna in cui è possibile richiamare e cancellare le immagini salvate. La seguente videata è mostrata a display: Fig.
- Page 27 HT9025 - HT9025T Fig. 19 Cancellazione e condivisione immagini richiamate 29. Premere il tasto MODE/VFD per cancellare la foto richiamata o il tasto HOLD/REL per tornare alla videata precedente 30. Con immagine fissa a display usare il tasto freccia per selezionare l’opzione...
- Page 28 HT9025 - HT9025T Fig. 21 Menu Informazioni 35. Premere il tasto freccia , il tasto o il tasto HOLD/REL per confermare e uscire dal menu generale Comando Imp:Default o per 36. Selezionare la voce “Imp.Default” e premere i tasti ripristinare le condizioni di default (fabbrica) dello strumento Fig.
-
Page 29: Istruzioni Operative
HT9025 - HT9025T 5. ISTRUZIONI OPERATIVE 5.1. MISURA TENSIONE AC, AC+DC, VFD ATTENZIONE La massima tensione AC in ingresso è 1000Vrms. Non misurare tensioni che eccedano i limiti espressi in questo manuale. Il superamento di tali limiti potrebbe causare shock elettrici all’utilizzatore e danni allo... -
Page 30: Misura Tensione Dc
HT9025 - HT9025T 5.3. MISURA TENSIONE DC ATTENZIONE • La massima tensione DC in ingresso è 1500V. Non misurare tensioni che eccedono i limiti indicati in questo manuale. Il superamento dei limiti di tensione potrebbe causare shock elettrici all’utilizzatore e danni allo strumento •... -
Page 31: Misura Resistenza E Test Continuità
HT9025 - HT9025T 5.5. MISURA RESISTENZA E TEST CONTINUITÀ ATTENZIONE Prima di effettuare una qualunque misura di resistenza accertarsi che il circuito in esame non sia alimentato e che eventuali condensatori presenti siano scarichi Selezionare la posizione 2. Inserire... -
Page 32: Misura Capacità
HT9025 - HT9025T 5.7. MISURA CAPACITÀ ATTENZIONE Prima di eseguire misure di capacità su circuiti o condensatori, rimuovere l’alimentazione al circuito sotto esame e lasciare scaricare tutte le capacità presenti in esso. Nel collegamento tra il multimetro e la capacità sotto esame rispettare la corretta polarità... -
Page 33: Misura Corrente Dc
HT9025 - HT9025T 5.9. MISURA CORRENTE DC ATTENZIONE Assicurarsi che tutti i terminali di ingresso dello strumento siano disconnessi Selezionare la posizione 60A , 600A o 1000A 2. Premere il tasto MODE/VFD per selezionare la misura “A “ 3. Premere a lungo il HOLD/REL per azzerare la corrente di magnetizzazione residua (vedere §... -
Page 34: Misura Corrente Di Spunto Ac (Inrush)
HT9025 - HT9025T 5.11. MISURA CORRENTE DI SPUNTO AC (INRUSH) ATTENZIONE Assicurarsi che tutti i terminali di ingresso dello strumento siano disconnessi Selezionare la posizione 60A , 600A o 1000A 2. Premere il tasto MODE/VFD per selezionare la misura “A “... -
Page 35: Misura Corrente Dc, Ac, Ac+Dc Con Pinza
• Lo strumento esegue la misura sia con il trasduttore a pinza flessibile F3000U (solo AC) sia con altri trasduttori a pinza standard della famiglia HT. Con trasduttori aventi il connettore di uscita HT è necessario l’adattatore opzionale NOCANBA per... -
Page 36: Funzione Data Logger
HT9025 - HT9025T 5.13. FUNZIONE DATA LOGGER Accendere lo strumento ruotando il selettore nella posizione desiderata Impostazione intervallo di campionamento 2. Premere il tasto “ ”, selezionare la voce “Registrazione” e premere il tasto . La videata di Fig.35 – parte sinistra è... - Page 37 HT9025 - HT9025T 9. Usare i tasti freccia o per selezionare le voci “Ora”, “Min” o “Sec” e premere il tasto per entrare nella modalità di impostazione. Il valore presente assume colore nero 10. Usare i tasti freccia o per l’impostazione dei valori compresi negli intervalli: 0 ÷...
- Page 38 HT9025 - HT9025T 17. Premere il tasto MODE/VFD (TREND) per visualizzare a display il grafico della registrazione e il relativo andamento nel tempo (Trend). La videata di Fig.39 – parte sinistra è mostrata a display: Fig.39: Data logger – Visualizzazione grafico registrazione 18.
- Page 39 HT9025 - HT9025T Fig. 41: Funzione data logger – Contenuto memoria 24. Il parametro “Num. Registrazioni” indica quante registrazioni sono state salvate nella memoria interna. E’ possibile salvare fino ad un massimo di 16 registrazioni. Il parametro “Memoria residua” indica il valore percentuale di memoria ancora disponibile per il salvataggio delle registrazioni 25.
-
Page 40: Uso Della Termocamera Interna (Ht9025T)
HT9025 - HT9025T 5.14. USO DELLA TERMOCAMERA INTERNA (HT9025T) Accendere lo strumento in qualsiasi posizione del selettore 2. Premere il tasto IR/ per attivare la termocamera interna Fig. 2 3. Agire sul selettore di protezione (vedere – parte 3) scoprendo la lente 4. - Page 41 HT9025 - HT9025T Fig. 44: Rappresentazione rapporto D/S dello strumento HT9025T 9. Premere il tasto HOLD/REL per fissare il risultato. Il messaggio “HOLD” e il tasto SALVA sono mostrati a display (vedere Fig.45) Fig. 45: Salvataggio immagine IR 10. Premere il tasto per salvare il dato nella memoria interna...
-
Page 42: Download App Htmercury
HT9025 - HT9025T 5.15. DOWNLOAD APP HTMERCURY Premere il tasto /INRUSH, selezionare il menu “Impostazioni” e attivare il collegamento Bluetooth sullo strumento (vedere § 4.3) come mostrato nella Fig.47 Fig. 47: Attivazione collegamento Bluetooth 2. Scaricare la APP HTMercury dagli stores di Android e iOS e... -
Page 43: Manutenzione
HT9025 - HT9025T 6. MANUTENZIONE 6.1. GENERALITÀ Durante l’utilizzo conservazione rispettare raccomandazioni elencate in questo manuale per evitare possibili danni o pericoli durante l’utilizzo. 2. Non utilizzare lo strumento in ambienti caratterizzati da elevato tasso umidità temperatura elevata. esporre direttamente alla luce del sole. -
Page 44: Specifiche Tecniche
HT9025 - HT9025T 7. SPECIFICHE TECNICHE 7.1. CARATTERISTICHE TECNICHE Incertezza calcolata come ±[%lettura + (num.cifre x risoluzione)] a 18°C28°C, <75% RH Tensione DC Campo Risoluzione Incertezza Impedenza ingresso (0.8%lettura + 8cifre) 600.0mV 0.1mV 6.000V 0.001V (0.5%lettura + 5cifre) 60.00V 0.01V >10M... - Page 45 HT9025 - HT9025T Corrente AC TRMS / Corrente di spunto (INRUSH) Campo Risoluzione Incertezza (*) 60.00A 0.01 A (2.5%lettura+5cifre) 600.0A 0.1A 1000A (*) Incertezza specificata dal 10% al 100% del campo di misura; forma d’onda sinusoidale Tempo di risposta funzione INRUSH: 100ms; Campo frequenza: 50Hz ÷ 60Hz...
- Page 46 HT9025 - HT9025T Frequenza (circuiti elettronici) Campo Risoluzione Incertezza 60.00Hz 0.01Hz 600.0Hz 0.1Hz 6.000kHz 0.001kHz (0.2%lettura + 5cifre) 60.00kHz 0.01kHz 600.0kHz 0.1kHz 6.000MHz 0.001MHz 10.00MHz 0.01MHz Protezione da sovraccarichi: 1000ADC/ACrms ; Sensibilità: >2Vrms (@20%80%duty cycle) e f<100kHz; >5Vrms (@20%80%duty cycle) e f>100kHz...
-
Page 47: Caratteristiche Generali
HT9025 - HT9025T 7.2. CARATTERISTICHE GENERALI Normative di riferimento Sicurezza: IEC/EN61010-1 EMC: IEC/EN61326-1 Isolamento: doppio isolamento Grado di inquinamento: Categoria di misura: CAT IV 600V, CAT III 1000V CAT II 1500VDC Display Tipo display: colori TFT, 6000 punti con bargraph Velocità... -
Page 48: Accessori
• Trasduttore a pinza standard DC/AC 40-400A Cod. HT4006 • Trasduttore a pinza flessibile AC 30/300/3000A Cod. F3000U • Trasduttore a pinza standard AC 1-100-1000A (con. HT) Cod. HT96U • Trasduttore pinza standard AC 10-100-1000A (con. HT) Cod. HT97U • Trasduttore a pinza standard DC 1000A (con. HT) Cod. -
Page 49: Assistenza
HT9025 - HT9025T 8. ASSISTENZA 8.1. CONDIZIONI DI GARANZIA Questo strumento è garantito contro ogni difetto di materiale e fabbricazione, in conformità con le condizioni generali di vendita. Durante il periodo di garanzia, le parti difettose possono essere sostituite, ma il costruttore si riserva il diritto di riparare ovvero sostituire il prodotto. - Page 50 HT9025 - HT9025T 1. PRECAUTIONS AND SAFETY MEASURES 1.1. During use 1.2. After use 1.3. Measuring categories definitions 2. GENERAL DESCRIPTION 2.1. TRMS/Mean Value measuring instruments 2.2. TRMS value and Crest Factor definitions 3. PREPARATION FOR USE 3.1. Initial checks 3.2.
-
Page 51: Precautions And Safety Measures
HT9025 - HT9025T 1. PRECAUTIONS AND SAFETY MEASURES The instrument has been designed in compliance with directive IEC/EN61010-1 relevant to electronic measuring instruments. For your safety and to prevent damaging the instrument, please carefully follow the procedures described in this manual and read all notes preceded by symbol with the utmost attention. -
Page 52: During Use
HT9025 - HT9025T The below symbols are used on meter: CAUTION: keep to what described by the manual. An incorrect use could damage the instrument or its components High voltage: risk of electric shock This symbol indicates that the clamp can operate on... -
Page 53: After Use
HT9025 - HT9025T 1.2. AFTER USE • Once the measurements are completed, turn the rotary switch to OFF. • If you expect not to use the clamp for a long time, remove the battery 1.3. MEASURING CATEGORIES DEFINITIONS The norm IEC/EN61010-1: Safety requirements for electrical... -
Page 54: General Description
HT9025 - HT9025T 2. GENERAL DESCRIPTION Multimeter function • DC Voltage up to 1500V • AC, AC+DC TRMS Voltage • DC, AC, AC+DC TRMS Voltage with low impedance (LoZ) • AC TRMS Voltage and Current on VFD devices • DC, AC TRMS Current with jaws •... -
Page 55: Trms/Mean Value Measuring Instruments
HT9025 - HT9025T 2.1. TRMS/MEAN VALUE MEASURING INSTRUMENTS Safety testers for alternate parameters are divided into two big families: • MEAN VALUE instruments: instruments which measure only the value of the wave at the fundamental frequency (50 or 60 Hz) •... -
Page 56: Preparation For Use
HT9025 - HT9025T 3. PREPARATION FOR USE 3.1. INITIAL CHECKS Before shipping, the instrument has been checked from an electric as well as mechanical point of view. All possible precautions have been taken so that the instrument is delivered undamaged. -
Page 57: Nomenclature
HT9025 - HT9025T 4. NOMENCLATURE 4.1. INTRUMENT DESCRIPTION Fig. 1 Description of the instrument’s front Inductive clamp jaw /INRUSH DC Current positive polarity Key RANGE Key IR/ (HT9025T) AC Voltage NCV detector (HT9025) Jaw trigger Rotary selector switch LCD display... - Page 58 HT9025 - HT9025T Fig. 2 Description of the instrument’s back DC Current negative polarity Lens protection selector (HT9025T) White LED illuminator Battery cover fastening screw Laser pointer (HT9025T) Battery cover Thermal camera lens (HT9025T)
- Page 59 HT9025 - HT9025T Fig. 3 Alignment marks Alignment marks Conductor...
-
Page 60: Function Keys Description
HT9025 - HT9025T 4.2. FUNCTION KEYS DESCRIPTION Key HOLD/REL Pressing key HOLD/REL freezes the value of the measured quantity “ ” on the display. After pressing this key, the message HOLD appears on the display. Press the key HOLD/REL again to quit the function. - Page 61 (HT9025T) allows displaying the multimeter section or the combination multimeter + thermographic image (see § 5.14). Pressing and holding (>2s) key IR/ (EXCLIPSE) or pressing key (HT9025) allows turning on/off the internal white LED illuminator (see Fig.2 – part 2) /INRUSH “ ”...
-
Page 62: Description Of Internal Functions
HT9025 - HT9025T 4.3. DESCRIPTION OF INTERNAL FUNCTIONS Description of the display, Multimeter section Fig. 4 Description of the symbols shown on the display Symbol Description Indication of battery charge level 13.17 Indication of the system's current time HOLD Indication of active Data HOLD function Indication of currently selected function 228.5... - Page 63 HT9025 - HT9025T Description of the display, Thermal camera section (HT9025T) Fig. 5 Description of the symbols shown on the display Symbol Description E=0.95 Set value of object emissivity (see § 4.3) °C Indication of the temperature measuring unit Indication of the temperature associated with...
- Page 64 HT9025 - HT9025T Storage of measurement results “ ” Press key HOLD/REL to freeze the result. Message HOLD SAVE appears on the display (see Fig.7– right side) 2. Press key to save the value as a BMP image on the ’...
- Page 65 HT9025 - HT9025T MIN/MAX and PEAK measurement Press key MAX to enter measurement of MAX and MIN values of the quantity to be measured (see Fig.9 - central part). “ ” “ ” The symbols appear on the display.
- Page 66 HT9025 - HT9025T Measurement of AC, AC+DC Voltage with low impedance (LoZ) This mode permits to perform the AC/DC voltage measurement with a low input impedance in way to avoid the wrong readings due to stray voltage in capacitive coupled.
- Page 67 Fig. 12 General menu of the instrument (HT9025T and HT9025) 2. Use the arrow keys or to select menu items and arrow keys , to select parameters and enter/quit internal...
- Page 68 HT9025 - HT9025T Command Emissivity (HT9025T) “ ” or to set the value 12. Select item Emissivity and press keys of parameter Emissivity to be used in Thermal Camera mode 13. Use the arrow keys or to select the value within range: 0.01 ÷...
- Page 69 HT9025 - HT9025T Fig. 15 Settings Menu (HT9025T and HT9025) 19. Use the arrow keys or and keys or to select the following options: ➢ Key sound → activation/deactivation of key tone when pressing function keys ➢ Bluetooth →...
- Page 70 HT9025 - HT9025T Command Memory (recalling and deleting images) “ ” or to access the 24. Select item Memory and press key ’ instrument s memory in which it is possible to recall and delete saved images. The following screen appears on the display: Fig.
- Page 71 HT9025 - HT9025T Fig. 19 Deleting and sharing recalled images 29. Press key MODE/VFD to delete the recalled image or the key HOLD/REL to return in previous screen 30. With image fixed at display use the arrow key and select the “...
- Page 72 HT9025 - HT9025T Fig. 21 Menu Information 35. Press the arrow key , key or key HOLD/REL to confirm and quit the general menu Command Factory Set. “ ” or to restore the 36. Select item Factory Set. and press key ’...
-
Page 73: Operating Instructions
HT9025 - HT9025T 5. OPERATING INSTRUCTIONS 5.1. AC, AC+DC, VFD VOLTAGE MEASUREMENT CAUTION The maximum input AC voltage is 1000V. Do not measure voltages exceeding the limits given in this manual. Exceeding voltage limits could result in electrical shocks to the user and damage to the... -
Page 74: Dc Voltage Measurement
HT9025 - HT9025T 5.3. DC VOLTAGE MEASUREMENT CAUTION • The maximum input DC voltage is 1500V. Do not measure voltages exceeding the limits given in this manual. Exceeding voltage limits could result in electrical shocks to the user and damage to the instrument •... -
Page 75: Resistance Measure And Continuity Test
HT9025 - HT9025T 5.5. RESISTANCE MEASURE AND CONTINUITY TEST CAUTION Before attempting any resistance measurement, cut off power supply from the circuit to be measured and make sure that all capacitors are discharged, if present Select position 2. Insert the red cable into input terminal VHz% CAP... -
Page 76: Capacitance Measurement
HT9025 - HT9025T 5.7. CAPACITANCE MEASUREMENT CAUTION Before carrying out capacitance measurements on circuits or capacitors, cut off power supply from the circuit being tested and let all capacitance in it be discharged. When connecting the multimeter and the capacitance to be measured, respect the correct polarity (when required) Select position ... -
Page 77: Dc Current Measurement
HT9025 - HT9025T 5.9. DC CURRENT MEASUREMENT CAUTION Make sure that all the test leads are disconnected from the meter terminals for current measurement Select position 60A , 600A o 1000A 2. Press key MODE/VFD to select measurement “A “... -
Page 78: Inrush Current Measurement
HT9025 - HT9025T 5.11. INRUSH CURRENT MEASUREMENT CAUTION Make sure that all the test leads are disconnected from the meter terminals for current measurement Select positions 60A , 600A or 1000A “ ” 2. Press the MODE/VFD key to select measurement 3. -
Page 79: Measure Dc, Ac, Ac+Dc Current With Clamp
• The instrument carries out the measurement both with flexible clamp transducer F3000U (AC only) and with other standard clamp transducers in the HT family. With transducers having an HT output connector, optional... -
Page 80: Data Logger Function
HT9025 - HT9025T 5.13. DATA LOGGER FUNCTION Switch on the instrument by turning the rotary switch to the desired position. Setting of the sampling interval “ ” “ ” and press key . 2. Press key MENU , select item Recording –... - Page 81 HT9025 - HT9025T Starting and stopping recording “ ” – 13. Select item Start Recording (see Fig.37 left side) and press – . The screen in Fig.37 middle, in which the date and time of recording start, the remaining time and the number of samples taken in real time are indicated, appears on the display.
- Page 82 HT9025 - HT9025T – Fig. 39: Data logger function Display of recording graph 18. Use arrow keys or to move the cursor on the graph, looking at the value of the sampled data and at the relevant sampling moment at the bottom of the display.
- Page 83 HT9025 - HT9025T – Fig. 41: Data logger function Content of the memory “ ” 24. Parameter Num. Recordings indicates how many recordings have been saved in the internal memory. It is possible to save “ ” up to a maximum of 16 recordings. Parameter...
-
Page 84: Use Of Internal Thermal Camera (Ht9025T)
HT9025 - HT9025T 5.14. USE OF INTERNAL THERMAL CAMERA (HT9025T) Switch on the instrument in any position of the selector switch. 2. Press key IR/ to activate the internal thermal camera. – 3. Move the protection selector (see Fig. 2 part 5) and uncover the lens. - Page 85 HT9025 - HT9025T Fig. 44: Representation of the D/S ratio of HT9025T “ ” 9. Press key HOLD/REL to freeze the result. Message HOLD SAVE key appears on the display (see Fig.45) Fig. 45: Salvataggio immagine IR 10. Press key to save the value as a BMP image on the ’...
-
Page 86: Download Of App Htmercury
HT9025 - HT9025T 5.15. DOWNLOAD OF APP HTMERCURY “ ” Press key /INRUSH, select menu Setup and activate the Bluetooth connection on the instrument (see § 0) as shown in Fig.47 Fig. 47: Activation of Bluetooth connection 3. Download the HTMercury APP from the Android and iOS stores... -
Page 87: Maintenance
HT9025 - HT9025T 6. MAINTENANCE 6.1. GENERAL INFORMATIONS Only expert trained technicians should perform maintenance operations. Before carrying out maintenance operations, disconnect all cables from the input terminals. 2. Do not use the instrument in environments with high humidity levels or high temperatures. Do not expose to direct sunlight. -
Page 88: Technical Specifications
HT9025 - HT9025T 7. TECHNICAL SPECIFICATIONS 7.1. TECHNICAL CHARACTERISTICS Accuracy calculated as ±[%reading + (num. digits*resolution)] at 18°C 28°C <75%RH DC Voltage Range Resolution Accuracy Input impedance (0.8%rdg + 8dgt) 600.0mV 0.1mV 6.000V 0.001V (0.5%rdg + 5dgt) 60.00V 0.01V >10M... - Page 89 HT9025 - HT9025T AC TRMS Current / INRUSH current Range Resolution Accuracy (*) 60.00A 0.01 A (2.5%r 600.0A 0.1A 1000A (*) Accuracy specified from 10% to 100% of the measuring range and sinusoidal waveform Response time INRUSH function: 100ms; Frequency range: 50Hz ÷ 60Hz...
- Page 90 HT9025 - HT9025T Frequency (electronic circuits) Range Resolution Accuracy 60.00Hz 0.01Hz 600.0Hz 0.1Hz 6.000kHz 0.001kHz (0.2%rdg + 5dgt) 60.00kHz 0.01kHz 600.0kHz 0.1kHz 6.000MHz 0.001MHz 10.00MHz 0.01MHz Overload protection: 1000ADC/ACrms ; Sensitivity: >2Vrms (@ 20% 80% duty cycle) and f<100kHz; >5Vrms (@ 20% 80% duty cycle) and f>100kHz...
-
Page 91: General Characteristics
HT9025 - HT9025T 7.2. GENERAL CHARACTERISTICS Reference guidelines Safety: IEC/EN61010-1 EMC: IEC/EN61326-1 Insulation: double insulation Pollution level: Measurement category: CAT IV 600V, CAT III 1000V CAT II 1500VDC Display Type of display: color TFT, 6000 dots with bargraph Sampling frequency:... -
Page 92: Standard Accessories
• Standard clamp transducer DC/AC 40-400A Cod. HT4006 • Flexible clamp transducer AC 30/300/3000A Cod. F3000U • Standard clamp transducer AC 1-100-1000A (HT conn.) Cod. HT96U • Standard clamp transducer AC 10-100-1000A (HT conn.) Cod. HT97U • Standard clamp transducer DC 1000A (HT connector) Cod. -
Page 93: Service
HT9025 - HT9025T 8. SERVICE 8.1. WARRANTY CONDITIONS This equipment is guaranteed against material faults or production defects, in accordance with the general sales conditions. During the warranty period (one year), faulty parts may be replaced. The manufacturer reserves the right to decide either to repair or replace the product. In case of returning of the instrument, all transport charges must be paid by the customer. - Page 94 HT9025 - HT9025T 9. FIGURE INTERNE / INTERNAL FIGURES Uso strumento per misura di Tensione AC, Uso strumento per misura di Tensione AC+DC, VFD LoZAC, LoZAC+DC Fig. 23 Fig. 24 Taking AC, , AC+DC, VFD voltage Taking LoZAC, LoZAC+DC voltage...
- Page 95 HT9025 - HT9025T Uso dello strumento per misura di Frequenza e Duty Cycle Fig. 26 Taking Frequency and Duty Cycle measurements Uso dello strumento per misura di Resistenza e Test Continuità Fig. 27 Taking Resistance and Continuity test measurements...
- Page 96 HT9025 - HT9025T Uso dello strumento per la Prova Diodi Uso strumento per misura di Capacità Fig. 28 Fig. 29 Taking Diode test measurements Taking Capacitance measurements Uso strumento per misura di Temperatura Uso strumento per misura di Corrente DC Fig.
- Page 97 HT9025 - HT9025T Uso dello strumento per misura di Corrente AC Fig. 32 Taking AC Current measurements Uso dello strumento per misura di Corrente di spunto (INRUSH) Fig. 33 Taking AC INRUSH Current measurements...
- Page 98 HT9025 - HT9025T Uso dello strumento per misura di corrente AC/DC con trasduttori a pinza Fig. 34 Use of the instrument for AC/DC current measurement with clamp transducer...
- Page 99 ...
Need help?
Do you have a question about the HT9025 and is the answer not in the manual?
Questions and answers