Table of Contents
Advertisement
Advertisement
Table of Contents

Related Manuals for Merlin WeatherDrive MR550EVO


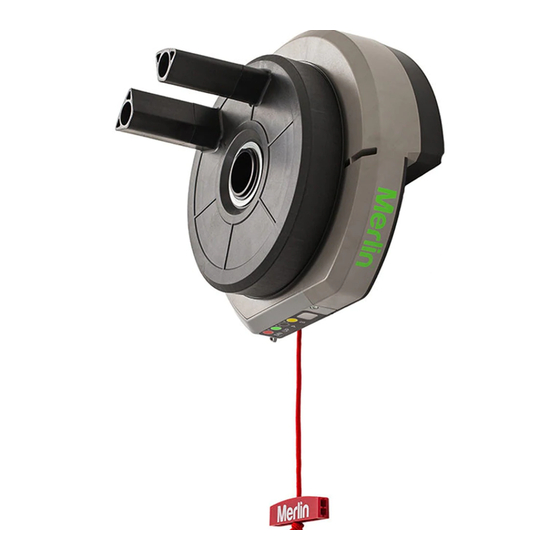
Summary of Contents for Merlin WeatherDrive MR550EVO
- Page 1 gomerlin.com.au gomerlin.co.nz MR550EVO Rolling Garage Door Opener Installation and Operating Instructions Owners Copy: Please keep these instructions for future reference This manual contains IMPORTANT SAFETY information DO NOT PROCEED WITH THE INSTALLATION BEFORE READING THOROUGHLY...
- Page 2 MUST BE AVAILABLE when using the Key Lockable Feature. * This Merlin Unit is rated to IP34 and has a UV stabilizer added, however, to ensure the best operation of the opener the installer should ensure that it is protected from the elements.
- Page 3 IP Rating Chart Protection of persons and protection of equipment indicated by the IP code. Protection provided by enclosures for electrical equipment is indicated by the IP codes two: CHARACTERISTIC NUMERALS The rst numeral indicates protection of persons against The second numeral indicates access to hazardous parts, protection of equipment against and protection of equipment...
-
Page 4: Table Of Contents
START BY READING THESE IMPORTANT SAFETY INSTRUCTIONS WARNING • Failure to comply with the following instructions may result in serious personal injury or property damage. • Read and follow all instructions carefully. • The garage door opener is designed and tested to offer safe service provided it is installed and operated in strict accordance with the instructions in this manual. -
Page 5: Carton Inventory
TOOLS REQUIRED CARTON INVENTORY 1. Instruction manual (this document) 1. Ladder 2. Stop collar 2. Adjustable wrench for U-bolts already installed 3. Clamp bracket on the door 4. Release handle, cord, keys and risk of entrapment 3. 8 mm socket, 10 mm socket and 13 mm extended card socket and socket wrench 5. -
Page 6: Prepare & Test The Door
TESTING THE DOOR Complete the following test to ensure your door is well balanced, and not sticking or binding: • Disable all locks and remove any ropes connected to the garage door. • Lift the door to about halfway and then release it. The door should remain spring balanced. -
Page 7: Control Panel
CONTROL PANEL 1. Terminal Block: used for external accessories (see chart below). Colour Polarity Comment No Function Push button Dry contact input for push button wired wall controls: White Common Common terminal for push button, IR Beams & accessory power: Grey IR Beams IR Beam Input: (pulsing type only) -
Page 8: Manual Release Key
THE RELEASE HANDLE & CORD DO NOT DISENGAGE THE OPENER TO MANUAL OPERATION WITH CHILDREN , PERSONS OR OTHER OBJECTS INCLUDING MOTOR VEHICLES WITHIN THE DOORWAY : (The door is under significant tension and if the door has developed a fault or incorrect tension, it may be unsafe and may fall rapidly.) The manual release mechanism enables the door to be manually operated during power outages or in an emergency. -
Page 9: Pinning The Door
PINNING THE DOOR Note: A ballooning door may delay the safety reversal response and can compromise garage door security. Free curtain Ballooning Add fasteners here • To remedy any ballooning place self tapping metal screws or rivets where the curtain leaves the roll. Secure these through the curtain into the drum wheel at each end of the roll. -
Page 10: Installation Procedure
INSTALLATION PROCEDURE Do not allow people to walk under or around the door during the installation process as serious injury can occur. NOTE: The opener can be installed on either side of the door. The following instructions are for Rope RIGHT HAND INSTALLATIONS (as illustrated i.e. -
Page 11: Adjustment & Testing
Courtesy light: during the programming sequence, the courtesy light will flash at half strength. NOTE: The WeatherDrive MR550EVO opener is factory configured for right hand installation. The opener will operate during this procedure. Make sure the door is clear of obstruction. - Page 12 TESTING THE SAFETY REVERSE SYSTEM The safety reverse system test is important. The garage door must reverse on contact with a 40 mm obstacle laid flat on the floor. Failure to properly adjust the opener may result in serious personal injury from a closing garage door.
-
Page 13: Install The Protector System
INSTALL THE PROTECTOR SYSTEM™ (IR BEAMS) OPTIONAL ACCESSORY NOTE: This accessory must be used for all installations where the closing force as measured on the bottom of the door is over 400 N (40 kgf). After the opener has been installed and adjusted, the Protector System™... -
Page 14: Button
If adding a new wall control, program into the opener before mounting the unit as detailed in the “Wireless Programming” section. TRAVEL SPEED (OPTIONAL) There are two travel speeds available for this opener. (Regular and Slow speed) The WeatherDrive MR550EVO has been factory set for regular speed. Setting the SLOW SPEED: Flash DN UP... -
Page 15: Standby Mode
STANDBY MODE (OPTIONAL) The WeatherDrive MR550EVO has been factory set for Low Standby mode (sub 1 watt usage). This will deliver the lowest possible standby power. The Flash External Accessory Power is turned OFF in this mode, NORMAL DN UP... -
Page 16: Control Panel E-Lock
CONTROL PANEL E-LOCK (OPTIONAL) The WeatherDrive MR550EVO has been factory set with the Control Panel buttons UNLOCKED. After all the Installation and programming processes are complete, the Control Panel buttons can be locked, and all the coded transmitters will remain active. -
Page 17: Wireless Programming
WIRELESS PROGRAMMING (OPTIONAL ACCESSORIES) Activate the opener only when door is in full view, free of obstruction and properly adjusted. No one should enter or leave garage while door is in motion. Do not allow children to operate push button(s) or remote(s). Do not allow children to play near the door. NOTE: The transmitter(s) supplied with your opener are preprogrammed by the factory. -
Page 18: Operating Your Opener
OPERATION OF YOUR OPENER CARE OF YOUR OPENER When properly installed, your opener will operate with Your opener can be activated by any of the following minimal maintenance. The opener does not require devices: additional lubrication. Limit and Force Settings: These settings must be •... -
Page 19: Accessories & Wiring
6. Model E945M 3 Channel mini transmitter NOTE: Use of any Chamberlain Group accessories are approved to use with this opener. This includes genuine Merlin accessories. Generic compatible accessories are NOT approved for use with this opener TYPICAL WIRING DIAGRAM WEATHERDRIVE MR550EVO NOTE: The terminal block is weather protected by a rubber grommet. -
Page 20: Spare Parts
SPARE PARTS - Information for Service Personnel 002A1868 If the supply cord is damaged, it must be replaced by the manufacturer, its service agent or similarly qualified persons 002A1865 in order to avoid hazard. 002A1871 002A1870 002A1874 002A1867 002A1869 002A1872 002A1864 002A1873 002A1866... -
Page 21: Troubleshooting
TROUBLESHOOTING 9. The opener strains to operate door: • The door may be out of balance or the springs may 1. The opener will not operate from either the be broken. Close the door and use the manual UP/DOWN ACTIVATION button or the transmitters : release to disconnect the door. -
Page 22: Diagnostic Chart
DIAGNOSTIC CHART Your garage door opener is programmed with self-diagnostic capabilities. The indicator LEDʼs 1 & 3 on the control panel will flash a number of times to indicate a fault code exists. DIAGNOSTIC CODE SYMPTOM POSSIBLE RESOLUTION LED 1 LED 3 The garage door opener will not Safety sensors are open circuit or wires may be cut. -
Page 23: Warranty
What is covered excessive use or conditions other than normal domestic use; Chamberlain warrants to the original purchaser of the Merlin WeatherDrive 5 problems with, or relating to, the garage door or garage door hardware, MR550EVO Roller Door Opener (Unit) that all parts of the Unit, other than... - Page 24 Warranty Registration Warranty Registration To validate your warranty you must complete To validate your warranty you must complete the registration form online at: the registration form online at: gomerlin.com.au/warranty gomerlin.com.au/warranty gomerlin.co.nz/warranty gomerlin.co.nz/warranty Trademark of The Chamberlain Group, Inc. ® Registered Trademark of The Chamberlain Group, Inc. ©...
Need help?
Do you have a question about the WeatherDrive MR550EVO and is the answer not in the manual?
Questions and answers
is remote C945 compatible to this model MR550EVO
No, the C945 remote is not compatible with the Merlin MR550EVO model.
This answer is automatically generated