Table of Contents
Advertisement
www.merlingo.com
www.chamberlainanz.com
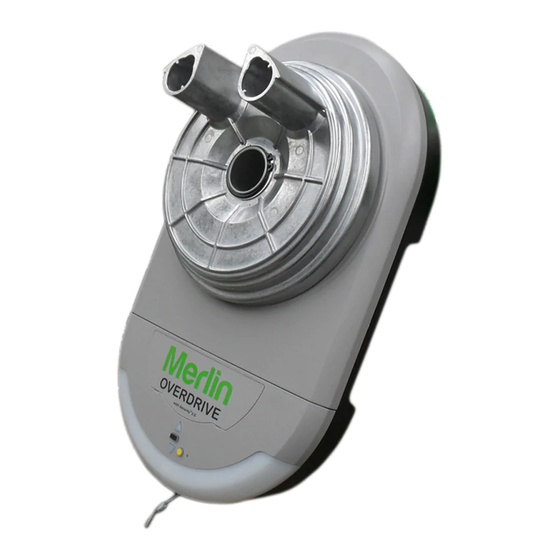
MRC950
professional
MRC950
Light Commercial Rolling Door Opener
Installation and Operating Instructions
Owners Copy: Please keep these instructions for future reference
This manual contains IMPORTANT SAFETY information
DO NOT PROCEED WITH THE INSTALLATION BEFORE READING THOROUGHLY
Advertisement
Table of Contents

Related Manuals for Merlin MRC950


Summary of Contents for Merlin MRC950
- Page 1 MRC950 professional MRC950 Light Commercial Rolling Door Opener Installation and Operating Instructions Owners Copy: Please keep these instructions for future reference This manual contains IMPORTANT SAFETY information DO NOT PROCEED WITH THE INSTALLATION BEFORE READING THOROUGHLY...
- Page 2 IMPORTANT Chain reduction assemblies that may interfere with the safe and proper operation of the MRC950 must be removed. All hand chains must be removed prior to fitting the MRC950.
-
Page 3: Table Of Contents
START BY READING THESE IMPORTANT SAFETY INSTRUCTIONS WARNING • Failure to comply with the following instructions may result in serious personal injury or property damage. • Read and follow all instructions carefully. • The door opener is designed and tested to offer safe service provided it is installed and operated in strict accordance with the instructions in this manual. -
Page 4: Carton Inventory
TOOLS REQUIRED CARTON INVENTORY 1. Instruction manual (this document) 1. Ladder or work platform (not shown) 2. Stop collar 2. Adjustable wrench for U-bolts already installed 3. Clamp bracket on the door 4. Release handle, cord and risk of entrapment card 3. - Page 5 THE RELEASE HANDLE & CORD • Thread one end of the rope through the hole in the top www.chamberlainanz.com MRC950 of the red release handle so that “NOTICE” reads right side up as shown. • Secure with an overhand knot at least 25mm from the professional end of the rope to prevent slipping.
- Page 6 OPERATING THE MANUAL RELEASE www.chamberlainanz.com MRC950 To disengage the opener professional Pull the release cord down firmly, (opener will make a clicking noise). To re-engage the opener Pull the release cord down firmly, Pull down (opener will make a clicking noise).
-
Page 7: Connect Electric Power
INSTALLATION PROCEDURE Do not allow people to walk under or around the door during the installation process as serious injury can occur. NOTE: The opener can be installed on either side of the door. The following instructions are for Rope RIGHT HAND INSTALLATIONS (as illustrated i.e. -
Page 8: Installation
NOTE: The MRC950 opener is factory configured for right hand installation. The opener will operate during this procedure. Make sure the door is clear of obstruction. - Page 9 SETTING THE FORCE The force, as measured on the closing edge of the door, should not exceed 600N (60kgf). If the closing force is Press twice professional measured to more than 600N, a safety reversing edge or FLASHING similar device must be used. orange LED •...
-
Page 10: Install The Protector
INSTALL THE PROTECTOR SYSTEM™ (IR BEAMS) OPTIONAL ACCESSORY NOTE: This accessory must be used for all installations where timer-to-close is enabled. After the opener has been installed and adjusted, the Protector System™ accessory can be installed. IR Beams must be installed Instructions are included with this accessory. -
Page 11: Installing Cm128 Wireless Wall Button
• Press and release the “LRN” button. LRN Press LRN • The courtesy LEDs will flash once. • Ensure the door is clear of obstruction, then test the transmitter. www.chamberlainanz.com MRC950 Release LRN button when professional Courtesy LEDs Deleting ALL transmitter codes flashes once... - Page 12 Do not allow children to play near the door. Wireless Keypad C840 MRC950 Using the “LRN” Button: 1. Press and release the “LRN” button (1) on the opener, the orange LED will light.
-
Page 13: Special Features
SPECIAL FEATURES (OPTIONAL ACCESSORIES) 1. Solenoid roller door lock (SRDLK01) 2. 24VDC power output for external devices 3. Voltage free door monitoring output 4. The Protector System IR Beams - C77 5. Motion detecting control panel - C98 6. Standby Power Unit (battery backup CM475) 7. -
Page 14: Spare Parts
SPARE PARTS 001A6621 041A6811-1 041B0029 If the supply cord is damaged, it must be replaced by the manufacturer, its service agent or similarly qualified persons in order to avoid hazard. 041B0603 041D6637 001A6528 041A6815 041A6814-1 001B6451-3S 041A6778-2 041A6811-1 Mount plate sub assembly (including motor) 041B0029 Sungear kit - Aluminium 041B0603... -
Page 15: Accessories & Wiring
14. Model SRDLK01 Solenoid roller door lock 7. Model C379 Wireless finger print access system 8. Model C98 Motion detecting control panel ENROLL SEND ENROLL PASS FAIL READY RETRY TYPICAL WIRING DIAGRAM MRC950 white External Device to alarm panel or monitoring 24vdc device white/black white... -
Page 16: Diagnostic Chart
• Turn the power off and remove the SPU if installed. Over current • Turn power back on and plug the SPU back in if installed. If opener fails to operate correctly after resetting contact your Chamberlain Merlin Professional Dealer. Symptom: Opener will not open or close the door 10 to 15 FLASHES •... -
Page 17: Troubleshooting
TROUBLESHOOTING • Repeat the limit and force setting in section 10 &11. Repeat safety reverse test after adjustments. 1. The opener will not operate from either the 9. The opener strains to operate door: ACTIVATION button or the transmitters : •... -
Page 18: Care Of Your Opener
• The optional Protector System™ uses an invisible beam which, when broken by an obstruction, causes a closing door to open and prevents an open door from closing. It SPECIFICATIONS MRC950 is STRONGLY RECOMMENDED for applications where young children may be present. -
Page 19: Warranty
8 use of sungear extension poles are used. ® Merlin MRC950 Roller Door Opener (Unit) that all parts of the Unit, other than remote controlled transmitters and accessories, globes and batteries, NB: A General Purpose Outlet (GPO) ie: power point must be supplied by the are free from defects in materials and workmanship for a period of 24 months consumer as this electrical fitting does not form a part of the Unit (opener). - Page 20 Trademark of The Chamberlain Group, Inc. ® Registered Trademark of The Chamberlain Group, Inc. © 2011 The Chamberlain Group, Inc 114A4200F...
Need help?
Do you have a question about the MRC950 and is the answer not in the manual?
Questions and answers