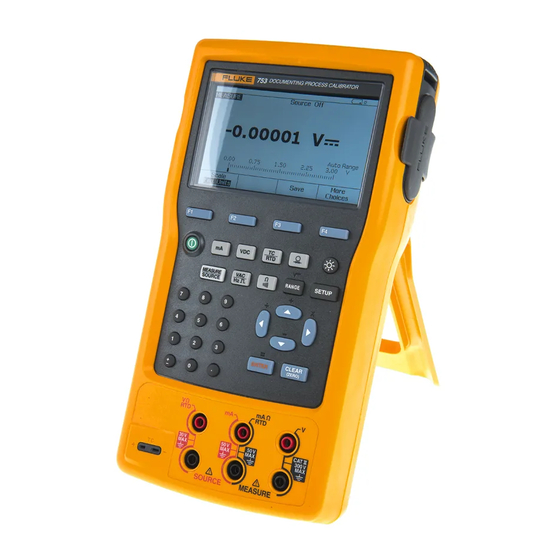
Fluke 753 User Manual
Documenting process calibrator
Hide thumbs
Also See for 753:
- User manual (130 pages) ,
- Calibration manual (52 pages) ,
- Getting started (22 pages)
Table of Contents
Advertisement
Quick Links
Download this manual
See also:
User Manual
753/754
Documenting Process Calibrator
Users Manual
July 2011 Rev. 1, 8/12
© 2011-2012 Fluke Corporation. All rights reserved. Specifications are subject to change without notice.
All product names are trademarks of their respective companies.
GlobalTestSupply
Find Quality Products Online at:
www.
.com
sales@GlobalTestSupply.com
Advertisement
Table of Contents

Related Manuals for Fluke 753


Summary of Contents for Fluke 753
- Page 1 753/754 Documenting Process Calibrator Users Manual July 2011 Rev. 1, 8/12 © 2011-2012 Fluke Corporation. All rights reserved. Specifications are subject to change without notice. All product names are trademarks of their respective companies. GlobalTestSupply Find Quality Products Online at: www.
- Page 2 LIMITED WARRANTY AND LIMITATION OF LIABILITY This Fluke product will be free from defects in material and workmanship for three years from the date of purchase. This warranty does not cover fuses, disposable batteries, or damage from accident, neglect, misuse, alteration, contamination, or abnormal conditions of operation or handling.
-
Page 3: Table Of Contents
Table of Contents Title Page Introduction ........................1 How to Contact Fluke ..................... 1 Safety Information ......................2 Standard Equipment....................... 6 Functions ........................9 Get Started ........................11 Operation Features ......................13 Input and Output Jacks ....................13 Buttons ........................15 Display ........................ - Page 4 753/754 Users Manual Preserve Battery Life ....................25 The Battery Charger ....................25 Display Languages ......................26 Display Intensity......................26 Date and Time ....................... 26 The Backlight ......................... 28 Personalize the Product ....................28 Measure Mode ....................... 29 Measurement Ranges ....................29 Electrical Parameter Measurement ................
- Page 5 Contents (continued) Source Scale ......................61 Linear-Responding Transmitters ................61 Square-Root Process Variables ................61 Step and Ramp the Output Value ................62 Manual Step Use ....................62 Auto Step Use ....................... 62 Ramp the Output ....................63 Simultaneous Measure/Source ..................66 Process Instrument Calibration ..................
- Page 6 753/754 Users Manual Battery Replacement ....................101 Clean the Product ..................... 101 Calibration Data ......................102 In Case of Difficulty ....................102 Service Center Calibration or Repair ................ 102 User-Replaceable Parts ....................102 Accessories ........................104 Specifications ........................ 106 General Specifications ....................106 Environmental Specifications ..................
- Page 7 List of Tables Table Title Page Symbols ..........................4 Summary of Source and Measure Functions ................ 10 Input/Output Jacks and Connectors ..................13 Buttons ..........................16 Elements of a Typical Display ....................20 Typical Battery Life ........................ 23 Thermocouple Types Accepted ..................... 37 RTD Types Accepted ......................
- Page 8 753/754 Users Manual GlobalTestSupply Find Quality Products Online at: www. .com sales@GlobalTestSupply.com...
- Page 9 List of Figures Figure Title Page Standard Equipment ......................7 Jumper Connections ......................12 Measure/Source Example ..................... 12 Input/Output Jacks and Connectors ..................14 Buttons ..........................15 Elements of a Typical Display ....................19 Stand Use and Strap Attachment ..................21 Battery Removal and Charger Use ..................
- Page 10 753/754 Users Manual Correct Jumper Use ......................41 Temperature Measurement with an RTD ................42 Electrical Source Connections ....................47 Connections fo Simulate a 4 to 20 mA Transmitter ............... 49 Connections to Supply Loop Power ..................51 Connections to Source Pressure ..................54 Connections to Simulate a Thermocouple ................
- Page 11 Contents (continued) Monitor AC Line Voltage and Frequency ................90 Current-to-Pressure (I/P) Transmitter Calibration ..............91 Output Current of a Transmitter Measurement ..............92 Precision Resistor Measurement ................... 93 Resistance Source ........................ 93 Checking a Switch ......................... 94 Tachometer Examination ....................... 94 Analog and HART Pressure Transmitter Connection ............
- Page 12 753/754 Users Manual GlobalTestSupply Find Quality Products Online at: www. .com sales@GlobalTestSupply.com...
-
Page 13: Introduction
Introduction The 753 and 754 Documenting Process Calibrators (the Product) are battery-powered, hand-held instruments that measure and source electrical and physical parameters. In addition, the 754 supplies basic HART communicator functions when used with HART-capable transmitters. See the 754 HART Mode Users Guide for instructions on how to use the HART communication feature. -
Page 14: Safety Information
753/754 Users Manual • Safety Information Limit operation to the specified measurement category, voltage, or A Warning identifies conditions and actions that pose amperage ratings. hazards to the user; a Caution identifies conditions and • actions that may damage the Product or the equipment Do not exceed the Measurement Category under test. - Page 15 Documenting Process Calibrators Safety Information • • Connect the common test lead before the Do not use test leads if they are damaged. live test lead and remove the live test lead Examine the test leads for damaged before the common test lead. insulation, exposed metal, or if the wear •...
-
Page 16: Symbols
Directive Annex I, this product is classed as category 9 "Monitoring and Control Instrumentation” product. Do not dispose of this product as unsorted municipal waste. Go to Fluke’s website for recycling information. GlobalTestSupply Find Quality Products Online at: www. .com... - Page 17 Documenting Process Calibrators Safety Information Table 1. Symbols (cont.) Symbol Meaning Symbol Meaning Application around and removal from HAZARDOUS LIVE conductors is Conforms to relevant Australian standards. permitted. Double insulated German certifying body. CAT II equipment is designed to protect against transients from energy-consuming equipment supplied from CAT II the fixed installation, such as TVs, PCs, portable tools, and other household appliances.
-
Page 18: Standard Equipment
Battery with integrated charger/power supply and HART communications cable (754) international adapters • Calibration Manual (available from Fluke’s website) • Printed multilingual 753/754 Getting Started Manual • Sample DPCTrack2 application software • 753/754 Manual CD containing multilingual Users • NIST-traceable Certificate of Calibration Manuals •... - Page 19 Documenting Process Calibrator Standard Equipment TC Cap AC280 SureGrip Hook Clip Set (2 Red and 2 Black) Jumper Fluke-75X-Stackable Test Lead Set (3 Red and 3 Black) 754-8016, Alligator Clip Set (3 Red and 3 Black) Strap TP220-1 Test Probe (3 Red and 3 Black) gks01f.eps...
- Page 20 753/754 Users Manual Battery Charger/Universal Power Supply USB Cable Lithium Ion Battery Pack 753/754 Getting Started DPCTrack2 HART Communication Cable 753/754 Manuals gks02f.eps Figure 1. Standard Equipment (cont) GlobalTestSupply Find Quality Products Online at: www. .com sales@GlobalTestSupply.com...
-
Page 21: Functions
Automatic calibration procedures for transmitters and from one ramp increment to the next. limit switches when you use split screen For performance testing and calibration instructions, MEASURE/SOURCE mode. download the 753/754 Calibration Manual from Fluke’s website. GlobalTestSupply Find Quality Products Online at: www. -
Page 22: Summary Of Source And Measure Functions
753/754 Users Manual Table 2. Summary of Source and Measure Functions Function Measure Source Volts dc 0 V to ±300 V 0 V to ±15 V (10 mA max) Volts ac 0.27 V to 300 V rms, 40 Hz to 500 Hz No sourcing 0.1 V to 30 V p-p sine wave, or 15 V peak... -
Page 23: Get Started
Documenting Process Calibrator Get Started Connect voltage output to the voltage input. To do this Get Started connect the left pair of jacks (V Ω RTD SOURCE) to Warning the right pair of jacks (V MEASURE). See Figure 2. To prevent possible electrical shock, fire, or Push o to turn on the Product. - Page 24 753/754 Users Manual gks03f.eps Figure 2. Jumper Connections gks04s.bmp Figure 3. Measure/Source Example GlobalTestSupply Find Quality Products Online at: www. .com sales@GlobalTestSupply.com...
-
Page 25: Operation Features
Documenting Process Calibrator Operation Features Operation Features Input and Output Jacks Figure 4 shows the input and output jacks and connectors. Table 3 explains their use. Table 3. Input/Output Jacks and Connectors Name Description HART jack (754 only) Connects the Product to HART devices. ... - Page 26 753/754 Users Manual gks05f.eps Figure 4. Input/Output Jacks and Connectors GlobalTestSupply Find Quality Products Online at: www. .com sales@GlobalTestSupply.com...
-
Page 27: Buttons
Documenting Process Calibrator Operation Features Buttons Figure 5 shows the Product buttons and Table 4 tells their functions. The softkeys are the four (F1-F4) blue buttons below the display. Softkey functions are defined by the labels that show above the softkey during operation. Softkey DOCUMENTING PROCESS CALIBRATOR labels and other display text are shown in this manual in bold type, for example, Choices. -
Page 28: Buttons
(754) (754) Toggles between HART communication mode and analog operation. In calculator mode, this key supplies the square root function. (753) (753) Adjusts the Range of the Product. GlobalTestSupply Find Quality Products Online at: www. .com sales@GlobalTestSupply.com... - Page 29 Documenting Process Calibrator Operation Features Table 4. Buttons (cont) Item Button Description Push or to increase display intensity. Push or to decrease intensity (seven levels). Make choices from lists on the display. , , , Increase or decrease the source level when using the step feature.
-
Page 30: Display
753/754 Users Manual • Display Measured Value: Shows the measured value in a Figure 6 and Table 5 show a typical display. The display selection of engineering units or percent of scale. shown is MEASURE mode. Near the top of the display is •... - Page 31 Documenting Process Calibrator Operation Features gks07c.eps Figure 6. Elements of a Typical Display GlobalTestSupply Find Quality Products Online at: www. .com sales@GlobalTestSupply.com...
-
Page 32: Elements Of A Typical Display
753/754 Users Manual Table 5. Elements of a Typical Display Item Description Time and Date Display HART Indicator Loop Power Indicator Battery Gauge Backlight Indicator Source Status Undamped (Unsettled) Indicator Custom Units Indicator ... -
Page 33: Strap And Stand
Documenting Process Calibrator Operation Features Strap and Stand After you unpack the Product, attach its carrying strap as shown in Figure 7. The straps can be adjusted as necessary to hang the Product on any sturdy support. Figure 7 also shows how to open the Stand to put the Product at an optimal sight angle for bench top use. -
Page 34: The Battery
Connect the battery charger to the mains battery. power outlet before the Product. • To charge the battery while it is inside the Product: Use only Fluke approved power adapters to charge the battery. Turn the Product OFF. • Keep cells and battery packs clean and Connect the battery charger to the Product and keep it dry. -
Page 35: Battery Charge Level
Documenting Process Calibrator The Battery Remove the battery. Battery Life The battery gauge bar graph is shown on the upper Connect the battery charger to the input. Outside of the right of the display. Product, the battery will charge in 5 hours. Table 6 shows the typical operation time for a new, fully- Note charged battery. -
Page 36: Users Manual
753/754 Users Manual gks9f.eps Figure 8. Battery Removal and Charger Use GlobalTestSupply Find Quality Products Online at: www. .com sales@GlobalTestSupply.com... -
Page 37: Preserve Battery Life
Auto Battery Save operates the same when the To avoid damage to the Product, use only the battery charger is used. Battery that comes with the Product, Fluke model BP7240, part number 4022220. To turn on the Auto Battery Save feature: Where ac power is available, the battery charger can be used to conserve battery power and energize the Product. -
Page 38: Display Languages
753/754 Users Manual Display Languages Display Intensity The Product shows information in five languages: There are two ways to increase display intensity: • English • Push . There are three levels of intensity when using this button. • European French •... - Page 39 Documenting Process Calibrator Date and Time To set the time and date displays: Push s. Push the Next Page softkey. See Figure 9. gks39s.bmp Figure 10. Edit the Date Format Push or to move the cursor to the necessary date format.
-
Page 40: The Backlight
753/754 Users Manual When the backlight dims, the Product also beeps. The Backlight Push to change the backlight intensity from dim to bright Personalize the Product and back again. shows at the top of the display when the Alphanumeric identifiers can be put into the Product to be backlight is active. -
Page 41: Measure Mode
Documenting Process Calibrator Measure Mode The ID string is shown at the bottom of the boxed area. Measure Mode To erase a character, push the Back Space softkey. To Note erase the complete string, push . Information To get the best noise rejection and highest recorded in the ID string is recorded with all accuracy performance when you measure, use the measurements stored in memory. -
Page 42: Electrical Parameter Measurement
753/754 Users Manual Electrical Parameter Measurement When the Product is turned on, it is in the dc voltage measurement function. Figure 12 shows electrical measurement connections. To select an electrical measurement function from SOURCE or MEASURE/SOURCE mode, first push for MEASURE mode: Push ... - Page 43 Documenting Process Calibrator Measure Mode – gks10f.eps Figure 12. Electrical Measurement Connections GlobalTestSupply Find Quality Products Online at: www. .com sales@GlobalTestSupply.com...
-
Page 44: Continuity Test
When you do a continuity test, the beeper sounds and Many ranges and types of pressure modules are available from Fluke. See “Accessories”. Before you use a pressure Short is shown on the display when the resistance between module, read its instruction sheet. The modules are different the Ω... - Page 45 Documenting Process Calibrator Measure Mode Caution To prevent possible damage to the Product or Gage Differential to equipment under test: High • Never apply more than 10 ft.-lb. of torque 700 P 06 PRESSURE MODULE 700 P 04 between the pressure module fittings, or PRESSURE MODULE RANGE 100 PSIG...
- Page 46 753/754 Users Manual Connect a pressure module to the Product as shown in If necessary, the pressure display units can be changed Figure 14. The threads on the pressure modules accept to psi, mHg, inHg, inH2O, ftH2O, mH2O, bar, Pa, standard ¼...
- Page 47 Documenting Process Calibrator Measure Mode Isolation Valve Gage Module Differential Module Tank gks12c.eps Figure 14. Pressure Measurement Connections GlobalTestSupply Find Quality Products Online at: www. .com sales@GlobalTestSupply.com...
-
Page 48: Temperature Measurement
753/754 Users Manual If necessary, change between °C, °F, °R, and °K Temperature Measurement Temperature Units as follows: Thermocouple Use Push s. The Product supports thirteen standard thermocouples, Push the Next Page softkey twice. each identified with an alpha character: E, N, J, K, T, B, R, S, C, L, U, XK, or BP. -
Page 49: Thermocouple Types Accepted
Documenting Process Calibrator Measure Mode Table 7. Thermocouple Types Accepted Positive Lead (H) Positive Lead Negative Lead Specified Range Color Type Material Material (°C) ANSI Chromel Purple Violet Constantan -250 to 1000 Ni-Cr-Si Orange Pink Ni-Si-Mg -200 to 1300 Iron White Black Constantan... - Page 50 753/754 Users Manual Process Temperature Warning 30 V maximum to TC Miniplug gks12f.eps Figure 15. Temperature Measurement with a Thermocouple GlobalTestSupply Find Quality Products Online at: www. .com sales@GlobalTestSupply.com...
-
Page 51: Resistance-Temperature Detectors (Rtds)
Documenting Process Calibrator Measure Mode Resistance-Temperature Detectors (RTDs) The Product accepts RTD types shown in Table 8. RTDs are characterized by their resistance at 0 °C (32 °F), which is called is 100 Ω. A large number of RTDs come in a three-terminal configuration. The the “ice point”... - Page 52 753/754 Users Manual To measure temperature where an RTD input is used: Caution To prevent possible damage to the Product, do If necessary, push for MEASURE mode. not force a dual banana plug between any two Push t. jacks in the horizontal orientation. Doing so will damage the jacks.
- Page 53 Documenting Process Calibrator Measure Mode If necessary, change between °C, °F, K, and °R temperature units in Setup: Push s. Push the Next Page softkey twice. Push and to move the cursor to Temperature Units. Push or the Choices softkey to choose a setting for that parameter.
- Page 54 753/754 Users Manual Wire Wire Wire gks15f.eps Figure 17. Temperature Measurement with an RTD GlobalTestSupply Find Quality Products Online at: www. .com sales@GlobalTestSupply.com...
-
Page 55: Measurement Scale
Documenting Process Calibrator Measure Mode Measurement Scale Square-Law Process Variables This feature scales measurements in accordance with a When you select √ within scaling, the Product takes the applicable process instrument’s response. Percent of scale square root of its input and shows the measurement in works for linear-output transmitters or square-law percent. -
Page 56: Measure Or Source With Custom Units
The measurement or source display can be setup to show The Fluke 700-IV Current Shunt is designed specifically for custom units. To do this, select a function, for example mV use with the 700 Series Documenting Process Products. -
Page 57: Damping Measurements
until SOURCE is shown. The Product damping method is a running average of the last eight must be in SOURCE mode to change any of the SOURCE measurements. Fluke recommends leaving damping on. parameters. Turning damping off may be useful when measurement... - Page 58 753/754 Users Manual Note To set the output value in the present source function, push then enter the desired value and push . If sourcing frequency, respond when the Product asks you to select a zero-symmetric sine or To turn off sourcing completely, push twice.
- Page 59 Documenting Process Calibrator Source Mode Common Common gks16f.eps Figure 18. Electrical Source Connections GlobalTestSupply Find Quality Products Online at: www. .com sales@GlobalTestSupply.com...
-
Page 60: To 20 Ma Transmitter Simulation
753/754 Users Manual 4 to 20 mA Transmitter Simulation The Product can be configured as a load on a current loop through the SOURCE mA function. In SOURCE mode, when is pressed, the display prompts to select Source mA or Simulate Transmitter. When you Source mA the... - Page 61 Documenting Process Calibrator Source Mode DOCUMENTING PROCESS CALIBRATOR Loop Power Supply – gks17c.eps Figure 19. Connections to Simulate a 4 to 20 mA Transmitter GlobalTestSupply Find Quality Products Online at: www. .com sales@GlobalTestSupply.com...
-
Page 62: Supply Loop Power
753/754 Users Manual Connect the Product in series with the instrument current Supply Loop Power loop as Figure 20 shows. To supply loop power: The Product supplies loop power at 26 V dc through an internal series resistance of 250 Ω. The setting supplies Push s for Setup mode. - Page 63 Documenting Process Calibrator Source Mode DOCUMENTING PROCESS CALIBRATOR TEST DC PWR – + – – gks18c.eps Figure 20. Connections to Supply Loop Power GlobalTestSupply Find Quality Products Online at: www. .com sales@GlobalTestSupply.com...
-
Page 64: Source Pressure
Many ranges and types of pressure modules are available module. from Fluke, see “Accessories”. Before you use a pressure • Always apply correct torque between the module, read its instruction sheet. The modules are different... - Page 65 Documenting Process Calibrator Source Mode Connect a pressure module and pressure source to the Pressurize the pressure line with the pressure source to Product as Figure 21 shows. The threads on the the necessary level as shown on the display. pressure modules accept ¼...
- Page 66 753/754 Users Manual Pressure Module Hand Pump gks19c.eps Figure 21. Connections to Source Pressure GlobalTestSupply Find Quality Products Online at: www. .com sales@GlobalTestSupply.com...
-
Page 67: Thermocouple Simulation
Documenting Process Calibrator Source Mode Push t, and then push to select the TC sensor Thermocouple Simulation type. The display asks you to select the thermocouple Note type. See “Temperature Measurement” for a table of Push or followed by to select the necessary thermocouple types that are supported by the thermocouple type. -
Page 68: Rtd Simulation
753/754 Users Manual RTD Simulation Note See Table 8 for data about RTD (Resistance- Temperature Detector) types compatible with the Product. Connect the Product to the instrument under test as shown in Figure 23. The figure shows connections for two, three, or four-wire transmitters. - Page 69 Documenting Process Calibrator Source Mode DOCUMENTING PROCESS CALIBRATOR TEST DC PWR Color depends – on type of TC TC Miniplug – gks20c.eps Figure 22. Connections to Simulate a Thermocouple GlobalTestSupply Find Quality Products Online at: www. .com sales@GlobalTestSupply.com...
- Page 70 753/754 Users Manual gks21f.eps Figure 23. Connections to Simulate an RTD GlobalTestSupply Find Quality Products Online at: www. .com sales@GlobalTestSupply.com...
-
Page 71: Source Temperature With A Hart Scientific Drywell
Documenting Process Calibrator Source Mode 10 seconds, double check your cable connections and Source Temperature with a Hart Scientific Drywell drywell configuration. The Product can source temperature using a Hart Scientific Drywell. Many models are supported. If a dual well is recognized, a menu will pop up that allows you to select a "hot"... - Page 72 753/754 Users Manual Null Modem Drywell Fluke Interface Cable Drywell (DB9) Fluke 3.5 mm Interface Cable Fluke Drywell (3.5 mm) gks99f.eps Figure 24. Source Temperature with Drywell GlobalTestSupply Find Quality Products Online at: www. .com sales@GlobalTestSupply.com...
-
Page 73: Source Scale
Documenting Process Calibrator Source Mode Note Push the Done softkey. When the Product is set to display temperatures Percent of scale stays in effect until you change to a in Kelvin, the drywell readout will show Celsius, different source function or until the Scale softkey is and when the Product shows Rankine, the pushed and you select a different scale mode. -
Page 74: Step And Ramp The Output Value
753/754 Users Manual Square root percent of scale is in effect until the Product To step the source value in % of scale, set the % of is changed to a different source function or the Scale scale value as given before in “Measurement Scale”. -
Page 75: Ramp The Output
Documenting Process Calibrator Source Mode The display tells you to select values for these Ramp the Output When ramped, the source sweeps up or down in value. parameters: Use the ramp feature to check a switch or alarm, or when •... - Page 76 753/754 Users Manual To ramp (for example, sweep the source): See the applicable section earlier in this manual (for example, “Source Electrical Parameters”) and connect the Product to the test circuit. To automatically stop the Ramp function if a trip...
- Page 77 Documenting Process Calibrator Source Mode DOCUMENTING PROCESS CALIBRATOR Trip Relay Voltage Trip Detect Output – Input 4 – 20 mA – Source mA gks22c.eps Figure 26. Check a Relay Output Trip Alarm GlobalTestSupply Find Quality Products Online at: www. .com sales@GlobalTestSupply.com...
-
Page 78: Simultaneous Measure/Source
753/754 Users Manual Table 9 shows the functions that can be used at the same Simultaneous Measure/Source time when Loop Power is disabled. Table 10 shows the Use the MEASURE/SOURCE mode to calibrate or emulate functions that can be used at the same time when Loop a process instrument. -
Page 79: Simultaneous Measure/Source Functions With Loop Power Disabled
Documenting Process Calibrator Simultaneous Measure/Source Table 9. Simultaneous MEASURE/SOURCE Functions with Loop Power Disabled Source Function Measure Function Ω dc V Freq Pressure • • • • • • • dc V • • • • • • • • •... -
Page 80: Simultaneous Measure/Source Functions With Loop Power Enabled
753/754 Users Manual Table 10. Simultaneous MEASURE/SOURCE Functions with Loop Power Enabled Source Function Measure Function Ω dc V Freq Pressure • • • • • • dc V • • • • • • • • • • •... -
Page 81: Process Instrument Calibration
Documenting Process Calibrator Process Instrument Calibration Here, the Product simulates the output of a thermocouple Process Instrument Calibration and measures the current regulated by the transmitter. Other transmitters use this same procedure. Go back to Note MEASUREMENT or SOURCE mode and change the To calibrate a HART-capable transmitter using the operation parameters before you push As Found. - Page 82 753/754 Users Manual Push for MEASURE/SOURCE mode. The display The display changes to the screen shown in Figure 29. changes to the screen shown in Figure 28. gks44s.bmp Figure 29. Process Instrument Calibration Screen 2 gks42s.bmp Figure 28. Process Instrument Calibration Screen 11.
- Page 83 Documenting Process Calibrator Process Instrument Calibration DOCUMENTING PROCESS CALIBRATOR TEST DC PWR – – Original Circuit Wiring Power – Supply gks23c.eps Figure 30. Calibrate a Thermocouple Temperature Transmitter GlobalTestSupply Find Quality Products Online at: www. .com sales@GlobalTestSupply.com...
- Page 84 753/754 Users Manual 12. More delay time can be input for the process instrument 15. The Test Strategy is the number of test points and to become stable than the Product’s usual settling time which test points are performed rising and falling in (about 2 seconds).
- Page 85 Documenting Process Calibrator Process Instrument Calibration 17. Push the Done softkey to accept the calibration When a measurement is stable and recorded, the parameters. The display changes to the screen shown Product goes to the subsequent step. Because the in Figure 32. Product waits until the measurement becomes stable, the Auto Test works as necessary for instruments with built-in damping.
-
Page 86: Transmitter Adjustment
753/754 Users Manual In the results summary test, failures are highlighted. An Push the Adjust softkey. The Product sources 0 % of adjustment is necessary in this example because three span (100 °C in this example) and shows these tests show failures. The failures were outside the softkeys: ±0.5 % tolerance that was selected. -
Page 87: As Left" Test Run
Documenting Process Calibrator Process Instrument Calibration Unsettled measure or source values are highlighted. “As Left” Test Run This means that there was an unsettled value Proceed as follows to generate and record as left data for (g annunciator) when the measurement was taken. the thermocouple temperature transmitter that was adjusted. -
Page 88: Switch Calibration
753/754 Users Manual Select the √ instrument procedure in a menu after you push the As Found softkey. Switch Calibration Switch B The procedure to calibrate a switch also uses the As Found Open Switch B and As Left calibration templates. Select the 1 Pt. Switch or Setpoint 2 Pt. - Page 89 Documenting Process Calibrator Process Instrument Calibration To do a pressure switch test: The switch in this example Push to zero the pressure module. sets at a high limit of 10 psi. The set condition is a closed Push . switch contact.
- Page 90 753/754 Users Manual 16. Push to move through the choices to Set Trip 26. Push the Done softkey. Function to Trip Cont. 27. Push the As Left softkey to start the test again with the 17. Push the Done softkey.
-
Page 91: Transmitter Mode
Documenting Process Calibrator Transmitter Mode To set up the Product to emulate a transmitter: Transmitter Mode The Product can be set so that a varying input (MEASURE) Disconnect the control bus wires from the transmitter controls the output (SOURCE), like a transmitter. This is output (loop current or dc V control signal). -
Page 92: Memory Operations
753/754 Users Manual Push the applicable function key for the control output 15. To change the Transmitter mode parameters, push (for example, or ). If the transmitter is connected Change Setup, and do the procedure in step 13 again. - Page 93 Documenting Process Calibrator Memory Operations After you push Save, the Product keeps the information on To add information to the kept data, push the Continue the display and shows a kept result index number, the date softkey, the display asks you to record the instrument tag and time, and the percentage of memory available, as in identifier (Tag), instrument serial number (S/N), and Figure 36.
- Page 94 753/754 Users Manual Record alphanumeric characters into the highlighted field The display shows an alphanumeric entry window. See with the optional bar code reader or the Product buttons. Figure 38. To record alphanumeric characters using the Product buttons, push with the cursor on the necessary field to change (for example, Tag, above).
-
Page 95: Review The Memory
Documenting Process Calibrator Memory Operations Review the Memory Log Data Users can record a series of measurements for later upload Push the More Choices softkey until Review Memory is to a host computer that uses DPCTrack2 application shown, then push the Review Memory softkey to recall and software. -
Page 96: Duration Limits
753/754 Users Manual To log data: Table 11 gives an estimate of the limits for duration, assuming that no memory is being used for other purposes. If necessary, push for MEASURE mode. Push the More Choices softkey twice. Table 11. Duration Limits Push the Log softkey. - Page 97 Documenting Process Calibrator Memory Operations After the Product records the duration selection, the Caution display shows how much memory that duration will To prevent possible damage to the Product, use a completely charged battery and the consume. See the Memory Available percentage on appropriate duration, or use the battery charger the display.
-
Page 98: Record Min And Max Measurements
753/754 Users Manual 10. Note the LOG annunciator next to MEASURE. Push Record Min and Max Measurements You can set the display to record and show the maximum the Start Logging softkey to record data. (max) and minimum (min) readings. Min and Max readings 11. -
Page 99: Run A Preloaded Task
Documenting Process Calibrator The Calculator Run a Preloaded Task The Calculator Push the More Choices softkey until the Tasks softkey is For mathematical equations that involve the Product’s shown, then push Tasks to see the list of tasks source or measured value, use the Product’s built-in (procedures) downloaded from a host computer. -
Page 100: Save To And Recall From The Registers
753/754 Users Manual Save to and Recall from the Registers Use the Calculator to Set the Source Value When the Product is in calculator mode, the top half of the When you store to SOURCE, the Product shows a selection... - Page 101 Documenting Process Calibrator Quick Guide to Applications Measure V DOCUMENTING PROCESS CALIBRATOR DOCUMENTING PROCESS CALIBRATOR Circuit Ω 0 to 1V dc Input gks25c.eps gks26c.eps Figure 44.Voltage Drop Measurement Figure 43.Chart Recorder Calibration GlobalTestSupply Find Quality Products Online at: www. .com sales@GlobalTestSupply.com...
- Page 102 753/754 Users Manual Measure DOCUMENTING PROCESS CALIBRATOR gks27c.eps Figure 45. Monitor AC Line Voltage and Frequency GlobalTestSupply Find Quality Products Online at: www. .com sales@GlobalTestSupply.com...
- Page 103 Documenting Process Calibrator Quick Guide to Applications Measure Pressure Source mA DOCUMENTING PROCESS CALIBRATOR Loop Power Disabled Pressure Module gks28c.eps Figure 46. Current-to-Pressure (I/P) Transmitter Calibration GlobalTestSupply Find Quality Products Online at: www. .com sales@GlobalTestSupply.com...
- Page 104 753/754 Users Manual DOCUMENTING PROCESS CALIBRATOR Measure mA Loop Power Disabled TEST DC PWR – – Original Circuit Wiring Power – Supply gks29c.eps Figure 47. Output Current of a Transmitter Measurement GlobalTestSupply Find Quality Products Online at: www. .com sales@GlobalTestSupply.com...
- Page 105 Documenting Process Calibrator Quick Guide to Applications Measure Resistance DOCUMENTING PROCESS CALIBRATOR Source DOCUMENTING PROCESS CALIBRATOR Resistance Circuit gks30c.eps gks31c.eps Figure 48. Precision Resistor Measurement Figure 49. Resistance Source GlobalTestSupply Find Quality Products Online at: www. .com sales@GlobalTestSupply.com...
- Page 106 753/754 Users Manual Measure Measure Continuity Frequency DOCUMENTING PROCESS CALIBRATOR DOCUMENTING PROCESS CALIBRATOR gks32c.eps gks33c.eps Figure 50. Checking a Switch Figure 51. Tachometer Examination GlobalTestSupply Find Quality Products Online at: www. .com sales@GlobalTestSupply.com...
- Page 107 Documenting Process Calibrator Quick Guide to Applications Measure mA Source Pressure Loop Power Enabled Pressure Module Hand Pump gks34c.eps Figure 52. Analog and HART Pressure Transmitter Connection GlobalTestSupply Find Quality Products Online at: www. .com sales@GlobalTestSupply.com...
- Page 108 753/754 Users Manual Measure mA DOCUMENTING PROCESS CALIBRATOR Output – Input 0 – 1mV, 0 – 10mV, 0 – 100mV, 1 – 5V, 0 – 1V, 0 – 10V Output 4 – 20 mA Input – Source mV or V gks35c.eps...
- Page 109 Documenting Process Calibrator Quick Guide to Applications Measure Frequency DOCUMENTING PROCESS CALIBRATOR gks36c.eps Figure 54. Vortex Shedding Flowmeter Check GlobalTestSupply Find Quality Products Online at: www. .com sales@GlobalTestSupply.com...
- Page 110 753/754 Users Manual – 2-Wire RTD= 3-Wire RTD= 4-Wire RTD= gks60.eps Figure 55. HART and Analog RTD Transmitter Connections GlobalTestSupply Find Quality Products Online at: www. .com sales@GlobalTestSupply.com...
- Page 111 Documenting Process Calibrator Quick Guide to Applications – gks61.eps Figure 56. Analog and HART Thermocouple Transmitter Connections GlobalTestSupply Find Quality Products Online at: www. .com sales@GlobalTestSupply.com...
- Page 112 753/754 Users Manual gks43.eps Figure 57. Transmitter HART- Comm Only GlobalTestSupply Find Quality Products Online at: www. .com sales@GlobalTestSupply.com...
-
Page 113: Communication With A Pc
PC. A PC, Microsoft parts is available in the 75X Series Calibration Windows, USB cable (supplied), and Fluke DPCTrack2 Manual available from the Fluke website. application software, or a qualified Fluke partner’s software are required. See the DPCTrack2 Users Manual Battery Replacement for further instructions. -
Page 114: Calibration Data
Be sure to pack the Warning Product securely, using the original shipping container if it is available. See “How to Contact Fluke” and the Warranty To avoid possible electric shock or personal Statement. injury, do not use the Product if it operates abnormally. -
Page 115: Replacement Parts
Documenting Process Calibrator User-Replaceable Parts Table 12. Replacement Parts Item Fluke Part Number Adjustable Quick-Release Strap 3889532 Input/Output Jack Decal 3405856 Tilt Stand 3404790 BP7240 Battery 4022220 USB Cable 1671807 BC7240 Power Supply/Battery Charger 4022655 Lens Cover 3609579 Alligator Clip Set-Extended Tooth... -
Page 116: Accessories
753/754 Users Manual • C700 Hard Carrying Case Accessories The Fluke accessories listed below are compatible with • BP7240 Li-Ion Battery the Product. For more information about these • TL series test leads accessories and their prices, contact a Fluke representative. - Page 117 Documenting Process Calibrator Accessories • FLUKE-700P27 300 psi / 0.01 • FLUKE-700P07 500 psi/0.01 • FLUKE-700P08 1000 psi/0.1 • FLUKE-700P09 1500 psi/0.1 • FLUKE-700PA3 5 psi/0.0001 • FLUKE-700PA4 15 psi/0.001 • FLUKE-700PA5 30 psi/0.001 • FLUKE-700PA6 100 psi/0.01 • FLUKE-700PV3 -5 psi/0.0001 •...
-
Page 118: Specifications
753/754 Users Manual Specifications General Specifications All specifications apply from +18 °C to +28 °C unless stated otherwise. All specifications assume a 5-minute warmup period. Measurement specifications are valid only when Damping is turned on. When damping is turned off, or when the annunciator is shown, floor specifications are multiplied by 3. -
Page 119: Detailed Specifications
Documenting Process Calibrator Detailed Specifications Double Insulation Creepage and Clearance ....... Per IEC 61010-1 Installation Category ............. 300 V CAT II Design Standards and Compliance ........EN/IEC 61010-1:2010, CAN/CSA C22.2 No. 61010-1-04, ANSI/UL 61010- 1:2004 EMI, RFI, EMC ................ EN 61326-1:2006 RF Fields ................ -
Page 120: Dc Voltage Measurement
753/754 Users Manual DC Voltage Measurement % of Reading + Floor Range Resolution 1 Year 2 Year ±3.00000 V 0.00001 V 0.02 % + 0.00005 V 0.03 % + 0.00005 V 0.0001 V 0.02 % + 0.0005 V 0.03 % + 0.0005 V ±30.0000 V... -
Page 121: Dc Current Measurement
Documenting Process Calibrator Detailed Specifications DC Current Measurement % of Reading + Floor Range Resolution 1 Year 2 Year ±30.000 mA 1 μA 0.01 % + 5 μA 0.015 % + 7 μA ±100.00 mA 10 μA 0.01 % + 20 μA 0.015 % + 30 μA Maximum Input: 110 mA Maximum Burden Voltage: 420 mV at 22 mA... -
Page 122: Frequency Measurement
753/754 Users Manual Frequency Measurement Ranges Resolution 2 Year 1.00 Hz to 110.00 Hz 0.01 Hz 0.05 Hz 110.1 Hz to 1100.0 Hz 0.1 Hz 0.5 Hz 1.101 kHz to 11.000 kHz 0.001 kHz 0.005 kHz 11.01 kHz to 50.00 kHz 0.01 kHz... -
Page 123: Dc Current Source
Documenting Process Calibrator Detailed Specifications +DC Current Source % of Output + Floor Range/Mode Resolution 1 Year 2 Year 0.100 to 22.000 mA 1 μA 0.01 % + 3 μA 0.02 % + 3 μA Temperature Coefficient: 3 % of specified accuracy / °C (<18 °C or >28 °C) Source mA Compliance Voltage: 18 V maximum Source mA Open Circuit Voltage: 30 V maximum +DC Current Simulate (External Loop Power) -
Page 124: Frequency Sourcing
753/754 Users Manual Frequency Sourcing Specification Range 2 Year Sine Wave: 0.1 Hz to 10.99 Hz 0.01 Hz Square Wave: 0.01 Hz to 10.99 Hz 0.01 Hz Sine and Square Wave: 11.00 Hz to 109.99 Hz 0.1 Hz Sine and Square Wave: 110.0 Hz to 1099.9 Hz 0.1 Hz... -
Page 125: Temperature, Thermocouples
Documenting Process Calibrator Detailed Specifications Temperature, Thermocouples Measure °C Source °C Range °C Type 1 Year 2 Year 1 Year 2 Year -250 to -200 -200 to -100 -100 to 600 600 to 1000 -200 to -100 -100 to 900 900 to 1300 -210 to -100 -100 to 800... - Page 126 753/754 Users Manual Measure °C Source °C Range °C Type 1 Year 2 Year 1 Year 2 Year -20 to 0 0 to 100 100 to 1767 -20 to 0 0 to 200 200 to 1400 1400 to 1767 0 to 800...
- Page 127 Documenting Process Calibrator Detailed Specifications Measure °C Source °C Range °C Type 1 Year 2 Year 1 Year 2 Year -200 to 300 300 to 800 Sensor inaccuracies not included. Accuracy with external cold junction; for internal junction add 0.2 °C Resolution: 0.1 °C Temperature Scale: ITS-90 or IPTS-68, selectable (90 is default) Compensation: ITS-90 per NIST Monograph 175 for B,R,S,E,J,K,N,T;...
-
Page 128: Temperature, Resistance Temperature Detectors
753/754 Users Manual Temperature, Resistance Temperature Detectors Temperature, RTDs Degrees or % of Reading Measure °C Source °C Allowable Range °C Type (α) Excitation Source 1 Year 2 Year 1 Year 2 Year Current Current -200 to 100 0.07 °C 0.14 °C... -
Page 129: Loop Power
Documenting Process Calibrator Detailed Specifications Temperature, RTDs Degrees or % of Reading Measure °C Source °C Allowable Range °C Excitation Type (α) Source 1 Year 2 Year 1 Year 2 Year Current Current 10 Ω -100 to 260 0.2 °C 0.4 °C 3 mA 0.2 °C...
Need help?
Do you have a question about the 753 and is the answer not in the manual?
Questions and answers