Table of Contents
Advertisement
Quick Links
Advertisement
Table of Contents

Related Manuals for Jolimark DP750


Summary of Contents for Jolimark DP750
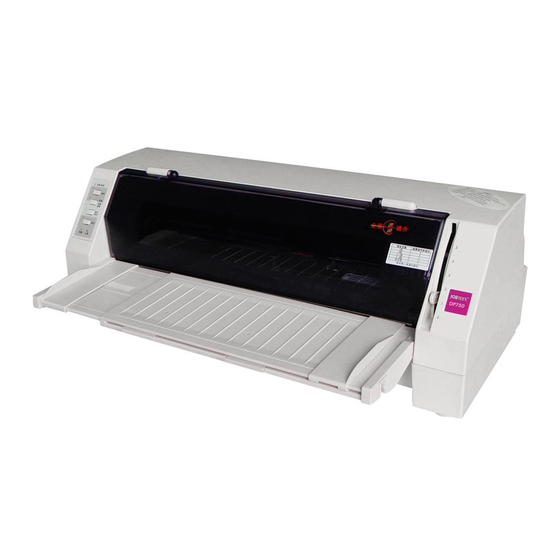
- Page 1 User's Manual DP750 Flatbed Bill Printer...
-
Page 2: Important Safety Instructions
DP750 User's Manual Important Safety Instructions 1. Read all of these instructions carefully and thoroughly and save them for later reference. 2. Follow all warnings and instructions in the manual as well as marked on the product. 3. Unplug this product from the power outlet before cleaning. Do not use liquid or aerosol cleaners. -
Page 3: Table Of Contents
DP750 User's Manual Table of Contents Important Safety Instructions.........................i Chapter 1 Overview ..........................1 1.1 Features............................1 Chapter 2 Preparation ..........................3 2.1 Unpacking ............................3 2.2 Unpacking the Protective Materials....................3 2.3 Identifying the Parts ........................4 2.4 Installing the Printer ........................5 2.4.1 Installing the Paper Feed Knob ....................5 2.4.2 Uninstalling the Front Table ......................5... - Page 4 DP750 User's Manual 4.7.2 Maintenance Printing Test (H pattern) ..................36 4.7.3 Alignment Adjust Mode......................36 4.7.4 Hex Dump Mode ........................36 Appendix A............................37 A.1 Cleaning the Printer........................37 A.2 Problems and Solutions........................38 A.3 Error LED on the Control Panel ....................39 Appendix B ............................40 B.1 Specifications ..........................40...
-
Page 5: Chapter 1 Overview
DP750 User's Manual erview Chapter 1 Ov 1.1 Features Thank you for purchasing this Jolimark DP750 printer. This printer is a 24 pin flatbed Hi-Speed Bill printer which can fulfill multi-function printing requirement, especially for enterprise and office. Flatbed Paper-feed Mechanism Newly-style 106 column flatbed printer can feed the paper smoothly. - Page 6 Automatic Interface Switching The DP750 includes both a parallel interface, a USB interface and an Ethernet interface or serial interface. (According to specific interface standards) The printer automatically detects the type of data transfer received from the host computer and switches to the corresponding interface type.
-
Page 7: Chapter 2 Preparation
DP750 User's Manual Chapter 2 Preparation 2.1 Unpacking Check each item against the following packing list, if any of these items are missing, please contact your dealer. NOTE Hold the bottom of printer in the box, and then carefully lift it up. As you unpack, save all the original packing materials. -
Page 8: Identifying The Parts
DP750 User's Manual Protective materials Figure 2-2 Unpacking the protective materials 2.3 Identifying the Parts Figures 2-2 and 2-3 highlight the main components of the printer. Figure 2-3 Main parts of printer (front view) Top cover Print head Control panel... -
Page 9: Installing The Printer
DP750 User's Manual A Tractor B Paper guide slider C Tractor D Ethernet interface E Parallel interface F USB interface G Serial interface H Power supply inlet ★ According to the specific interface standards 2.4 Installing the Printer Before placing the printer in your chosen location, consider the following guidelines: This printer should be placed on a normal table or desk. -
Page 10: Installing And Replacing The Ribbon Cartridge
DP750 User's Manual 2.4.3 Installing and Replacing the Ribbon Cartridge 1. Turn off the printer. 2. Hold the concaves of the printer cover to open the printer cover. 3. Hold up the sub friction lever. 4. Move the gap adjust lever to the highest position. -
Page 11: Connecting The Printer To Your Computer
Besides, do not touch the print head at the time finishes using the printer for overheating. 4. Please use the Jolimark JMR121 ribbon cartridge, our company will not guarantee to keep the printer in good repair, when it is damaged by unauthorized ribbon cartridge. -
Page 12: Connecting To The Ethernet Interface
DP750 User's Manual USB interface USB interface cable Figure 2-11 Connecting to the USB interface 2.5.3 Connecting to the Ethernet interface Plug the RJ-45 crystal plug of the Ethernet cable into the printer, and plug the other plug into the LAN. -
Page 13: Installing Driver
DP750 User's Manual Power switch Power supply inlet Electrical outlet Power cord Figure 2-13 Connecting the power cord to the printer To turn the printer ON, press the I mark at the side of the power switch. To turn the printer OFF, press the O mark at the side of the power switch. - Page 14 5. Come out a window of "Install From Disk". Please according to the operating system environment, you should select the path as follow: CD-ROM-"Driver"-"WIN 2000 (XP-Vista-Win7)", that you can find a file named: DP750.inf, click "Open", then click "OK”, click "Next".
-
Page 15: Network Settings
6. The printer driver process is installed successfully. 2.8 Network Settings Please use Jolimark network setting software NetFinder to set the IP address for Jolimark printers, which can be found in the CD or downloaded from www.jolimark.com. Note: The network printing function needs the operating system of Windows2000 or above. -
Page 16: Setting Ip Address
DP750 User's Manual Yellow LED Green LED Description Flash Normal Not connect to network 2.8.2 Setting IP Address 1. Run NetFinder Software Double click NetFinder.exe in the PC which connects the printer in the same LAN. The figure of the software is shown as follows: Button description: Exit—Exit from the software... - Page 17 DP750 User's Manual If the printer still can not be found out when the network connection is correct and in the same network, Please check whether the network fire wall on the PC open or not. If there is fire wall, please close it temporarily;...
-
Page 18: Installing Printer Network Driver
DP750 User's Manual address used in printer may conflict with another one). The network segment part of the IP address and Subnet Mask must be the same as those of PC connecting with a printer. For example, the address of working PC is 192.168.0.1/255.255.255.0 (IP/Subnet Mask), then which of printer should be set to 192.168.0.x/255.255.255.0(x=2~254 and should avoid the IP in used. - Page 19 DP750 User's Manual in “Upgrade-install printer network driver”. 1. Newly-install printer network driver 1) Click “Start” ”Settings”, select “Printers. 2) Click “Add printer”, then come out a window of “Add Printer Wizard”, click “next”, 3) Come out a window of “Add Printer Wizard”, then please read the select direct carefully. Such as, select “local or Network Printer”, then click “next”.
- Page 20 DP750 User's Manual 7) Come out a window of “Additional Port Information Required”, select “Custom” in the “Device Type”, and then click “Settings”. 8) Come out a window of “Port Settings”. Affirm that “Port name” and “Printer name or IP address”...
- Page 21 If PC has installed the printer’s driver, set driver’s network port to carry out network printing. The concrete steps are shown below: 1) Click “Start” ”Settings”, select “Printers” 2) Right click DP750 driver, click “Properties” on the window coming out. 3) Come out a window of “Properties”, click “Ports” and “Add Ports”. - 17 -...
- Page 22 DP750 User's Manual 4) Come out a window of “Printer port”, select “Standard TCP/IP Port”, click “New port”. 5) Come out a window of “Add Standard TCP/IP Printer Port Wizard”, click “Next”. 6) Come out a window of “Add a port”, import the IP address reported by the “Setting printer’s IP address”...
- Page 23 DP750 User's Manual 7) Come out a window of “Port information”, select “User-defined” in the “Equipment style”, then click “setting”. Come out a window of “Additional Port Information Required”, select “Custom” in the “Device Type”, then click “settings”. 8) Come out a window of “Port Settings”. Affirm that “Port name” and “Printer name or IP address”...
- Page 24 DP750 User's Manual 9) Return to “Additional Port Information Required”, click “Next”. 10) Come out a window of “Completing the Add Standard TCP/IP Printer Port Wizard”, click “Finish”. 11) Return to “Printer Ports”, click “Close”. 12) Return to “Properties”, make sure the network port is selected, click “Apply”, and then click “Close”.
- Page 25 DP750 User's Manual - 21 -...
-
Page 26: Chapter 3 Paper Loading
DP750 User's Manual Chapter 3 Paper loading 3.1 Paper Thickness Adjustment Before loading cut sheet or tractor paper, you have to adjust the gap adjust lever on the right of the printer. To feed thicker paper through the printer, you need to move the gap adjust lever from its standard position. - Page 27 DP750 User's Manual Paper select lever Figure 3-2 Setting the paper select lever 3. Position the left hand cut sheet guide by referring to the marking on the window cover. (On the left side of the window cover, “O” indicates the transverse valid printing home position) As shown in Figure 3-3.
-
Page 28: Using Tractor Paper
DP750 User's Manual Figure 3-5 Loading cut sheet NOTE The printer’s skew detection level can be set within the default setting menu. 3.3 Using tractor paper This printer feeds tractor paper from the rear of the printer to the front. -
Page 29: Tearing Off Tractor Paper
DP750 User's Manual Release the lock lever of the right tractor. 4. Open the tractor paper guide and place the paper on the sprocket pins as shown in Figure 3-8, then close the paper guide. If you are using preprinted paper or labels, install them with the printed or labeled side facing upwards. - Page 30 DP750 User's Manual chapter 4, Control Panel). Figure 3-10 Tractor paper tear off - 26 -...
-
Page 31: Chapter 4 Control Panel
DP750 User's Manual Chapter 4 Control Panel 4.1 Control Panel Keys and LEDs This control panel consists of 4 keys and 4 indicator LEDs as shown in Figure 4-1. Figure 4-1 The Printer Control Panel The following table details each indicator LED function:... -
Page 32: Bill Print Function
DP750 User's Manual Pressing the ONLINE button, alternates between ONLINE and OFFLINE mode. ONLINE When offline, press LOAD/EJECT key can control cut sheet or tractor paper feeding. In LOAD/EJECT cut sheet mode, if you press LOAD/EJECT key when offline, the paper will be ejected. -
Page 33: Tear-Off Adjustment Mode
DP750 User's Manual Note: When the printing home position is in the maximum, press LOAD/EJECT key, the printer will not increase. When the printing home position is in the minimum, press LF/FF key, the printer will not decrease. NOTE To exit without saving, just turn the printer OFF. - Page 34 DP750 User's Manual 4. Turn the printer on. The printer automatically loads paper and prints the current settings. An example print out is shown in Figure 4-2. Caution: 1. The options whose color is printed contrarily are the current settings. If the initialization of “Language”...
- Page 35 DP750 User's Manual Current Setting Report LANGUAGE CHINESE EMULATION CHAR. MODE CHINA FONT SANS SER COURIER PRESTIGE SCRIPT OCR-B OCR-A ORATOR ENG PITCH 12 CPI 15 CPI PROPORTIONAL CHI PITCH 7.5 CPI SLASH ZERO INTL CHAR SET FRANCE GERMANY U.K.
-
Page 36: Enter The Setup Menu System And Change The Settings
DP750 User's Manual MAC Address: XX-XX-XX-XX-XX-XX DHCP:YES IP:10.0.0.1 Subnet mask:255.255.255.0 gateway:255.255.255.255 Figure 5-2 Current setting report 4.6.2 Enter the Setup Menu System and Change the Settings If need to use different fonts or printing formats, you can use the setup menu system to change the settings. -
Page 37: Restoring Factory Printer Settings
DP750 User's Manual 6. Switch the printer off and then turn on again. New settings of the menu will be stored. 4.6.3 Restoring Factory Printer Settings You can restore to the factory printer settings without having to work through the Setup Menu System to reset the menus. -
Page 38: Online-Aptitude Parameter Settings
Table 4-2 Description of options 4.6.5 Online-aptitude Parameter Settings DP750 supports the function of online-aptitude parameter settings, which can be set in the PC with the driver installed in. The concrete setting steps are shown as follows: 1. Make sure that the host and the printer are connected with a cable and both the host and the printer is turned on, the printer should be online as well. -
Page 39: Using The Self Test Functions
Continuous printing of ASCII pattern is performed by turning power on, while pressing the ONLINE key and LOAD/EJECT key at the same time. Pressing the ONLINE key can stop printing, and turn off the printer to exit ASCII test mode. ASCII TEST MODE Jolimark DP750 VX.X XXXX/XX/XX !”#$%&’()*+,-./10123456789:;<=>?@ABCDEFGHIJKLMNOPQRSTUVWXYZ[\]^_’abcdefghijklm !”#$%&’()*+,-./10123456789:;<=>?@ABCDEFGHIJKLMNOPQRSTUVWXYZ[\]^_’abcdefghijklmn ”#$%&’()*+,-./10123456789:;<=>?@ABCDEFGHIJKLMNOPQRSTUVWXYZ[\]^_’abcdefghijklmno... -
Page 40: Maintenance Printing Test (H Pattern)
DP750 User's Manual 4.7.2 Maintenance Printing Test (H pattern) One page printing of H pattern is performed by turning power on, while pressing the LF/FF key. Press ONLINE key can stop printing, restart the printer can exit the H pattern. -
Page 41: Cleaning The Printer
DP750 User's Manual Appendix A Caution Do not open the printer top cover or rotate the paper feed knob while printing, Do not place any heavy object on the printer no matter it is printing or not. Turn off both the printer and the Host before connecting them. Not allow plug in the power cord or the signal cord. -
Page 42: Problems And Solutions
DP750 User's Manual 2. Clean the dust on the protect cover of the photoelectric sensor. Protect cover Protect cover Protect cover Light extinction patch Light extinction patch Figure A-2 Cleaning the dust on the protect cover of the photoelectric sensor and the light extinction patch Note: 1. -
Page 43: Error Led On The Control Panel
DP750 User's Manual A.3 Error LED on the Control Panel In case of printer error, the printer enters off line state and indicates an alarm by blinking the LEDs as shown below. Error Remedy The PAPER OUT LED blinks Paper empty or Load paper or remove the jammed and the ONLINE LED is off. -
Page 44: Specifications
DP750 User's Manual Appendix B B.1 Specifications B.1.1 General Item Description Type 24-Pin Flatbed Dot Matrix Impact Printer Print direction Unidirectional or bidirectional Number of columns 136 columns (10 CPI) Print speed ASCII Chinese speed 10 CPI 12 CPI speed 6.7 CPI... -
Page 45: Interface Specification
Safety marks GB 4943 B.2 Interface Specification DP750 is configured with Centronics (IEEE1284 NIBBLE) parallel interface, 2.0 Full-Speed USB interface, RS-232 serial interface or 10/100Base-T Ethernet interface. You can connect to the computer according to your requirement. B.2.1 Parallel Interface... -
Page 46: Usb Interface
DP750 User's Manual B-1 Sequence Diagram Connector Pin Assignments Signal Pin No. Return Line Pin No. Signal Name Signal Direction Printer ←Host STROBE 2 ~ 9 DATA Printer ←Host Printer →Host BUSY Printer →Host Printer →Host SELECT Printer →Host ——... -
Page 47: Ethernet Interface
DP750 User's Manual B-2 USB-B Type Connector B.2.3 Ethernet Interface 10/100Base-T Ethernet interface, it can connect to 10/100M Ethernet. B-3 Ethernet interface B.2.4 Serial Interface Serial Specification Data input/output mode: 7-bit or 8-bit serial interface Data input code: ASCII, JIS 7-bit or 8-bit, International character code, CG, Dot matrix graphic code... - Page 48 DP750 User's Manual Signal description: Prescription of signal level on RS-232C 1=Low (Mark): -23 ~ -3 V 0=High (Space):+3 ~ +25V RDY/BSY protocol (RS-232C) PIN 1 FG (Frame Ground--- connect to the printer rack Connect to the circuit frame ground...
-
Page 49: Printable Area
DP750 User's Manual B.3 Printable Area Note: 1. For assurance of the print quality, please insure print contents all in printable area. 2. If print contents to outrun the printable area, may cause the print head break needle. Cut Sheet Printable Area: ≥4mm... -
Page 50: Cautions Of Printing
DP750 User's Manual B.4 Cautions of Printing The paper which inserted should not be collapsed, tore or carry any staple, clip or pin and so on. (As shown in B-7) Or else, it will damage the printer seriously. Do not use the print paper which edges fall into disrepair. -
Page 51: Appendix C Command Code Summary
DP750 User's Manual Appendix C Command Code Summary C.1 Epson Emulation Name Code (Symbol) Code (Hex.) Code (Dec.) Print and Line Feed Execution Carriage Return Line Feed n/180” Line Feed ESC J n/180” Reverse Line Feed ESC j Format Control Set 1/8”... -
Page 52: Character Set
DP750 User's Manual Name Code (Symbol) Code (Hex.) Code (Dec.) Select Double Width Mode (one line) Cancel Double Width Mode (one line) Select/Cancel Double Width Mode ESC W Select Compressed Mode Cancel Compressed Mode Select Emphasized Mode ESC E Cancel Emphasized Mode... -
Page 53: Input Data Control
DP750 User's Manual Name Code (Symbol) Code (Hex.) Code (Dec.) Input Data Control Cancel Line Delete Character Select Printer Deselect Printer Cancel MSB Control Sequence ESC # Set MSB to 1 ESC > Reset MSB to 0 ESC = Miscellaneous... -
Page 54: Select Code Pages
DP750 User's Manual Name Code (Symbol) Code (Hex.) Code (Dec.) Select Reverse Mode ESC ~ 2 1 Select language of Print settings ESC ~ L n Bar Code Printing ESC } R Select Code Pages ESC ~ R 0 ESC ~ R 1...
Need help?
Do you have a question about the DP750 and is the answer not in the manual?
Questions and answers