Table of Contents
Advertisement
Quick Links
Advertisement
Table of Contents

Related Manuals for Jolimark DP350


Summary of Contents for Jolimark DP350
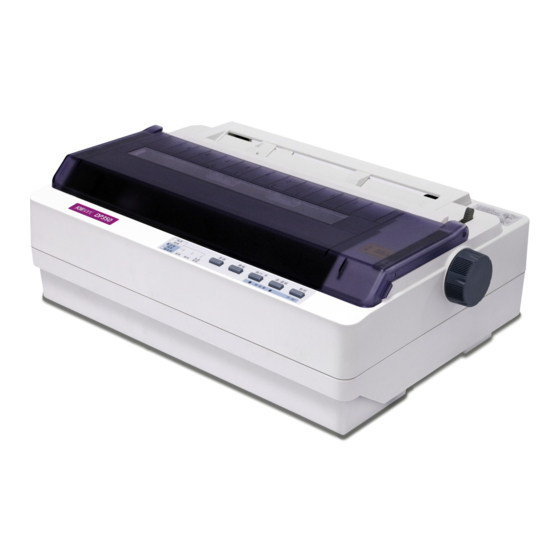
- Page 1 User's Manual DP350 Dot Matrix Printer...
-
Page 2: Important Safety Instructions
DP350 User's Manual Important Safety Instructions 1. Read all of these instructions carefully and thoroughly and save them for later reference. 2. Follow all warnings and instructions in the manual as well as marked on the product. 3. If the printer has been used just now, please not touch the print head for overheating. -
Page 3: The Guide
Notes contain important information and useful tips on the operation of your printer. The Guide First thanks for buying the Jolimark printer. The printer is 24-pin 80-column Dot Matrix Printer, can satisfy multi-function print requests. It can be widely used in tax, mail, telecom, police, hospital, insurance, finance, stock, customhouse, cabaret, aviation and transport etc. -
Page 4: Table Of Contents
DP350 User's Manual Table of contents Important Safety Instructions ........................i The Guide ..............................ii Chapter 1 Preparation ..........................1 1.1 Unpacking and Checking ........................1 1.2 Dismantling the Protective Materials ....................1 1.3 Main Parts of the Printer........................1 1.4 Choosing a Place for the Printer ......................2 1.5 Installing the Ribbon Cartridge ......................2... - Page 5 DP350 User's Manual 3.1.5 Envelopes........................... 28 3.2 Changing the Printer Settings ......................29 3.2.1 Setting printer parameter through the control panel..............29 3.2.2 Online-aptitude Parameter Settings.................... 31 3.3 Printer Setting Descriptions....................... 32 3.4 Restore the Default Settings ......................34 Chapter 4 Troubleshooting ........................35 4.1 Power Supply ............................
-
Page 6: Chapter 1 Preparation
1. Open the packing box, lift up the printer. 2. Save all the original packing materials, so that it can be used when transport the printer. 1.3 Main Parts of the Printer Figure1-2 and figure1-3 shown are main parts of DP350. Gap adjust lever Printer upper cover... -
Page 7: Choosing A Place For The Printer
DP350 User's Manual Printer back cover Paper guide slide Tractor Paper feed knob Power switch Serial interface Power supply inlet Parallel interface Ethernet interface USB interface USB interface Figuer 1-3 main parts of the printer (rear view) ★ According to specific interface standards 1.4 Choosing a Place for the Printer... - Page 8 DP350 User's Manual 3. Put the gap adjust lever to the uppermost position. 4. Slide the print head to the middle of the printer.(shown as figure 1-4) Note: Never move the print head while the printer is turned on; this can damage the printer.
-
Page 9: Connect The Power Cord
DP350 User's Manual 3. Please use the Jolimark JMR120 ribbon cartridge, our company will not guarantee to keep the printer in good repair, when it is damaged by unauthorized ribbon cartridge. 1.6 Connect the Power Cord 1. Make sure the power switch on the printer is turned off. It is off when the O side of the switch is pressed down. -
Page 10: Connecting The Printer To Your Computer
6. To end the self test, make sure the printer is not printing. Press LF/FF or LOAD/EJECT button to eject cut sheet; then turn off the printer. ASCII Self-test mode Jolimark DP350 VX.X XXXXXXX/XX/XX SN: 0000000000 !"#$%&’( )*+-./0123456789:;<=>?@ABCDEFGHIJKLMNOPQRSTUVWXYZ[\]^_`ab !"#$%&'( )*+-./0123456789:;<=>?@ABCDEFGHIJKLMNOPQRSTUVWXYZ[\]^_`abcd "#$%&'( )*+-./0123456789:;<=>?@ABCDEFGHIJKLMNOPQRSTUVWXYZ[\]^_`abcde... -
Page 11: Connecting To The Parallel Interface
DP350 User's Manual Parallel interface Serial interface Ethernet interface USB interface USB interface Figure 1-12 lay the back of the printer upward Note: Before connecting the parallel interface or the serial interface, please make sure the power of the printer is shut down. Only after tighten the cable, could turn on the printer, or it will damage the printer. -
Page 12: Connecting To The Serial Interface
DP350 User's Manual 1.8.3 Connecting to the Serial Interface 1. Turn off both the computer and the printer. Plug the serial cable connector securely into the printer’s serial interface. Tighten the screws on either side of the connector. Screw Serial cable... - Page 13 5. Come out a window of "Install From Disk". Please according to the operating system environment, you should select the path as follow: CD-ROM-"Driver"-"WIN2000 (XP-Vista-Win7)", where you can find a file named: DP350.inf, click "Open", then click "OK" to return to the window of "Add printer wizard", click "Next".
-
Page 14: Network Settings
6. The printer driver process is installed successfully. 1.10 Network Settings Please use Jolimark network setting software NetFinder to set the IP address for Jolimark printers, which can be found in the CD or downloaded from www.jolimark.com. Note: The network printing function needs the operation system of Windows2000 or above. -
Page 15: Setting Ip Address
DP350 User's Manual Yellow LED Green LED Description Blink Normal Not connect to network 1.10.2 Setting IP Address 1. Run NetFinder Software Double click NetFinder.exe in the PC which connects the printer in the same LAN. The figure of the... - Page 16 DP350 User's Manual If the printer still can not be found out when the network connection is correct and in the same network, please check whether the network fire wall on the PC open or not. If there is fire wall, please close it temporarily, open again after finishing searching and setting a printer completely.
-
Page 17: Installing Printer Network Driver
DP350 User's Manual address used in printer may conflict with another one). The network segment part of the IP address and Subnet Mask must be the same as those of PC connecting with a printer. For example, the address of working PC is 192.168.0.1/255.255.255.0 (IP/Subnet Mask),then which of printer should be set to 192.168.0.x/255.255.255.0(x=2~254 and should avoid the IP in used. - Page 18 DP350 User's Manual If the printer driver has been installed on the PC, adopt Upgrade-install way whose steps are shown in “Upgrade-install printer network driver”. 1. Newly-install printer network driver 1) Click “Start” → “Settings”, select “Printers”. 2) Click “Add printer”, then come out a window of “Add Printer Wizard”, click “next”.
- Page 19 DP350 User's Manual 7) Come out a window of “Additional Port Information Required”, select “Custom” in the “Device Type”, and then click “Settings”. 8) Come out a window of “Port Settings”. Affirm that “Port name” and “Printer name or IP address” are correct, “Protocol”...
- Page 20 If PC has installed the printer’s driver, set driver’s network port to carry out network printing. The concrete steps are shown below: 1) Click “Start” → “Settings”, select “Printers”. 2) Right click DP350 driver, click “Properties” on the window coming out. 3) Come out a window of “Properties”, click “Ports” and “Add Ports”. - 15 -...
- Page 21 DP350 User's Manual 4) Come out a window of “Printer port”, select “Standard TCP/IP Port”, click “New port”. 5) Come out a window of “Add Standard TCP/IP Printer Port Wizard”, click “Next”. 6) Come out a window of “Add a port”, import the IP address reported by the “Setting printer’s IP address”...
- Page 22 DP350 User's Manual 7) Come out a window of “Port information”, select “User-defined” in the “Equipment style”, then click “setting”. Come out a window of “Additional Port Information Required”, select “Custom” in the “Device Type”, then click “settings”. 8) Come out a window of “Port Settings”. Affirm that “Port name” and “Printer name or IP address”...
- Page 23 DP350 User's Manual 9) Return to “Additional Port Information Required”, click “Next”. 10) Come out a window of “Completing the Add Standard TCP/IP Printer Port Wizard”, click “Finish”. 11) Return to “Printer Ports”, click “Close”. 12) Return to “Properties”, make sure the network port is selected, click “Apply”, and then click “Close”.
- Page 24 DP350 User's Manual - 19 -...
-
Page 25: Chapter 2 Control Panel Operations
DP350 User's Manual Chapter 2 Control Panel Operations 2.1 Control Panel label Include 5 keys and 3 indicators (shown as 2-1). Figure 2-1 control panel 2.2 LED Description BLINK PAPER OUT Normal —— Paper out or malfunction ONLINE Online Offline ——... -
Page 26: In The Cut Sheet Mode
DP350 User's Manual LF/FF In the offline mode, if the paper is at the print position, press the LF/FF button once (less than 0.5 second), the printer will feed the paper one line base on current line spacing setting. Alternatively, hold the LF/FF button down, the printer will load one page of tractor paper. -
Page 27: Feed Paper To The Tear Position
DP350 User's Manual 2. Hold the ONLINE button down for 3 seconds, ensure the online light blinks, till the printer beeps once. The online indicator and paper out indicator blinks alternately. Caution:Don’t press SPEED, or the printer can’t enter the micro-adjust function. -
Page 28: Paper Feed Knob
DP350 User's Manual 2.6 Paper Feed Knob The paper feed knob is used to feed paper or eject paper manually. In general, it’s better not to use it. 2.7 The Gap Adjust Lever The gap adjust lever lets you specify the correct setting for your printing material. It is factory-set for standard office paper. -
Page 29: Chapter 3 How To Use The Printer
DP350 User's Manual Chapter 3 How to Use the Printer Here are the steps of using printer: 1. Assemble the printer as the chapter 1, connect the printer to your computer and install the driver correctly. 2. Load the correct type of paper. -
Page 30: Loading Tractor Papers
DP350 User's Manual Back cover Figure 3-3 adjust the position of the back cover 4. Adjust the right paper guide of the back cover to the range of the scale. Then adjust the left paper guide to make the distance match the width of the print paper. (Shown as below) Figure 3-4 adjust the right and the left paper guide 5. - Page 31 DP350 User's Manual Figure 3-6 adjust the gap adjust lever 2. Close the cover, and set paper select lever toward the tractor paper position. Figure 3-7 adjust the paper selected lever 3. Pull up the right handle of the tractor to loose the right tractor. (Shown as below)
-
Page 32: Multi-Part Forms
DP350 User's Manual 5. Make sure your paper has a clean, straight leading edge. Open the right and left tractor covers. Fit the first holes of the paper over the tractors pins and then close the tractors covers. Slide the left tractors to remove any slack in the paper and lock it in place. -
Page 33: Labels
DP350 User's Manual head (see Appendix for details). Figure 3-11 raise the back cover 3.1.4 Labels You basically print on labels as the tractor paper. Keep these tips in mind: 1. Set the paper select lever to “1” position. 2. Make sure the printing stays entirely within the printable area. (See the Appendix for specifications.) 3. -
Page 34: Changing The Printer Settings
DP350 User's Manual 3.2 Changing the Printer Settings 3.2.1 Setting printer parameter through the control panel 1. Press the ONLINE button on the control panel as well as turn on the printer. The print head returns with the printer beeping once. If the ONLINE indicator and the Paper Out indicator blink, it can be indicated that there is paper out. - Page 35 DP350 User's Manual Current Setting Report VX.X XXX XXXX/XX/XX SN: XXXXXXXXXXXXXXXXXXXX MAC Address: XX-XX-XX-XX-XX-XX DHCP: YES IP: 10.0.0.1 Subnet Mask: 255.255.255.0 Gatewaqy: 255.255.255.255 FONT SANS SER COURIER PRESTIGE SCRIPT OCR-B OCR-A ORATOR ENG PITCH 12 CPI 15 CPI PROPORTIONAL CHI PITCH 7.5 CPI...
-
Page 36: Online-Aptitude Parameter Settings
4. Turn off and restart the printer, newly settings are in operation. 3.2.2 Online-aptitude Parameter Settings DP350 supports the function of online-aptitude parameter settings, which can be set in the PC with the driver installed in. The concrete setting steps are shown as follows: 1. -
Page 37: Printer Setting Descriptions
DP350 User's Manual 5. The setting way is corresponding with that of printer menu system. In the “Printer Settings” layout, select the first class menu in the combobox of “Select Printer Setting Class”, select the second menu in the “Configuration” and set the item in the current parameters list. - Page 38 DP350 User's Manual or 8 LPI. 5. FORM LENGTH You can set the page length to 3, 3.5, 11/3, 4, 5, 5.5, 6, 7, 8.5, 11, 12, or 70/6 (the length of A4 paper) inches. 6. FORM LOCK Select form lock function ON or OFF.
-
Page 39: Restore The Default Settings
DP350 User's Manual 20. TEAR OFF Open or close the auto advance paper to tear off position function. When the tear off function is opened, if the printer doesn’t receive data a few minutes after printing, the printer will advance the paper to the tear off position automatically. -
Page 40: Chapter 4 Troubleshooting
Solutions: Check whether the printer’s rating voltage is matched with the power cord. If not, unplug the power cord immediately and contact your dealer or a specified Jolimark service center for advice. Do not plug the power cord to the electrical outlet again. - Page 41 Phenomenon 1: A line of dots is missing in the printout. Solutions: The print head may be damaged. Stop printing and contact your dealer or a specified Jolimark service center to have the print head replaced. Phenomenon 2: Dots are missing in random positions.
-
Page 42: Paper Handling
DP350 User's Manual “Changing the printer settings” on chapter 3.2. 4.3 Paper Handling Cut sheets do not be fed properly Phenomenon 1: Paper does not feed. Solutions: 1. Tractor paper may be left in the printer. Remove the tractor paper. Set the paper select lever to the cut sheet position. -
Page 43: Alignment Adjust Mode
DP350 User's Manual 2. Please make sure the paper length is within prescribed range. (Refer to the paper specifications in Appendix A) Phenomenon 4: When you switch between cut sheets and tractor paper, the beeper sounds some times and the online indicator is off. -
Page 44: Chapter 5 Printer Maintenance
DP350 User's Manual Chapter 5 Printer maintenance Carriage shaft Figure 5-1 Printer cleaning Periodical cleaning and cleaning tool Periodical cleaning: Every 6 months or 300 working hours Cleaning tool: Dry cloth (Use soft cloth while cleaning metal) Cleaning carriage shaft: There is a layer of oil covered on the carriage shaft which guarantees the carriage runs smoothly. -
Page 45: Appendix A Specifications
DP350 User's Manual Appendix A Specifications A.1 General ITEM DESCRIPTION Print Type 24-pin Dot Matrix Impact Printer Print direction Bidirectional logic seeking Print width 80 columns (10cpi) / 203.2 mm ASCII Chinese Speed 10 CPI 12 CPI Speed 6.7 CPI 7.5 CPI... - Page 46 DP350 User's Manual Paper Set through paper gap adjust lever thickness Width: 48 ~ 261 mm Cut sheet (feed by tractor) Thickness: 0.065 ~ 0.14 mm Weight: 52 ~ 90 g/m Width: 56 ~ 267 mm Thickness: 0.065 ~ 0.39 mm...
-
Page 47: Interface Specifications
DP350 User's Manual A.2 Interface Specifications Your printer is equipped with a parallel interface, two USB interfaces and an option among a serial interface or Ethernet interface. The printer switches automatically to the appropriate interface when it receives data. A.2.1 Parallel Interface... -
Page 48: Ethernet Interface
DP350 User's Manual Pin No. Signal Direction Description — Frame Ground (FG) Printer’s chassis ground Transmitted Data (TXD/SD) Printer has transmitted serial data Received Data (RXD/RD) Printer has received serial data Signal Ground (SG) — Return path for data control signals... - Page 49 DP350 User's Manual Tractor paper A: The minimum top and bottom margin above and below the perforation are≥ 8.0mm. B: The minimum left and right margins are≥ 13.0 mm. The maximum printable width is 203.2 mm (8.0 inches). - 44 -...
-
Page 50: Appendix B Command Summary
DP350 User's Manual Appendix B Command Summary This printer supports EPSON ESC/P-K2 control commands shown as the follow table: Classify Command Description ESC @ Initialize Printer Cancel Line Select Printer Deselect Printer Delete Character ESC # Cancel MSB Control Sequence ESC >... - Page 51 DP350 User's Manual Cancel Double Width Mode (Chinese) Select/Cancel quadruple-size mode Chinese character Select lengthways printing Select transverse printing Two character lengthways half-size mode paratactically printing Select/Cancel Underline Mode for Chinese character Select full-size mode pitch for Chinese character Select half-size mode pitch for Chinese character...
- Page 52 DP350 User's Manual ESC & Define Downloaded Characters ESC : Copy ROM Characters Set into RAM ESC % n Select/Deselect User-Defined Set ESC 6 Enable Character Set 2 ESC 7 Cancel command ESC 6 Select Compressed Mode Cancel Compressed Mode...
Need help?
Do you have a question about the DP350 and is the answer not in the manual?
Questions and answers