Table of Contents
Advertisement
Quick Links
Download this manual
See also:
User Manual
Advertisement
Table of Contents

Related Manuals for Jolimark DP320


Summary of Contents for Jolimark DP320
- Page 1 User's Manual DP320 Dot Matrix Printer...
-
Page 2: Important Safety Instructions
DP320 User's Manual Important Safety Instructions Read all of these instructions carefully and thoroughly and save them for later reference. Follow all warnings and instructions in the manual as well as marked on the product. Unplug this product from the power outlet before cleaning. Do not use liquid or aerosol cleaners. -
Page 3: Table Of Contents
DP320 User's Manual TABLE OF CONTENTS Important Safety Instructions......................i Chapter 1 Preparation ........................1 1.1 Unpacking ..........................1 1.2 Unpack the Protect Materials ....................1 1.3 Main Parts of the Printer ......................2 1.4 Choosing a Place for the Printer ....................3 1.5 Assembling the Printer ...................... - Page 4 DP320 User's Manual Chapter 4 Problems and Solutions ....................30 4.1 Problems and Solutions ......................30 4.2 Power Supply......................... 30 4.3 Printing........................... 30 4.4 Paper Handling ........................32 4.5 Options ..........................33 Appendix A Specifications......................34 A.1 General..........................34 A.2 Printable Area ........................36 A.2.1 Single Sheets and Envelopes ..................
-
Page 5: Chapter 1 Preparation
DP320 User's Manual Chapter 1 Preparation 1.1 Unpacking Check each item against the following packing list, if any of these items are missing, please contact your dealer. NOTE Hold the bottom of printer in the box, and then carefully lift it up. As you unpack, save all the original packing materials. -
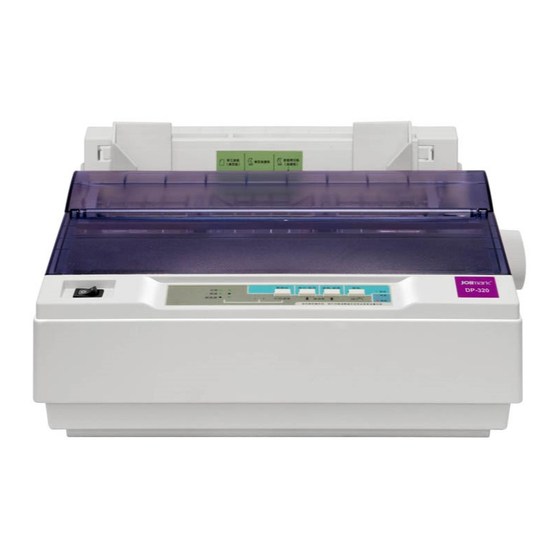
Page 6: Main Parts Of The Printer
DP320 User's Manual Protect materials Protect materials Figure1-2 Unpacking protect materials 1.3 Main Parts of the Printer Figure1-3, Figure1-4 and Figure 1-5 shown are main parts of DP320. Paper thickness adjust lever Tear part Paper guide Paper select lever Power switch... -
Page 7: Choosing A Place For The Printer
DP320 User's Manual Power supply inlet Serial interface USB interface Parallel interface Figure1-5 Main parts of printer (back view) 1.4 Choosing a Place for the Printer When selecting a place to set up your printer, choose a convenient location that provides the following: 1. -
Page 8: Installing The Ribbon Cartridge
DP320 User's Manual Note: The D shape of knob should be corresponding to the D shape shaft inside the printer case. 2. Push firmly on the knob until it fits against the printer case. 1.5.2 Installing the Ribbon Cartridge 1. Before installing the ribbon cartridge, make sure the printer is turned off. - Page 9 DP320 User's Manual Figure1-10 Tighten the ribbon 6. Insert the ribbon cartridge into the printer as the following figure shown; then press both sides of the cartridge down firmly to fit the plastic hooks into the printer slots. Figure1-11 Install ribbon cassette 7.
-
Page 10: Installing The Tractor
DP320 User's Manual 1.6 Installing the Tractor There are two positions for the tractor to be installed, one is push installation position (back of printer), and the other is pull installation position (top of printer). The tractor that installed in the back of printer is called push tractor, and the one installed in the top of printer is called pull tractor. -
Page 11: Connect The Power Cord
DP320 User's Manual Locked piece Figure1-15 Take down the push tractor 3. Compact the locked piece of the tear part (shown as the following figure), lift it upwards. Tear part Locked piece Figure1-16 Take down the tear part 4. Take up the tractor aiming at the installation slot on the top of printer (the slot for the tear cutter to be installed), press the tractor until it locked into the slot according to the following figure. -
Page 12: Running The Self-Test
DP320 User's Manual Power switch Electrical outlet Power cord AC inlet Figure1-18 Turn off the printer 2. Check the label on the bottom of the printer to make sure the voltage required by the printer matches that of your electrical outlet. - Page 13 DP320 User's Manual Figure1-20 Start up self test 3. Slide the left edge guide until it locked in place at the triangular guide mark. Next, adjust the right edge guide to match the width of your paper. Figure1-21 Adjust the right edge guide 4.
-
Page 14: Connecting The Printer To Your Computer
DP320 User's Manual NOTE: If the self test did not print satisfactorily, see Chapter 3. If it prints correctly, go on to the next section. 1.9 Connecting the Printer to Your Computer The printer configures a parallel interface、a USB interface and a Serial interface, Connect the printer to the computer with the correct cables. -
Page 15: Connecting To The Usb Interface
DP320 User's Manual 1.9.2 Connecting to the USB Interface 1. Plug the A plug of the USB cable (square shape) into the printer's USB interface. 2. Plug the B plug of the USB cable (flat shape) into the computer's USB interface. - Page 16 5. Come out a window of "Install From Disk". Please according to the operating system environment, you should select the path as follow: CD-ROM-"Driver"-"WIN 2000 (XP-Vista-Win7)", that you can find a file named: DP320.inf, click "Open", then click "OK”, click "Next".
- Page 17 Disk...", please click "Browse", select the path as follow : CD-ROM-"Driver"-"WIN98 (WINME) ", where you can find a file named: DP320.inf, click "Open", then click "OK". 4. Come out a window of “Install From Disk”, click "OK, return to a window of "Add Printer", then click "Next".
-
Page 18: Chapter 2 Control Panel Operations
DP320 User's Manual Chapter 2 Control Panel Operations You can use the four keys on the control panel to operate your printer. Figure2-1 Control pannel 2.1 LED Description FLASH ONLINE Micro-Adjust OFFLINE ONLINE Indicate rhe printer state LED 1, 2... -
Page 19: In The Single Sheet Mode
DP320 User's Manual ONLINE indicator is on and the printer enters into the print mode. Press this key in the offline mode, the printer is offline, ONLINE indicator is off and the printer can not print. 2. If the paperr is at the tear position in the offline mode, press ONLINE button, the printer will go back to the current page or the original print position of next page. -
Page 20: Feed Paper To The Tear Position
DP320 User's Manual position set by the factory). 2.2.5 Feed Paper to the Tear Position 1. Turn on the printer, hold the ONLINE button 3 seconds till the ONLINE indicator is on with a beep in the offline mode. 2. Hold the TEAR button 3 seconds that you can switch the function of feeding paper to the tear position automatically ON or OFF. - Page 21 DP320 User's Manual 2. Use the table below to select the appropriate paper thickness. Copies(including original) Lever position (Reserved) Standard paper (single sheets or continuous) 2-sheet 3-sheet Multi-part forms 4-sheet 5-sheet 20-sheet Envelopes 24-sheet (Reserved) - 17 -...
-
Page 22: Chapter 3 How To Use The Printer
DP320 User's Manual Chapter 3 How to use the printer Here are the steps of using printer: 1. Assemble the printer as the chapter 1, connect the printer to your computer and install the driver correctly. 2. Load the correct type of paper 3. -
Page 23: Printing On Continuous Papers
DP320 User's Manual Figure 3-3 Raise the paper guide upright 4. Slide the left edge guide until it locks in place at the triangular guide mark. Next, adjust the right edge guide to match the width of your paper Figure 3-4 Adjust the paper guide 5. - Page 24 DP320 User's Manual such as continuous forms with printed tables, multiple sheets and labels. Here’s how to load continuous paper: Printing in the push tractor position When using the push tractor, it is a good idea to set the auto tear off feature in the Printer Setting mode ON.
- Page 25 DP320 User's Manual 5. Make sure your paper has a clean, straight leading edge. Open the sprocket covers. Fit the first holes of the paper over the sprocket pins and then close the sprocket covers. Slide the right sprocket unit to remove any slack in the paper and lock it in place. Now the paper is in the paper-park position.
- Page 26 DP320 User's Manual Note: Do not use the knob to adjust the paper-in position due to the micro-range is limited. When the adjustment exceeds the up-limit or down-limit, the beeper beeps and the position can not be adjusted for a further time. The position is in effect before next adjustment.
- Page 27 DP320 User's Manual the scale on the printer as a guide. The printer prints to the right of the position marked 0. Figure 3-13 Insert the continuous paper into the paper slot Note: Make sure your paper supply is positioned within 1 meter (3 feet) of the printer.
-
Page 28: Multi-Part Forms
DP320 User's Manual 10. Make sure the printer cover is closed. Then turn on the printer. When the printer receives data, it begins printing automatically. When using push tractor and pull tractor at the same time 1. Turn the printer off; then remove the paper guide. Pull the paper-select lever forward to the continuous paper position as shown in the illustration on page 2.3. -
Page 29: Labels
DP320 User's Manual Figure 3-17 Raise paper guide 3.1.4 Labels You must use the tractor as a pull tractor to print on labels. Keep these tips in mind: 1. Choose labels mounted on a continuous backing sheet with sprocket holes made for use with a tractor. -
Page 30: Using The Printer Setting Mode
DP320 User's Manual 3. Use envelopes only under normal temperature and humidity conditions. 4. Make sure the printing stays entirely within the printable area. The print head must not go past the left or right edge of the envelope or other thick paper. (See the Appendix for specifications.) It’s a good idea to print a test sample using a normal single sheet of paper before you print on the envelopes. -
Page 31: Printer Setting Descriptions
DP320 User's Manual Jolimark DP320 Current Setting FONT SANS SER COURIER PRESTIGE SCRIPT OCR-B OCR-A ORATOR ENG PITCH 12 CPI 15 CPI PROPORTIONAL CHI PITCH 7.5 CPI LINE SPACING 8 LPI FORM LENGTH 3 INCH 11/3INCH 3.5 INCH 4 INCH 5 INCH 5.5 INCH... -
Page 32: Config Setup
DP320 User's Manual printed pages. When the printer receives data, it automatically reverses the paper to the top-of-form position and starts printing, so you can use whole of the next sheet. When you use the tractor to print on labels, set this feature to Off. -
Page 33: Restore The Default Settings
DP320 User's Manual 3.2.3 Restore the Default Settings You can restore to the factory printer settings without having to work through the Setup Menu System to reset the menus. 1. Hold on TEAR, LOAD/EJECT and LF/FF keys on the control panel at the same time for 3 seconds, and then turn on the printer. -
Page 34: Chapter 4 Problems And Solutions
Solutions: Check whether the printer’s rating volage is matched with the power cord. If not, unplug the power cord immediately and contact your dealer or a specified jolimark service center for advice. Do not plug the power cord to the electrical outlet again. - Page 35 2. Let the print head cool. Then switch on and try to print again. If the printer still does not print correctly, contact your dealer or a specified jolimark service center. Phenomenon 5: The beeper sounds once and the ONLINE indicator is off.
-
Page 36: Paper Handling
DP320 User's Manual 2. Check the page length set by your software and adjust it n the sofeware or in the printer to match the paper length. Phenomenon 2: Regular gaps occur in the printout. Solutions: Skip-over-perforation may be on. Set skip-over-perforation to off in the Printer Setting mode. -
Page 37: Options
DP320 User's Manual 7. Check whether the paper specifications meet the standard request according to the Appendix Phenomenon 3: The paper does not eject completely. Solutions: 1. May be the page length is too long. When using the pull tractor, tear off the paper having entered the printer, then press the LF/FF button to feed the paper forward. -
Page 38: Appendix A Specifications
DP320 User's Manual Appendix A Specifications A.1 General Item Description Type 24-Pin Dot Matrix Impact Printer Print direction The shortest distance bidirectional logic seeking Print width 80 columns(10cpi)/ 203.2 mm Print speed ASCII Chinese speed 10 CPI 12 CPI speed 6.7 CPI... - Page 39 DP320 User's Manual Paper specification Cut sheet: : Width: 148 ~ 257 mm Thickness: 0.065 ~ 0.14 mm Weight: 52 ~ 90 g/m Continuous paper: Width: 101.6 ~ 254 mm Total Thickness: 0.065 ~ 0.39 mm Weight: Single paper 52 ~ 82 g/m Multiple paper Every page 40 ~...
-
Page 40: Printable Area
DP320 User's Manual A.2 Printable Area Note: 1. To assure the print quality, please make sure the print contents are within the printable area. 2. If the print contents exceed the printable area, the printhead may be damaged. A.2.1 Single Sheets and Envelopes A: The mininum top margin ≥... -
Page 41: Usb Interface
DP320 User's Manual BUSY and ACKNLG signals Handshaking: TTL compatible Signal level: A.3.2 USB Interface The following table provides the standardized contact terminating assignments by number and color for Series “A” and Series “B” connectors of Full-speed USB 2.0. Contact Number... -
Page 42: Appendix B Command Summary
DP320 User's Manual Appendix B Command Summary B.1 Sending Printer Commands Most actions your printer performs are controlled by your software. Software commands instruct the printer to print in a particular typeface, feed the paper a certain amount after printing each line, start printing at a particular place on the page, and so on. -
Page 43: Print Mode
DP320 User's Manual Name Code (Symbol) Code (Hex.) Code(Dec.) Select a VFU Channel ESC / Select VFU Positions ESC b Set right Margin ESC Q Set Left Margin ESC l Horizontal Tab Set Horizontal Tab Positions ESC D Set Character Space... -
Page 44: Download Character
DP320 User's Manual Name Code (Symbol) Code (Hex.) Code(Dec.) Select Character Table ESC t n Enable Character Set 2 ESC 6 Cancel command ESC 6 ESC 7 Assign Character Table ESC ( t Download Character Select/Deselect User-Defined Set ESC % n Define Downloaded Characters ESC &...
Need help?
Do you have a question about the DP320 and is the answer not in the manual?
Questions and answers