Table of Contents
Advertisement
Quick Links
Advertisement
Table of Contents
Troubleshooting

Related Manuals for Jolimark DP100


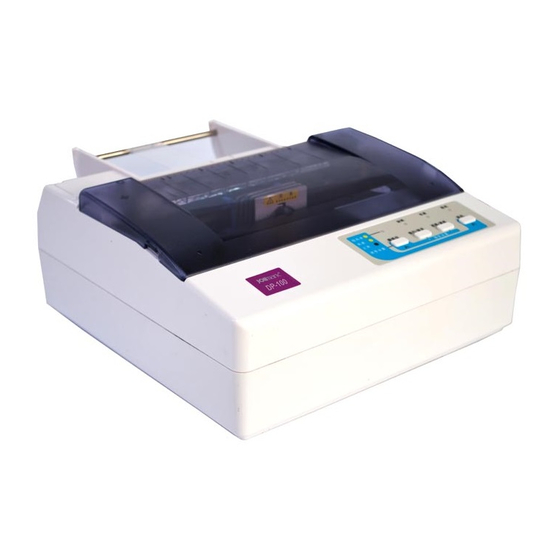
Summary of Contents for Jolimark DP100
- Page 1 User's Manual DP100 Series Receipt Printer...
-
Page 2: Important Safety Instruction
DP100 User’s Manual Important Safety Instruction Be sure to have read the manual carefully before your operation. Neither our Corporation nor its affiliates shall be liable to the purchaser of this product or third parties for damages, losses, costs, or expenses incurred by purchaser or third parties as a result of: accident, misuse, or abuse of this product or unauthorized modifications, repairs, or alterations to this product, or failure to strictly comply with our Corporation’s operating and maintenance instructions. -
Page 3: Overview
DP100 is the new-style printer with high quality performance, 24-pin and 40-column for bill printing. DP100 is ideal for a wide range bill printing requirements, especially for all kinds of instruments and the industries of post & telecom, business, transportation and finance. -
Page 4: Table Of Contents
DP100 User’s Manual Contents Important Safety Instruction......................i Overview ............................ii Chapter 1 Installation ........................1 1.1 Unpacking ..........................1 1.2 Unpacking the Protective Materials..................1 1.3 Identifying Main Parts of the Printer ..................2 1.4 Installing the Ribbon Cartridge....................2 1.5 Installing and Uninstalling the Top Cover ................. - Page 5 DP100 User’s Manual A.3 Troubleshooting........................34 Appendix B Specifications ......................36 B.1 Basic Specification ........................ 36 B.2 Printable Area........................38 Appendix C Command Code Summary ..................39 C.1 Introduction ........................... 39 C.2 ESC/PK2 Command Codes....................39 C.3 ESC/POS Command Codes....................41 C.4 STAR320 Command Codes ....................
-
Page 6: Chapter 1 Installation
DP100 User’s Manual Chapter 1 Installation 1.1 Unpacking Check each item against the following packing list, if any of these items are missing, please contact your local dealer. ★ Interface cable is an optional part, it is selected or canceled as client’s requirement. -
Page 7: Identifying Main Parts Of The Printer
DP100 User’s Manual 1.3 Identifying Main Parts of the Printer DP100F/FS/FU/FUE DP100/S/U/UE Paper guide film Top cover Top cover Tractor Paper ladle Control panel Control panel Power cord Power cord Paper feed knob Paper feed knob Power switch Power switch... - Page 8 And then install a new one as the above steps. 3. Please use the Jolimark JMR116 ribbon cartridge, our company will not guarantee to keep the printer in good repair, when it is damaged by unauthorized ribbon cartridge.
-
Page 9: Installing And Uninstalling The Top Cover
1.6 Connecting the Computer or Other Equipment DP100 is equipped with one data interface (parallel interface, serial interface, USB interface or USB & Ethernet interface) and one cash drawer interface. (According to specific interface standards) Please contact your dealer to change the interface with payment if needed. Make sure that you have selected the proper cable before connecting. -
Page 10: Connecting The Parallel Interface Cable
DP100 User’s Manual printer gets damaged for this reason that cannot be kept in repair service. 1.6.2 Connecting the Parallel Interface Cable 1. Make sure that the computer and the printer are both turned off, connect the parallel interface cable to the connector on the rear side of the printer, squeeze the wire chips together until they are locked into place on both sides of the connector. -
Page 11: Connecting The Ethernet Interface Cable
DP100 User’s Manual Screws Serial interface Serial cable Figure 1-12 Connecting the serial cable 1.6.5 Connecting the Ethernet Interface Cable Plug the crystal end of the Ethernet cable (RJ-45) into the printer’s Ethernet interface, plug the other end of the Ethernet cable to the LAN. (As shown in Figure1-13) -
Page 12: Installing The Driver
CD-ROM-“Driver”-“WIN 2000(XP-Vista-Win7)”, that you can find a file named: DP100.inf, click “Open”, then click “OK”, return to the window of “Manufactures/Printers”, click “Next”. 6. Follow the direct click “Next” gradually till the installation is finished. The installing steps for Windows 7 are as follows:... - Page 13 Disk...”, please click “Browse”, select the path as follow: CD-ROM-“Driver”-“WIN98 (WINME)”, where you can find a file named: DP100.inf, click “Open”, and then click “OK”. 4. Come out a window of “Install From Disk”, click “OK”, return to a window of “Add Printer”, then click “Next”.
-
Page 14: Network Settings
Disk...”, please click “Browse”, select the path as follow: CD-ROM-“Driver”-“WIN98 (WINME)”, where you can find a file named: DP100.inf, click “Open”, and then click “OK”. 4. Come out a window of “Install From Disk”, click “OK”, return to a window of “Add Printer", then click “Next”. - Page 15 DP100 User’s Manual Button description: Exit—Exit from the software Search—Search printers in the same LAN Assign IP—Modify the IP address and other settings for the specified printer. 2. Search printer Click “Search” button in the main interface, the dialog box appearing will begin searching automatically and show appearance, listing a printer in the main interface if found.
- Page 16 DP100 User’s Manual 1) Correlative description for IP address settings In order to search and set printer’s IP address conveniently for the first time, the factory default setting is DHCP mode which assigns IP address dynamically. If there is no DHCP server in the connected LAN and printer is set to DHCP mode as well, then it will use the internal pre-set address (IP: 10.0.0.1, Subnet Mask: 255.255.255.0) automatically.
-
Page 17: Installing Printer Network Driver
DP100 User’s Manual printer’s IP address. 3) Report printer’s IP address Report the printer’s IP address, which will be used in the section “Newly-install printer network driver” or “Upgrade-install printer network driver (setting driver’s network port)”. 1.9.3 Installing Printer Network Driver The ways of installing network driver are divided into Newly-install way and Upgrade-install way according to whether the PC installs the printer driver or not. - Page 18 DP100 User’s Manual 7) Come out a window of “Additional Port Information Required”, select “Custom” in the “Device Type”, and then click “Settings”. 8) Come out a window of “Port Settings”. Affirm that “Port name” and “Printer name or IP address”...
- Page 19 Windows 2000/XP/Vista/Win7 operating system you should select the path as follows: CD-ROM-“Driver”-“WIN2000 (XP-Vista-Win7)”, that you can find a file named: DP100.inf, click “open”, then click “OK”, then return to the window “install printer software”, click “next”. 13) Follow the direct click “next” gradually till the installation is finish. At this time, printer network driver is installed completely.
- Page 20 DP100 User’s Manual 4) Come out a window of “Printer port”, select “Standard TCP/IP Port”, click “New port”. 5) Come out a window of “Add Standard TCP/IP Printer Port Wizard”, click “Next”. 6) Come out a window of “Add a port”, import the IP address reported by the “Setting printer’s IP address”...
- Page 21 DP100 User’s Manual “192.168.0.240” for example. “Port name” is created automatically after finishing filling in IP address. Click “Next”. 7) Come out a window of “Port information”, select “Custom” in the “Equipment style”, then click “setting”. 8) Come out a window of “Port Settings”. Affirm that “Port name” and “Printer name or IP address”...
- Page 22 DP100 User’s Manual 9) Return to “Additional Port Information Required”, click “Next”. 10) Come out a window of “Completing the Add Standard TCP/IP Printer Port Wizard”, click “Finish”. 11) Return to “Printer Ports”, click “Close”. 12) Return to “Properties”, make sure the network port is selected, click “Apply”, and then click “Close”.
- Page 23 DP100 User’s Manual - 18 -...
-
Page 24: Chapter 2 Control Panel
DP100 User’s Manual Chapter 2 Control Panel 2.1 Control Panel The control panel consists of four keys and four LEDs as shown in Figure 2-1. Figure 2-1 control panel 2.1.1 Function Keys You can use the four keys on the control panel to operate your printer. -
Page 25: Indicator Led
DP100 User’s Manual LF/FF + TEAR + Power Switch Enter Hex Dump mode LOAD/EJECT+ LF/FF + Power Switch Print the current printer setting In the online mode, hold down the LOAD/EJECT key, the printer will enter the current printer setting mode, the functions of the keys are described as follows:... -
Page 26: Set The Print Speed, The Top Of Form And The Tear-Off Position
DP100 User’s Manual Indicator LED Function ON:ONLINE mode; OFF: OFFLINE mode ONLINE ON: paper out; OFF: paper in PAPER OUT OFF: normal speed; ON: high speed; BLINK: super high speed SPEED ON: the printer is turned on; OFF: the printer is turned off POWER When the printer has something wrong, the printer buzzer sounds with “beep…beep”, and the... - Page 27 DP100 User’s Manual The printer automatically loads paper and prints the current setting report as shown in Figure 2-2. Jolimark DP100 Current Setting Report Version X.XX XXX XXXX-XX-XX SN: XXXXXXXXXXXXXXXXXXX DHCP: XX IP: XXX.XXX.XXX Subnet Mask: XXX.XXX.XXX.XXX Gateway: XXX.XXX.XXX.XXX MAC: XX-XX-XX-XX-XX-XX...
-
Page 28: To Enter The Setup Menu System And Change The Settings
DP100 User’s Manual GRAPHIC DIR BI-DIR UNI-DIR QUIET MODE AUTO LF FF TO TEAR FF BY CONTENT LOADING PUSH KEY 0.5 SEC. 1.0 SEC. 2.0 SEC. IMPACT MODE PAPER TYPE ROLL TRACTOR BLACK MARK TEAR KNIFE PIN SWITCH HEAD PIN... -
Page 29: Description Of Options
DP100 User’s Manual 2. Hold down the LOAD/EJECT key for about 3 seconds. The PAPER OUT LED and ONLINE LED blinks two times simultaneously. The printer enters setup menu system. Firstly, it prints out title and main menu. (As Figure2-3 shown) The default options are underlined. -
Page 30: Online-Aptitude Parameter Settings
“BROKEN”, and then the printer will compensate the position of broken pins automatically. 2.5 Online-aptitude Parameter Settings DP100 supports the function of online-aptitude parameter settings, which can be set in the PC with the driver installed in. - 25 -... -
Page 31: Using The Self Test Functions
2. Click “Start” → “Settings” → “Printers”, open the window of “Printers”. 3. Right click “ Jolimark DP100” in the “Printers”, select “Properties”. 4. Click “Device Property” in the property page. - Page 32 DP100 User’s Manual H PRINT MODE Jolimark DP100 Version X.XX XXX XXXX-XX-XX SN: XXXXXXXXXXXXXXX DHCP: XX IP: XXX.XXX.XXX Subnet Mask: XXX.XXX.XXX.XXX Gateway: XXX.XXX.XXX.XXX MAC: XX-XX-XX-XX-XX-XX HHHHHHHHHHHHHHHHHHHHHHHHHHHHHHHHHHHHHHHHHH HHHHHHHHHHHHHHHHHHHHHHHHHHHHHHHHHHHHHHHHHH HHHHHHHHHHHHHHHHHHHHHHHHHHHHHHHHHHHHHHHHHH Figure 2-5 H print mode ASCII Test Mode Continuous printing of ASCII pattern is performed by turning power on, while pressing the ONLINE key.
- Page 33 DP100 User’s Manual Hex Dump Mode Turn the power on while pressing the LF/FF + TEAR keys, then the printer will enter Hex Dump mode. In this mode, the data which are sent from computer will print with Hex mode.
-
Page 34: Chapter 3 Loading Paper
DP100 User’s Manual Chapter 3 Loading Paper DP100 can use many kinds of different specification papers. And it also has convenient install and uninstall paper function. This chapter will introduce these functions in detail. 3.1 Paper Thickness Adjustment Before loading roll paper or tractor paper, you have to adjust the gap adjust lever on the right side of the printer. - Page 35 DP100 User’s Manual Back cover Figure 3-2 Lift up the back cover 3. Release the tractor locking levers, adjust the tractor position, and make it closed to the paper width. Tractor Tractor locking lever Figure 3-3 Release the tractor locking levers 4.
-
Page 36: Loading The Roll Paper
DP100 User’s Manual 7. Turn on the printer after installing the tractor paper, press LOAD/EJECT key, then it can load tractor paper automatically. Then adjust the top of form position. 3.4 Loading the Roll Paper 1. Ensure the paper ladle has been installed on the back of printer and the printer is turned off. - Page 37 DP100 User’s Manual 6. Turn the paper feed knob to adjust the Top-of-Form position. At this time, printer has already prepared for files printing. Before loading paper, printer stays at waiting state, and indicators on control panel will remind you of loading paper according to “Paper-out”...
-
Page 38: Appendix A Maintenance And Troubleshooting
DP100 User’s Manual Appendix A Maintenance and Troubleshooting A.1 Maintenance Clean out the waste paper or other sundries inside the printer periodically. Close the top cover when the printer is not being used. Carriage frame Paper path Carriage shaft Black mark sensor... -
Page 39: Troubleshooting
DP100 User’s Manual not printing. Reason: The temperature of the print head is too high, so it enters into the protection state. Solution: Wait patiently, and the printer will recover automatically after the print head is cool. (2) Fault check of the restoration sensor Phenomenon: PAPER OUT LED and ONLINE LED blink alternately. - Page 40 DP100 User’s Manual print character Phenomenon: The printer can’t print the appropriate characters. Solution: Make sure the driver is installed correctly, and the character format you selected in the application is in the appropriate format. - 35 -...
-
Page 41: Appendix B Specifications
DP100 User’s Manual Appendix B Specifications B.1 Basic Specification Item Description Type 24-Pin Dot Matrix Impact Printer Print direction Bidirectional logic research orientation printing Print width 40 columns (10cpi)/101.6 mm Print speed ASCII 10 CPI Chinese 7.5 CPI Speed 10 CPI... - Page 42 MTBF≥10000 hours (IEC 605.7standard) Safety marks GB 4943 Wireless Grade B disturbance Note: Print head’s life and MTBF should be under Jolimark appointed conditions of the above descriptions, and use the appointed paper and ribbon that testing requirements. - 37 -...
-
Page 43: Printable Area
DP100 User’s Manual B.2 Printable Area Note: 1. To ensure the print quality, please make sure the contents are all within printable area. 2. If contents are out of the printable area, it may cause print head to break pins. -
Page 44: Appendix C Command Code Summary
STAR320 model command codes, it just fit for the users who are using STAR320 model already and using DP100 to replace STAR320 model, it is not suggest for new users to use. A schedule is listing below and gives explanations for every command. The explanation of each command contains two parts of format and explanation. - Page 45 DP100 User’s Manual ESC @ 1B 40 Initialize printer ESC A 1B 41 n Set n/60” Line Spacing ESC B 1B 42 n1 n2…0 Set Vertical Tab Positions ESC C 1B 43 n Set Form Length in Lines ESC C 0...
-
Page 46: Esc/Pos Command Codes
DP100 User’s Manual FS K 1C 4B Select transverse printing FS S 1C 53 n1 n2 Select full-size mode pitch for Chinese character FS T 1C 54 n1 n2 Select half-size mode pitch for Chinese character FS U 1C 55... -
Page 47: Star320 Command Codes
DP100 User’s Manual FS ! 1C 21 n Select print mode for Chinese character C.4 STAR320 Command Codes Symbol Code (Hex.) Function Horizontal tab Print and line feed Enter next vertical tap position Form feed Carriage return Select enlarge font mode... -
Page 48: Printer Operating Commands
DP100 User’s Manual Printer Operating Commands ESC @ Initialize printer Format: ASCII: Decimal: Hex: Description: The data in the print buffer is cleared and the printer mode(s) is reset to the mode that was in effect when the power was turned on. -
Page 49: Data Control Commands
DP100 User’s Manual ESC J n/180 inch line feed Format: ASCII: Decimal: Hex: Description: n=0~255; Carriage return can not occur after using this command for line feed. Data Control Commands Print and carriage return Format: ASCII: Decimal: Hex: Description: After finishes printing one line, the print head moves back to the beginning of print line. -
Page 50: Line Spacing Commands
DP100 User’s Manual ESC O Cancel page slot blank Format: ASCII: Decimal: Hex: Description: Cancel the page slot blank set by the ESC N command. ESC l Set left margin Format: ASCII: Decimal: Hex: Description: 0≤n≤255, Set the left margin at n lines according to the current character width. -
Page 51: Orientation Setting Commands
DP100 User’s Manual ESC 3 Set n/180 inch line spacing Format: ASCII: Decimal: Hex: Description: Specifies the line feed pitch in units of n/180 inch n=0~255. ESC + Set n/360 inch line spacing Format: ASCII: Decimal: Hex: Description: Specifies the line feed pitch in units of n/360 inch n=0~255. -
Page 52: Print Position Commands
DP100 User’s Manual Specify vertical tabs from the lowest tab and end with (00) ESC / Select a VFU Channel Format: ASCII: Decimal: Hex: Description: 0≤c≤7. The VT command selects vertical tab channel according to this command. When using ESC B, the default channel is the 0 channel. -
Page 53: Font Enhancement Commands
DP100 User’s Manual Font Enhancement Commands Select double width mode Format: ASCII: Decimal: Hex: 0E Description: Beginning from the current position, set to double width printing in English mode. This command is invalid in picture printing. Cancel double width printing with DC4 or CR command. - Page 54 DP100 User’s Manual with bold mode. ESC H Cancel double-strike mode Format: ASCII: Decimal: Hex: 1B Description: Cancels double-striking mode set by ESC G, which can be used in Chinese character printing mode. ESC S n Select Superscript/Subscript Mode Format:...
-
Page 55: Print Effect Commands
DP100 User’s Manual a1: Specify net spot area: a1=0, Select background net spot. a1=1时, Select font interior net spot. a2: Select net lines style (The original value is 0). 0: Cancel net spot. 1: Solid net spot; 2: Dot-shape net spot; 3: Diagonal net spot. 4: Crossing net spot. - Page 56 DP100 User’s Manual ESC M Select Character Width Mode (12CPI) Format: ASCII: Decimal: Hex: Description: Set the character spacing as 12 CPI for Chinese characters or full-size characters. ESC g Select 15CPI Mode Format: ASCII: Decimal: Hex: Description: Set the character spacing as 15 CPI for Chinese characters or full-size characters.
-
Page 57: Character Commands
DP100 User’s Manual When characters are enlarged, the character spacing is n times normal value. The character spacing for double-width mode is twice the normal value. As for draft mode, the horizontal motion unit is 1/120 inch. Character Commands ESC R... -
Page 58: Chinese Character Printing Commands
DP100 User’s Manual Number of data k=n1+n2*256 Horizontal dot density: 120dpi. ESC Z Select 8-dot Quadruple-Density Format: ASCII: Decimal: Hex: Description: Number of data k=n1+n2*256 Horizontal dot density: 240dpi. ESC * Select image print mode Format: ASCII: ESC * d1.. dk Decimal: d1. - Page 59 DP100 User’s Manual Double-width Double-height ESC I A ESC I B ○ ESC I C ○ ESC I D ○ ○ FS & Set Chinese language mode Format: ASCII: & Decimal: Hex: Description: This command sets Chinese language mode. After receiving this command, the printer stops to print characters in Chinese language mode starting from next line.
- Page 60 DP100 User’s Manual The characters in this mode can be printed twice and the line spacing is added 24/180 inch that of current line spacing. This command is of no effect if there are paper feeding commands such as CR, LF, FF, VT and ESC J and other characters in the line.
- Page 61 DP100 User’s Manual Default: n1=0, n2=3 when the printer is turned on. FS T Select half-size mode pitch for Chinese character Format: ASCII: Decimal: Hex: Description: 0 ≤ n1 ≤ 127, 0 ≤ n2 ≤ 127 Set the character left-side spacing to n1*(horizontal or vertical motion unit), right-side spacing to n2*(horizontal or vertical motion unit).
- Page 62 DP100 User’s Manual FS x Select /Cancel high speed printing Format: ASCII: Decimal: Hex: Description: n=1, Turn on the Chinese character high speed printing mode. n=0, Turn off the Chinese character high speed printing mode. FS 2 Chinese character of user-defined...
-
Page 63: Esc/Pos Commands Description
DP100 User’s Manual C.6 ESC/POS Commands Description This section will describe for ESC/POS command lists. The definition of these commands are same as ESC/PK except ESC ! 、ESC E、ESC G、ESC U、 ESC c 4、ESC c 5、ESC d、ESC p、ESC {、FS ! 、FS W. - Page 64 DP100 User’s Manual When LSB of the n is 1, the unidirectional print mode is turn on. ESC c 4 Select whether printing when paper end Format: ASCII: Decimal: Hex: Description: When the LSB of n is 0, printer goes on printing when paper end.
-
Page 65: Parts Of Star320 Compatible Commands Description
DP100 User’s Manual Not define Underline is selected Underline is not selected FS W Select/Cancel quadruple-size mode for Chinese character Format: ASCII: Decimal: Hex: Description: 0 ≤ n ≤ 255 When the LSB of n is 0, cancel the quadruple-size mode. -
Page 66: Paper Feed Commands
DP100 User’s Manual Beeper Format: ASCII: Decimal: Hex: Description: Actives the printer buzzer Paper Feed Commands Print and Form feed Format: ASCII: Decimal: Hex: Description: Prints the data in the print buffer and feeds paper to the print starting position on the next page according to the page length current setting. -
Page 67: Page Mode Setting Commands
DP100 User’s Manual Cancel line buffer Format: ASCII: Decimal: Hex: Description: Deletes all the print data in the current line buffer and initializes the printer. Page Mode Setting Commands ESC C Set form length in lines Format: ASCII: Decimal: Hex: Description: Set Form length at n lines according to the current line spacing. -
Page 68: Line Spacing Commands
DP100 User’s Manual ESC Q Set right margin Format: ASCII: Decimal: Hex: Description: 0≤n≤255, Set the right margin at n lines according to the current character width. Line Spacing Commands ESC 0 Set 1/8 inch line spacing Format: ASCII: Decimal:... -
Page 69: Orientation Setting Commands
DP100 User’s Manual ESC z Set 1/6 or 1/12 inch line spacing Format: ASCII: Decimal: Hex: Description: Specifies the line feed pitch is 1/6 or 1/12 inch. n=0 or “0”, Set 1/12 inch line spacing. n=1 or “1”, Set 1/6 inch line spacing. -
Page 70: Font Enhancement Commands
DP100 User’s Manual Font Enhancement Commands Select enlarge font mode Format: ASCII: Decimal: Hex: 0E Description: Beginning from the current position, set to double width printing mode. The function of this command is same as ESC W n and you can cancel it with DC4 command. -
Page 71: Character Processing Commands
DP100 User’s Manual ESC - Turn underline mode on/off Format: ASCII: Decimal: Hex: Description: x = 0 (ASCII): Turns off underline mode x = 1 (ASCII): Turns on underline mode The underline mode is effective for all the English characters including space, but the printer cannot underline the space set by tab. - Page 72 DP100 User’s Manual ;+-+-+-+-+-+-+-+-+ ;|7|6|5|4|3|2|1|0| ;+-+-+-+-+-+-+-+-+ | +-- 0: Checkout code, 1: Not printing checkout code(Only suits to 39 barcode and three kinds of 25 barcode) +---- 0: Printing character, 1: Not printing character(Suits to all barcodes.) ; +---------------- 0:Barcode(If 1, not print barcode. So it must be 0)...
-
Page 73: Appendix D Interface
DP100 User’s Manual Appendix D Interface D.1 Cash Drawer Interface Figure D-1 Cash drawer interface Pin Assignments Pin NO. Signal Name Signal Direction Frame GND Cash drawer drive signal 1 Output Cash drawer Open/closed signal Input +24VDC Power Cash drawer drive signal 2... - Page 74 DP100 User’s Manual Table D-2 Return Signal Direction Description number /STROBE Data selected The selected pulse width is 0.5us. DATA1 Bit 1 IN/OUT DATA2 Bit 2 IN/OUT DATA3 Bit3 IN/OUT ndicate 8-bit parallel data signal. High lever DATA4 Bit 4...
-
Page 75: Usb Interface
DP100 User’s Manual Null pin This pin is null. Power The voltage is pulled to 5V through 3.3KΩ supply resistance. Printer ★ Only when this signal lever is low, can /SLCTIN selected data input to the printer. respond. The “Direction” in the above table is the flow which is for printer signal to printer. -
Page 76: Serial Interface
DP100 User’s Manual Figure D-4 USB-B type connector 2. Connecting with printer and computer USB interface shown as figure D-5. VBUS USB DP D+ USB DM D- Figure D-5 Connecting figure of printer and computer USB D.4 Serial Interface Serial Interface Specifications The serial interface meets the standard of RS-232. -
Page 77: Ethernet Interface
DP100 User’s Manual 0=high (Space): +3 ~ +15VDC Pin Assignments as table D-3 shown Table D-3 Pin Number Name Direction Pin Description — Frame ground Send data Receive data — Signal ground Data terminal ready Note: The signal direction is according to the printer main board. -
Page 78: Appendix E Black Mark
DP100 User’s Manual Appendix E Black mark DP100 series printer is equipped with black mark checked settings, which is installed on the left side of the printer at the factory setting and other selectable installed position should be reserved. The concrete installed position of black mark sensor is according to the paper specification that customer use practically.
Need help?
Do you have a question about the DP100 and is the answer not in the manual?
Questions and answers