Table of Contents
Advertisement
Quick Links
Advertisement
Table of Contents

Related Manuals for Jolimark bp-900kll


Summary of Contents for Jolimark bp-900kll
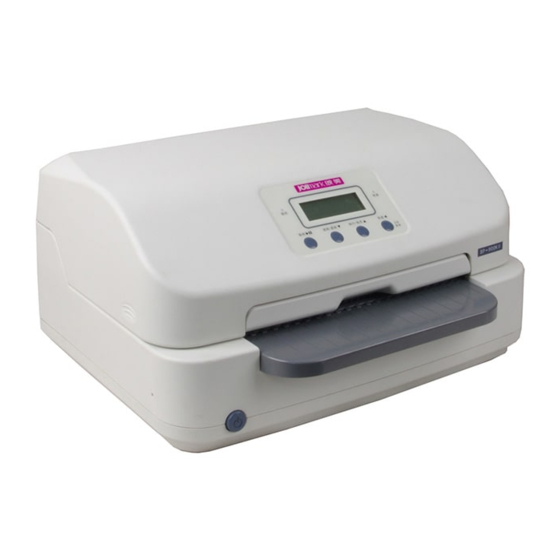
- Page 1 User's Manual BP-900KII Printer...
- Page 2 Corporation names and product names are the registered trademarks or commodity names of the corporation. * Jolimark is a registered trademark of Kong Yue Electronics & Information Industry (XIN HUI) LTD. * EPSON and ESC/PK2 are the registered trademarks of Seiko Epson Corporation.
-
Page 3: Important Safety Instructions
BP-900KII User's Manual Important Safety Instructions Read all of these instructions carefully and thoroughly and save them for later reference. The unauthorized operation would lead to malfunction or accident. Manufacturers have no responsibilities for the problems which are led by misoperations. Follow all warnings and instructions in the manual as well as marked on the product. - Page 4 BP-900KII User's Manual A. When the power cable or plug is damaged or frayed. B. If liquid has been spilled into the product. C. If the product has been exposed to rain or water. D. If the product does not operate normally when the operating instructions are followed. E.
-
Page 5: Table Of Contents
BP-900KII User's Manual Table of Contents Declare................................i Important Safety Instructions ........................ii Chapter 1 Product Features........................1 Chapter 2 Checking and Installing ......................3 2.1 Unpacking and Checking ........................3 2.2 Removing the Protective Materials......................3 2.3 Main Parts of the Printer........................4 2.4 Installing the Printer ..........................4 2.4.1 Choose Proper Installing Place ....................4 2.4.2 Upper Frame Lever ........................5 2.4.3 Installing the Ribbon Cartridge .....................7... - Page 6 BP-900KII User's Manual 4.6 The Self Test Functions........................33 4.6.1 ASCII Self Test..........................33 4.6.2 Hex Mode ........................... 33 4.6.3 Head Pin Test ..........................33 4.6.4 Alignment Adjust Mode ....................... 34 Chapter 5 Maintenance and Troubleshooting ..................35 5.1 Cleaning the Printer .......................... 35 5.1.1 Replacing the Ribbon Cartridge....................
-
Page 7: Chapter 1 Product Features
BP-900KII User's Manual Chapter 1 Product Features Thank you for choosing this printer. It is a 24 pin and 94 columns high quality passbook printer, and it can fulfill your multifunctional printing requirement. The printer has the specialties as follows: Auto match the paper thickness Use floating flat platen which matches the paper thickness automatically, so that it makes the printing quality better. - Page 8 BP-900KII User's Manual Letter quality font There are Draft, Roman, Sans Serif, Courier, Prestige, Script, OCR-A&B, ORATOR, etc. characters which can compare with other band of printer. Bar code memorizer Standard bar codes show as follows: EAN-13, EAN-8, Interleaved 2 of 5, Matrix 2 of 5, Industrial 2 of 5, Code 39, Code 128 B, Code 128 C, and NW-7.
-
Page 9: Chapter 2 Checking And Installing
BP-900KII User's Manual Chapter 2 Checking and Installing 2.1 Unpacking and Checking Check the following items in the package, if any of these items is missing, please contact your dealer. (as Figure 2-1 shown) Ribbon cartridge JMR128/JMR131 Power cable Printer Driver CD (Including User's Manual and Driver) Facility user's guide... -
Page 10: Main Parts Of The Printer
BP-900KII User's Manual 2.3 Main Parts of the Printer Figure 2-3 and Figure 2-4 show the main part names of printer. Control panel Upper cover Ribbon cartridge Upper frame lever (JMR128/JMR131) Print head Carriage shaft Power switch Ribbon guide Figure 2-3 Main parts of the printer (Front view) Serial interface USB interface Power supply inlet... -
Page 11: Upper Frame Lever
BP-900KII User's Manual Placement area Approx. 15cm Approx.10cm Approx.10cm Figure 2-5 Printer placement 2.4.2 Upper Frame Lever Use the lever to lift the upper frame up and down, so that it is easier to install or remove the ribbon cartridge and maintenance. Before lifting the upper frame up or down through the upper frame lever, please open the printer upper cover. - Page 12 BP-900KII User's Manual Figure 2-7 (1) Lift up the upper frame Lever Frame pole Figure 2-7 (2) Fix the frame pole into the lever slot 2. Press down the upper frame Hold the lever with your left hand and pull the lever towards the front of printer to make the frame pole out of the lever slot, and then press the upper frame at the position which has a labe “PUSH 压下”, press the upper frame down until it lock in place.
-
Page 13: Installing The Ribbon Cartridge
BP-900KII User's Manual Lever Frame pole Figure 2-8 (2) Lock the upper frame 2.4.3 Installing the Ribbon Cartridge 1. Turn on the printer and open the upper cover. The print head would move to the middle position automatically and then turn off the printer. Note: Don’t replace the ribbon cartridge when the power is on, or else, it may hurt you when it suddenly starts to work. - Page 14 BP-900KII User's Manual Figure 2-10 Lock the upper frame 3. Take out the ribbon from the package, push the ribbon guide backwards as the arrow shown to divide the ribbon cartridge from the ribbon guide. Place the ribbon with ribbon knob upwards, turn the ribbon knob as the arrow shown to tighten the ribbon, so that it is easier to install.
- Page 15 2. When the print becomes faint, you need to replace the ribbon cartridge. Otherwise, the print quality would be affected and the print head may be damaged. 3. Please use the Jolimark JMR128/JMR131 ribbon cartridge only. Manufacturer will not honor warranty when using unauthorized ribbon cartridge.
-
Page 16: Connecting To Your Computer
BP-900KII User's Manual 2.5 Connecting to Your Computer The printer can be configured with parallel interface, USB interface, serial interface or Ethernet interface (Please take the specific interface as standard.). Please connect your computer and the printer with respective interface cable. (As Figure 2-15, 2-16, 2-17, 2-18 shown) Note: Before connecting the parallel interface or serial interface, please make sure the power of the printer is shut down. -
Page 17: Connecting The Ethernet Cable
BP-900KII User's Manual Screw Serial cable Serial interface Figure 2-17 Connecting the serial cable 2.5.4 Connecting the Ethernet Cable Plug the crystal end of the Ethernet cable (RJ-45) into the printer's Ethernet interface, and then plug the other end into the LAN’s entrance as shown in Figure 2-18. Ethernet cable Ethernet interface Figure 2-18 Connecting the Ethernet cable... -
Page 18: Installing The Driver
BP-900KII User's Manual Note:1. If the rated voltage and your outlet voltage do not match, do not plug in the power cable, and contact your dealer for assistance. 2. Use the electrical outlet which connecting the ground properly. 2.7 Installing the Driver Please use the cable to connect computer with printer, then turn on the computer and the printer, put the driver CD into the CD-ROM. - Page 19 BP-900KII User's Manual 4. A window of “Add Printer Wizard” pops up, click “Have Disk...”, click “Browse”. 5. A window of “Install From Disk” pops up. Please according to the operating system environment, you should select the path as follow: CD-ROM → “Drivers” → “WIN2000 (XP-Vista-Win7)”, click “Open”, then click “OK”...
-
Page 20: Ethernet Settings
6. The printer driver process is installed successfully. 2.8 Ethernet Settings Please use Jolimark network setting software NetFinder to set the IP address for Jolimark Ethernet interface network printers, which can be found in the CD or downloaded from www.jolimark.com. - Page 21 BP-900KII User's Manual counting down in the progress bar (10s in total) and the search will finish as soon as the time is over. When going on searching, press “search” button again. If the printer still can not be found out when the network connection is correct in the same network, please check whether the network fire wall on the PC opens or not.
-
Page 22: Installing Printer Network Driver
BP-900KII User's Manual dynamic address used in printer may conflict with another one). The network segment part of the IP address and Subnet Mask must be the same as those of PC connecting with a printer. For example, the address of working PC is 192.168.0.1/255.255.255.0 (IP/Subnet Mask), then which of printer should be set to 192.168.0.x/255.255.255.0(x=2~254 and should avoid the IP in used. - Page 23 BP-900KII User's Manual If the printer driver has been installed on the PC, adopt Upgrade-install way whose steps are shown in “Upgrade-install printer network driver”. 1. Newly-install printer network driver 1) Click “Start” → “Settings” → “Select Printers”. 2) Click “Add printer”, then a window of “Add Printer Wizard” pops up, click “next”, then please read the select guide carefully.
- Page 24 BP-900KII User's Manual 6) A window of “Additional Port Information Required” pops up, select “Custom” in the “Device Type”, then click “Settings”. 7) A window of “Port Settings” pops up. Affirm that “Port name” and “Printer name or IP address” are correct, “Protocol”...
- Page 25 BP-900KII User's Manual 8) Return to “Additional Port Information Required”, click “Next”. 9) A window of “Completing the Add Standard TCP/IP Printer Port Wizard” pops up, click “Finish”. 10) In the selection of “Manufacturers/Printers”, click “Have Disk”, and then click “Next”. 11) A window of “Install From Disk”...
- Page 26 BP-900KII User's Manual 5) A window of “Add Standard TCP/IP Printer Port Wizard” pops up, click “Next”. 6)A window of “Add a port” pops up, import the IP address reported by the “Setting printer’s IP address” in the “Printer name or IP address” column. Take IP address “192.168.0.240” for example. “Port name”...
- Page 27 BP-900KII User's Manual 8)A window of “Port Settings” pops up. Affirm that “Port name” and “Printer name or IP address” are correct, “Protocol” is “RAW” and “Port Number” is “9100”, click “OK”. 9)Return to “Additional Port Information Required”, click “Next”. - 21 -...
- Page 28 BP-900KII User's Manual 10)A window of “Completing the Add Standard TCP/IP Printer Port Wizard” pops up, click “Finish”. 11)Return to “Printer Ports”, click “Close”. 12)Return to “Properties”, make sure the network port is selected, click “Apply”, and then click “Close”. Thus, printer’s network port setting is finished. - 22 -...
-
Page 29: Chapter 3 Paper Process
BP-900KII User's Manual Chapter 3 Paper Process 3.1 Feeding the Cut Sheet (Cut sheet, Passbook, Certificate) You can feed cut sheet and single copy paper (Max 1+6 copy). Follow the steps as below to feed cut sheet: 1. Turn on the printer. 2. - Page 30 BP-900KII User's Manual 3.2 Feeding the continuous paper (Report form, single ply continuous paper, multiply continuous paper) You can feed cut sheet and single copy paper (Max 1+6 copy). Follow the steps as below to feed cut sheet: 1. Turn on the printer. 2.
-
Page 31: Chapter 4 Control Panel
BP-900KII User's Manual Chapter 4 Control Panel 4.1 Button, LED Light and LCD Display on the Control Panel There are four buttons, two LED lights and a LCD display on the control panel. (As shown in figure 4-1) The LCD display is dot matrix display part (128×32 dots), the display size is 62.7mm*17.6mm. The control panel is shown as follows: Figure 4-1 Control panel The meaning of LED light is shown as follows:... -
Page 32: The Information On The Lcd Display
BP-900KII User's Manual In offline mode, press this button to switch the speed modes among “NORMAL”, “HIGH1” and “HIGH 2”. At the same time, the LCD display would show the current printing speed. High Speed ◄ In online mode, hold down this button for about 3 seconds, the printer would enter menu setup mode. - Page 33 BP-900KII User's Manual √.) The detailed descriptions are as follows: 1) After entering menu setup mode, the information which shows in the LCD display as shown below. MENU SETUP 1. PRN SPEED ► 2) Press “LF/FF▲” button, “LOAD/EJECT▼” button to choose the option of the menu. (As shown below) MENU SETUP 2.
-
Page 34: Printing The Current Setting Report
BP-900KII User's Manual As the right picture shows, the option with a “√” is the current default setting of PRT-SPEED. 4) Press “▲” button, “▼” button to select the options up and down. For example, if you need to change the speed to “High 2”, you can press “▲” and “▼” to choose, then press “►II”... - Page 35 BP-900KII User's Manual Jolimark BP-٩٠٠KII Current Setting Report BP-٩٠٠KII VX.X XXX XXXX/XX/XX SN:XXXXXXXXXXXXXXXXXXXX PRN SPEED — — — — NORMAL PRN QLTY — — — — COPY — — — — EMULATION — — — — EPSON CHAR MODE — — — —...
-
Page 36: Menu Item Description
BP-900KII User's Manual 4.4.3 Menu Item Description Table 4-2: Menu item description as follow: Item Description Specify the print speed of printer. Printing resolution is lower while print speed is PRN SPEED higher. PRN QLTY Set the printing quality. COPY According to customer's printing requirement, select the printing capability. -
Page 37: Online Intelligent Parameter Setting
BP-900KII User's Manual every line feed instruction. Print head would move to the printing home position automatically. Specify the wait time between cut sheet is put into the paper guide and it is fed into LOAD PAPER the printer. SKEW After selecting this function on, printer would adjust the skew paper automatically CORRECT when loading cut sheet. -
Page 38: Restoring Factory Printer Settings
BP-900KII User's Manual 5. Corresponding with the third submenu setting methods of printer menu system, in the window of “Printer settings”, select main menu in the “Setting Class”, select second submenu in “Options”, at last, select setting parameter in current parameter item. 6. -
Page 39: The Self Test Functions
BP-900KII User's Manual When the printer in online mode, load paper and then press ▲ LF/FF for 3 seconds, and the printer LEDs of the power and online on the control panel blink by turns. Press “LF/FF▲”, “LOAD/EJECT▼” can change the setting of TOF (The max dimension of the changing of TOF is measure by the default setting under zero position): “LF/FF▲”... -
Page 40: Alignment Adjust Mode
BP-900KII User's Manual the printer would use break pin compensation function. 4.6.4 Alignment Adjust Mode In the online mode, press online + LF/FF buttons at the same time for about 3 seconds, so that the printer enters into the alignment adjust mode. In the Bidirectional adjust mode, online light blinks. -
Page 41: Chapter 5 Maintenance And Troubleshooting
BP-900KII User's Manual Chapter 5 Maintenance and Troubleshooting 5.1 Cleaning the Printer 5.1.1 Replacing the Ribbon Cartridge When the printing is faint, please replace the ribbon cartridge in time, or it may affect the printing result and damage the print head. Please refer to chapter Installing the Ribbon Cartridge for detail information. -
Page 42: Problems And Solutions
BP-900KII User's Manual PF part Buckle Sensor protect cover (Transparency) Platen (Black) Figure 5-2 Turn over the PF part Note: 1. Turn off printer and pull out the power cable before cleaning. 2. Being used under dust circumstance, the carriage shaft may stack much dust and affect the print quality, therefore, please shorten the cleaning period. - Page 43 BP-900KII User's Manual 1. Turn off the printer, and turn over the upper cover. 2. Lift up the upper frame with the lever, and lock the lever to make sure the upper frame is fixed. 3. Pull out the buckles on both sides of PF part, turn over the PF part, Jamming during and then take out the jammed paper.
- Page 44 BP-900KII User's Manual paper. part part buckles Figure 5-4 Take out the jammed paper 4. After taking out the jammed paper, please close the PF part and lock the buckles on both sides of the PF part. Figure 5-5 Lock the buckles on both sides of PF part 5.
-
Page 45: Error Indication On The Display Of Control Panel
BP-900KII User's Manual 5.3 Error Indication on the Display of Control Panel When the printer in trouble, it would in offline state, and alarm by the LED blinking also with the error indications on the display as follow: LED light LCD display Reason Solution... -
Page 46: Chapter 6 Paper Specification
BP-900KII User's Manual Chapter 6 Paper Specification 6.1 Paper Specification and Printable Area 6.1.1 The Notice Relates to Paper Using the following paper will cause unstable paper feeding, paper jam or paper crease, even leads to break pin. So it is forbidden using. •... -
Page 47: Useable Paper Types And Guarantee Area
BP-900KII User's Manual 6.1.2 Useable Paper Types and Guarantee Area Useable papers are shown in the following table: Paper type Guarantee grade Other conditions Cut sheet ● Continuous paper ● Post card ● Deposit book ● Card ▲ Envelope ▲ Delivery order form ▲... - Page 48 BP-900KII User's Manual Note: 1. This thickness is added by multi single-ply papers, and it is only achieved when just printing on the upper paper. (No need to copy) 2. Refer to the requirement of the multi-ply paper (NCR paper), the mount paper can be thicker than other plies, but we can’t guarantee the printing effect as it is influenced by paper difference.
- Page 49 BP-900KII User's Manual Caution: 1. Paper less than 52 g/m is worse in rigidity, so it is not in the guarantee list. 2. Please use the paper with no crease or bend. 3. Do not print beyond the printable area, or it may cause print head break pins and affect print head life.
- Page 50 BP-900KII User's Manual The fixing requirements of multi-ply paper (NCR paper) ◆ ○ Fixing method: • The fixation method of fanfold paper is to sizing on the 1 mm line which in the front of paper inserts direction. • Sizing with strong mucilage and press it tightly to avoid cocking. •...
-
Page 51: Continuous Paper
BP-900KII User's Manual According to different storage conditions, paper would easily become fold, bend or curliness through manually disposal, transport and deposit. Therefore, they would affect paper feeding when using these papers. Thus, please use them after amending according to the following regulations. - Page 52 BP-900KII User's Manual Single-ply paper White paper Paper Multi-ply paper NCR paper Width ~ Length ≥ 67 7 copies (Original + 6 copies), paper weight bases on 40g/ m Copy capability (Max.) standard. Single-ply paper: 52 ~ Multi-ply paper (each sheet): 40 ~...
- Page 53 BP-900KII User's Manual Figure of continuous paper specification and tractor hole Central line Central line Transverse perforation 90° Vertical perforation Vertical perforation Transverse perforation Edge Edge Item Mark Size (mm) Function The distance from central line to the nearer Position of Central line 6.0 ±...
- Page 54 BP-900KII User's Manual corresponding tractor hole in the right. The distance to other end when the parallel Lean of right and left – Below 0.15 moved right and left central lines superposes central line with one end. ◆ Requirement of transverse perforation The transverse perforation should not across the tractor hole, but it should at the center of two adjacent tractor holes, as well as, the wrap should not over 0.1mm.
- Page 55 BP-900KII User's Manual First Second Third Forth Fifth page page page page page Line pulp 1 ~ 2 mm ○ Paper Binding • Paper binding should be in both ends, it is not allow paper binding only in one end. •...
- Page 56 BP-900KII User's Manual Loading direction Unit: mm 6.35 6.35 Fixed tightly Above 2 Transverse perforation Not fixed tightly Paper binding space is 25.4 over 50.8mm (2inches) 3 ~ 4 Press down to About 1 avoid warping 50.8 Space If bind the four places together The size and position of paper binding (Double-ply)
- Page 57 BP-900KII User's Manual Transverse perforation Less than1 mm Less than 1 mm Transverse perforation ◆ Warp between toothed holes of each ply Please use the paper which toothed holes warp between each ply (causes by the warp of multi-ply papers superposition) is less than 0.4 mm. Toothed hole Warp is less than 0.4 mm Toothed holes section...
-
Page 58: Postcard
BP-900KII User's Manual ◆ Paper folding part Please fold the paper base on the transverse perforation. It will affect paper feeding while the folding part sticks up as the following figure shown, please not use it. Protrusive part 6.1.5 Postcard The printer supports the postcards which the specifications are shown below. - Page 59 BP-900KII User's Manual Postcard print direction and printable area (transverse) Stamp Postcard - 53 -...
- Page 60 BP-900KII User's Manual Postcard print direction and printable area (vertical) - 54 -...
-
Page 61: Passbook/Certificate
BP-900KII User's Manual 6.1.6 Passbook/Certificate 6.1.6.1 Horizontal Passbook The cover and inner of passbook should not crease, twist or broken. The passbook cover should have the same thickness. Open the passbook, fold it along the binding line to make it flat before printing. The binding line in the back of the passbook should not stick up over 0.5mm, or it may cause printing faint. -
Page 62: Envelope
BP-900KII User's Manual 6.1.6.2 Vertical Passbook Vertical printing area Size Min. Max. Passbook width 100 mm 245 mm Passbook length 75 mm 355 mm Left and right margins 3 mm Top margin 3 mm Centre binding margin 5 mm Bottom margin 6 mm Paper weight 90 g/m... - Page 63 BP-900KII User's Manual Envelope type Code name Length (mm) Width (mm) Support Sample 1 Envelope Yes (Note 1) Yes (Note 2) Sample 2 Envelope Envelope which is Grade or above Material Weight ~ 6.25 mm Bottom 6.25 mm Non-guarantee Left 6.25 mm Area Right...
- Page 64 BP-900KII User's Manual Sample 1 Envelope (Rear view) Sample 1 Envelope print direction and printable area Stamp - 58 -...
- Page 65 BP-900KII User's Manual Sample 2 Envelope (Front view) Stamp Sample 2 Envelope (Rear view) - 59 -...
- Page 66 BP-900KII User's Manual Sample 2 Envelope print direction and printable area Note: • Envelope refers to single layer envelope. Printer doesn’t support double layer envelope and the envelope should not with solid edge. • When the envelope pulp at the top or bottom, please don’t print at that area with 5mm. •...
-
Page 67: Delivery Note
BP-900KII User's Manual 6.1.8 Delivery Note Delivery notes here refers to the multi-ply papers (2-ply ~ 7-ply). Its paper size and printable area base on the specifications of continuous paper and cut sheet. Moreover, the copy capability and printing precision are not guaranteed because they are affected by paper thickness and inner paper quality (such as, thickness). -
Page 68: Appendix A Technical Specification
BP-900KII User's Manual Appendix A Technical Specification A.1 Specification Item Description Printing 24-Pin Flatbed Dot Matrix Impact Printer method Printing Bi-directional logic seeking in the shortest distance direction Printing width 94 column (10cpi) / 238.76 mm ASCII Speed 10 CPI LQ speed 117 CPS Printing speed... - Page 69 BP-900KII User's Manual Input Buffer 132 KB Model: JMR128; Life: 8 million characters (draft mode) (Standard) Ribbon Model: JMR131; Life: 12 million characters (draft mode) (Optional) Noise Normal printing ≤55 dB (A) (ISO7779 standard), Quiet mode≤52dB (A) Control panel 4 buttons and 2 LED lights and a LCD display Paper type cut sheet, multipart paper, continuous paper, passbook, certificate, card cut sheet, multipart paper, passbook, certificate, card: Load/eject from the front / Load...
-
Page 70: Parallel Interface
BP-900KII User's Manual Frequency range: 50 ~ 60 Hz China Compulsory Certification, China Environmental Labelling, Energy Conservation Certificate Certification, China Energy Efficiency Index Level 1 (Low Energy) Accord with the new energy standard of USA Note: All the technical instructions in this user's manual are the laboratorial measurements which achieved under national standard store and work environment (room temperature), the measuring paper accords with the specification in this user's manual. -
Page 71: Usb Interface
BP-900KII User's Manual — ERROR Printer → Host — SIGNAL GND Printer ↔ Host — Printer → Host — PULLED UP 5V Printer → Host — SELECTIN Printer ← Host Figure A-2 Parallel interface connector pin number A.3 USB Interface USB interface is 2.0 (Full Speed), the interface connector A and B signal assignments are shown below: Name Color... -
Page 72: Ethernet Interface
BP-900KII User's Manual Character length: 7 ~ 8 bits Figure A-5 Serial interface connector pin number Connect figure of communicate cable: Host: 9 PIN DB-9S (hole) Printer: 9PIN DB-9S (hole) Metal case Shield part Metal case Figure A-6 Printer and host 9 PIN RS232C connect figure A.5 Ethernet Interface Ethernet interface of 10/100 Base-T can be connected to 10/100M. -
Page 73: Appendix C Command Summary
BP-900KII User's Manual Appendix C Command Summary This printer supports EPSON ESC/PK2 control commands shown as the follow table: Classify Command Description ESC @ Initialize Printer Cancel Line Delete Character ESC # Cancel MSB Control Sequence ESC > Set MSB to 1 ESC = Reset MSB to 0 Beeper... - Page 74 BP-900KII User's Manual Cancel Double Width Mode Select/Cancel quadruple-size mode Chinese character Select lengthways printing Select transverse printing Two character lengthways half-size mode paratactically printing Select/Cancel Underline Mode for Chinese character Select full-size mode pitch for Chinese character Select half-size mode pitch for Chinese character Select half-size mode pitch adjustment for character Chinese Cancel half-size mode pitch adjustment for character...
- Page 75 BP-900KII User's Manual ESC R Select International Character Set ESC & Define Downloaded Characters ESC : Copy ROM Characters Set into RAM ESC % n Select/Deselect User-Defined Set ESC 6 Enable Character Set 2 ESC 7 Cancel command ESC 6 Select Compressed Mode Cancel Compressed Mode Select Double Width Mode...
Need help?
Do you have a question about the bp-900kll and is the answer not in the manual?
Questions and answers