Table of Contents
Advertisement
Advertisement
Table of Contents

Related Manuals for Jolimark TP820


Summary of Contents for Jolimark TP820
- Page 1 User's Manual TP820 Series Tiny Printer...
- Page 2 TP820 User’s Manual The Guide Be sure to have read the manual seriously before your operation. Neither Jolimark Corporation nor its affiliates shall be liable to the purchaser of this product or third parties for damages, losses, costs, or expenses incurred by purchaser or third parties as a result of: accident, misuse, or abuse of this product or unauthorized modifications, repairs, or alterations to this product, or failure to strictly comply with Jolimark Corporation’s operating and maintenance instructions.
-
Page 3: Table Of Contents
TP820 User’s Manual Table of contents The Guide..............................i Chapter 1 Introduction ...........................1 1.1 Features............................1 1.2 Part Description ..........................1 1.3 Parts Identification ..........................1 Chapter 2 Connecting Cables .......................3 2.1 Unpacking ............................3 2.2 Unpack the Protect Materials ......................3 2.3 Connecting to Your Computer or Other Equipment.................3 2.3.1 Connecting the Parallel Interface Cable ...................3... -
Page 4: Chapter 1 Introduction
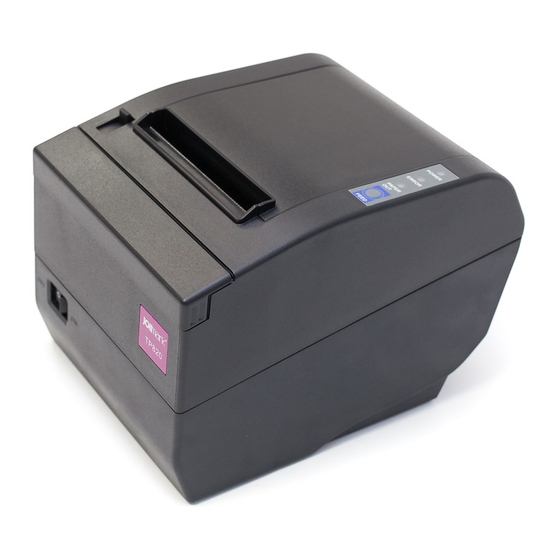
USB interface, TP820U is equipped with USB interface and TP820UE with Ethernet interface and USB interface. TP820 serials printer is equipped with auto cutter, It have two kinds of cutter for the consumer to selected: partial cutter can only cut the paper with one point left while full cutter cuts the paper fully. - Page 5 TP820 User’s Manual Parallel (or serial or USB) Interface position Drawer connector Power connector Fig1-2 Back of the printer - 2 -...
-
Page 6: Chapter 2 Connecting Cables
TP820 User’s Manual Chapter 2 Connecting Cables 2.1 Unpacking Check each item against the following packing list. If any of these items are missing. Please contact your dealer. The interface cable is optional, which will be equipped or cancelled according the customer’s request. -
Page 7: Connecting The Serial Interface Cable (Optional)
TP820 User’s Manual Clip Wires Parallel Interface Parallel Cable Fig 2-2 Connecting the parallel interface cable 2. Connect the other end of the cable to the host. Tighten the connector screws. 3. This printer can carry out a network printing through connecting parallel interface to network print server, which you can use are PS-1206, SX-110 and SX-3100 which have been validated. -
Page 8: Connecting The Drawer Cable
TP820 User’s Manual USB Interface USB Cable Fig2-4 Connecting the USB interface cable 2.3.4 Connecting the Drawer Cable Turn off the printer and plug the drawer cable into the drawer connector on the back of the printer as shown in Fig2-5. -
Page 9: Connecting The Adapter
2. Please use the exactitude electrical outlet with ground wire. 3. Make sure to use Jolimark original adapter, or we will not assume to take ability for the printer damage. Power connector... - Page 10 5. Come out a window of “Install From Disk”. Please according to the operating system environment, such as Windows XP operating system you should select the path as follow: CD-ROM-“Driver”-“WIN2000(XP-Vista)”, which you can find a file named: TP820.inf, click “Open”, then click “OK” to return to the window of “"Manufacturers/Printers" , click “Next”.
- Page 11 TP820 User’s Manual Fig2-8 TP820 Printing Preferences The following condition may cause the printer can’t cut paper properly in Win2000/XP (or updated version). 1. You do not setup the driver with the document setup.exe in the CD. Instead, you follow the Windows’...
-
Page 12: Network Settings
TP820 User’s Manual Fig2-9 Modify the driver property 2.6 Network Settings Please use Jolimark network setting software NetFinder to set the IP address for Jolimark printers, which can be found in the CD or downloaded from www.jolimark.com. 2.6.1 Connecting Printer... - Page 13 TP820 User’s Manual Fig2-10 Run NetFinder Software Button description: Exit—Exit from the software Search—Search printers in the same LAN Assign IP—Modify the IP address and other settings for the specified printer. 2. Search printer Click “Search” button in the main interface, the dialog box appearing will begin searching automatically and show appearance, listing a printer in the main interface if found.
- Page 14 TP820 User’s Manual 3. Setting printer’s IP address The printer’s information is listed in the main interface, the left side of which is the model and description and the right is the IP and MAC address. What’s more, the assign mode (dynamic/static) is noted behind the IP address.
-
Page 15: Installing Printer Network Driver
TP820 User’s Manual response after “Close this window on success” is checked, and then this dialog is closed automatically. Select “Reload Timer” then the software will wait for the printer’s response. Generally, printer will take response in a circle time if network connection is correct. - Page 16 TP820 User’s Manual 6) Come out a window of “Additional Port Information Required”, select “Custom” in the “Device Type”, then click “Settings”. 7) Come out a window of “Port Settings”. Affirm that “Port name” and “Printer name or IP address”...
- Page 17 If PC has installed the printer’s driver, set driver’s network port to carry out network printing. The concrete steps are shown below: 1) Click “Start” ”Settings”, select “Printers” 2) Right click TP820 driver, click “Properties” on the window coming out. 3) Come out a window of “Properties”, click “Ports” and “Add Ports”. - 14 -...
- Page 18 TP820 User’s Manual 4) Come out a window of “Printer port”, select “Standard TCP/IP Port”, click “New port”. 5) Come out a window of “Add Standard TCP/IP Printer Port Wizard”, click “Next”. 6) Come out a window of “Add a port”, import the IP address reported by the “Setting printer’s IP address”...
- Page 19 TP820 User’s Manual 7) Come out a window of “Port information”, select “User-defined” in the “Equipment style”, then click “setting”. Come out a window of “Additional Port Information Required”, select “Custom” in the “Device Type”, then click “settings”. 8) Come out a window of “Port Settings”. Affirm that “Port name” and “Printer name or IP address”...
- Page 20 TP820 User’s Manual 9) Return to “Additional Port Information Required”, click “Next”. 10) Come out a window of “Completing the Add Standard TCP/IP Printer Port Wizard”, click “Finish”. 11) Return to “Printer Ports”, click “Close 12) Return to “Properties”, make sure the network port is selected, click “Apply”, and then click “Close”.
- Page 21 TP820 User’s Manual - 18 -...
-
Page 22: Chapter 3 Base Control Panel Operations
TP820 User’s Manual Chapter 3 Base Control Panel Operations 3.1 Control Panel There are three light indicators and one key on the control panel shown as Fig 3-1. Fig3-1 Control panel 3.1.1 Indicator Indicator Description Indicate whether the printer’s power supply is connected or not. The indicator is on POWER when the power is connected. -
Page 23: Hex Dump Printing
3.6 Online-aptitude Parameter Settings TP820 supports the function of online-aptitude parameter settings, which can be set in the PC with the driver installed in. The parameter settings of serial interface can be modified in the driver’s property page. - Page 24 TP820 User’s Manual 2. Click “Start” ”Settings” ”Printers” 3. Right click ”TP820”, select “Properties”. 4. Click “Printer settings” in the property page. Fig3-3 Parameter settings 5. Check whether the selected port in the “Ports” is matched with the port connecting to the printer in practical.
-
Page 25: Chapter 4 Install And Replace The Roll Paper
TP820 User’s Manual Chapter 4 Install and Replace the Roll Paper The printer can install the paper conveniently, which should be 80mm width. How to deal with the paper will be explained in details in this chapter 4.1 Paper Installed Steps !... - Page 26 TP820 User’s Manual Note: Paper head should be pulled out by the direction of paper-input slot, but not the opposite. 3. Pull out a small amount of paper as shown in Fig 4-3. Fig 4-3 Pull out the paper 4. Put the paper as shown below, and then close the cover.
-
Page 27: Chapter 5 Features
TP820 User’s Manual Chapter 5 Features 5.1 General Specification Item Description Print method Direct thermal printing Print direction Line printing Paper width 72 mm Print speed 220 mm/s(52line/s) Print head Lifespan: 100 Km Resolution 8 dot/mm, 576dot/line, 203DPI ASCII: 13 international character sets... -
Page 28: Interface Features
Full-speed USB 2.0 interface+RS-232C serial interface or CENITRONICS Full-speed USB 2.0 interface+10/100Base-T Ethernet interface according your need. 5.2.1 Parallel Interface TP820 printer’s parallel interface is compatible with protocol, supporting BUSY/ACK CENIRONICS handshaking protocol. The connector is a 36-PIN connector, whose pins are indicated as below. -
Page 29: Serial Interface (Optional)
The default setting in serial stands for 9600bps, 8 bits, parity check disabled and 1 stop bit. TP820 printer can be connected to the standard RS-232C connector. When connecting with an IBM PC or compatible PC, the connecting picture is shown as figure 5-3. While connecting with a 25 pin PC, you can connect the cable as shown in Fig 5-4. -
Page 30: Usb Interface
TP820 User’s Manual Printer 9-Pin connector Host 9-Pin connector Fig5-3 TP820 connecting with 9-Pin PC Printer 9PIN connector Host 25PIN connector Fig5-4 TP820 connecting with 25-Pin PC 5.2.3 USB Interface Full-speed USB interface of version 2.0. Fig 5-5 USB interface 5.2.4 Drawer Connector... -
Page 31: Power Supply Connector
TP820 User’s Manual Drawer Open/closed signal 24VDC Drawer kick-out drive signal Drawer kick-out Open/closed signal ground ≤1A/24V Drive electricity ≤1A/24V Note: Make sure the drawer meets the specification mentioned above, or we will not guarantee to keep the printer in good repair. -
Page 32: Chapter6 Troubleshooting And Maintenance
TP820 User’s Manual Chapter6 Troubleshooting and Maintenance 6.1 Maintenance To prolong the printer’s life, make sure that the printer is well away from heaters and other sources of extreme heat, and the surrounding area is clean, dry, and free of dust. - Page 33 TP820 User’s Manual come out. Rotate the white plastic gear by hand in the direction of arrow to make the cutter return to the normal position which is shown as figure 6-1. Auto-cutter Figure 6-1 Adjust the cutter by hand...
-
Page 34: Chapter 7 Control Commands
TP820 User’s Manual Chapter 7 Control Commands 7.1 General The commands TP820 supplies are based on ESC/POS, and are compatible with TM-88III serials. The format described as following: Command Function Format: ASCII: Indicates the ASCII equivalents Decimal: Indicates the decimal equivalents... - Page 35 TP820 User’s Manual DLE EOT n Real-time status transmission * Format: ASCII: Decimal: Hex: Description: Transmit the selected printer status according the specified parameter n, 1<=n<=4; n=1: Transmit print status n=2: Transmit off-line status n=3: Transmit error status n=4: Transmit paper roll sensor status *Note: Only valid in serial interface.
- Page 36 TP820 User’s Manual ESC $ Set absolute print position Format: ASCII: Decimal: Hex: Description: Set the distance from the beginning of the line to the position at which subsequent characters are to be printed. The distance is (nL+nH*256)* (horizontal or vertical motion unit). Nl, nH=0~255.
- Page 37 TP820 User’s Manual ESC - Turn underline mode on/off Format: ASCII: Decimal: Hex: Description: n=0, 48 Turn underline mode off. n=1, 49 one-dot thick underline mode on n=2, 50 two-dot thick underline mode on ESC 2 Set default line spacing...
- Page 38 TP820 User’s Manual ESC D Set horizontal tab position. Format: ASCII: D n1……nk NUL Decimal: 68 n1……nk NUL Hex: 44 n1……nk NUL Description: Set the horizontal tab position to the column specified by nk from the beginning of the line.
- Page 39 TP820 User’s Manual ESC \ Set relative print position Format: ASCII: Decimal: Hex: Description: Set the print position at (nL+nH*256)* (horizontal or vertical motion unit) inches from current position; nL,nH=0~255. Horizontal or vertical motion unit is specified by GS P command.
- Page 40 TP820 User’s Manual ESC j Print and feed paper conversely Format: ASCII: Decimal: Hex: Description: Print the content in the buffer and feed paper n*vertical unit inch conversely. n=0~255. Horizontal or vertical motion unit is specified by GS P command.
- Page 41 TP820 User’s Manual Off/On Hex Decimal Function Not define Not define Double-width is not selected Double-width is selected Double-height is not selected Double-height is selected Not define Not define Not define Underline is selected Underline is not selected Selects the Chinese character mode according n as follows: FS &...
- Page 42 TP820 User’s Manual Set Chinese character spacing Format: ASCII: Decimal: Hex: Description: 0 ≤ n1 ≤ 255, 0 ≤ n2 ≤ 255 Set the character left-side spacing to n1*(horizontal or vertical motion unit),right-side spacing to n2*(horizontal or vertical motion unit).
- Page 43 TP820 User’s Manual GS BEL n1 n2 Beep for appointment Format: ASCII: BEL n1 n2 n3 Decimal: n1 n2 n3 Hex: n1 n2 n3 Description: N1 specifies the beeping times, n2 specifies the length of beeping time and n3 specifies the length of intermission time.
- Page 44 TP820 User’s Manual Define downloaded bit image Format: ASCII: d1…dk Decimal: d1…dk Hex: d1…dk Description: Define the downloaded bit image in the downloaded graphic area. n1=1~48,n2=1~255,n1×n2<1200,k=n1×n2×8。 d specifies the bit image data . n1×8 dots in the horizontal direction and n2×8 dots in the vertical direction.
- Page 45 TP820 User’s Manual GS L Set left margin Format: ASCII: GS L nL nH Decimal: 29 76 nL nH Hex: 1D 4C nL nH Description: Set the left margin to (nL+nH*256)*(horizontal or vertical motion unit); nL, nH=0~255. Horizontal or vertical motion unit is specified by GS P command.
- Page 46 TP820 User’s Manual GS k Print bar code Format: ASCII: d1..dk Decimal: d1..dk Hex: d1..dk ASCII: n d1..dn Decimal: n d1..dn Hex: n d1..dn *when m>64 Bar code Amount of The range of character Character code type data UPC-A Fixed 11<=k<=12...
-
Page 47: Appendix Commands List
TP820 User’s Manual Appendix Commands List Here list the commands supported in the printer in alphabetical order. Control commands Functions Beeper Horizontal tab Print and line feed Print and Feed paper to next black mark position DLE EOT Real-time status transmission... - Page 48 TP820 User’s Manual Turn quadruple-size mode on/off for Chinese character FS W Print NV bit image FS p n m Define the NV bit image FS q n Beep for appointment GS BEL Print and Feed paper to next black mark position...
- Page 49 Manufacturer: KONGYUE JOLIMARK INFORMATION TECHNOLOGY LTD Address: Kong Yue Industrial Park, 18 Kong Yue Road, JinGuZhou Zone, XinHui District, Jiangmen City, Guang Dong province, P.R.C Postal Code: 529141 Customer Hot line: 400-7002299 FAX:(86)750 6390382 Http://www.jolimark.com.cn...
Need help?
Do you have a question about the TP820 and is the answer not in the manual?
Questions and answers