Table of Contents
Advertisement
Quick Links
Advertisement
Table of Contents

Related Manuals for Jolimark DP320


Summary of Contents for Jolimark DP320
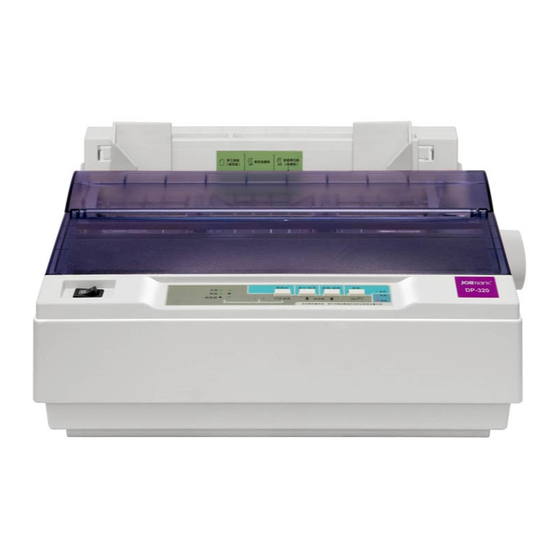
- Page 1 User's Manual DP320 Dot Matrix Printer...
- Page 2 Corporation names and product names are the registered trademarks or commodity names of the corporation. * Jolimark is a registered trademark of Kong Yue Electronics & Information Industry (XIN HUI) LTD * EPSON and ESC/PK2 are registered trademarks of Seiko Epson Corporation.
-
Page 3: Important Safety Instructions
DP320 User's Manual Important Safety Instructions Read all of these instructions carefully and thoroughly and save them for later reference. The unauthorized operation would lead to malfunction or accident. Manufacturers have no responsibilities for the problems which are led by misoperations. -
Page 4: The Guide
Notes contain important information and useful tips on the operation of your printer. The Guide First thanks for purchasing this Jolimark printer. Your printer is a 24-pin 80-column dot matrix printer, offering a wide range of features and multiple functions. It can be widely used in tax, mail, telecom, police, hospital, insurance, finance, stock, customhouse, cabaret, aviation and transport etc. -
Page 5: Table Of Contents
DP320 User's Manual Table of Contents Declare................................i Important Safety Instructions ........................ii The Guide ..............................iii Chapter 1 Installing the Printer........................1 1.1 Unpacking & Checking ........................1 1.2 Removing the Protective Materials......................1 1.3 Main Parts of the Printer........................1 1.4 Choosing a Place for the Printer ......................2 1.5 Installing the Printer ..........................3... - Page 6 DP320 User's Manual 3.2 Changing Printer Settings ......................... 24 3.2.1 Setting Printer Parameter Through the Control Panel ..............24 3.2.2 Online-aptitude Parameter Settings.................... 26 3.3 Printer Setting Descriptions....................... 30 3.4 Restore the Default Settings ......................31 Chapter 4 Problems and Solutions ......................32 4.1 Power Supply ............................
-
Page 7: Chapter 1 Installing The Printer
2. Save all the original packing materials so that they can be used when transporting the printer. Protective materials Protective materials Figure1-2 Removing protective materials 1.3 Main Parts of the Printer Figure1-3, Figure1-4 and Figure 1-5 shows the main parts of DP320. - 1 -... -
Page 8: Choosing A Place For The Printer
DP320 User's Manual Gap adjust lever Cutter Paper guide Paper select lever Power switch Print head Paper feed knob Control panel Ribbon cartridge Figure1-3 Main parts of printer (front view) Window Tractor Figure1-4 Main parts of printer (side view) Power supply inlet... -
Page 9: Installing The Printer
DP320 User's Manual electrical outlets controlled by timers or wall switches; an interruption in power can wipe out the information in your computer or printer memory. If you place the printer on a stand, follow these guidelines: 1. Use a stand that supports at least 9 kg (19 lb). - Page 10 DP320 User's Manual Cutter Lock sheet Figure1-8 Remove the cutter 4. Pull the gap adjust lever to the highest position. 5. Move the print head to the middle. Note: Never move the print head when the printer is on, or else the printer may get damaged.
-
Page 11: Installing The Tractor
DP320 User's Manual 8. Use hands or other auxiliaries, to guide the ribbon between the print head and metal sheet. Turn the ribbon knob to feed the ribbon into place, it should not be twisted or creased. Metal sheet Print head Figure1-12 Guide the ribbon between the print head and metal sheet 9. -
Page 12: Installing The Draught Tractor
DP320 User's Manual 1.6.2 Installing the Draught Tractor If the tractor has been installed the push position (back of printer), take down the tractor, remove the cutter, and then install the tractor in the pull position. The concrete steps are as follows. -
Page 13: Connecting The Power Cord
DP320 User's Manual Figure1-17 Install the draught tractor 1.7 Connecting the Power Cord 1. Make sure the printer is turned off. (“O” mark on the power switch is pressed down.) Power switch Electrical outlet Power cord Power supply inlet Figure1-18 Turn off the printer 2. - Page 14 6. After the printer finishes printing, press LF/FF key or LOAD/EJECT key to eject cut sheet, and then turn off the printer to exit self test mode. ASCII Self-test mode Jolimark DP320 VX.X 20XX/XX/XX !"#$%&’( )*+-./0123456789:;<=>?@ABCDEFGHIJKLMNOPQRSTUVWXYZ[\]^_`ab !"#$%&'( )*+-./0123456789:;<=>?@ABCDEFGHIJKLMNOPQRSTUVWXYZ[\]^_`abcd "#$%&'( )*+-./0123456789:;<=>?@ABCDEFGHIJKLMNOPQRSTUVWXYZ[\]^_`abcde...
-
Page 15: Connecting The Printer To Your Computer
DP320 User's Manual NOTE: If the self test does not print satisfactorily, see Chapter 4. If it prints correctly, go on to the next section. 1.9 Connecting the Printer to Your Computer The printer can be configured with parallel interface, USB interface or Serial interface (according to the specific interface standards). -
Page 16: Connecting To The Serial Cable
DP320 User's Manual USB interface Figure1-26 Connect to the USB cable 1.9.3 Connecting to the Serial Cable 1. Turn off both the computer and the printer. Plug the serial cable securely into the printer’s serial interface. Tighten the screws on both sides of the connector. - Page 17 DP320 User's Manual 5. A window of “Install From Disk” pops up. Please according to the operating system environment, you should select the path as follow: CD-ROM → “Driver” → “WIN2000 (XP-Vista-Win7)”, click “Open”, then click “OK” to return to the window of “Install Printer Software”, select the respective model, click “Next”.
- Page 18 DP320 User's Manual pops up, click “Yes”. 6. The printer driver process is installed successfully. (2) The installing steps with an USB cable: Note: 1. As the system of Windows 98/ME doesn’t have integrated USB driver control, please install USB driver before using USB interface printing. Then install USB printer driver.
-
Page 19: Chapter 2 Control Panel
DP320 User's Manual Chapter 2 Control Panel You can use the four keys on the control panel to operate your printer, such as line feed, form feed, load paper, eject paper or set print speed. The indicator lights on the control panel show the current print speed. -
Page 20: In The Cut Sheet Mode
DP320 User's Manual Press this key in the online mode, the printer is offline, ONLINE indicator is off and the printer is unavailable to print. 2. If the paper is at the tear off position in the offline mode, press ONLINE key, the printer will go back to the printing home position of the current page or the next page. -
Page 21: Feed Paper To The Tear Off Position
DP320 User's Manual 2.2.5 Feed Paper to the Tear off Position 1. Turn on the printer, and then hold the ONLINE key down for about 3 seconds in the offline mode till the ONLINE indicator blinks with a beep. 2. Hold the TEAR key down for about 3 seconds to switch the function of automatically feeding paper to the tear off position ON or OFF. - Page 22 DP320 User's Manual Copies (including original) Lever position (Reserved) Standard paper (cut-sheet or tractor paper) 2-ply 3-ply Multi-ply paper 4-ply 5-ply 20-pound Envelopes 24-pound (Reserved) - 16 -...
-
Page 23: Chapter 3 How To Use The Printer
DP320 User's Manual Chapter 3 How to use the printer Here are the steps of using printer: 1. Assemble the printer as the chapter 1, connect the printer to your computer and install the driver correctly. 2. Load the correct type of paper. -
Page 24: Loading Tractor Paper
DP320 User's Manual Figure 3-3 Raise the paper guide upright 4. Slide the left edge guide until it reaches the triangular guide mark. Next, adjust the right edge guide to match the width of your paper. (As shown below) Figure 3-4 Adjust the paper guide 5. - Page 25 DP320 User's Manual tractor paper with printed tables, multi-ply paper and labels. Here’s how to load tractor paper: Using drive tractor: 1. Make sure the printer is turned off. Remove the paper guide and place the paper select lever in the tractor paper position.
- Page 26 DP320 User's Manual position. Figure 3-9 Load the tractor paper in the tractor Note: Only to clean the paper jams when the printer is turned off, can use the paper feed knob on the right side of the printer. Otherwise, you may damage the printer or change the printing home position.
- Page 27 DP320 User's Manual 9. When you finish printing (the printer receives no data for several seconds) the printer feeds the perforation of the tractor paper to the edge of the window so that you can tear off the last sheet.
- Page 28 DP320 User's Manual lock it in place. Then slide the right sprocket unit to match the width of your paper, but do not lock it. Move the paper support midway between the two sprockets. Figure 3-14 Adjust the position of the sprocket 6.
-
Page 29: Loading Multi-Ply Papers
DP320 User's Manual Figure 3-16 Adjust the position of the draught tractor 6. If the tractor holes of the paper do not match with the sprocket of the draught tractor when tightening the paper lengthways, then you can do as follows: 1) Pull the paper select lever to the cut sheet position. -
Page 30: Loading Envelopes
DP320 User's Manual 4. Do not leave labels in the printer while doing other jobs, or they would curl around the platen and may jam when you resume printing. 5. Remove the labels from the printer, tear off the fresh supply at the rear of the printer, and then press LF/FF key to eject the remaining labels out of the printer. - Page 31 DP320 User's Manual Jolimark DP320 Current Setting Report VX.X-XXX XXXX/XX/XX SYSTEM SETUP LANGUAGE CHINESE CHAR. MODE CHINA CHARACTER FONT SANS SER COURIER PRESTIGE SCRIPT OCR-B OCR-A ORATOR ENG PITCH 12 CPI 15 CPI PROPORTIONAL CHI PITCH 7.5 CPI INTL CHAR SET...
-
Page 32: Online-Aptitude Parameter Settings
4. Turn off and restart the printer, newly settings are in operation. 3.2.2 Online-aptitude Parameter Settings DP320 supports the function of online-aptitude parameter settings, which can be set in the PC with the driver installed in. The concrete setting steps are shown as follows: 1. - Page 33 DP320 User's Manual - 27 -...
- Page 34 DP320 User's Manual 6. The left side of each items is the parameter icon, the top right is the item name and the bottom right is the current setting. The current settings of the printer will be loaded automatically when opening each parameters settings window.
- Page 35 DP320 User's Manual 7. When setting the parameter, please click the parameter icon firstly to open the parameter setting window. In the parameter setting window, there are parameter options, item explanation and control buttons. After selecting the corresponding parameter, click “Set”, the printer will change the setting at the moment it receives the change command.
-
Page 36: Printer Setting Descriptions
DP320 User's Manual 3.3 Printer Setting Descriptions This section describes all the settings available in the Printer Setting mode. Options Description Specify the printer menu language as English or Chinese. LANGUAGE Select ASCII or Chinese character mode to print when printer receives character CHAR. -
Page 37: Restore The Default Settings
DP320 User's Manual PARITY Specify the parity bit for serial data transfer. DATA BIT Specify the serial data bits. STOP BIT Specify the serial data transfer stop bit. Specify the protocol of printer serial data transfer as software control PROTOCOL (XON/XOFF) or hardware control (DTR). -
Page 38: Chapter 4 Problems And Solutions
Solutions: Check whether the printer’s rating voltage is matched with the power cord. If not, unplug the power cord immediately and contact your dealer or a specified Jolimark service center for advice. Do not plug the power cord to the electrical outlet again. - Page 39 Phenomenon 1: A line of dots are missing in the printout. Solutions: The print head may be damaged. Stop printing and contact your dealer or a specified Jolimark service center to have the print head replaced. Phenomenon 2: Dots are missing in random positions.
-
Page 40: Paper Handling
DP320 User's Manual Phenomenon 2: Regular gaps occur in the printout. Solutions: Page Skip may be on. Set Page Skip function to off in the Menu Setup mode. See “Changing printer settings” on page 3.2.2. 4.3 Paper Handling Cut sheets do not be fed properly Phenomenon 1: Paper does not feed. -
Page 41: Alignment Adjust Mode
DP320 User's Manual 1. May be the page length is too long. When using the draught tractor, tear off the paper having entered the printer, then press the LF/FF key to feed the paper forward. When using the drive tractor, tear off the last paper printed out, then press the LOAD/EJECT key to feed the paper backward. -
Page 42: Chapter 5 Printer Maintenance And Technical Service
DP320 User's Manual Chapter 5 Printer maintenance and Technical Service 5.1 Printer Cleaning Carriage Shaft Figure 5-1 Printer cleaning Periodical cleaning and cleaning tool Periodical cleaning: Every 6 months or 300 working hours Cleaning tool: Dry cloth (Use soft cloth while cleaning metal) Cleaning carriage shaft: There is a layer of oil covered on the carriage shaft which guarantees the carriage runs smoothly. -
Page 43: Appendix A Specifications
DP320 User's Manual Appendix A Specifications A.1 General Item Description Printing method 24 Dot Matrix Impact Printer Printing direction Bidirectional logic seeking Printing width 80 columns(10cpi)/ 203.2 mm ASCII Speed 10 CPI 12 CPI Printing speed Normal speed 90 CPS... -
Page 44: Interface Specifications
DP320 User's Manual Total Thickness: 0.065 ~ 0.39 mm Weight (Single sheet): 52 ~ 82 g/m Multi-ply paper (Each sheet): 40 ~ 64 g/m Width (Mount): 101.6 ~ 254 mm Smallest label: 63.5 × 23.8 mm Not dry gum label Thickness (mount): 0.07 ~ 0.09 mm... -
Page 45: Serial Interface
DP320 User's Manual Contact Number Signal Name Color VBUS White Green Black Figure A-2 USB-B type connector A.2.3 Serial Interface The serial interface has the following characteristics. Baudrate: 1200 bps, 2400 bps, 4800 bps, 9600 bps, 19200 bps (selectable) 7 or 8-bit (selectable) -
Page 46: Chapter B Paper Specification
DP320 User's Manual Chapter B Paper Specification B.1 Paper Specification and Printable Area B.1.1 The Notice Relates to Paper Using the following paper will cause unstable paper feeding, paper jam or paper crease, even leads to break pin. So it is forbidden using. -
Page 47: Useable Paper Types And Guarantee Area
DP320 User's Manual B.1.2 Useable Paper Types and Guarantee Area Useable papers are shown in the following table: Paper type Guarantee grade Other conditions Cut sheet ● Continuous paper ● Card × Envelope ▲ Delivery order form ▲ Postcard ×... - Page 48 DP320 User's Manual ◆ Cut Sheet Dimension and Printable area ○ Single-ply paper First character (10 CPI) Printable area : Printable area : Print area Print area is not included in print specification. Mark Name Specification value Paper width 148 ~ 257 mm Paper length ≥90 mm (Note 1)
- Page 49 DP320 User's Manual ○ Multi-ply paper (NCR paper) Datum line (1 mm) Paper inserts direction Plumb at datum line Datum line Less than 0.2 First character (10 CPI) Printable area : Printable area : Print area Print area is not included Print side in print specification.
- Page 50 DP320 User's Manual Strong mucilage Paper inserts direction (1mm width) ◆ The combination requirements of multi-ply paper (NCR paper) We recommend using the perfect paper or which the quality is above. The low quality NCR paper will affect the copy effect and the printing life.
-
Page 51: Tractor Paper
DP320 User's Manual The paper that the whole page has folded can not be used. Amend it less than 2mm More than 15 mm corner The fold of ○ Bend and curliness (cut sheet, tractor paper) • The paper can be used when the bend of the whole page less than 2 mm. - Page 52 DP320 User's Manual Note: 1. This thickness is added by multi single-ply papers, and it is only achieved when just printing on the upper paper. (No need to copy) 2. Refer to the requirement of the multi-ply paper (NCR paper), the mount paper can be thicker than other plies, but we can’t guarantee the printing effect as it...
- Page 53 DP320 User's Manual Figure of tractor paper specification and gear hole Central line Central line Transverse perforation 90° Vertical perforation Vertical perforation Transverse perforation Edge Edge Item Mark Size (mm) Function The distance from central line to the nearer edge.
- Page 54 DP320 User's Manual The distance to other end when the parallel moved Lean of right and left – Below 0.15 right and left central lines superposes with one central line end. ◆ Requirement of transverse perforation The transverse perforation should not across the gear hole, but it should at the center of two adjacent gear holes, as well as, the wrap should not over 0.1mm.
- Page 55 DP320 User's Manual First Second Third Forth Fifth page page page page page Line pulp 1 ~ 2 mm ○ Paper Binding • Paper binding should be in both ends, it is not allow paper binding only in one end.
- Page 56 DP320 User's Manual Loading direction Unit: mm 6.35 6.35 Fixed tightly Above 2 Transverse perforation Not fixed tightly Paper binding space is 25.4 over 50.8mm (2inches) 3 ~ 4 Press down to About 1 avoid warping 50.8 Space If bind the four...
- Page 57 DP320 User's Manual Toothed hole Warp is less than 0.4 mm Toothed holes section ◆Binding hole, Clipped corner It is not support the paper which is with binding holes and clipped corners. Caution: Do not use the paper with clipped corner or binding hole which is not include in the guarantee list.
-
Page 58: Envelope
DP320 User's Manual Protrusive part B.1.5 Envelope Envelope specification should accord with the following table. In this specification, some envelopes are beyond the support range because of shape, size and so on. ◆ Print Size and Printable Area Envelope type... - Page 59 DP320 User's Manual Sample 1 Envelope (Front view) Stamp Sample 1 Envelope (Rear view) - 53 -...
- Page 60 DP320 User's Manual Sample 1 Envelope print direction and printable area Note: To load envelope, please place it on the paper guide with the front downwards and the back upwards. Stamp Sample 2 Envelope (Front view) Stamp - 54 -...
- Page 61 DP320 User's Manual Sample 2 Envelope (Rear view) - 55 -...
- Page 62 DP320 User's Manual Sample 2 Envelope print direction and printable area Note: To load envelope, please place it on the paper guide with the front downwards and the back upwards. Note: • Envelope refers to single layer envelope. Printer doesn’t support double layer envelope and the envelope should not with solid edge.
-
Page 63: Delivery Note
DP320 User's Manual B.1.6 Delivery Note Delivery notes here refers to the multi-ply papers (2-ply ~ 7-ply). Its paper size and printable area base on the specifications of tractor paper and cut sheet. Moreover, the copy capability and printing precision are not guaranteed because they are affected by paper thickness and inner paper quality (such as, thickness). -
Page 64: Appendix C Command Summary
DP320 User's Manual Appendix C Command Summary This printer supports EPSON ESC/PK2 control commands shown as the follow table: Classify Command Description ESC @ Initialize Printer Cancel Line Delete Character ESC # Cancel MSB Control Sequence ESC > Set MSB to 1... - Page 65 DP320 User's Manual Select/Cancel quadruple-size mode Chinese character Select lengthways printing Select transverse printing Two character lengthways half-size mode paratactically printing Select/Cancel Underline Mode for Chinese character Select full-size mode pitch for Chinese character Select half-size mode pitch for Chinese character...
- Page 66 DP320 User's Manual ESC : Copy ROM Characters Set into RAM ESC % n Select/Deselect User-Defined Set ESC 6 Enable Character Set 2 ESC 7 Cancel command ESC 6 Select Compressed Mode Cancel Compressed Mode Select Double Width Mode Cancel Double Width Mode...
Need help?
Do you have a question about the DP320 and is the answer not in the manual?
Questions and answers