Advertisement
Quick Links
Porsche Cayenne 2003-2010
KIT FEATURES
• ISO DIN radio provision with pocket
• ISO DDIN radio provision
• Painted matte black
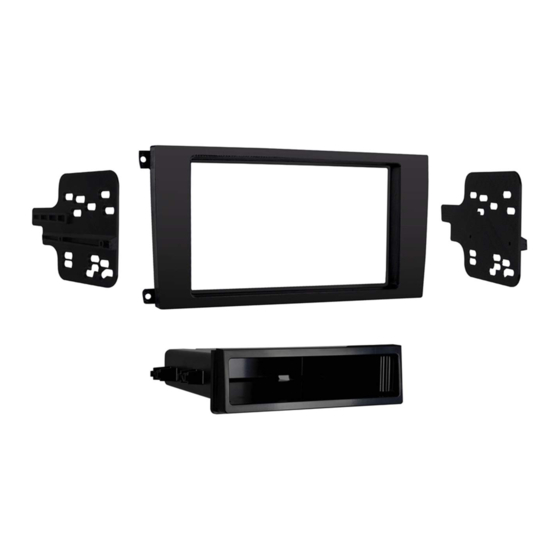
KIT COMPONENTS
• A)
Radio trim panel
• B) Radio brackets
Phillips pan-head screws • E) (4) Phillips 5mm x 12mm flat-head screws
A
B
WIRING & ANTENNA CONNECTIONS (sold separately)
Wiring Harness: • N/A
Antenna Adapter: • 40-EU10
Installation instructions for part 99-9604
99-9604B
• C) Pocket • D) (8) #8 x 3/8"
C
D
E
TOOLS REQUIRED
• Panel removal tool • Phillips screwdriver
• Torx T-20 screwdriver • Pick tool
CAUTION!
All accessories, switches, climate controls panels, and
especially air bag indicator lights must be connected before cycling
the ignition. Also, do not remove the factory radio with the key in the
on position, or while the vehicle is running.
Advertisement

Related Manuals for Metra Electronics 99-9604B


Summary of Contents for Metra Electronics 99-9604B
- Page 1 Installation instructions for part 99-9604 Porsche Cayenne 2003-2010 TOOLS REQUIRED • Panel removal tool • Phillips screwdriver 99-9604B • Torx T-20 screwdriver • Pick tool KIT FEATURES • ISO DIN radio provision with pocket • ISO DDIN radio provision • Painted matte black KIT COMPONENTS •...
- Page 2 99-9604 Dash Disassembly 1. Unsnap and remove the trim panel around the outside of the radio, switches, and climate controls. (Figure A) 2. Remove (4) T-20 Torx screws to remove the radio. (Figure B) There are (2) different methods for installing this kit.
- Page 3 99-9604 Kit Assembly ISO DIN radio provision with pocket Option 1 Option 2 5. Slide the completed assembly into 1. Remove the metal DIN sleeve and 1. Remove the metal DIN sleeve and 5. Locate the factory wiring harness the dash. trim ring from the aftermarket radio.
- Page 4 99-9604 Kit Assembly ISO DDIN radio provision Option 1 Option 2 4. Install the radio/sub-dash assembly 1. Secure the radio brackets to the 1. Secure the radio brackets to the 4. Attach the radio trim panel over the back into the dash using the (4) radio using the screws supplied with radio using the screws supplied with radio and then secure it using the...
Need help?
Do you have a question about the 99-9604B and is the answer not in the manual?
Questions and answers